
Tools & materials you'll need
Affiliate linksAs an Amazon Associate FixlyGuide earns from qualifying purchases — at no extra cost to you. Prices and availability are accurate as of publication and subject to change.
Quick Answer
The oils from your hands get trapped in the microscopic grooves, or 'grain,' of the stainless steel finish, making them hard to wipe away. The only way to effectively remove them is to clean with a high-quality microfiber cloth in the direction of the grain, using a gentle degreaser like diluted vinegar, followed by a water rinse and a final polish with a completely dry microfiber cloth to erase streaks.
The Problem
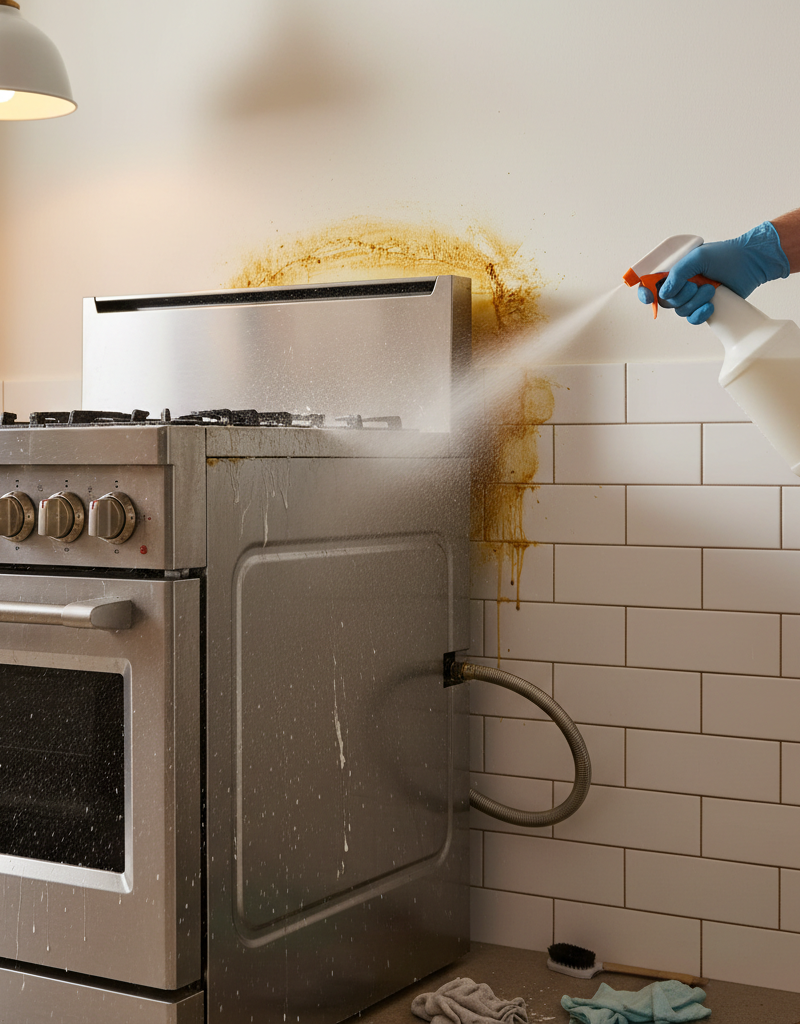
You invested in a beautiful kitchen, anchored by a sleek, modern stainless steel refrigerator. It looked pristine in the showroom, a gleaming monolith of culinary promise. But now, in your home, it's a daily battleground. Every touch, every grab of the handle, every casual lean against the door leaves behind a ghostly reminder: fingerprints, smudges, and oily streaks. The surface that was meant to look clean and professional now seems to broadcast every interaction, creating a constant visual clutter in the heart of your home. You wipe it with a paper towel, and it leaves lint. You use a generic cleaner, and it leaves streaks. This relentless cycle is frustrating for any homeowner who takes pride in a tidy space; the very appliance that should signal "clean" is ironically the hardest thing to keep looking that way.
How It Works
To understand why your refrigerator is a fingerprint magnet, we have to look at its surface on a microscopic level. Stainless steel isn't a single material but an alloy, primarily of iron and chromium, with other elements like nickel added for durability and luster. The "stainless" quality comes from a fascinating bit of chemistry: the chromium reacts with oxygen in the air to form a very thin, invisible, and incredibly durable "passive layer" of chromium oxide. This layer is what protects the iron from rusting.
However, most appliance-grade stainless steel isn't smooth like glass. During manufacturing, the steel sheets are passed through heavy rollers and brushed with abrasive belts to create a uniform, textured finish. This process etches millions of tiny, parallel grooves into the surface. This is known as the "grain" or "brushed finish." While beautiful, these grooves are the primary culprit behind the fingerprint problem.
When you touch the stainless steel, the natural oils, sweat, and salts from your skin (collectively called sebum) are transferred to the surface. On a perfectly smooth material like polished chrome or glass, these oils would sit entirely on the surface, making them relatively easy to wipe off in any direction. But on your brushed stainless steel fridge, these oils sink into the microscopic valleys of the grain. When you try to wipe the surface with a simple cloth or paper towel, especially if you move against or across the grain, you aren't truly lifting the oil. Instead, you're smearing it. The cloth only cleans the "peaks" of the grain, while pushing the oil deeper into the "valleys," resulting in the frustratingly persistent streaks and smudges that seem to reappear moments after cleaning.
This is where the magic of the right tools comes in. A high-quality microfiber cloth isn't just any piece of fabric. Its fibers are dramatically thinner than a human hair and are split during manufacturing. This creates an enormous surface area and a slight positive electrostatic charge. Dirt, dust, and oil are naturally negatively charged. The microfiber cloth actively attracts and lifts these particles from the tiny grooves, trapping them within its fibers instead of just pushing them around. When you combine this lifting power with the correct technique—cleaning with the grain—you are effectively scooping the oils out of the grooves from end to end, which is the only way to achieve a truly clean, streak-free surface.
Step-by-Step Fix
Follow these methodical steps to remove fingerprints and restore that factory shine. The secret is not brute force, but technique and moving with the grain of the steel.
-
Safety First & Spot Test — Always work in a well-ventilated area. While the cleaners we recommend are mild, good airflow is always a smart practice. Never mix cleaning agents, especially bleach and ammonia, as they can create toxic gas. Before cleaning the entire door, test your cleaning solution on a small, inconspicuous area (like the very bottom edge of the door) to ensure it doesn't react negatively with your appliance's specific finish.
-
Find the Grain — This is the most critical step. Stand back from the refrigerator and look at the surface from an angle near a light source. You will see very faint, fine lines running in a single direction, either vertically (top to bottom) or horizontally (left to right). All of your wiping motions for the rest of this process must go in this same direction.
-
Gather Your Arsenal — You will need three separate, clean, high-quality microfiber cloths (look for a GSM—grams per square meter—of 300 or higher for best results). You will also need two clean spray bottles. Do not reuse old chemical bottles.
-
Create Your Cleaning Solution — In the first spray bottle, create a 1-to-1 solution of distilled white vinegar and water. In the second spray bottle, fill it with plain, clean water. The vinegar solution is an excellent, gentle degreaser that will break down the oils from the fingerprints.
-
The Degreasing Pass — Take your first microfiber cloth and fold it into quarters. Lightly mist one of the outer quarters with your vinegar-water solution. Do not spray the refrigerator directly. Spraying the cloth prevents the solution from dripping down the appliance and creating difficult-to-remove streaks. Starting at the top and working your way down, wipe the surface in a firm, deliberate motion, following the direction of the grain you identified earlier. Apply even pressure.
-
Flip and Continue — As you clean a section, you'll notice the cloth face becomes soiled. Flip the cloth to a new, clean quarter section. This prevents you from simply redepositing the oils you just lifted. Continue this process until you have wiped down the entire surface.
-
The Rinsing Pass — Now, take your second, clean microfiber cloth and fold it into quarters. Lightly mist it with the spray bottle containing plain water. The purpose of this step is to remove any acidic vinegar residue, which you don't want sitting on the passive chromium oxide layer long-term. Thoroughly wipe down the entire surface again, moving in the exact same direction as the grain.
-
The Final Dry Polish — This step is what creates the streak-free, uniform shine. Take your third, completely clean and dry microfiber cloth. Vigorously buff the entire surface, again moving strictly with the grain. This removes any lingering water droplets before they can evaporate and leave mineral spots. Your refrigerator should now be completely free of fingerprints and streaks.
-
Optional: The Protective Oil Finish — For added resistance to future fingerprints, you can apply a micro-thin layer of food-grade mineral oil (or even olive oil in a pinch). Place a few drops—no more than the size of a dime—onto a clean, soft cloth (a new microfiber cloth is ideal). Gently wipe this onto the appliance, moving with the grain. Then, take a separate dry cloth and buff it thoroughly until it feels dry to the touch and all excess oil is removed. This fills the microscopic grooves, leaving less space for finger oils to settle.
Common Causes
- Skin Oils: The most frequent cause is sebum, the natural oil produced by our skin, transferring from our hands to the appliance surface.
- Airborne Cooking Grease: Tiny aerosolized oil particles from frying or sautéing can settle on all kitchen surfaces, including your refrigerator, creating a sticky film that attracts dust and smudges.
- Incorrect Cleaning Residue: Many all-purpose cleaners, and even some dedicated "stainless steel cleaners," can leave behind surfactants, silicones, or waxy residues that attract more fingerprints.
- Food and Drink Splashes: Small, unnoticed splashes from cooking or pouring drinks can dry and create spots that disrupt the uniform finish.
- Hard Water Minerals: If you use tap water and a regular rag to wipe down your fridge, the dissolved minerals (calcium, magnesium) can leave behind a dull, spotty film as the water evaporates.
- Lint from Paper Towels: The fibers in paper towels and low-quality cloths can break off and get lodged in the grain of the steel, making the surface look dusty and unkempt.
Common Mistakes
- Wiping Against the Grain: The number one mistake. This pushes oils and dirt deeper into the microscopic grooves and is the leading cause of streaks.
- Using Abrasive Sponges or Pads: Never use steel wool, scouring powders, or the rough side of a kitchen sponge. These will permanently scratch the brushed finish, and iron particles from steel wool can imbed in the surface and rust.
- Using Harsh Chemicals: Avoid cleaners containing chlorine (bleach), ammonia (like many glass cleaners), oven cleaners, or other caustic chemicals. They can strip the protective chromium oxide layer, leading to permanent discoloration or even rust and pitting.
- Spraying Cleaner Directly onto the Fridge: This leads to drips and runs that are difficult to buff out, resulting in an uneven, streaky finish.
- Not Rinsing Away the Cleaner: Leaving any cleaning solution, even a mild vinegar one, to dry on the surface can leave a residue that dulls the shine and attracts more dirt.
- Using a Dirty or Linty Cloth: Moving dirt from one place to another. A dirty cloth will smear grime, and a linty one will embed fibers into the grain.
Cost & Time Breakdown
| Task | DIY Cost | Pro Cost | Time Commitment |
|---|---|---|---|
| Initial Deep Clean & Polish | $15 - $25 (for quality cloths, spray bottles) | $100 - $175 | 20-30 minutes |
| Weekly Maintenance Wipe-Down | $0 (using existing supplies) | N/A | 5 minutes |
| Specialized Stainless Steel Kit | $10 - $20 (cleaner + polish + cloth) | N/A | 15-20 minutes |
| Removing a Minor Scratch | $20 - $35 (for a scratch removal kit) | $150 - $300+ | 1-2 hours |
Tips & Prevention
- Train Your Hands: Make a conscious effort to use only the refrigerator handles to open and close the doors. This single habit change can reduce fingerprinting by over 90%.
- The Oil Barrier: Periodically applying a very thin coat of food-grade mineral oil or a specialized stainless steel polish can act as a barrier, filling in the grain and making it harder for fingerprints to take hold.
- Keep a Cloth Handy: Keep a dedicated, dry microfiber cloth in a nearby kitchen drawer. You can perform a quick buff (always with the grain) every day or two to instantly remove fresh prints before they have a chance to set.
- Clean Spills Immediately: Wipe away splatters and drips from food or drinks with a damp cloth as soon as they happen. Dried-on sugar and acids are much harder to remove later.
- Increase Kitchen Ventilation: When cooking, especially frying, use your range hood fan. This will help capture airborne grease particles before they have a chance to land and settle on your appliance surfaces.
When to Call a Professional
While most surface issues on stainless steel are purely cosmetic and can be handled with the cleaning methods above, there are instances where a professional may be needed, or where the damage is unfortunately permanent. You should consider calling an appliance refinishing professional if you encounter deep scratches that you can easily feel with a fingernail. While DIY scratch removal kits exist, they carry a high risk of making the problem worse by creating a noticeable patch of altered finish. A professional has the tools and experience to blend the repair into the surrounding area more effectively.
The other major issue is corrosion or rust. While stainless steel is highly rust-resistant, it is not rust-proof. Exposure to harsh chemicals like chlorine bleach or muriatic acid, or prolonged contact with salty or acidic foods, can compromise the passive layer and cause pitting and rust spots. If you see orange or brown specks of rust appearing, especially around handles or water dispensers, a standard cleaning will not remove them. A professional may be able to abrade and re-finish the surface, but often, this type of chemical damage is irreversible. In these cases, prevention is the only true cure.
Get the print-ready PDF of this guide
A clean, ad-free, printable version you can keep on your phone or pin to the workshop wall. We'll also send occasional weekly tips matched to your home situation.
- Print-optimized layout
- Tools, materials & every step included
- Unsubscribe anytime
Frequently asked questions
Can I use Windex or other glass cleaners on my stainless steel fridge?+
No, you should never use glass cleaners like Windex on stainless steel. Most contain ammonia, which can damage the protective chromium oxide layer over time, potentially leading to streaks, discoloration, or even rust.
How can I tell which direction the 'grain' of the steel runs?+
To find the grain, look at the refrigerator door from an angle in good light. You will see a pattern of very faint, fine lines. These lines will either run vertically (top to bottom) or horizontally (side to side). Always wipe and polish parallel to these lines, not against them.
Are stainless steel wipes better than a cloth and solution?+
While convenient, pre-moistened wipes often contain chemicals and silicones that can build up on the surface, leaving a residue that attracts more dust and fingerprints over time. The microfiber cloth and vinegar/water method is cheaper, more effective for a deep clean, and leaves no residue behind.
Will magnets scratch my stainless steel refrigerator?+
Yes, they can. If you slide a magnet across the surface, any tiny piece of grit trapped underneath can easily cause fine scratches in the finish. If you use magnets, place them gently and lift them straight off rather than sliding them.


Discussion
Loading comments…