Tools & materials you'll need
Affiliate links- AmazonDawn PowerwashExcellent for cutting grease on the splash guard.
- AmazonIce Cubes2 cups
- AmazonCoarse Salt1/2 cup · Rock salt or ice cream salt works best.
- AmazonCitrus PeelsFrom one lemon or orange.
- AmazonBio-Enzyme Garbage Disposal CleanerThe key to digesting organic waste without harsh chemicals.
As an Amazon Associate FixlyGuide earns from qualifying purchases — at no extra cost to you. Prices and availability are accurate as of publication and subject to change.
'''
Quick Answer
To thoroughly deep clean a foul-smelling garbage disposal, you need a multi-pronged attack. First, unplug the unit and manually scrub the underside of the rubber splash guard (the source of most odors) with a brush and a potent degreaser like Dawn Powerwash. Next, pour two cups of ice cubes and a half-cup of coarse salt into the disposal, run it with cold water until the grinding stops to mechanically scour the impeller plates. For the final, critical step, pour a specialized enzymatic cleaner down the drain and let it sit overnight. These enzymes will biologically digest the grease, food bits, and bacterial biofilm that cause the persistent stench, flushing clean in the morning.
Why This Works
That gag-inducing odor wafting from your kitchen sink isn't just from last night's leftovers; it's the byproduct of a thriving ecosystem of bacteria feasting on a layer of FOG—Fats, Oils, and Grease—and decaying food particles. This gunk forms a sticky, stubborn matrix called a biofilm, which coats the internal components of your disposal, especially the underside of the rubber splash guard and the impeller plates. Simply masking the smell with citrus or using a foaming cleaner offers only temporary relief because it doesn’t eliminate the source.
This deep cleaning method works because it tackles the problem on three distinct chemical and physical levels:
-
Physical-Abrasive Action: The combination of ice cubes and coarse rock salt acts as a powerful mechanical scrubber. As the disposal's impellers spin, they fling these hard, sharp-edged particles against the chamber walls at high velocity. This is far more effective than just water, physically scouring away caked-on sludge and biofilm that a simple rinse would leave behind. It’s a safe, non-corrosive alternative to using harsh abrasives.
-
Surfactant Chemistry: The initial scrubbing of the baffle with a degreaser like Dawn Powerwash is crucial. Degreasers contain surfactants—molecules with a water-loving (hydrophilic) head and an oil-loving (hydrophobic) tail. The tails bury into the grease and grime, while the heads face out, allowing the running water to grab onto the entire complex and wash it away. This step chemically breaks down the stickiest, most concentrated source of the smell.
-
Enzymatic Digestion: This is the secret weapon for a lasting clean. Products like Bio-Enzyme Drain & Odor Eliminator aren't traditional soaps or solvents. They contain specific, non-pathogenic bacteria and the enzymes they produce: lipase (digests fats), protease (digests proteins), and amylase (digests starches). When you pour them in and let them sit, these enzymes act as biological catalysts, breaking down the complex organic molecules in the biofilm into smaller, simpler, water-soluble molecules. This doesn't just cover the smell; it digests and eliminates the food source for the bad, odor-causing bacteria. It's a targeted, biological deep clean that continues working long after you’re done.
Crucial Safety Note: Always ensure ventilation when cleaning. Wear gloves and eye protection. NEVER mix cleaning chemicals, especially bleach and ammonia (which creates toxic chloramine gas) or bleach and acid-based cleaners like vinegar or some toilet bowl cleaners (which creates chlorine gas). This guide specifically avoids these dangerous combinations.
What You Need
- Nitrile Gloves: To protect your hands from grime.
- Safety Glasses: To protect your eyes from splashes.
- Flashlight: For inspecting the inside of the disposal chamber.
- Long-handled bottle brush or dedicated disposal brush: Essential for scrubbing the baffle.
- Dawn Powerwash: Its surfactant-rich formula is excellent for cutting grease on the splash guard.
- Ice Cubes: About 2 cups.
- Coarse Salt: ½ cup of rock salt or ice cream salt works best.
- Citrus Peels (Optional but Recommended): From one lemon or orange, for a final deodorizing pass.
- Bio-Enzyme Garbage Disposal Cleaner: A product specifically designed for digesting organic waste. Do not substitute with a caustic chemical drain opener.
Step-by-Step Method
-
Safety First: Disconnect the Power — This is a non-negotiable first step. Unplug the garbage disposal unit from the wall outlet under your sink. If its hardwired, you must go to your home's electrical panel and flip the breaker that controls the disposal. Double-check that it's off by trying to flip the disposal's switch.
-
Inspect the Chamber: Use a Flashlight — Put on your gloves and safety glasses. Shine a flashlight down into the disposal. Look for any non-food items that may have fallen in (bottle caps, twist ties, silverware) and remove them with tongs or pliers—never your fingers. This is also a good time to get a "before" look at the grime you're about to defeat.
-
Target the Baffle: Degrease and Scrub — The flexible rubber splash guard is the primary臭い culprit. Lift the flaps and spray the underside generously with Dawn Powerwash, letting the foam cling and penetrate the grease for 2-3 minutes. Then, take your long-handled brush, insert it into the disposal, and scrub the baffle’s underside, top side, and all the crevices vigorously. You’ll be disgusted, and then satisfied, by the amount of black gunk you remove. Rinse the brush and repeat until it comes out clean.
-
Initial Flush: Hot Water Rinse — While the disposal is still off, pour a kettle of very hot (not boiling) water down the drain to help loosen and flush away some of the grime you just broke free. This preps the chamber for the next step.
-
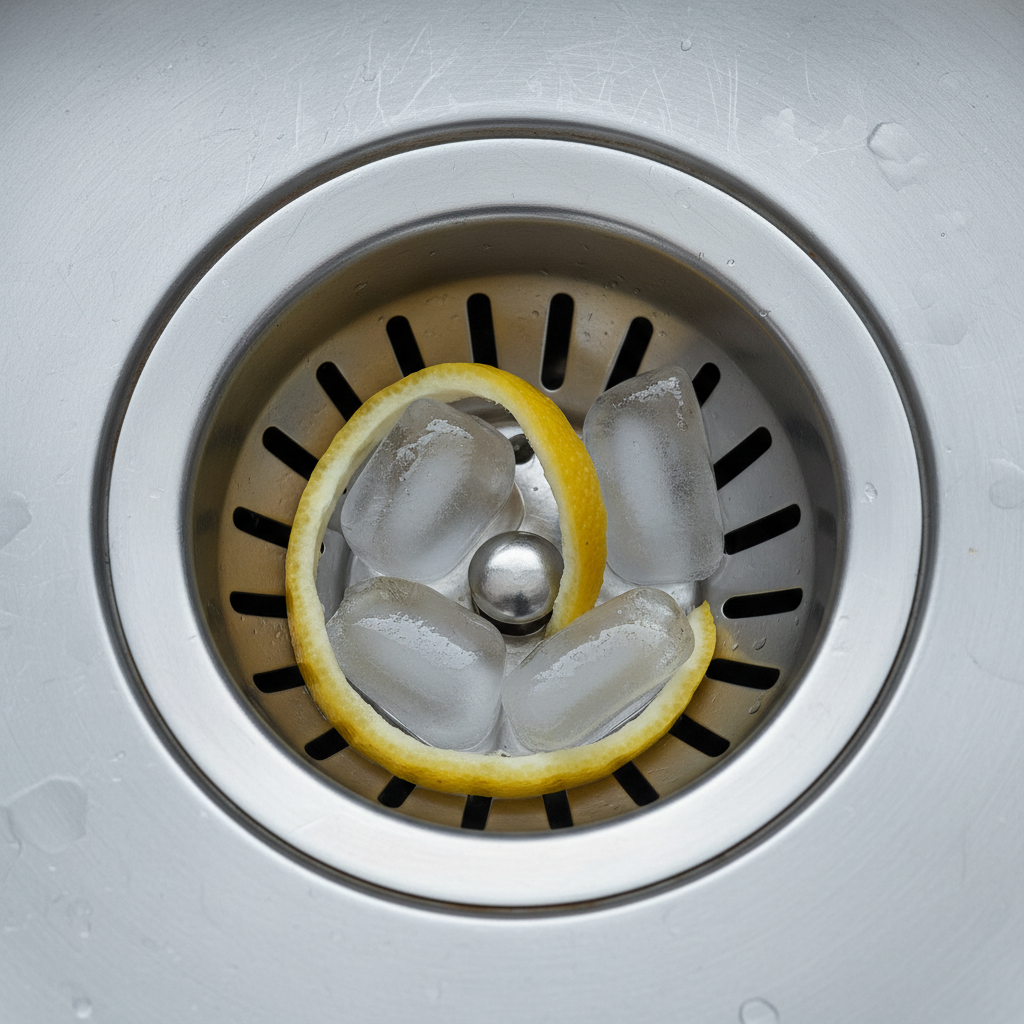
The Ice Grinder Trick: Mechanical Scouring — Reconnect power to the unit for this step only (either plug it in or flip the breaker back on). Pour the 2 cups of ice cubes and ½ cup of coarse salt directly into the disposal chamber. Turn on the cold water, then turn on the disposal. Let it run until the loud grinding noise completely ceases, which may take 30-60 seconds. The ice and salt will act like a sandblaster, scouring the chamber walls and impeller plates clean.
-
The Citrus Deodorizer: A Quick Freshen-Up — With the water still running, toss in the peels from a lemon or orange and let the disposal grind them up completely. The citric acid provides a small cleaning boost, but more importantly, the citrus oils will release a powerful, pleasant scent that immediately deodorizes the unit and your kitchen.
-
Final Power Down: Prepare for Enzymes — Your disposal is now physically clean, but the microscopic, odor-causing biofilm remains. It's time to eliminate it. Turn off the disposal and the water, and once again, disconnect the power at the plug or breaker for the overnight dwell period.
-
Enzymatic Assault: The Overnight Deep Clean — Read the directions on your chosen bio-enzymatic cleaner. Typically, this involves pouring a specific amount (often 2-4 ounces) into the quiet disposal. Do not run any water after applying the cleaner. The goal is to let the enzymes sit in the chamber and drainpipe undisturbed for at least 8 hours (doing this just before bed is perfect).
-
The Morning After: Final Flush — The next morning, after the enzymes have worked all night digesting the biofilm, reconnect the power one last time. Turn on the cold tap and run the disposal for 30 seconds to flush out all the digested waste and residual enzymes, leaving behind a truly clean and odor-free unit.
Common Mistakes to Avoid
- Using Bleach: Bleach is a poor choice for disposals. It is ineffective against biofilm, can harden rubber seals and gaskets leading to leaks, and is extremely dangerous if it accidentally mixes with any residual acid (vinegar) or ammonia in your pipes.
- Pouring Grease Down the Drain: Never pour hot grease or oil down the sink. It seems liquid when hot but will solidify in your pipes or disposal, creating instant clogs and a rancid food source for bacteria. Always pour grease into a disposable container and throw it in the trash once it solidifies.
- Using Only Hot Water to "Clean": Running hot water when using the disposal can melt fats, allowing them to travel further down your pipes before they cool and solidify, potentially causing a clog deeper in your system. Cold water helps solidify fats, allowing the disposal to break them into small pieces and flush them away.
- Forgetting the Splash Guard: People often focus on the blades but ignore the rubber baffle. This component doesn't get scoured by grinding and is the primary collection point for slimy, smelly gunk. If you only clean one thing, clean the baffle.
- Using Harsh Chemical Drain Openers: Products like Drano or Liquid-Plumr are highly caustic and designed to dissolve hair and clogs, not to clean a disposal. They can severely corrode the metal components of your unit, leading to premature failure and expensive replacement.
- Relying on Lemons Alone: Grinding a lemon makes things smell nice for an hour, but it's like using perfume instead of taking a shower. It doesn't remove the source of the odor (the biofilm), which will return quickly.
Cost & Time Breakdown
| Task | DIY Cost (Supplies) | Pro Cost | Time Investment |
|---|---|---|---|
| Manual Baffle Scrubbing | <$5 (for a brush) | N/A | 5-10 minutes |
| Ice & Salt Scouring | <$1 | N/A | 5 minutes |
| Enzymatic Treatment | $2-$4 per treatment | N/A | 5 mins prep + 8 hr dwell |
| Full DIY Deep Clean | ~$25 (initial supplies) | N/A | ~25 min active time |
| Plumber Service Call | N/A | $150 - $350 | 1-2 hours |
Prevention & Maintenance
- The Rule of 30: Every time you use the disposal, run cold water for 10 seconds before, for the entire duration of the grind, and for 10 seconds after grinding is complete. This ensures all waste is ground up and flushed completely out of the unit and past the P-trap.
- Weekly Ice Cleanse: Once a week, grind a tray of ice cubes. This quick scouring action takes less than a minute and prevents significant buildup before it starts.
- Monthly Enzyme Refresh: Once a month, use your bio-enzymatic cleaner overnight to keep the biofilm from ever re-establishing itself. This is the single best thing you can do to prevent future odors.
- Cut it Up: While disposals are powerful, they work more efficiently on smaller pieces. Cut large food scraps up before feeding them into the unit.
- Know What to Avoid: Keep hard, non-food items out. Also avoid feeding it large quantities of starchy, swelling foods (pasta, rice, potatoes) and highly fibrous vegetables (celery stalks, corn husks, onion skins), as these are common causes of clogs and odors.
When to Call a Professional
While this deep cleaning method resolves over 95% of odor issues, sometimes the problem lies beyond simple grime. You should call a licensed plumber if you experience any of the following:
- Persistent Odor After Deep Cleaning: If you have followed all the steps above and the foul smell returns within a day or two, the issue may be a clog in the P-trap, a blocked plumbing vent, or even sewer gas backing up. A professional can diagnose these more complex plumbing issues.
- Loud Humming or Grinding Noise: If the motor hums but the blades don’t spin, you have a jam. You can often clear this yourself using the small wrench that came with the unit, but if you’re not comfortable or if it happens frequently, it could signal a failing motor.
- Water Leaking from the Unit: If you see water dripping from the bottom or sides of the disposal itself, it indicates a failed seal or a crack in the housing. The unit needs to be repaired or, more likely, replaced.
- The Disposal Won't Turn On: If you’ve checked the wall switch, the circuit breaker, and the small red or black reset button on the bottom of the disposal unit itself and it still has no power, there may be an electrical fault that requires a pro to diagnose safely. '''
Get the print-ready PDF of this guide
A clean, ad-free, printable version you can keep on your phone or pin to the workshop wall. We'll also send occasional weekly tips matched to your home situation.
- Print-optimized layout
- Tools, materials & every step included
- Unsubscribe anytime
Frequently asked questions
Can I use vinegar and baking soda to clean my garbage disposal?+
While the fizzing action of baking soda and vinegar can help dislodge some loose debris and temporarily deodorize the unit, it is not an effective solution for a true deep clean. This combination is a mild acid-base reaction that does not have the chemical power to break down the hardened grease and complex biofilm that cause persistent odors. It's better than nothing, but it won't solve a truly stinky problem the way an enzymatic cleaner can.
Why does my brand-new garbage disposal already smell bad?+
Odor can build up much faster than most people realize, sometimes within a few weeks of installation. The most common reason is not using enough cold water during and after grinding. Without sufficient water flow, small, sticky particles of food (especially starches or fats) can get flung onto the chamber walls and remain there. Bacteria begin to break this food down almost immediately, creating a smell. Implementing a weekly ice cube cleaning from the start is the best way to prevent odors in a new unit.
What's the difference between an enzymatic cleaner and a drain opener like Drano?+
They are fundamentally different and you should never use a caustic drain opener in a garbage disposal. A drain opener like Drano uses harsh chemicals (sodium hydroxide) to create a powerful chemical reaction that dissolves hair and soap scum, generating heat. This can damage the plastic and metal parts of your disposal. An enzymatic cleaner, on the other hand, uses natural enzymes and bacteria to slowly and safely digest organic waste like fats, starches, and proteins. It is not corrosive and is the recommended method for cleaning and maintaining a disposal.
Is it better to use hot or cold water with a garbage disposal?+
Always use cold water. This is a common point of confusion. Hot water can melt fats and oils, which might seem like a good thing. However, this liquid grease then travels down your pipes, where it cools and solidifies further down the line, creating a stubborn blockage. Cold water, by contrast, keeps the fats in a solid state, allowing the disposal's impellers to break them up into tiny pieces that can be easily flushed through the plumbing system without sticking.


Discussion
Loading comments…