Tools & materials you'll need
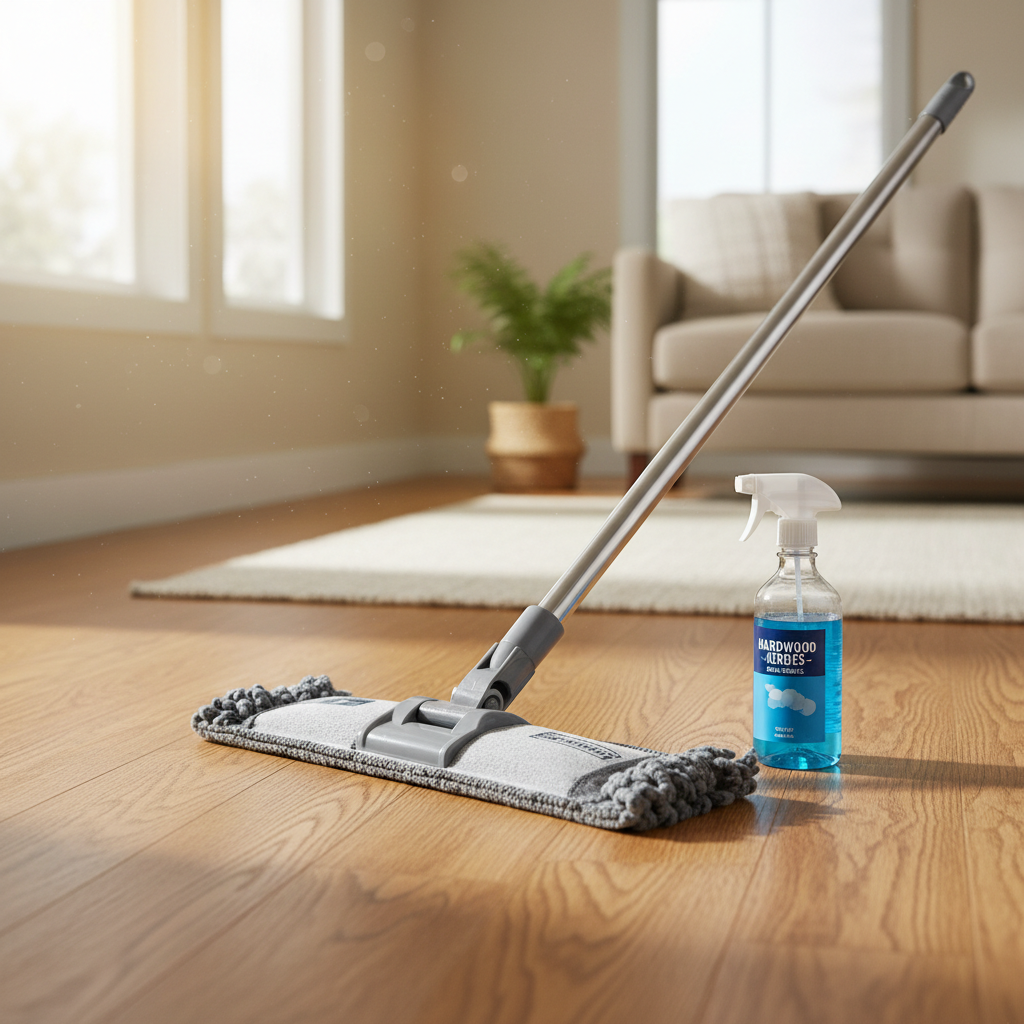
Affiliate links- AmazonMicrofiber flat-head mop1 · Far superior to string mops for wood floors.
- AmazonBuckets2 · Two are needed: one for the solution, one for rinse water.
- AmazonpH test strips1 pack · Optional but helpful for diagnosing your old cleaner.
- AmazonRubber gloves1 pair · Protect your hands during stripping.
- AmazonClean towels2-3 · For drying sections of the floor after rinsing.
As an Amazon Associate FixlyGuide earns from qualifying purchases — at no extra cost to you. Prices and availability are accurate as of publication and subject to change.
'''
Quick Answer
A dull, hazy film on wood floors after mopping is most often a chemical residue caused by using a cleaner with the wrong pH. Alkaline cleaners (pH above 7) chemically react with the polyurethane finish on your floor, creating a cloudy residue that builds up over time. The solution is to strip this film and switch to a pH-neutral cleaner specifically designed for wood floors.
The Problem
You spent the afternoon cleaning. You vacuumed, you prepped, and you mopped the hardwood floors. But after they dry, instead of a warm, satisfying sheen, you see a milky, dull haze. Sometimes it looks like streaky footprints or ghostly mop marks that catch the light just right. The floor doesn't look clean; it looks aged, cloudy, and worse than before you started. You might have even tried mopping it a second time, thinking you missed a spot, only to find the problem persists or even worsens. This frustrating, hazy film is a common complaint among homeowners, and it's not your imagination. It's a clear sign that your cleaning method is working against you, creating a problem rather than solving one.
How It Works
To understand why your floor looks dull, you need to think less about dirt and more about chemistry. The issue lies in the interaction between your cleaning solution and your floor's protective finish.
Most modern wood floors (those installed or refinished since the 1980s) are sealed with a polyurethane or polycrylic finish. Think of this not as part of the wood, but as a thin, durable layer of plastic bonded to the wood surface. Its job is to protect the wood from moisture, scratches, and stains. This finish has a specific chemical makeup that requires a specific type of care.
Enter the pH scale. This is a measure of how acidic or alkaline a substance is, ranging from 0 (very acidic) to 14 (very alkaline), with 7 being neutral. Pure water is pH 7. Your polyurethane floor finish is happiest and most stable at this neutral pH.
The problem begins when you introduce a cleaner that is too alkaline, or in some cases, too acidic. Many popular "all-purpose" cleaners, floor cleaners promising a deep clean, and even some DIY solutions have a high alkaline pH (often between 9 and 11). When you spread this high-pH solution across your floor, a chemical reaction occurs. The alkalinity attacks the polyurethane, ever so slightly dissolving or etching the surface. It also leaves behind microscopic salt crystals as it dries. This combination of subtle chemical damage and salt residue is the dull, hazy film you see. It’s not just leftover soap; it’s a chemical byproduct that light can no longer reflect off evenly, resulting in a cloudy appearance.
This is also why the problem gets worse over time. Each mopping session adds another micro-layer of residue and damage, building up a stubborn film that won't rinse away with your regular method. The only way to fix it is to use a process that dissolves the built-up film without further harming the finish, and then to adopt a new, pH-neutral cleaning routine for the future. A cleaner labeled "pH-neutral" or specifically "for hardwood floors" will have a pH around 7.0, allowing it to remove dirt and oils without causing this damaging chemical reaction, preserving the clarity and longevity of your finish.
Step-by-Step Fix
This process involves two main phases: first, stripping the existing residue film from your floors, and second, cleaning them correctly with the right product. This will restore the shine and prevent the haze from returning.
SAFETY NOTE: Wear rubber gloves to protect your hands. Ensure good ventilation by opening windows or using fans. Never work on a wet floor; dry sections completely before stepping on them.
-
Confirm the Culprit: Before you begin, confirm your old cleaner is the problem. If you have pH test strips (available online or at pool supply stores for about $10), test your usual cleaning solution. Dip a strip into the mixed solution and compare the color to the chart. If it reads anywhere above 8, it's too alkaline and likely the cause of the haze.
-
Dry Mop the Entire Floor: Begin by thoroughly removing all loose dirt, dust, and hair. Use a microfiber dust mop or the hard floor setting on your vacuum cleaner. This prevents you from turning dry debris into mud during the wet-cleaning phase.
-
Gather Your New Supplies: You will need a pH-neutral wood floor cleaner from a trusted brand (e.g., Bona, Pallmann, Loba). You'll also need two buckets, a clean microfiber flat-head mop with at least two clean mop pads, and some old towels for drying.
-
Test Your Stripping Solution: To remove the old film, we'll use a very mild stripping solution. A common DIY option is a mixture of 1/4 cup of non-sudsing ammonia in 1 gallon of warm water. CRITICAL: Before applying this to your whole floor, test it in a small, hidden area, like inside a closet or under a large piece of furniture. Apply the solution, gently scrub, rinse with a clean water-dampened cloth, and dry. Check if it removes the haze without discoloring the finish. For stubborn factory finishes, a commercial residue remover/stripper might be necessary.
-
Strip the Residue - Section by Section: Working in a manageable 5x5 foot area, apply the tested stripping solution with your microfiber mop. The mop should be damp, not dripping. Let the solution sit for 1-2 minutes to dissolve the film, but do not let it dry on the floor.
-
Scrub and Agitate: Gently scrub the section with your mop. You’re not trying to scrub the wood, but rather the residue film sitting on top of the finish. You may see a milky substance lifting from the floor; this is the film you are removing.
-
Rinse the Section: Fill your second bucket with clean, plain water. Using a fresh, clean mop pad, go over the section you just stripped with the water-dampened mop to rinse away the stripping solution and lifted residue. Wring out the mop pad frequently to ensure you are effectively removing the old chemicals.
-
Immediately Dry the Section: Use a clean, dry towel to wipe the section completely dry. Standing water is the enemy of wood floors. Once the first section is stripped, rinsed, and bone-dry, move on to the next, slightly overlapping the areas.
-
Prepare the pH-Neutral Cleaner: Once the entire floor is stripped, rinsed, and dry, you're ready for the final, correct cleaning. Mix your new pH-neutral cleaner in a clean bucket according to the manufacturer’s directions. Do not add more cleaner than recommended.
-
Damp-Mop Correctly: Using a fresh, clean microfiber mop pad, lightly dampen it with the pH-neutral solution. Mop the entire floor, moving with the grain of the wood. The goal is a floor that is just damp enough to clean but dries within a minute or two. There should be no pooling or standing liquid.
-
Final Air Dry: Let the floor air dry completely. Do not walk on it during this time. Once dry, the original sheen should be restored. The clarity of the grain will be visible again, and the hazy, cloudy appearance will be gone.
Common Causes
- High-pH All-Purpose Cleaners: Using cleaners meant for tile, vinyl, or general household tasks. Their alkaline formulas (pH 9-11) are the number one cause of chemical haze on polyurethane.
- Oil Soaps: Products like Murphy Oil Soap are often misused on modern polyurethane finishes. They are designed for older oil-based finishes and leave behind an oily residue on poly that attracts dirt and builds into a dull, streaky layer.
- DIY Vinegar Solutions: While popular online, using a vinegar and water solution is not recommended. Vinegar is acetic acid. Repeated use of an acid, even a mild one, can slowly break down the polyurethane finish over time, leading to dulling.
- Using Too Much Cleaner: Even with a pH-neutral cleaner, using a higher concentration than the instructions recommend can leave behind a residue.
- Using Dirty Equipment: Mopping with a dirty mop head or reusing dirty water simply spreads a thin layer of grime across the floor, which dries to a dull finish.
- Steam Mopping: The combination of high heat and moisture from a steam mop can damage the polyurethane finish and even force water into the seams between boards, causing wood damage over time. Most wood flooring manufacturers explicitly void their warranty if a steam mop is used.
Common Mistakes
- Assuming "All-Purpose" Means for All Floors: Homeowners grab the multi-surface cleaner they use on countertops, not realizing it's chemically incompatible with their floor finish.
- Believing More Cleaner Equals More Power: Dumping extra capfuls of cleaner into the bucket, thinking it will provide a deeper clean. It only increases the amount of residue left behind.
- Using a Soaking Wet Mop: Using a traditional string mop that puts down excessive water. This water can get into seams and, as it evaporates, leaves behind any solids from the cleaner or dirt.
- Never Reading the Cleaner's Label: Failing to check if a cleaner is specified as safe for sealed hardwood floors or is pH-neutral.
- Chasing a "Wet Look" with Oils: Mistaking the temporary shine from an oil soap for a clean floor, which only creates a dirt-attracting film that dulls the true finish.
- "Rinsing" with the Same Dirty Water: Dipping the mop back into the same bucket of dirty solution, which contaminates the whole process and ensures a filmy result.
Cost & Time Breakdown
Here is a realistic breakdown of what it takes to fix a hazy floor and maintain it.
| Task | DIY Cost | Pro Cost | Time |
|---|---|---|---|
| Diagnosing with pH Strips | $8 - $12 | N/A | 5 minutes |
| DIY Residue Stripping & Cleaning | $25 - $60 (for cleaner, new mop head, strips) | $150 - $300 (professional cleaning service) | 2 - 4 hours |
| Routine pH-Neutral Mopping | $0 (using supplies from stripping) | $75 - $150 (recurring cleaning service) | 30-45 minutes |
| Professional Screen & Recoat | N/A | $1.50 - $3.00 per sq. ft. | 1 - 2 days |
| Full Sand & Refinish | N/A | $4.00 - $8.00 per sq. ft. | 3 - 5 days |
Tips & Prevention
- Dedicate Your Cleaner: Keep a clearly labeled bottle of pH-neutral wood floor cleaner with your mop and bucket. This prevents accidentally grabbing the wrong product in a hurry.
- Adopt the Two-Bucket Method: Use one bucket for your cleaning solution and a second bucket filled with clean water for rinsing the mop head. This keeps your cleaning solution from getting contaminated with dirt.
- Clean Your Tools: Wash your microfiber mop pads in the washing machine after every single use. Do not use fabric softener, as it can leave a residue on the pad.
- Use Doormats and Rugs: Place high-quality doormats at all exterior doors to trap grit and chemicals from shoes. Use area rugs in high-traffic zones.
- Tackle Spills Immediately: Clean up spills as soon as they happen using a dry or slightly damp paper towel. This prevents the spill from drying and affecting the finish.
- Always Test First: Before using any new cleaning product on your floors for the first time, always test it in a small, inconspicuous area to ensure it doesn't cause discoloration, damage, or haze.
When to Call a Professional
You should call a professional if the haze doesn't disappear after following the stripping and cleaning process described above. If the dullness persists, it likely means the issue is no longer a surface-level film but rather physical damage to the polyurethane finish itself. The finish may be permanently etched, abraded, or worn thin.
In this scenario, a flooring professional can diagnose the problem. They may recommend a "screen and recoat." This is a process where they lightly abrade (screen) the top layer of the existing finish to rough it up and then apply a fresh coat of compatible polyurethane, restoring the protective layer and sheen without the cost and mess of a full refinish. If the damage is deeper, with scratches, gouges, or areas where the finish is completely worn through to the bare wood, your only option is a full sand and refinish, where the floor is sanded down to raw wood and a new multi-layer finish is applied. This is a major project that should always be handled by an experienced flooring contractor. '''
Get the print-ready PDF of this guide
A clean, ad-free, printable version you can keep on your phone or pin to the workshop wall. We'll also send occasional weekly tips matched to your home situation.
- Print-optimized layout
- Tools, materials & every step included
- Unsubscribe anytime
Recommended for DIYers & woodworkers
Sponsored
The Top 20 Tools for Workshops of Any Budget
No stationary machines or power tools required — plus 3 fundamental tools that can't be bought at any price.
Get the free guide
Ted's Woodworking — The #1 Woodworking Resource
Detailed instructions, dimensioned drawings, materials & cutting lists, and 3D schematics for every skill level.
See the plansSponsored: links above are affiliate links. FixlyGuide may earn a commission on qualifying purchases — at no extra cost to you.
Frequently asked questions
Can I just use vinegar and water to clean my wood floors?+
It is not recommended. Vinegar is an acid that can, over time, break down and dull the polyurethane finish on your floor. While it may seem to clean well initially, repeated use can cause long-term damage that requires professional repair.
What is a pH-neutral floor cleaner and where do I find one?+
A pH-neutral cleaner has a pH level of around 7.0, meaning it's neither acidic nor alkaline. These cleaners are gentle and won't chemically react with your floor's finish. You can find them at home improvement stores, flooring supply stores, or online. Look for products specifically labeled 'pH-neutral' and 'safe for hardwood floors.'
How can I tell if my wood floors have a polyurethane finish?+
If your floors were installed or refinished after the 1970s, they almost certainly have a polyurethane, aluminum oxide, or polycrylic finish. A simple test is to put a drop of water on the floor in an inconspicuous area. If the water beads up and stays on the surface, the floor is sealed. If it soaks in and darkens the wood, the floor is likely unsealed or has a worn-out finish.
How often should I be mopping my wood floors?+
This depends on traffic. For high-traffic areas, a weekly damp-mopping with a pH-neutral cleaner is appropriate. For less-used rooms, mopping every 2-4 weeks is sufficient. You should dry mop or vacuum to remove grit and dust several times a week, as this dry debris is what causes most scratches.


Discussion
Loading comments…