- Dust and Debris: Even with regular filter changes, some dust, lint, pet hair, and airborne particles can slip past your AC filter, get into the condensate pan, and then wash into the drain line, contributing to the biological sludge.
- Infrequent Maintenance: Neglecting regular maintenance allows minor buildups to become major clogs. Many homeowners don't realize the drain line needs attention until a problem arises.
- Cracked or Damaged Pan: A cracked condensate pan can lead to water leaking directly from the pan, mimicking a clogged drain line. While not a clog of the line itself, it presents the same problem of unwanted water.
Plumbing · Clog
| Project category | Plumbing |
|---|---|
| Problem type | Clog |
| Trade required | Plumbing |
| Urgency | Soon — within weeks |
| Safety risk | Low safety risk |
| DIY suitability | DIY friendly |
| Cost category | Low cost |
| Typical timeline | Same-day DIY attempt; pro visit within a day or two |
| Contractor type | Licensed plumber |
Repair option
Plunger, hand auger, or trap cleanout before chemicals.
Replacement option
Line replacement when clogs return in the same spot repeatedly.
Common causes
- Hair and soap buildup in the trap
- Grease cooling in the branch line
- Flushed wipes or foreign objects
Relevant tools:diy difficultydiy or hire a pro
Published July 23, 2026Last updated August 17, 2026
Tools & materials you'll need
Affiliate linksAs an Amazon Associate FixlyGuide earns from qualifying purchases — at no extra cost to you. Prices and availability are accurate as of publication and subject to change.
Quick Answer
A clogged AC drain line is a common yet troublesome issue that arises when condensation, a normal byproduct of your air conditioner's operation, cannot properly exit the system. This usually happens due to a buildup of algae, mold, and sludge within the condensate line. The immediate consequence is water backing up into your drain pan, potentially overflowing and causing significant water damage to ceilings, walls, or flooring. The most effective DIY solution involves safely clearing the obstruction by flushing the line with a solution of distilled white vinegar or a diluted bleach mixture, followed by a thorough water rinse. This process helps dissolve the organic material forming the clog, restoring proper drainage and preventing further issues.
The Problem
You're enjoying a cool home, and suddenly you notice water dripping from your AC unit, or worse, a puddle forming on the floor or a water stain spreading on your ceiling. These are tell-tale signs of a clogged AC condensate drain line. This seemingly small issue can quickly escalate into a major headache, causing expensive water damage, promoting mold growth, and reducing your AC unit's efficiency. Without a clear pathway, the water produced by your air conditioner as it dehumidifies your home has nowhere to go. This typically leads to the drain pan overflowing, triggering your AC's safety shut-off switch (if equipped), or spilling water into your living space. Many homeowners rush to mop up the water, but fail to address the underlying clog, leading to a recurring problem. Understanding why this happens and how to properly clear it is key to preventing future occurrences and maintaining a healthy home environment.
How It Works
Your air conditioner doesn't just cool the air; it also removes humidity from it. As warm, humid air passes over the AC unit's cold evaporator coil, moisture in the air condenses into liquid water, much like dew forming on a cold glass. This condensation drips into a sloped collection pan, known as the condensate drain pan, located directly beneath the evaporator coil.
From the condensate pan, the water flows into a PVC or copper drain line, typically a 3/4-inch diameter pipe. This line is designed to carry the accumulated water, usually several gallons per day in humid climates, away from your AC unit and out of your home. The drain line usually terminates outdoors, often near the foundation, or connects to a utility sink or a main drain stack.
However, this cool, dark, and often damp environment within the drain line creates an ideal breeding ground for microscopic organisms, particularly various types of algae, mold, and mildew. These organisms thrive in moisture and darkness. Over time, these growths accumulate, forming a slimy, gelatinous clog within the narrow drain pipe. dust, dirt, and other airborne particles that get past your air filter can also contribute to this buildup. Eventually, this biological sludge becomes thick enough to completely obstruct the flow of water. When the drain line is blocked, the condensate pan fills up, and if not addressed, it will overflow. Many modern AC systems include a float switch in the drain pan or on the drain line itself. When the water level rises to a certain point, this switch automatically shuts off the outdoor compressor unit to prevent water damage. While this is a helpful safety feature, it also means your AC stops cooling, leaving you with a hot home until the clog is cleared. Understanding this continuous cycle of condensation and the potential for organic buildup is crucial for effectively diagnosing and preventing clogged AC drain lines.
Step-by-Step Fix
Safety First— Always turn off the power to your entire AC unit at the thermostat and the electrical disconnect switch near the outdoor compressor unit before beginning any work. This prevents accidental startup and potential injury. Wear gloves and eye protection when working with cleaning solutions.
-
Locate the Drain Line & Pan — Find the indoor AC unit (air handler), usually in your attic, basement, crawl space, or a utility closet. Look for a shallow pan directly beneath the unit (the condensate pan) and a PVC pipe, typically 3/4-inch in diameter, extending from it. This is your condensate drain line. You might also spot an access port, usually a T-shaped vent or a cap, on the drain line near the unit.
- If you see water overflowing: Place towels or a wet-dry vacuum around the unit to catch any spills.
-
Clear Standing Water from the Pan — If the condensate pan is full or overflowing, you'll need to empty it. Use a wet-dry vacuum to carefully suction out all the standing water. Make sure to get as much water as possible.
- Alternative: If you don't have a wet-dry vacuum, use old towels and sponges to carefully soak up the water. Be careful not to damage any components.
-
Inspect the Access Port — Many drain lines have a T-shaped vent or a removable cap close to the air handler. If yours does, carefully remove the cap. This will be your primary point of access for cleaning. If there's no obvious access port, sometimes the entire drain line can be disconnected from the unit (usually a simple slip fitting or a threaded connection that can be unscrewed by hand).
-
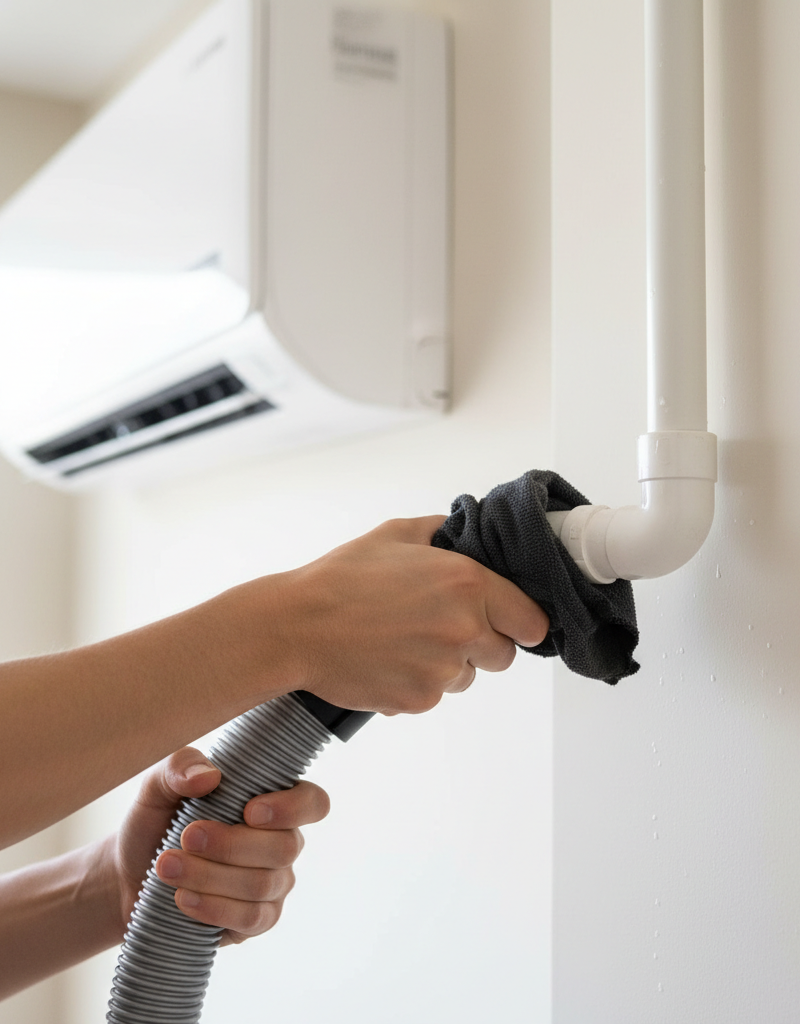
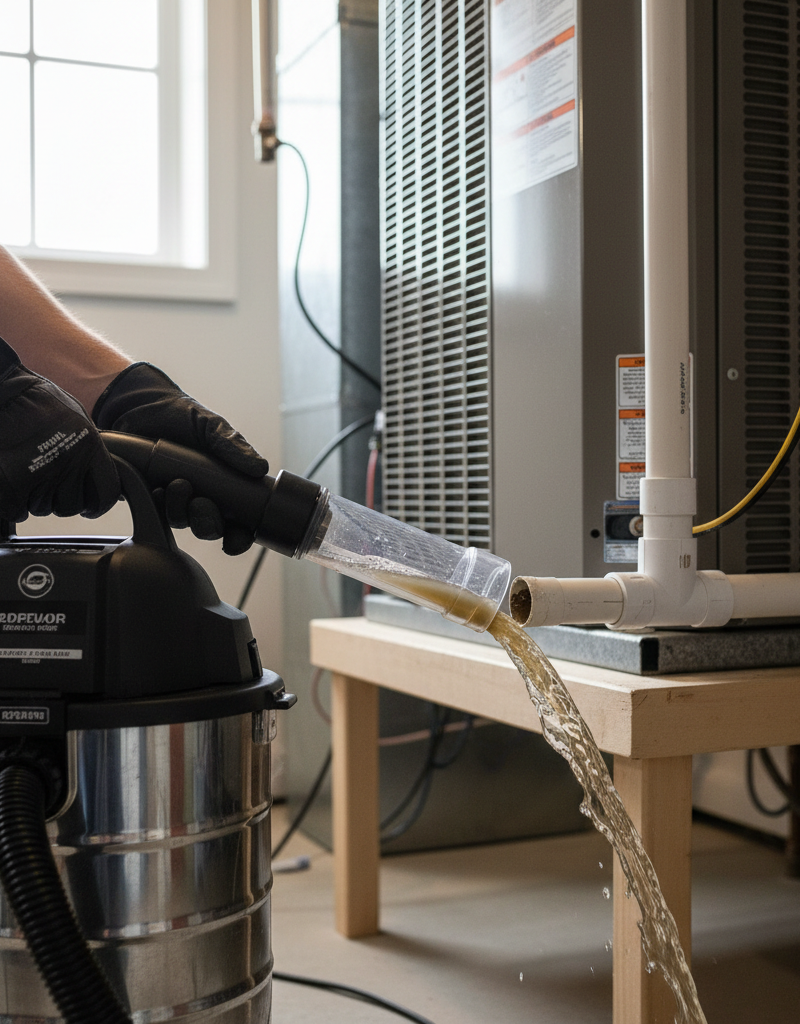
Use a Wet-Dry Vacuum to Clear the Clog (Optional but Recommended) — With the access port open (or the line disconnected), place the nozzle of your wet-dry vacuum tightly over the open end of the drain line (either the access port or the disconnected end). Seal the connection as best you can with your hand or a rag. Turn on the vacuum for 2-3 minutes. This creates a strong suction that can often pull out the clog or suck out any standing water in the line. You might hear a gurgling sound as the clog is dislodged.
- Tools: Wet-dry vacuum, rags for sealing.
- If this doesn't work: The clog might be too dense, or too far down the line. Proceed to chemical flushing.
-
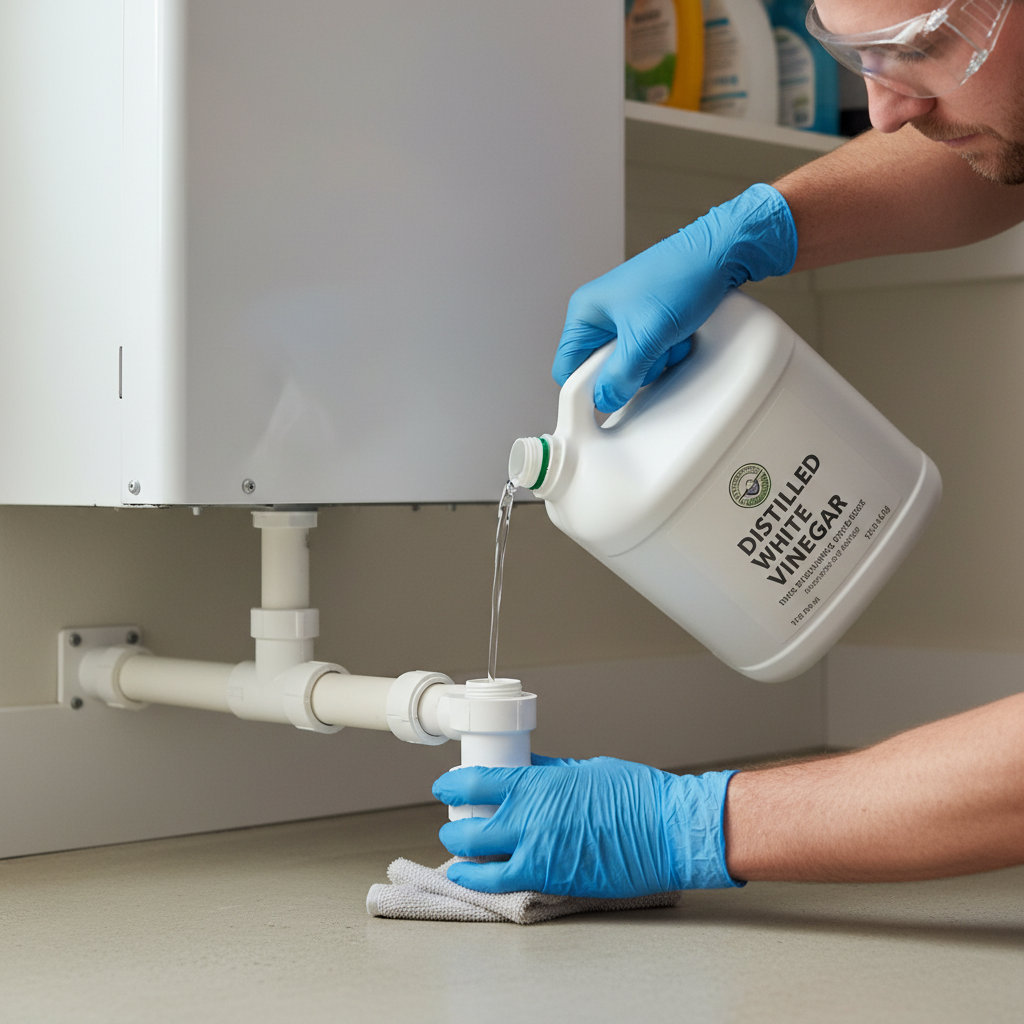
Flush with Distilled White Vinegar or Bleach Solution — After vacuuming or if you skipped that step, slowly pour 1 cup of distilled white vinegar into the access port or disconnected drain line. Distilled white vinegar is excellent for dissolving organic matter like mold and algae. If you prefer to use bleach, mix 1/4 cup of regular household bleach with 1 gallon of water. Never mix vinegar and bleach as it creates toxic fumes.
- Safety: Wear eye protection and gloves. Ensure adequate ventilation.
- For stubborn clogs: Let the vinegar or bleach solution sit in the line for 30 minutes to an hour to allow it to work on the clog.
-
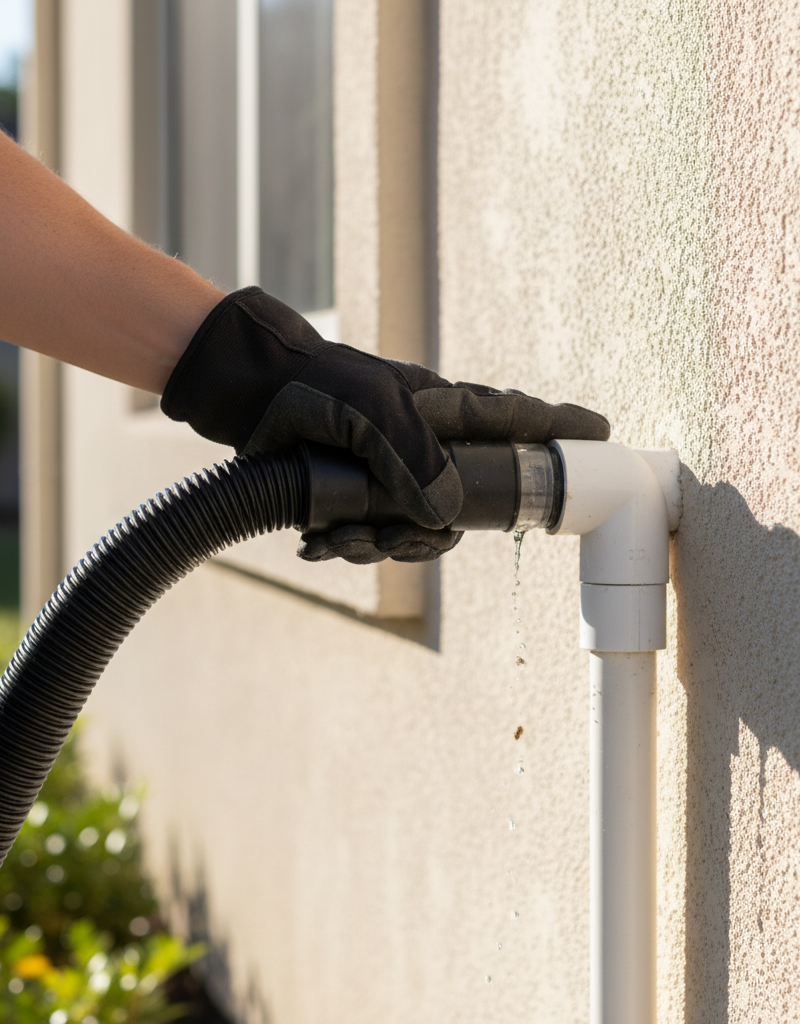
Flush with Water — After the vinegar or bleach solution has had time to work, slowly pour 2-3 cups of plain water into the drain line. This will flush out the dissolved clog material and any remaining cleaning solution. You should see the water draining freely from the outdoor end of the condensate line.
- Observe for drainage: Go outside to the drain line's termination point. You should see a steady stream of water exiting. If water still backs up, the clog might be deeper, or you might need to repeat the flushing process.
-
Reconnect and Restore Power — Once you're confident the line is clear and draining properly, securely replace any caps or reconnect the drain line sections. Restore power to your AC unit at the electrical disconnect and then at the thermostat.
-
Monitor the Drainage — Turn on your AC unit and let it run for at least 30 minutes. Periodically check the condensate pan to ensure no water is accumulating, and verify that water is consistently dripping or flowing from the outdoor drain line exit. This confirms your efforts were successful.
Common Causes
- Algae and Slime Buildup: This is by far the most common culprit. The dark, moist environment of the condensate drain line is an ideal breeding ground for various types of algae, mold, and bacteria, which form a slimy, gelatinous accumulation that eventually blocks the pipe. Air filters don't catch microscopic spores, and they readily multiply in the humid conditions.
- Dust and Debris: Even with regular filter changes, some dust, lint, pet hair, and airborne particles can slip past your AC filter, get into the condensate pan, and then wash into the drain line, contributing to the biological sludge.
- Infrequent Maintenance: Neglecting regular maintenance allows minor buildups to become major clogs. Many homeowners don't realize the drain line needs attention until a problem arises.
- Improper Installation/Slope: If the condensate drain line was installed with an insufficient slope (less than 1/8 inch per foot) or has sags or bellies, water can sit in sections of the pipe, stagnating and promoting faster biological growth and debris accumulation.
- Cracked or Damaged Pan: A cracked condensate pan can lead to water leaking directly from the pan, mimicking a clogged drain line. While not a clog of the line itself, it presents the same problem of unwanted water.
Common Mistakes
- Using a Wire Hanger or Snake Improvised Tools: Attempting to clear the clog with a coat hanger or other rigid, sharp objects can puncture or crack the PVC drain line, creating a much bigger (and costlier) problem than a simple clog.
- Not Disconnecting Power: Forgetting to turn off the power to the AC unit before working on it is a critical safety oversight, risking electrical shock or damaging the unit if a component is short-circuited by water.
- Ignoring the Outdoor Drain Exit: Many homeowners focus only on the indoor unit and forget to check if the outdoor drain is actually flowing. If it's blocked by leaves, dirt, or even insects, the problem will persist.
- Mixing Cleaning Chemicals: Combining different cleaning agents, especially bleach and vinegar, can produce dangerous, toxic fumes. Always use one product at a time and flush thoroughly if switching.
- Only Addressing the Symptoms: Simply mopping up water without clearing the actual clog means the problem will inevitably return, potentially causing more damage in the long run.
- Overlooking the P-Trap: If your drain line includes a P-trap (a U-shaped bend designed to hold water and prevent sewer gases from entering your home), this is a common point for clogs. Make sure to check and clear it if accessible.
- Using High-Pressure Air/Water Without Caution: While some pros use compressed air or water to blast clogs, doing so improperly or with too much pressure can damage delicate AC components or fittings.
Cost & Time Breakdown
| Task | DIY Cost | Pro Cost | Time |
|---|---|---|---|
| Materials (Vinegar/Bleach) | $5–$10 | N/A | N/A |
| Wet-Dry Vacuum | $0 (if owned) | N/A | N/A |
| Clearing Clog | $0 | $75–$200 | 30–60 minutes |
| Water Damage Repair (Minor) | $50–$250 | $300–$1,000+ | 1-3 hours / Days |
| Preventative Maintenance (DIY) | $0 | Included in tune-up ($100-$150) | 15 minutes/month |
Tips & Prevention
- Monthly Vinegar Flush: Preventative maintenance is key. Every month, pour 1/2 to 1 cup of distilled white vinegar into the AC drain line's access port. This helps inhibit algae and mold growth.
- Check Filters Regularly: Replace your AC filter every 1-3 months (depending on usage, pets, and allergies). A dirty filter restricts airflow and can contribute to debris ending up in the condensate pan.
- Ensure Proper Slope: Periodically check that your condensate drain line maintains a continuous downward slope. If you notice any sags or upwards bends (bellies), consider supporting the line properly to eliminate standing water points.
- Keep Outdoor Exit Clear: Ensure the outdoor end of your condensate drain line is free from dirt, leaves, grass clippings, or insect nests. A blocked exit will cause backup regardless of how clean the interior line is.
- Install a Float Switch: If your AC unit doesn't have one, consider having a professional install a secondary float switch in the drain pan or on the drain line. This will automatically shut off your AC if water backs up, preventing overflow and damage.
- Regular Professional Tune-ups: Schedule annual professional AC maintenance. Technicians will often inspect and clear the condensate drain line as part of their service, catching small issues before they become big problems.
When to Call a Professional
While clearing a clogged AC drain line is a manageable DIY task for most homeowners, there are specific situations where calling an HVAC professional is the wiser and safer choice. If, after following the steps above, the drain line remains stubbornly clogged, or if the problem quickly recurs, a more complex issue might be at play. You should definitely call a professional if you suspect the clog is deep within the system, potentially inside the evaporator coil area, which requires specialized tools and expertise to clean without causing damage.
Furthermore, if you observe water leaking from unexpected places within the AC unit, or if the unit continues to shut off despite a seemingly clear drain line, it could indicate a problem with the condensate pump (if your system has one), a cracked drain pan, or even a refrigerant leak, all of which require professional diagnosis and repair. Any signs of electrical issues, such as tripped breakers or unusual burning smells, immediately warrant a professional's attention due to safety risks. Finally, if you're uncomfortable working with water and electrical components, or if the AC unit is in a hard-to-reach location like a cramped attic, it's best to rely on a licensed HVAC technician to ensure the job is done correctly and safely.
Related Articles
Keep troubleshooting with these hand-picked guides from FixlyGuide:
- The $5 Secret to Fixing a Clogged AC Drain Line (and Avoiding a Costly Flood) — A clogged AC drain line can lead to water damage and mold, but a simple, inexpensive DIY fix can prevent costly repairs.
- The $7 Trick That Unclogs Your AC Drain Line (and Prevents Nasty Surprises) — Discover the simple, inexpensive method to clear your AC's clogged drain line and prevent costly water damage and reduced cooling efficienc…
- The $7 Trick That Unclogs Your AC Drain Line (and Prevents Future Freezes) — A clogged AC drain line is a common culprit behind HVAC issues, but a simple, inexpensive trick can clear it and prevent costly damage.
- The #1 Mistake Homeowners Make When Their AC Drain Clogs (And The $5 Fix) — Discover the most common error homeowners make when tackling a clogged AC drain line and learn a simple, inexpensive solution to prevent co…
- The $7 Trick That Unclogs Your AC Drain Line (And Prevents Costly Leaks) — A clogged AC drain line can lead to water damage and mold, but a simple, inexpensive trick can clear it and prevent future issues.
- The #1 Mistake Homeowners Make Adjusting Sprinklers (and How to Fix It) — Learn the simple, often overlooked technique for adjusting sprinkler spray patterns to ensure optimal lawn coverage and prevent water waste.
Should you do this yourself?
Answer five quick questions before you start. Safety outranks savings every time.
Your experience with work like this
How high do you have to work?
Does the job involve any of these?
Will it need a permit?
Specialty tools
Free and instant. Educational guidance only — not a quote, inspection, or professional diagnosis.
Estimate your own project cost
National averages are a starting point. Enter your details for a range that fits your house.
HVAC replacement cost
- Equipment$2,200 – $3,800
- Installation labor$1,200 – $2,500
Always insist on a Manual J load calculation — sq-ft sizing is only a rough check. Federal heat-pump rebates may reduce cost significantly.
Educational estimate only — always confirm with written local bids.
What should this project cost?
Enter your project details for a realistic cost range before you call anyone.
Common repairs run $150–$650; repipes and water-heater replacements reach $1,500–$4,500.
- Regional adjustment
- National average
- Labor share (typical)
- ~$754
- Quotes to collect
- 3 written estimates
Educational estimate based on national averages — not a binding quote. Always confirm with written local estimates.
Fixly Project Decision Box
- DIY difficulty
- Advanced
- Estimated time
- Homeowner checks 20–30 minutes
- Cost level
- Moderate
Main tools / materials
- Clean air filter
- Garden hose for condenser coils
- Shop vac for the condensate line
When to stop and call a pro
- Burning smell, smoke, or a tripping breaker
- Refrigerant lines iced over or hissing
- Any work inside the sealed refrigerant circuit (EPA-licensed only)
- Gas smell near a furnace — leave and call the utility
Need professional help?
Find an HVAC Pro Near YouGet the print-ready PDF of this guide
A clean, ad-free, printable version you can keep on your phone or pin to the workshop wall. Free with a FixlyGuide account.
- Print-optimized layout
- Tools, materials & every step included
- Saved to your account
Frequently asked questions
What causes an AC drain line to clog?+
AC drain lines typically clog due to the buildup of algae, mold, and other organic matter that thrives in the cool, dark, and moist environment of the condensate line. Dust and debris that bypass the air filter can also contribute to this slimy buildup.
Can a clogged AC drain line cause water damage?+
Yes, absolutely. When the drain line is clogged, the condensate water has nowhere to go and will back up into the drain pan. If the pan overflows, it can cause significant water damage to ceilings, walls, floors, and other parts of your home, and can also lead to mold growth.
How often should I clean my AC drain line?+
For preventative maintenance, it's recommended to pour 1/2 to 1 cup of distilled white vinegar down the AC drain line's access port every 1-3 months, especially during peak cooling season. Regular filter changes also help prevent debris from entering the line.
Should I use bleach or vinegar to clear my AC drain line?+
Both distilled white vinegar and a diluted bleach solution (1/4 cup bleach to 1 gallon water) are effective for clearing organic clogs. Never mix bleach and vinegar, as this creates toxic fumes. Vinegar is generally preferred as it's less corrosive to some components.
What if my AC drain line keeps clogging after I clean it?+
If your AC drain line repeatedly clogs, it could indicate a deeper issue such as a persistently dirty evaporator coil, an improperly sloped drain line, or a damaged condensate pump. In such cases, it's best to consult a professional HVAC technician for a thorough inspection and lasting repair.
Can a clogged drain line make my AC stop working?+
Yes, many modern AC systems are equipped with a safety float switch in the condensate pan or drain line. When water levels rise due to a clog, this switch automatically shuts off the outdoor compressor unit to prevent water overflow and damage, effectively stopping your AC from cooling.
Discussion
Loading comments…