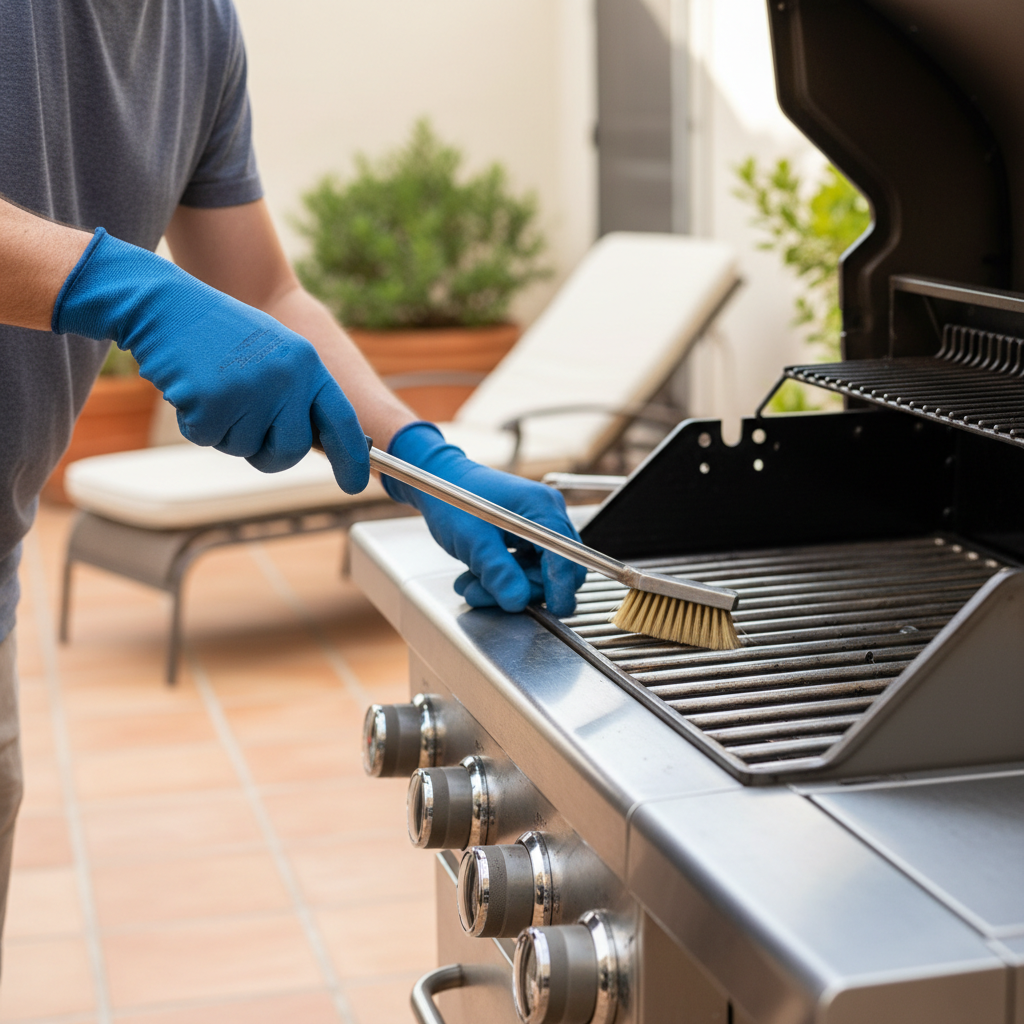
- Neglected Cleaning Schedule: The most significant cause of premature grill failure is simply not cleaning it regularly enough. Grease and food debris build up, leading to clogs, rust, and attracting pests.
- Exposure to Elements: Leaving a grill uncovered or exposed to rain, snow, and direct sunlight accelerates rust on metal components and degrades plastic parts and rubber hoses.
- Improper Storage: Storing a grill outdoors year-round without adequate protection, or storing it with food residue inside, significantly shortens its life.
- Infrequent Inspection: Failure to routinely check critical parts like burner tubes, igniters, and gas hoses allows minor issues to escalate into major, costly repairs or safety hazards.
- Using Harsh Abrasives Incorrectly: While strong brushes are needed, overly aggressive scraping on delicate parts like igniters or burner orifices can cause damage.
Published July 7, 2026Last updated August 17, 2026
Tools & materials you'll need
Affiliate linksAs an Amazon Associate FixlyGuide earns from qualifying purchases — at no extra cost to you. Prices and availability are accurate as of publication and subject to change.
Quick Answer
Many homeowners unknowingly shorten their grill's life by neglecting essential summer cleaning and maintenance. The combination of intense heat, outdoor exposure, and frequent use during peak grilling season can accelerate wear and tear, leading to premature rust, clogged components, and decreased performance. Regularly inspecting and cleaning your grill, properly storing it, and addressing minor issues promptly are crucial steps to enjoying your grill for many seasons and avoiding costly replacements.
The Problem
Summer is prime grilling season, a time when most homeowners fire up their barbecue multiple times a week. While the joy of outdoor cooking is undeniable, this increased usage, combined with exposure to the elements, puts significant stress on your grill. Grease buildup, food particles, and marinades can quickly carbonize and stick to grates, burners, and internal components, fostering bacterial growth and attracting pests. Furthermore, rain, humidity, and direct sunlight contribute to rust formation on metal surfaces and deterioration of hoses and electrical connections. Many homeowners simply clean the cooking grates after each use, overlooking the deeper, more critical areas that accumulate grime and suffer damage. This oversight leads to a cascade of problems: burners become inefficient or blocked, igniters fail, control knobs seize, and the entire unit can rapidly degrade, often requiring a full replacement much sooner than anticipated. Ignoring these maintenance needs transforms a simple outdoor appliance into a source of frustration, uneven cooking, and potential safety hazards.
How It Works
A grill, whether gas, charcoal, or electric, operates on fundamental principles of heat transfer to cook food. For gas grills, propane or natural gas flows from a tank or line, through a regulator, into manifold tubes, and finally to the burner tubes. Inside the burner tubes, air mixes with the gas, and this mixture is ignited by an igniter, producing a flame. The heat from these flames radiates upwards, heating the cooking grates and creating convection within the grill's lid to cook food evenly. Charcoal grills rely on the combustion of charcoal briquettes or lump charcoal, which, when ignited, produce radiant heat. Airflow control, typically achieved via vents, regulates the intensity of the burn and thus the cooking temperature. Electric grills use heating elements that convert electrical energy into heat.
Regardless of the fuel source, a grill's performance hinges on several key components working in harmony. For gas grills, the regulator maintains a safe and consistent gas pressure. The manifold distributes gas evenly, and the burner tubes, often perforated, ensure a uniform flame pattern. Flavorizer bars or heat diffusers sit above the burners, vaporizing drippings and distributing heat. The cooking grates transfer heat directly to the food. Over time, grease and food residue can clog the tiny holes in burner tubes, obstruct gas flow, and coat flavorizer bars, reducing their efficiency. Rust can corrode metal components, weakening structural integrity and causing parts to fail. Hoses and O-rings, especially on propane grills, can degrade from UV exposure and temperature fluctuations, potentially leading to dangerous leaks. Regular cleaning and inspection ensure that these critical parts remain clear, intact, and functioning as designed, allowing the grill to reach and maintain desired temperatures efficiently and safely.
Step-by-Step Fix
1. Disconnect Fuel & Gather Tools — Before performing any maintenance, always ensure your grill is completely cool and disconnected from its fuel source. For propane grills, turn off the valve on the tank and disconnect the regulator. For natural gas grills, turn off the supply valve. For electric grills, unplug it from the outlet.
- Safety First: Never work on a hot grill or one connected to its fuel source. Wear protective gloves to avoid cuts and grime.
2. Remove & Clean Grates — Take out the cooking grates and, if present, warming racks. Scrape off any large food deposits with a stiff wire brush or a grill scraper. For deeper cleaning, especially if heavily soiled, soak them in a mixture of hot soapy water (dish soap works well) for 15-30 minutes, then scrub thoroughly. Rinse completely and dry.
- If still greasy: For stubborn, baked-on grease, consider a specialized grill cleaner or a paste of baking soda and vinegar. Let it sit for 20 minutes before scrubbing.
3. Tackle Flavorizer Bars/Heat Tents — Lift out the metal flavorizer bars or heat tents that sit above the burners. These often accumulate significant carbonized grease. Scrape them clean with a putty knife or stiff brush. Inspect them for rust or perforations; severely rusted or damaged bars should be replaced as they no longer properly vaporize drippings or distribute heat.
- What if they're stuck? If they are heavily carbonized and stuck, gently pry them loose. A wire brush attachment on a drill can speed up cleaning, but be careful not to damage the underlying metal.
4. Clear Burner Tubes — Carefully remove the burner tubes. Use a thin wire, a paperclip, or a specialized venturi brush to clear any clogged ports along the length of the burner. Pay close attention to the small spider webs or insect nests that can block gas flow. Brush the outside of the tubes to remove rust and debris. Ensure the small igniter electrode is clean and properly positioned near a burner port.
- Important Check: After cleaning, hold the burner tube up to a light source to confirm all holes are clear. A consistent flame requires unobstructed gas flow.
5. Clean the Firebox & Drip Pan — Scrape the inside of the firebox (the bottom basin of the grill) to remove accumulated grease and debris. Use a grill scraper or a stiff putty knife to push everything into the drip tray. Remove and empty the drip pan. Line new drip pans with aluminum foil for easier cleanup next time.
- Don't forget the grease trap: Most grills have a small cup or tray that collects grease. Empty and clean this regularly.
6. Inspect Hoses & Connections — For gas grills, carefully inspect the gas hose for any cracks, fraying, or blistering. Check all connections for tightness. Perform a leak test: brush a soapy water solution over all gas connections (hose to tank, hose to manifold). If bubbles appear when the gas is turned on, there's a leak. Tighten connections or replace the hose if damaged.
- Safety Note: Never ignite the grill during a leak test. If you smell gas and detect a leak, turn off the gas immediately and air out the area. Replace faulty hoses or regulators.
7. Test Igniter & Control Knobs — With the gas still off and disconnected (or power unplugged), press and hold each igniter button (if manual) or turn the control knobs. You should hear a distinct clicking sound. If not, check the battery (if applicable) or the igniter wires for corrosion or disconnections. For control knobs, ensure they turn smoothly and don't stick.
- If igniter fails: Try cleaning the igniter tip with a fine-grit sandpaper or a wire brush. If it still doesn't spark, the igniter or wiring may need replacement.
8. Exterior Clean & Cover — Wipe down the exterior of the grill with a damp cloth and a mild detergent. For stainless steel, use a specialized stainless steel cleaner to maintain its shine and prevent corrosion. Once clean and completely dry, consider applying a UV protectant to plastic parts. Finally, use a high-quality grill cover, especially if storing outdoors, to protect against weather and pests.
- Beyond the cover: Even with a cover, if possible, store the grill under an overhang or in a garage during prolonged periods of non-use, especially in harsh weather conditions.
Common Causes
- Neglected Cleaning Schedule: The most significant cause of premature grill failure is simply not cleaning it regularly enough. Grease and food debris build up, leading to clogs, rust, and attracting pests.
- Exposure to Elements: Leaving a grill uncovered or exposed to rain, snow, and direct sunlight accelerates rust on metal components and degrades plastic parts and rubber hoses.
- Improper Storage: Storing a grill outdoors year-round without adequate protection, or storing it with food residue inside, significantly shortens its life.
- Infrequent Inspection: Failure to routinely check critical parts like burner tubes, igniters, and gas hoses allows minor issues to escalate into major, costly repairs or safety hazards.
- Using Harsh Abrasives Incorrectly: While strong brushes are needed, overly aggressive scraping on delicate parts like igniters or burner orifices can cause damage.
- Ignoring Minor Issues: A persistent weak flame, an igniter that sometimes fails, or a slightly corroded part often signals a bigger underlying problem that, if ignored, will worsen.
Common Mistakes
- Only Cleaning the Grates: Many homeowners focus solely on the cooking grates, ignoring the critical flavorizer bars, burner tubes, and firebox, where most damaging grease and debris accumulate.
- Not Disconnecting Fuel During Cleaning: Failing to turn off the gas supply or unplug an electric grill before maintenance is a significant safety hazard, risking gas leaks or accidental ignition.
- Using Water Inside Gas Appliance Components: Spraying water directly into burner tubes or igniter components can cause corrosion and electrical shorts. Use brushes and specialized tools instead.
- Propping the Lid Open for "Ventilation": While it might seem intuitive, leaving the grill lid slightly ajar to "air out" can actually draw more moisture inside, promoting rust, especially in humid environments.
- Over-Tightening Gas Connections: During leak checks or hose replacements, over-tightening can strip threads or damage rubber seals, making a leak worse rather than better.
- Ignoring Rust Spots: Even small rust spots, if not addressed, will spread rapidly. Homeowners often neglect these until they become extensive, structural damage.
Cost & Time Breakdown
| Task | DIY Cost | Pro Cost | Time |
|---|---|---|---|
| Routine Summer Cleaning | $5–$20 | N/A | 30–60 minutes |
| Replace Grates (if needed) | $50–$150 | N/A | 15 minutes |
| Replace Flavorizer Bars | $30–$80 | N/A | 15–30 minutes |
| Replace Burner Tubes | $40–$100 | N/A | 30–60 minutes |
| Replace Gas Hose/Regulator | $25–$60 | $100–$250 (parts + labor) | 15–30 minutes |
| Full Professional Deep Clean | N/A | $150–$300 | 1–2 hours |
Tips & Prevention
- Post-Cookout Burn-Off: After each use, close the lid and let the grill run on high for 10-15 minutes to carbonize any leftover food bits, making them easier to brush off.
- Regular Deep Cleans: Aim for at least two deep cleans per grilling season (e.g., spring startup and mid-summer). If you grill frequently, do it monthly.
- Invest in a Good Cover: A high-quality, weather-resistant grill cover is your first line of defense against the elements. Ensure it fits snugly.
- Store Properly: If possible, store your grill in a sheltered area like a garage or shed during the off-season or extended periods of non-use.
- Check Hoses Annually: Before the grilling season begins, perform a soapy water leak test on all gas connections and inspect the hose for any signs of wear.
- Keep Pests Out: During storage, consider blocking burner tubes and venturi tubes with foil or steel wool to prevent insects and rodents from nesting inside.
When to Call a Professional
While most grill maintenance is well within the capabilities of a diligent homeowner, certain situations warrant calling a licensed professional. If you detect a strong gas smell that persists after confirming the gas supply is off and connections are tight, this indicates a serious leak that requires immediate professional evaluation due to fire and explosion risks. Similarly, if you suspect an issue with the gas regulator or internal manifold system, which are complex high-pressure components, a certified technician should be called. If corrosion is so advanced that structural integrity is compromised, or parts are seized beyond repair, a professional can assess whether replacement or repair is the safer and more cost-effective option. For complex electrical grilles with wiring issues or if you simply lack the time or confidence to perform a thorough deep clean and inspection, a professional grill cleaning service can ensure your appliance is safely and properly maintained.
Related Articles
Keep troubleshooting with these hand-picked guides from FixlyGuide:
- The Secret to Lush Raised Beds? It's Not Just About How You Water — Smart irrigation for raised garden beds isn't just about automation; it's about delivering the right amount of water precisely when your pl…
- The Hidden Reason Your GFCI Trips (It's Not Always a Faulty Outlet) — A continuously tripping GFCI outlet is a critical safety warning, often indicating moisture, a faulty appliance, or a wiring problem that r…
- The #1 Mistake Owners Make With New Pellet Grills (And How to Fix It) — Avoid a bitter first cook by properly seasoning your new pellet grill before its inaugural use.
- The Hidden Reason Your GFCI Trips (It’s Not Always a Bad Outlet) — A tripping GFCI outlet is a safety mechanism doing its job, often indicating a problem like moisture, a faulty appliance, or a wiring issue…
- The Hidden Reason Your AC Isn't Cooling (And Why Most Homeowners Get It Wrong) — Is your central AC blowing warm air or struggling to cool your home? The culprit is often a silent but serious issue many homeowners overlo…
- The #1 Mistake Homeowners Make When Caulking a Bathroom Sink (And How to Fix It) — Discover the most common caulk mistake homeowners make around bathroom sinks and follow simple steps to achieve a lasting, watertight seal.
Repair or replace this system?
Plug in four numbers and see which choice holds up financially.
Free and instant. Educational guidance only — not a quote, inspection, or professional diagnosis.
Questions to ask before you sign
Ask every contractor the same questions and the cheapest bid stops looking cheapest. Check them off as you go — your progress is saved on this device.
Free, no signup. Bring this to every walkthrough so you compare bids on the same terms.
What should this project cost?
Enter your project details for a realistic cost range before you call anyone.
Cost depends heavily on which system turns out to be the source.
- Regional adjustment
- National average
- Labor share (typical)
- ~$1,620
- Quotes to collect
- 3 written estimates
Educational estimate based on national averages — not a binding quote. Always confirm with written local estimates.
Repair or replace?
Run the age, cost ratio, and repair history through the calculator before you commit.
- Estimate this projectGet a cost range for your scope and ZIP before you call anyone.Open
- Get local estimatesSend one request and compare written estimates from vetted pros.Open
Free, no signup required. Estimates are educational guidance, not a quote or an inspection.
This article was independently written by FixlyGuide based on the source topic.
Frequently asked questions
How often should I deep clean my grill?+
For frequent grillers (2-3 times a week), a deep clean is recommended monthly. For occasional users, aim for at least twice per grilling season, typically at the start and mid-season.
Can I use dish soap to clean grill grates?+
Yes, dish soap is effective for cleaning grill grates. Mix it with hot water and let heavily soiled grates soak for 15-30 minutes before scrubbing. Just be sure to rinse thoroughly to remove all soap residue.
What's the best way to prevent rust on my grill?+
The best way to prevent rust is to keep your grill clean, dry, and covered with a high-quality, weather-resistant cover when not in use. Regular cleaning of carbonized grease also prevents moisture from being trapped against metal surfaces.

Discussion
Loading comments…