Tools & materials you'll need
Affiliate linksAs an Amazon Associate FixlyGuide earns from qualifying purchases — at no extra cost to you. Prices and availability are accurate as of publication and subject to change.
Quick Answer
When your microwave hums, lights up, and spins the turntable but leaves your food cold, the most likely suspect is a faulty door interlock switch. These safety switches prevent the microwave from operating if the door isn't properly latched, and a broken one can fool the microwave into thinking the door is open, thus never engaging the high-voltage components that generate heat. Other possibilities include a blown high-voltage fuse or, less commonly, a failing magnetron tube. Always begin troubleshooting by unplugging the unit and visually inspecting the door and its mechanisms.
The Problem
You've popped your leftover lasagna into the microwave, set the timer, and hit start. The fan whirs, the light comes on, the plate rotates – everything seems normal. But when the timer dings, your lasagna is still stone cold. This frustrating scenario is a common complaint, indicating a problem within the microwave's heating system rather than its basic operational functions. It's a clear sign that the high-frequency electromagnetic waves, which agitate water molecules in food to generate heat, are not being produced. Pinpointing the exact component failure requires a systematic approach, starting with the most frequent and easiest-to-check culprits.
How It Works
To understand why your microwave isn't heating, it's helpful to grasp the basic principles of how it should work. A microwave oven uses a component called a magnetron to produce microwaves, a type of electromagnetic radiation. These microwaves are generated when electrons are accelerated through a magnetic field within the magnetron tube. This high-frequency energy is then directed into a "waveguide" and into the cooking chamber. The metal interior of the microwave reflects these waves, causing them to bounce around and penetrate the food. Water molecules (and other polar molecules) within the food absorb this microwave energy, causing them to vibrate rapidly. This vibration creates friction, and friction generates heat, cooking your food from the inside out.
However, this powerful process involves extremely high voltage, making safety paramount. Several interlocking safety mechanisms are in place to prevent microwave exposure. The most critical are the door interlock switches. When you close the microwave door, a series of typically three interlock switches (primary, secondary, and monitor) are engaged. The primary and secondary switches tell the control board that the door is closed and safe to operate, allowing power to flow to the high-voltage transformer. The monitor switch acts as a crucial fail-safe; if either of the other two switches fails to disengage when the door is opened, the monitor switch immediately creates a short circuit, blowing the main fuse and preventing microwave leakage. If any of these switches fail to make proper contact when the door is closed, the circuit to the magnetron won't complete, and the microwave will run (fan, light, turntable) but won't produce heat. Beyond the door switches, the high-voltage fuse protects the high-voltage circuit, and the magnetron itself is the component directly responsible for generating the microwaves. A failure in any of these key components will result in a non-heating microwave.
Step-by-Step Fix
Always unplug your microwave before performing any inspection or repair. Microwave ovens contain a high-voltage capacitor that can store a lethal electrical charge for an extended period, even after the unit is unplugged. If you are uncomfortable working with high voltage, call a professional.
- Safety First: Ensure the microwave is completely unplugged from the wall outlet. Even after unplugging, the high-voltage capacitor inside can store a dangerous charge. If you don't know how to safely discharge the capacitor, do NOT proceed beyond visual inspection.
- Inspect the Door and Latches—Look for obvious damage or misalignment.
- Open and close the microwave door a few times. Do the latches engage smoothly? Are there any visible cracks, bends, or obstructions on the plastic latches or the door frame itself? Even a slight misalignment can prevent the interlock switches from fully engaging. Try gently wiggling the door when closed to see if it feels secure. If the door isn't closing tightly, the interlock switches won't register it as closed.
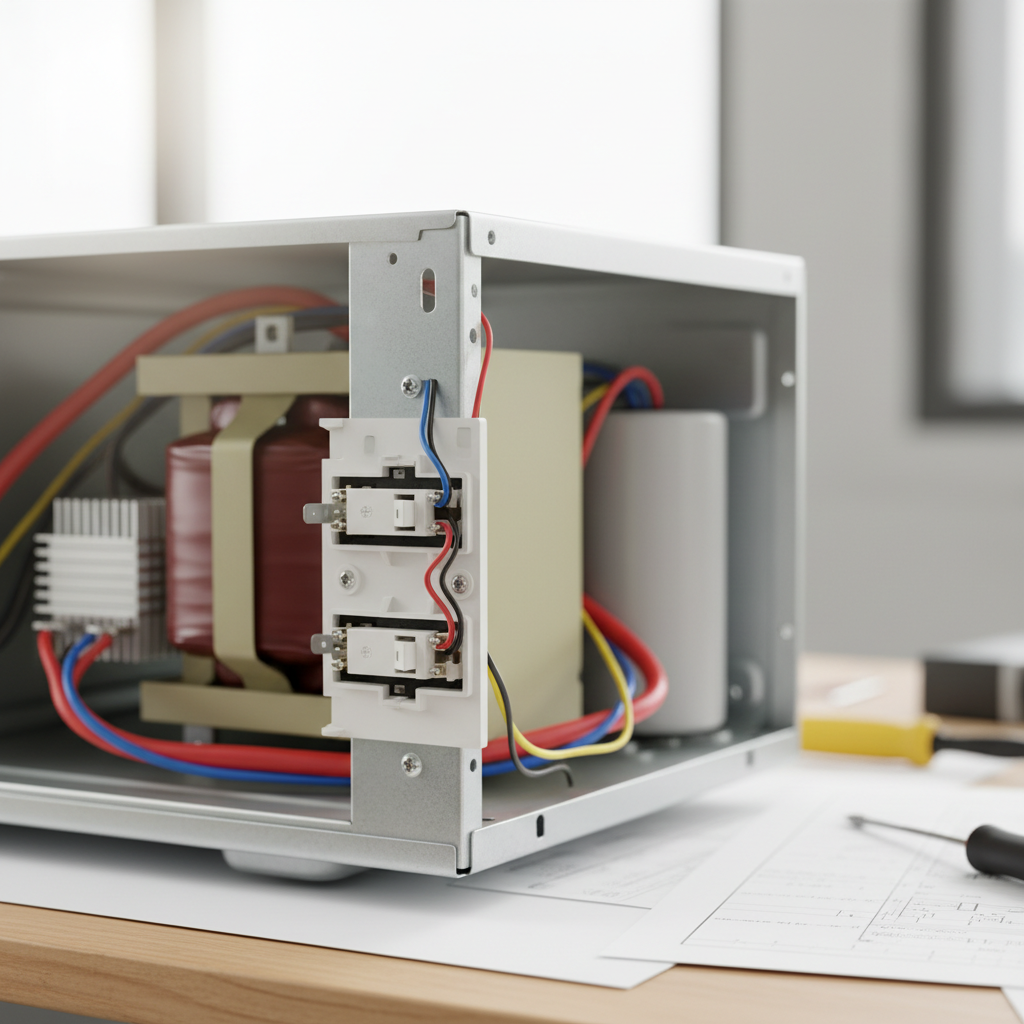
- Test the Door Interlock Switches—The most common culprit for no-heat situations.
- Access the switches: Carefully remove the outer casing of the microwave. This usually involves unscrewing several screws on the back and sides. Take a picture beforehand to remember where everything goes. The interlock switches are typically located near the door latch mechanism, often hidden behind a plastic panel. There are usually three switches: a primary, a secondary, and a monitor switch.
- Visual Check: Look for any obvious signs of damage, such as melted plastic, scorch marks, or loose wires.
- Continuity Test (requires a multimeter): With the microwave unplugged and the capacitor discharged, disconnect the wires from each switch. Set your multimeter to the continuity or ohms setting. For a normally open (NO) switch (most primary and secondary), you should get an open circuit (no reading) when the door is open and a closed circuit (reading close to zero ohms) when the switch plunger is pressed. For a normally closed (NC) monitor switch, you should get a closed circuit when the door is open and an open circuit when the switch plunger is pressed. If any switch doesn't behave as expected, it's faulty and needs replacement. If you find a faulty switch, replace it with an identical part number.
- Check the High-Voltage Fuse—Often protected by the monitor switch trip.
- Locate the fuse: The high-voltage fuse is typically a ceramic fuse, often encased in a plastic holder or sleeve, located near the high-voltage capacitor and transformer. It's designed to blow if there's an overload or a fault in the high-voltage circuit, such as a monitor switch activating.
- Visual and Continuity Test: With the microwave unplugged and capacitor discharged, visually inspect the fuse for a broken filament inside. Use a multimeter set to continuity to test the fuse. If there's no continuity, the fuse is blown. Replace it with an identical fuse, ensuring the amperage and voltage ratings match precisely. A blown fuse often indicates an underlying problem, so be prepared to investigate further if it blows again.
- Inspect the Diode (Rectifier)—A common failure point in the high-voltage circuit.
- Locate the diode: The high-voltage diode is a black cylindrical component, often connected to the high-voltage capacitor and the chassis.
- Testing (advanced): Testing a high-voltage diode accurately requires a specific high-voltage diode tester, as a standard multimeter will not provide a reliable reading due to the diode's high resistance. Without specialized equipment, visual inspection for burns or cracks is the main DIY check. If you suspect the diode, consider replacing it as a relatively inexpensive component. A faulty diode prevents the high-voltage capacitor from charging correctly, leading to no heat.
- Examine the Magnetron Tube—The core component for microwave generation.
- Locate the magnetron: It's a large, metallic component often with cooling fins, usually located behind the control panel or within the main cabinet, connected to the waveguide.
- Visual Check: Look for any signs of damage, such as burnt areas, scorch marks around the antenna tip, or a perforated waveguide cover (mica sheet). A strong burning smell often accompanies a failing magnetron. Do not attempt to remove or test the magnetron without extensive knowledge of high-voltage electronics and proper safety equipment, including discharging the capacitor multiple times. The magnetron itself doesn't typically fail without an underlying cause and is a costly replacement. If you suspect the magnetron, it's often more economical to replace the microwave, especially if it's an older model.
- Check for Loose or Damaged Wires—Simple yet overlooked.
- While the casing is off and after discharging the capacitor, carefully inspect all visible wires, especially those connected to the door switches, high-voltage transformer, magnetron, and capacitor. Look for any wires that are frayed, disconnected, or show signs of burning or melting. Secure any loose connections. Damaged wires can interrupt the flow of power to critical components.
- Reassemble and Test—After confirming all connections.
- Once you've completed your inspection and replaced any faulty components, carefully reassemble the microwave, ensuring all screws are tightened and the casing is secure. Plug the microwave back into the outlet and perform a test by heating a cup of water for 60 seconds. If the water is hot, your repair was successful. If not, you may need to re-evaluate your diagnostics or consider a professional intervention.
Common Causes
- Faulty Door Interlock Switches (Most Common): These safety switches prevent the microwave from operating if the door isn't closed properly. A broken or misaligned switch will prevent the magnetron from receiving power.
- Blown High-Voltage Fuse: This fuse protects the high-voltage circuit. It can blow due to a surge, a short circuit (often triggered by the monitor switch), or a failing component like the magnetron or diode.
- Defective High-Voltage Diode: The diode converts the AC voltage from the transformer into the high DC voltage needed by the magnetron. If it fails, the magnetron won't receive proper power.
- Failing Magnetron Tube: This tube is responsible for generating the microwaves. Over time, it can wear out or become damaged, leading to reduced efficiency or complete failure.
- Faulty High-Voltage Transformer: This component steps up the household voltage to the extremely high levels required by the magnetron. While less common, a faulty transformer will prevent the proper voltage from reaching the magnetron.
- Bad Capacitor: The high-voltage capacitor works in conjunction with the transformer and diode to provide the necessary power to the magnetron. A faulty capacitor can prevent the magnetron from firing.
Common Mistakes
- Ignoring the Safety Warning: The most critical mistake is failing to unplug the microwave or, worse, not knowing how to safely discharge the high-voltage capacitor. This can result in a severe, potentially fatal, electrical shock.
- Replacing the Fuse Without Diagnosing the Root Cause: A blown fuse usually indicates an underlying problem. Simply replacing it without fixing the cause (e.g., a faulty interlock switch or diode) will likely lead to the new fuse blowing again.
- Using Incorrect Replacement Parts: Always use genuine OEM (Original Equipment Manufacturer) or equivalent parts that match the exact specifications (part number, voltage, amperage) of the original components. Using incompatible parts can cause further damage or create safety hazards.
- Damaging the Waveguide Cover: The mica sheet inside the microwave that covers the waveguide is delicate. Puncturing or damaging it while cleaning or inspecting can allow food particles and grease to enter the waveguide, leading to arcing and potential damage to the magnetron.
- Overlooking Loose Connections: Sometimes, the simplest solution is a loose wire. Rushing through diagnostics and missing a disconnected terminal can lead to unnecessary component replacements.
- Trying to Repair a Deeply Damaged Unit: If the microwave shows extensive signs of arcing, burning, or structural damage, attempting a repair without professional expertise can be dangerous and uneconomical. It's often safer and cheaper to replace the unit.
Cost & Time Breakdown
| Task | DIY cost | Pro cost | Time |
|---|---|---|---|
| Door Interlock Switch Test/Replace | $10–$30 | $75–$150 | 20–45 mins |
| High-Voltage Fuse Test/Replace | $5–$15 | $75–$120 | 15–30 mins |
| High-Voltage Diode Test/Replace | $15–$40 | $90–$160 | 30–60 mins |
| Magnetron Tube Replacement | $70–$200+ | $150–$300+ | 1–2 hours |
| Professional Diagnostic Fee | $0 (DIY) | $60–$100 | 30–60 mins |
| New Microwave | $70–$500+ | N/A | N/A |
Tips & Prevention
- Close the Door Gently: Slamming the microwave door repeatedly can stress the latches and interlock switches, leading to premature failure. Close it firmly but gently.
- Keep Interior Clean: Regularly wipe down the interior of your microwave, especially the area around the door seals and the mica waveguide cover. Food splatters can absorb microwave energy, leading to arcing and damage to internal components.
- Avoid Running Empty: Never run the microwave when it's empty. Without food to absorb the microwaves, the energy can reflect back into the magnetron, causing it to overheat and fail prematurely.
- Use Microwave-Safe Cookware: Ensure all dishes and containers placed in the microwave are explicitly labeled as microwave-safe. Metal or non-microwave-safe plastics can cause arcing and damage.
- Listen for Unusual Noises: Pay attention to any new or unusual sounds (buzzing, grinding, loud hum) during operation, as these can be early indicators of a component starting to fail.
- Periodically Check Door Seal: Inspect the rubber gasket or seal around the microwave door for any tears, gaps, or signs of deterioration. A compromised seal can allow microwave energy to leak.
When to Call a Professional
You should absolutely call a professional appliance repair technician if you encounter any difficulty or discomfort in opening the microwave casing, testing electrical components, or if you are unsure about safely discharging the high-voltage capacitor. The high-voltage components inside a microwave can store a lethal charge even after the unit is unplugged, posing a serious electrocution risk. Additionally, if after basic troubleshooting you suspect the magnetron or high-voltage transformer is faulty, a professional diagnosis is warranted. These components are expensive, and their replacement often requires specialized tools and expertise. Furthermore, if you notice any burning smells, smoke, or arcing inside the microwave during operation, unplug it immediately and call a professional to assess the safety of the unit. Attempting to repair complex electrical issues without proper training can lead to further damage to the appliance or, more critically, personal injury.
Related Articles
Keep troubleshooting with these hand-picked guides from FixlyGuide:
- The #1 Reason Your AC Blows Warm Air (And It's Not What You Think) — Discover the most common and often overlooked reason your AC might be blowing warm air, and how a simple capacitor fix can restore cool air.
- The Secret Reason Your Oven Fails to Heat (It's NOT Always the Element) — Discover why your oven isn't reaching its set temperature, from common part failures to overlooked calibration issues, and how to fix it.
- The Secret Reason Your Furnace Turns On and Off So Much (It's Not What You Think) — Short cycling strains your furnace and wastes energy. Learn the most common surprising causes and how to fix them to restore efficient heat…
- The $5 Part That Stops Your Dryer From Heating (And How to Replace It in 30 Minutes) — A dryer that tumbles but doesn't heat often points to a blown thermal fuse, a simple and inexpensive fix most homeowners can do themselves.
- The $5 Part That Stops Your Dryer From Heating (And How to Replace It) — A dryer that tumbles but doesn't heat often points to a blown thermal fuse, a cheap and simple fix any homeowner can do.
- The Surprising Culprit Behind Your Refrigerator's Water Leak (It's Not Always the Ice Maker) — Discover the most common, often overlooked reason your refrigerator is leaking water and how to fix it with simple steps.
Get the print-ready PDF of this guide
A clean, ad-free, printable version you can keep on your phone or pin to the workshop wall. Free with a FixlyGuide account.
- Print-optimized layout
- Tools, materials & every step included
- Saved to your account
Frequently asked questions
Why does my microwave light up and spin but not heat?+
The most common reason a microwave operates but doesn't heat is a faulty door interlock switch. These safety switches tell the microwave whether the door is properly closed, and if one fails, the high-voltage circuit to the magnetron (which produces the heat) will not engage. Other possibilities include a blown high-voltage fuse or a failing magnetron tube.
Is it dangerous if my microwave runs but doesn't heat?+
While the immediate lack of heat isn't directly dangerous, an internal component failure could cause other problems. The primary danger during troubleshooting is the high-voltage capacitor, which can store a lethal electrical charge even after the microwave is unplugged. It's crucial to follow safety measures or call a professional.
How much does it cost to fix a microwave that's not heating?+
The cost to fix a non-heating microwave varies widely depending on the faulty part and whether you do it yourself or hire a professional. DIY repairs for a door switch or fuse might cost $5–$30. Professional repairs can range from $75 for simpler fixes up to $300 or more for complex issues like magnetron replacement. Often, replacing an older microwave is more cost-effective than a costly repair.
Can I replace the magnetron in my microwave myself?+
Replacing a magnetron is an advanced DIY task due to the high voltage involved and the precision required. It requires safely discharging the capacitor, handling delicate components, and ensuring proper reassembly. If you are not experienced with high-voltage electronics, it is strongly recommended to call a professional or consider replacing the microwave, as improper handling can be dangerous or cause further damage.
What's the difference between a high-voltage fuse and a regular fuse in a microwave?+
A microwave contains several fuses, but the high-voltage fuse specifically protects the high-voltage circuit that powers the magnetron. This fuse is typically ceramic and rated for higher voltage and amperage than standard household fuses. Its primary purpose is to blow if there's an overload or fault within the high-voltage components, often as a safety mechanism when a door switch malfunctions.


Discussion
Loading comments…