
Tools & materials you'll need
Affiliate links- AmazonOld towels or ragsTo catch drips
As an Amazon Associate FixlyGuide earns from qualifying purchases — at no extra cost to you. Prices and availability are accurate as of publication and subject to change.
Quick Answer
Safely thawing a frozen pipe involves locating the frozen section, applying gentle heat with a hairdryer or heat gun on a low setting, and ensuring water flow is restored. This DIY fix can prevent hundreds or even thousands of dollars in water damage, but it requires careful attention to avoid overheating and further damage.
The Problem
It's a chilling scenario: you wake up on a cold winter morning, turn on the faucet, and nothing comes out. Or worse, a mere trickle. You suspect a frozen pipe, and your mind immediately jumps to the catastrophic image of a burst pipe and a flooded home. Frozen pipes are not just an inconvenience; they're a ticking time bomb. As water freezes, it expands, creating immense pressure within your pipes. This pressure can cause pipes to crack or rupture, leading to significant water damage, costly repairs, and a major headache. The good news is that with a bit of knowledge and the right approach, many frozen pipes can be thawed safely by a homeowner, preventing the worst-case scenario.
How It Works
Water pipes typically freeze when the ambient temperature around them drops below 32°F (0°C) for an extended period. However, it's not just the external temperature that matters. Several factors contribute to a pipe freezing, including poor insulation, drafts, and even the type of pipe material. When water freezes, it undergoes a phase change, transforming into ice. Unlike most substances that contract when they cool, water is unique because it expands when it freezes. This expansion can increase the volume of water by about 9%, which exerts incredible pressure on the inside of the pipe walls. For example, a pipe with water frozen inside can experience pressures exceeding 2,000 pounds per square inch (psi) – far more than most residential plumbing systems are designed to withstand. This pressure can accumulate anywhere in the pipe, but often the most vulnerable points are bends, joints, or sections where the pipe diameter changes slightly. The ice blockage acts like a plug, preventing water flow, and the pressure build-up behind this plug is what ultimately leads to bursting. Understanding this expansion is key to recognizing the urgency of thawing a pipe before structural damage occurs.
Step-by-Step Fix
1. Identify the Frozen Area — Locate the blockage by systematically checking for cold spots.
Before you can thaw a pipe, you need to find the frozen section. Start by opening all faucets in your home to a trickle. This helps relieve pressure and allows you to confirm which lines are affected. Then, carefully trace the accessible water supply lines, particularly those running along exterior walls, in unheated basements, crawl spaces, attics, or under sinks. Look for sections of pipe that are unusually cold to the touch or have visible frost. Sometimes, you might even see a slight bulge in the pipe if the ice expansion is significant. Pay close attention to pipes near exterior vents or areas with known drafts. It's often not the entire pipe that's frozen, but a specific section.
- Safety Note: If you suspect the frozen pipe is behind a wall or ceiling, do not attempt to open up the wall yourself unless you are confident in your abilities. This can lead to more extensive damage or injury. Consider calling a professional in this instance.
- If you can't find it: If no water comes out of any taps and you can't locate the freeze, your main water line may be frozen, which is a more complex issue requiring professional help.
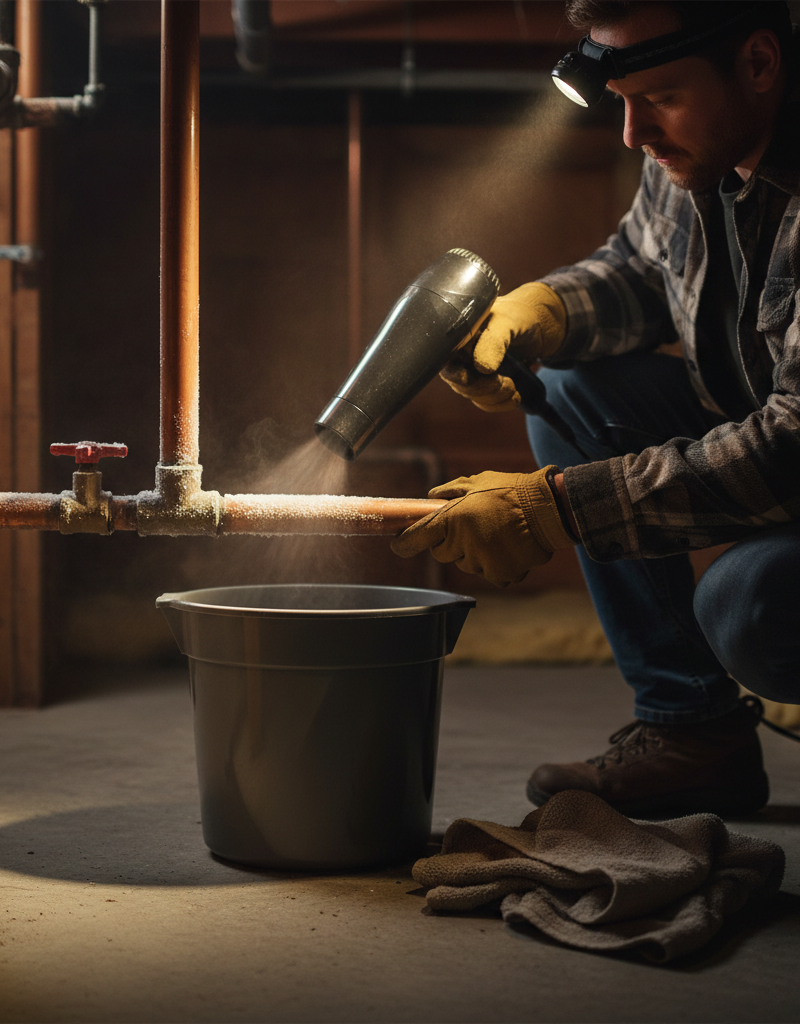
2. Prepare the Area — Ensure safety and accessibility before applying heat.
Clear away any clutter or flammable materials from around the frozen pipe. Lay down old towels or rags beneath the pipe to catch any condensation or melting ice. This also prepares for potential leaks if the pipe has already ruptured. Ensure you have good lighting to see what you are doing. If the pipe is in an enclosed space, make sure there's adequate ventilation.
- Tool Check: Have your chosen heat source (hairdryer, heat gun, heating pad) readily available and plugged into a GFCI outlet, if possible, to minimize electrical shock risk.
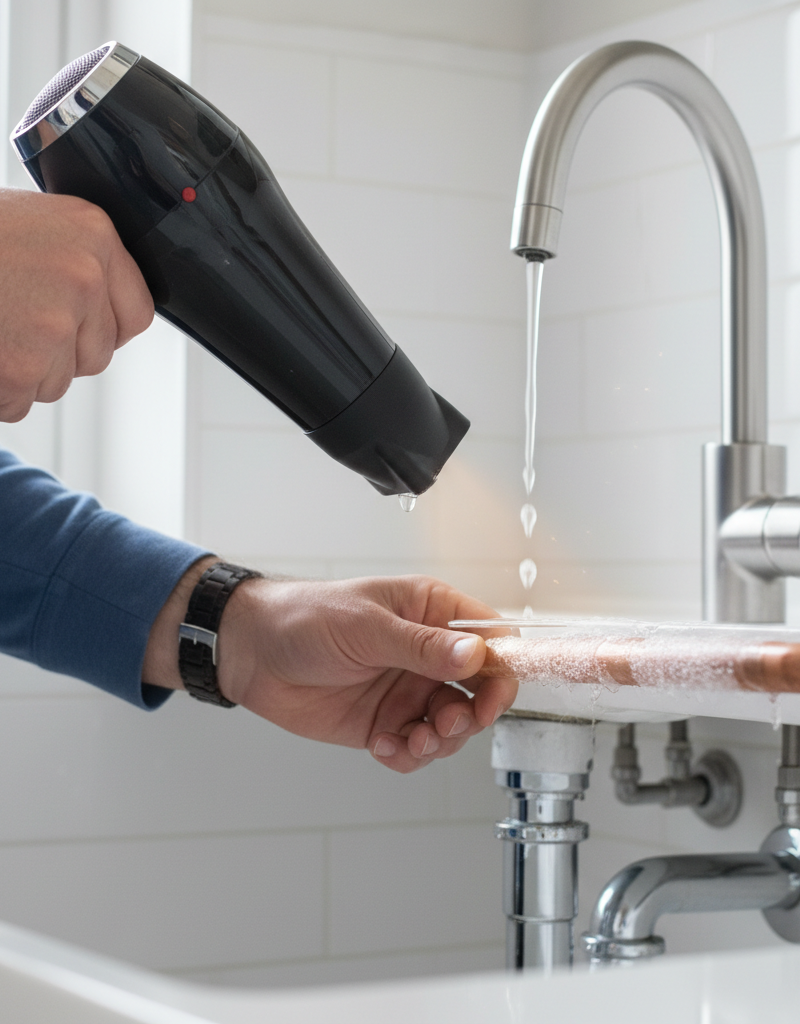
3. Apply Gentle, Gradual Heat — Slow and steady wins the race to avoid further damage.
This is the most critical step. Never use an open flame device, such as a propane torch, to thaw pipes. The intense, uneven heat can damage the pipe, especially PVC, or ignite nearby flammable materials. Instead, use one of the following methods:
- Hairdryer: Set it to a medium or high heat setting and continuously move it back and forth along the frozen section of the pipe. Maintain a distance of at least 6-8 inches from the pipe to prevent overheating.
- Heat Gun (on low setting): Similar to a hairdryer, keep it moving and don't hold it in one spot. A heat gun gets much hotter than a hairdryer, so exercise extra caution and keep a greater distance (10-12 inches).
- Electric Heating Pad: Wrap the heating pad around the frozen section. This provides more consistent, slower heat. Secure it with electrical tape or zip ties if it doesn't stay in place on its own.
- Warm Towels: Soak towels in hot water, wring them out, and wrap them around the pipe. Replace them frequently as they cool. This method is slower but very safe for inaccessible areas.
Start heating the pipe from the faucet side of the blockage, working your way back towards the main water supply. This allows melting water to drain out and reduces the chance of pressure building up between the ice and the open faucet.
- If it's taking too long: If after 30-60 minutes there's no progress, the freeze may be more extensive, or the pipe may be difficult to access. Re-evaluate your approach or consider professional help.
4. Monitor Water Flow — Listen and watch for signs of water moving again.
While you are applying heat, keep the affected faucet(s) open to a slight trickle. Listen for the sound of water beginning to flow. As the ice melts, water will gradually start to dribble out of the faucet. Continue applying heat until full water pressure is restored. This indicates that the blockage has completely cleared.
- Watch for leaks: As water begins to flow, inspect the heated section of the pipe carefully for any drips or sprays. If you see any, the pipe likely burst, and you'll need to shut off your main water supply immediately and call a plumber.
5. Inspect for Damage — Verify the pipe's integrity after thawing.
Once water flow returns to normal, thoroughly check the entire length of the thawed pipe for any signs of cracks, bulges, or leaks. Frozen pipes can sometimes crack without you immediately noticing if the water pressure hasn't returned yet. Feel the pipe for any dampness. If you detect any leaks, even small ones, immediately shut off your main water supply and contact a licensed plumber. Do not ignore minor leaks, as they can quickly become major problems.
6. Restore Heat and Prevent Re-Freezing — Address the root cause to avoid recurrence.
After successfully thawing the pipe, take steps to prevent it from freezing again. Close crawl space vents, add insulation to exposed pipes, open cabinet doors to allow warm air to reach pipes under sinks, and maintain a consistent indoor temperature. Consider wrapping vulnerable pipes with pipe sleeves or heat tape. Even a small amount of circulating warm air can make a big difference.
Common Causes
- Poor Insulation or Exposed Pipes: Pipes running through unheated areas like crawl spaces, attics, garages, or along exterior walls are highly susceptible to freezing if not properly insulated. Cold air directly contacts the pipe, dropping the water temperature below freezing.
- Sudden Temperature Drops: A rapid and severe drop in outdoor temperatures, especially overnight, can overpower existing insulation and quickly freeze water in vulnerable pipes.
- Open Vents or Drafts: Even a small draft entering a crawl space or basement through an open vent or crack in the foundation can direct frigid air onto a pipe, causing an isolated section to freeze.
- Thermostat Set Too Low While Away: If you leave your home for an extended period during winter and set your thermostat too low (e.g., below 55°F or 13°C), the ambient temperature inside walls and unheated areas can drop to freezing levels.
- Outdoor Faucets/Sillcocks Not Drained: If garden hoses are left connected to outdoor faucets, or if the sillcock isn't a
Related Articles
Keep troubleshooting with these hand-picked guides from FixlyGuide:
- The 3 Hidden Reasons Your Pipes Freeze (and How to Thaw Them Fast) — Discover the real culprits behind frozen pipes and learn safe, effective methods to thaw them quickly, preventing costly damage to your hom…
- The 3 Hidden Reasons Your Pipes Freeze (And How to Thaw Them Fast) — Discover the real culprits behind frozen pipes and learn a step-by-step method to safely thaw them, preventing costly damage.
- The 90-Minute Hidden Danger of a Frozen Pipe (And the DIY Fix) — Thawing a frozen pipe quickly and safely is crucial to prevent bursting and extensive water damage to your home.
- The 3 Hidden Dangers of Frozen Pipes (And How to Thaw Them Safely) — Frozen pipes can burst, causing extensive water damage. Learn to safely thaw them and prevent costly repairs.
- The 3 Hidden Reasons Your Pipe Froze (And How to Thaw It Fast) — Thawing a frozen pipe safely requires understanding the underlying causes and applying gentle, consistent heat to prevent further damage.
- The #1 Mistake Homeowners Make After Finding Missing Shingles (And How to Fix It Right) — Discover the crucial steps to take after a storm rips shingles from your roof, ensuring a proper, lasting repair and preventing costly futu…
Frequently asked questions
How do I know if my pipe is frozen?+
The most obvious sign is no water or very little water coming out of a faucet during cold weather. You might also notice frost on an exposed pipe, or a section of pipe that feels much colder than others.
What happens if a frozen pipe bursts?+
When a frozen pipe bursts, it can cause significant water damage to your home's walls, floors, ceilings, and belongings. It also leads to a loss of water service and can result in very expensive repairs, often thousands of dollars.
Can I use a blowtorch to thaw a frozen pipe?+
Absolutely not. Never use an open flame device like a blowtorch or propane torch to thaw a frozen pipe. The intense, uneven heat can quickly damage the pipe, especially PVC, or ignite nearby flammable materials, leading to an even more dangerous situation.
How long does it take to thaw a frozen pipe?+
The time it takes depends on the extent of the freeze and the ambient temperature. For a small, accessible freeze, it might take 20-30 minutes with a hairdryer. More extensive freezes can take several hours. Patience and continuous, gentle heat are key.

Discussion
Loading comments…