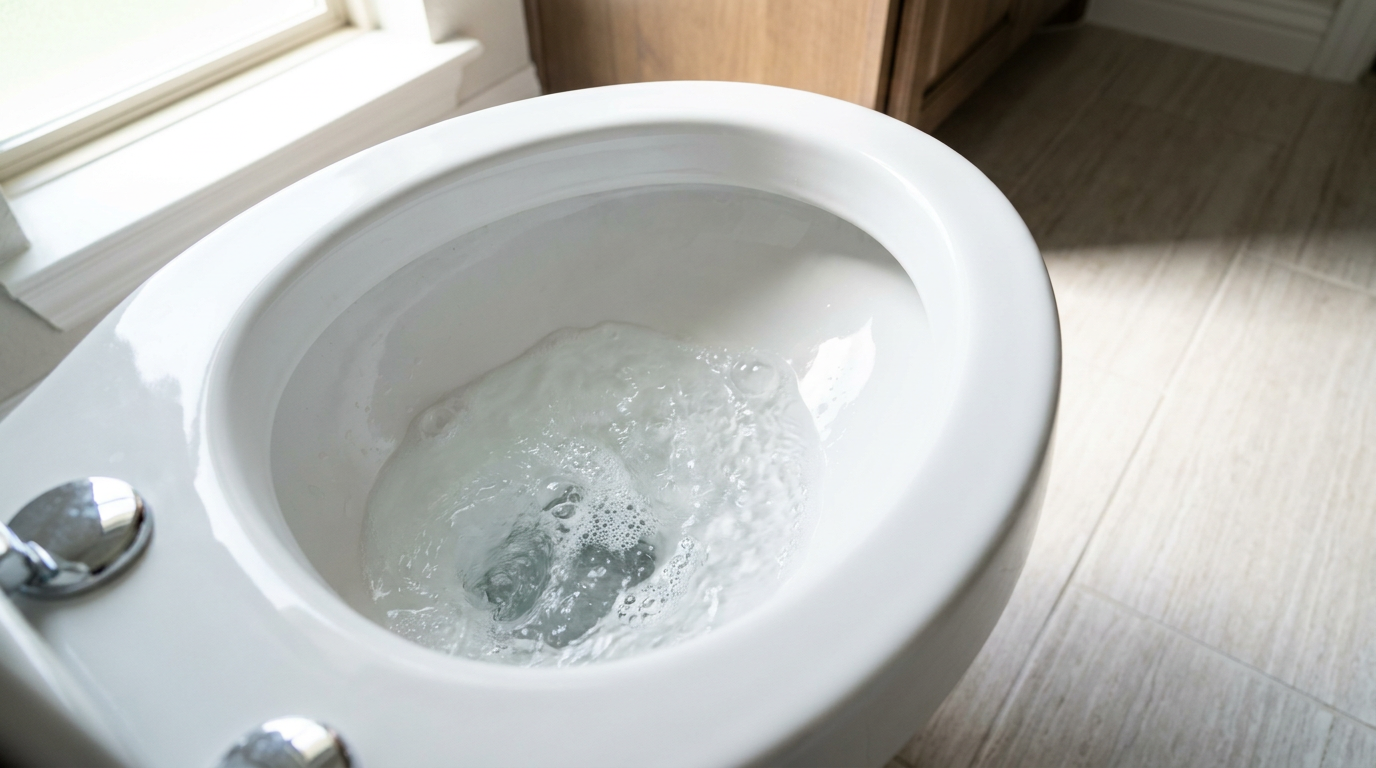
- If the bowl’s bone dry, pour in roughly 1 to 2 gallons of tap water to cover the plunger head.
- Push gently on the first downstroke to force out trapped air, then pump hard up and down 15 to 20 times with short, forceful, 2-inch strokes without breaking the seal.
- Yank the plunger away sharply on the final upstroke to pull backward suction on the blockage.
Plumbing · Clog
| Project category | Plumbing |
|---|---|
| Problem type | Clog |
| Trade required | Plumbing |
| Urgency | Soon — within weeks |
| Safety risk | Low safety risk |
| DIY suitability | DIY friendly |
| Cost category | Low cost |
| Typical timeline | Same-day DIY attempt; pro visit within a day or two |
| Contractor type | Licensed plumber |
Repair option
Plunger, hand auger, or trap cleanout before chemicals.
Replacement option
Line replacement when clogs return in the same spot repeatedly.
Common causes
- Hair and soap buildup in the trap
- Grease cooling in the branch line
- Flushed wipes or foreign objects
Relevant tools:diy difficultydiy or hire a pro
Published November 20, 2026Last updated November 20, 2026
Tools & materials you'll need
Affiliate links- AmazonFlange toilet plunger1 · Must have fold-out neck, not a flat cup plunger
- AmazonCloset auger (toilet snake)1 · 3-foot or 6-foot with rubber guard sleeve
- AmazonGarden hose with brass spray nozzle50 ft · For flushing roof vent stack
- AmazonStandard drum snake or drain auger1 · 25 to 50 foot for clearing roof vent line
- Amazon10-inch or 12-inch adjustable pipe wrench1 · For opening sewer cleanout cap
- AmazonBright LED flashlight1 · For peering down the vent stack
As an Amazon Associate FixlyGuide earns from qualifying purchases — at no extra cost to you. Prices and availability are accurate as of publication and subject to change.
Quick Answer
A bubbling or gurgling toilet means negative air pressure is pulling or pushing air through the water trapped in the bowl trapway. That usually happens because sewer air can’t vent freely through your roof plumbing stack, or because a partial drain obstruction is shoving air back the wrong way. You can usually clear minor fixture-level clogs with a heavy-duty flange plunger or a 6-foot toilet auger, but if more than one fixture’s acting up, I’d start looking hard at a blocked roof vent or a backed-up main sewer lateral.
The Problem
There aren’t many sounds in a house that’ll spike your blood pressure faster than an uninvited glug-glug-glug from the bathroom. You might be running the washing machine down the hall, taking a shower, or just draining the bathroom sink, and then the commode starts chattering like it’s got something to say. Sometimes the water level in the bowl drops an inch or two right after; other times, sewer gas odors ride in behind the bubbles. No dice either way.
A bubbling toilet isn’t just an annoying noise. It’s your home’s drain-waste-vent (DWV) system waving a red flag. Under normal conditions, water rushes down drainpipes while displaced air escapes through vent pipes that poke through the roof. When something chokes off that airflow—whether it’s an obstruction downstream in the 3-inch or 4-inch waste pipe, or a blockage up on the roof—the rushing water creates an atmospheric vacuum. The water seal sitting inside your toilet bowl is the thinnest barrier between your living space and the sewer line, requiring only about 0.036 psi of pressure differential to break. When the system’s gasping for breath, it gulps air straight through that toilet trap.
How It Works
Think of your home’s drainage network like one big straw filled with water. If you cap the top of a straw with your thumb and pull it out of a glass, the liquid stays suspended inside because atmospheric pressure can’t push down behind it. The second you lift your thumb, air rushes in and the liquid dumps out freely.
Your plumbing works on that same gravity-and-vent balance. Every fixture connects to two networks: drain lines sloping downward at a mandatory grade (typically 1/4 inch per foot of horizontal run) and vent stacks running straight up through the roofline. As a fixture dumps several gallons of wastewater per minute, air behind that moving slug of water gets pulled along with it. The roof vent supplies replacement air, keeping atmospheric pressure inside the pipe at 14.7 psi.
When a vent pipe gets clogged by debris, dead rodents, or bird nests, moving water can pull a vacuum on nearby fixtures and siphon the water seal right out of the toilet trapway. On the flip side, if a mainline clog is sitting downstream of the toilet, falling wastewater compresses the air pocket trapped in front of the blockage. With nowhere else to go, that pressurized air forces itself up through the lowest available fixture—which is almost always your toilet bowl—causing violent bubbling, splashing, and those rotten-egg sulfur smells nobody wants in the house.
Step-by-Step Fix
Before you call out an expensive emergency drain tech, walk through these diagnostic and repair steps to find the restriction and knock it loose safely.
-
Map the symptoms across your fixtures — Run water one fixture at a time: bathroom sink, tub, then the washing machine, and watch for bubbling during local use versus whole-house discharge. If the toilet bubbles only when its own handle gets tripped, the obstruction’s right in the toilet’s internal siphon jet or trap. If it bubbles when the tub drains or the washer pumps out, the problem’s farther down the line in the branch or vent stack.
- Write down which fixtures trigger the sound; that usually points you to the exact branch pipe.
- If sewage backs up into the shower or tub drain during testing, stop right there—you’ve got a mainline stoppage.
-
Seal off neighboring drain paths — Before plunging the toilet, grab painter’s tape or duct tape and seal the overflow drain on the nearby bathroom sink and the tub drain. Plunging builds hydraulic pressure through the pipe; if nearby vents and overflow openings stay open, your plunging stroke just bleeds air out of the sink instead of pushing hard against the clog.
- Use heavy-duty duct tape over sink overflows.
- If tape won’t stick to damp porcelain, press a damp washcloth firmly into the tub drain.
-
Deploy a flange plunger with proper technique — Set aside ordinary cup plungers, those flat little rubber domes made for sinks, and grab a heavy-duty toilet plunger with an extended fold-out rubber flange. Seat the flange directly inside the toilet’s bottom discharge hole so it forms an airtight seal, and make sure the plunger bell is fully submerged in water.
- If the bowl’s bone dry, pour in roughly 1 to 2 gallons of tap water to cover the plunger head.
- Push gently on the first downstroke to force out trapped air, then pump hard up and down 15 to 20 times with short, forceful, 2-inch strokes without breaking the seal.
- Yank the plunger away sharply on the final upstroke to pull backward suction on the blockage.
-
Feed a closet auger through the toilet trap — If plunging fails after three attempts, the obstruction’s lodged in the porcelain trapway or the closet bend beneath the floor. Retract the cable of a 3-foot or 6-foot toilet closet auger completely into its curved guide tube, set the rubber-sheathed elbow into the bottom of the bowl so you don’t scratch the vitreous china, and crank the handle clockwise while pushing downward.
- Don’t swap in a standard wire drain snake; bare metal coils will leave dark scuff marks on the bowl china that never really disappear.
- If you hit resistance around 18 to 24 inches down, keep cranking steady to bore the corkscrew head into the mass—often wet wipes, paper towels, or feminine products—and pull it back out instead of jamming it deeper.
-
Inspect the plumbing roof vent stack — If the toilet trapway’s clear but the gurgling keeps going across multiple fixtures, head outside and inspect the roof vent pipe, usually a 2-inch to 4-inch PVC, cast iron, or copper pipe sticking through the shingles above the bathroom.
- Wear non-slip, rubber-soled work shoes and take real care on steep or wet roofs; if ladders aren’t your thing, call a pro.
- Shine a bright flashlight down the open pipe; look for bird nests, dry leaves, tennis balls, or thick frost caps during cold snaps.
-
Clear the roof vent pipe mechanically — Feed a standard 25-foot to 50-foot plumbing drum auger straight down through the roof vent opening until you feel the cable punch through leaves or debris. Turn the drum to chew through the blockage, pull the cable back to clear off any roots or organic waste, and repeat until the cable moves freely through the drop.
- Keep your footing solid on the ladder or roof deck and wear leather work gloves so the spinning steel cable doesn’t catch your hands.
- If the snake hits a hard turn or metal baffle, back off a little so you don’t puncture or disconnect thin vent fittings in the attic.
-
Flush the vent stack with pressurized water — Have a helper bring a standard 5/8-inch garden hose fitted with an adjustable brass spray nozzle up to the roof. Feed the hose head a few feet down into the vent pipe and turn the water on full blast for 2 to 3 minutes.
- Listen for water draining freely downward without backing up toward the roof rim.
- Put your helper down in the bathroom to make sure water isn’t overflowing out of the toilet or backing up into the tub while the hose runs.
-
Check the sewer cleanout for mainline backup — Walk out into your yard or check the basement floor to find the threaded cap of your main sewer cleanout fitting, typically a 3-inch or 4-inch white PVC or black ABS plug with a square raised nut. Using a 10-inch or 12-inch adjustable wrench or pipe wrench, gently back off the cap counterclockwise.
- Safety warning: If sewage starts weeping out around the threads as you loosen the plug, stop and crank it tight again immediately. That line’s pressurized with backed-up raw effluent.
- If the pipe is bone dry and empty, your problem’s upstream between the toilet and the cleanout. If standing wastewater fills the pipe, the obstruction’s downstream toward the city main or septic tank.
-
Reset the toilet tank and test the flush dynamic — Once you’ve cleared the blockage or opened the vent, go back to the bathroom and get the tank water level back where it belongs. Flush the toilet multiple times while you run the sink faucet full-throttle at the same time.
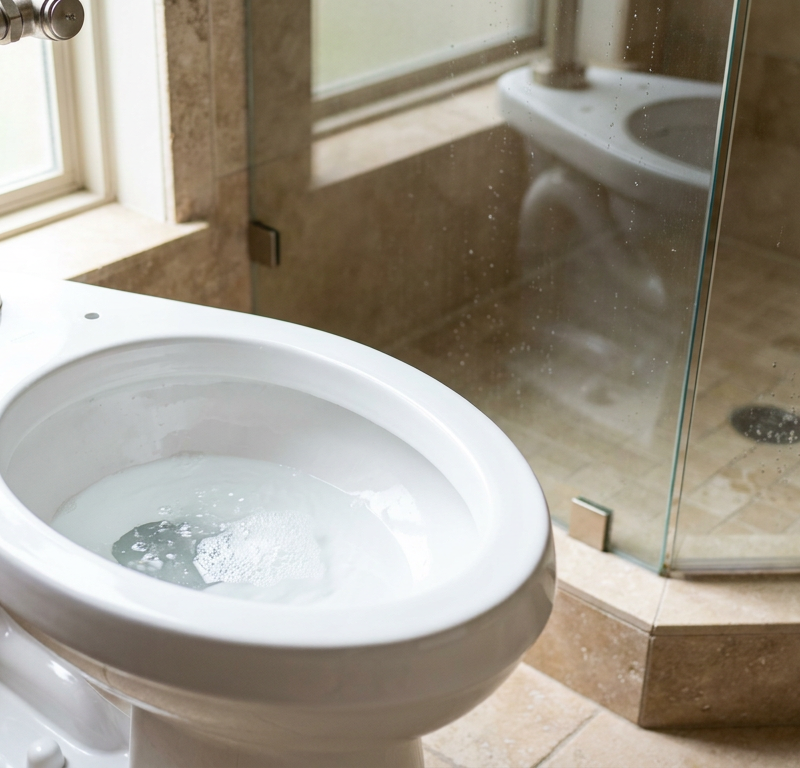
- Watch the bowl: the water should swirl smoothly, drop out fast with a clean, sharp siphon snap, and refill to a steady height without a single bubble or gasp.
- Check around the base of the toilet commode for any seepage that points to a blown wax seal ring caused by backpressure.
Common Causes
A bubbling toilet is rarely some isolated oddball problem; it’s almost always one of these five root issues:
- Partial line clogs (the wet-wipe menace): Modern low-flow toilets flush roughly 1.28 to 1.6 gallons per flush. If non-dispersible items like "flushable" wipes, paper towels, dental floss, or feminine hygiene products get into the waste pipe, they don’t break down like normal toilet paper. They snag on rough pipe joints or scale, building a dam that acts like a check valve and traps air bubbles until they force their way backward.
- Blocked plumbing vent stack: Leaves in autumn, pine needles, wasp nests, dead squirrels, and winter ice dams routinely plug the open vent stacks on residential roofs. Without vent air feeding the system from above, draining water creates suction that gulps replacement air straight through the nearest toilet trapway.
- Main sewer line blockages and tree root intrusion: Tree roots hunt for moisture and nutrients, slipping into older clay or cast iron sewer lateral seams through tiny hair-line joints. Once they’re in, they spread into dense root masses that snag toilet tissue and slow the flow, creating ugly backpressure whenever a big volume of water drops into the line.
- Compromised toilet wax ring: Underneath every toilet, a wax gasket seals the connection between the porcelain horn and the closet flange. If backpressure or an uneven rocking bowl breaks that seal, air can slip under the base of the toilet during flushes, messing with normal siphon action and venting foul sewer gases into the room.
- Full or failing septic tank: For homes on private waste systems, a saturated drain field, crushed transport pipe, or overfilled septic tank keeps wastewater from exiting the building drain. Compressed air pushes back through the lowest fixtures in the home, and the whole ground floor usually drains slow right along with it.
Common Mistakes
- Dumping caustic chemical drain cleaners into the toilet bowl — Pouring concentrated sulfuric acid or lye-based gel cleaners into a toilet is a flat-out mistake. These chemicals generate intense exothermic heat (exceeding 140°F) that can crack expensive vitreous china bowls, soften PVC pipes, and melt the wax seal beneath the toilet. Worse, if plunging becomes necessary later, you risk splashing blinding caustic acid all over your face and eyes.
- Using a sink snake on a porcelain commode — Standard wire hand snakes don’t have protective sheathing. Running a raw steel spring cable directly down a toilet scratches through the porcelain glaze, leaving permanent gray and black metallic gouges that trap waste and stain for good. Always spend the extra $35 on a proper closet auger with a protective plastic sleeve.
- Plunging without sealing secondary fixtures — Banging away with a plunger while the bathroom sink overflow or bathtub drain stays wide open doesn’t get you anywhere. Hydraulic energy always takes the path of least resistance; the water pushes straight out the unsealed sink drain instead of slamming into the clog downstream.
- Ignoring a gurgle that "fixes itself" — If your toilet bubbles hard on Tuesday and seems quiet on Thursday, don’t start celebrating. Often, a dropping water table, dry weather, or temporary shifts in household water volume hide a worsening root intrusion or partial line collapse. The clog’ll be back, and usually at the worst possible time.
- Over-tightening closet bolts after replacing a wax ring — If backpressure blew the wax ring and you pull the toilet to install a new one, don’t crank down on the brass closet flange nuts. Vitreous china has zero flex; too much torque will crack the toilet base with a loud pop and turn a $6 wax ring replacement into a $250 new toilet purchase. Tighten the nuts hand-tight plus one half-turn with a wrench.
Cost & Time Breakdown
| Task | DIY Cost | Pro Cost | Time |
|---|---|---|---|
| Flange plunging & fixture isolation | $10–$20 (plunger) | $125–$200 | 15–30 min |
| Augering commode with closet snake | $30–$55 (auger) | $175–$275 | 30–45 min |
| Clearing roof vent stack via drum auger | $40–$75 (snake rental/purchase) | $225–$400 | 1–2 hours |
| Replacing blown wax ring seal | $8–$20 (wax ring + bolts) | $200–$350 | 1.5–2.5 hours |
| Main sewer line hydro-jetting / clearing | $75–$120 (machine rental) | $350–$800 | 2–4 hours |
Tips & Prevention
- Enforce the strict "Four Ps" rule — The only things that belong in a toilet are pee, poop, paper, and puke. Don’t flush cleansing wipes, cotton rounds, dental floss, cat litter, or grease, no matter what the package says about flushability.
- Install a mesh vent cap on roof stacks — Climb onto the roof once (or have a roofer do it during routine maintenance) and install stainless steel wire mesh caps over your plumbing vent stacks. That keeps birds, leaves, and rodents from dropping down the 2-inch to 4-inch vent pipe while still letting air move like it should.
- Schedule proactive sewer camera inspections — If your home was built prior to 1980 and still has clay tile or cast iron sewer lines, spend $150 to $250 for a video camera inspection every three to four years. Catching root intrusion early lets you treat it with copper sulfate or mechanical cutting before your lines back up into the bathroom.
- Inspect the toilet bowl water level monthly — Keep an eye on the resting water line in the bowl. If you notice the water bouncing, rippling, or dropping an inch or two while other fixtures are running, an airflow restriction’s developing in your vent lines long before it starts making loud bubbling sounds.
- Check the toilet base for stability — Gently straddle the bowl and try to rock it with your hips. If the commode shifts even a 1/16 of an inch, the wax ring seal underneath is probably squished or broken, letting air exchange and moisture leaks rot the subfloor beneath the closet flange.
When to Call a Professional
If you plunge and auger the toilet with zero improvement, or if water bubbles upward into your bathtub, shower pan, or washing machine standpipe whenever the commode flushes, put your tools down. Multiple fixtures backing up at the same time points to a full mainline sewer blockage downstream of your home’s branch lines.
If loosening your exterior sewer cleanout cap reveals standing sewage under pressure, you’re looking at a serious biohazard that calls for heavy commercial equipment—like a trailer-mounted hydro-jetter or a 100-foot commercial sectional rooter machine. Main line breaks, deep tree root infiltration, and collapsed Orangeburg or deteriorated cast iron pipes need diagnostic video sewer cameras, line locators, and trenchless pipe lining or excavation. Don’t risk raw sewage flooding your living spaces, ruining flooring, and creating dangerous biological contamination; bring in a licensed, insured plumbing contractor with the heavy iron needed to clear the line safely.
Related Articles
Keep troubleshooting with these hand-picked guides from FixlyGuide:
- Contractor Quote Too High? 5 Hidden Reasons and How to Fix It — Stunned by an outrageously high contractor bid? Learn the real reasons behind bloated estimates, what drives risk pricing, and how to negot…
- OTR on a Truck? What It Means and 8 Ways to Protect Your Driveway — Spotting OTR on a truck means an 80,000-lb long-haul freight rig is near. Learn what it means for residential deliveries, driveway protecti…
- Heart Attack Snow? Why Wet Winter Slush Is Dangerous—and 9 Steps to Clear It Safely — "Heart attack snow" is heavy, water-logged slush that spikes cardiovascular strain. Learn the physics behind it, how to clear it safely, an…
- 7 Hidden Equity Drains Costing You Thousands Annually — Your home is an asset, but silent problems like minor leaks, poor insulation, and deferred maintenance can drain its value. Discover the se…
- The 3 Hidden Ways Your — Uncover the surprising habits and hidden household issues that are silently increasing your homeownership costs and learn how to fix them.
- Buzzing Outlet? 6 Causes and the Complete Step-by-Step Fix — Stop electrical outlet buzzing safely. Learn what causes dangerous 60 Hz hums and arcing, how to swap the receptacle step-by-step, and when…
Should you do this yourself?
Answer five quick questions before you start. Safety outranks savings every time.
Your experience with work like this
How high do you have to work?
Does the job involve any of these?
Will it need a permit?
Specialty tools
Free and instant. Educational guidance only — not a quote, inspection, or professional diagnosis.
Estimate your own project cost
National averages are a starting point. Enter your details for a range that fits your house.
Roof replacement cost
- Per square (installed)$604 – $866
Add $500–$2,500 if decking is rotten and needs replacement. Storm damage may be covered by insurance.
Educational estimate only — always confirm with written local bids.
What should this project cost?
Enter your project details for a realistic cost range before you call anyone.
Common repairs run $150–$650; repipes and water-heater replacements reach $1,500–$4,500.
- Regional adjustment
- National average
- Labor share (typical)
- ~$754
- Quotes to collect
- 3 written estimates
Educational estimate based on national averages — not a binding quote. Always confirm with written local estimates.
Fixly Project Decision Box
- DIY difficulty
- Professional Recommended
- Estimated time
- Inspection 1–2 hours · repairs 1–3 days
- Cost level
- High
Main tools / materials
- Binoculars for a ground-level look
- Flashlight for attic checks
- Moisture meter
- Roofing cement (temporary patch only)
When to stop and call a pro
- Active leak near lights, fans, or any wiring
- Sagging, bulging, or water-filled ceiling
- Steep, wet, or two-story roof — do not climb it
- Storm or hail damage you plan to claim on insurance
Need professional help?
Free roof assessment first — no phone calls until you ask for them.
Get Local Roofing HelpDecide what your roof needs
Two minutes of questions turns "something is wrong up there" into a clear next step.
- Repair or replace your roof?Answer 10 questions about age, leaks, and damage to get a clear next step.Open
- Compare contractor quotesScore up to four bids on price, warranty, licensing, and timeline.Open
- Get local estimatesSend one request and compare written estimates from vetted pros.Open
Free, no signup required. Estimates are educational guidance, not a quote or an inspection.
Get the print-ready PDF of this guide
A clean, ad-free, printable version you can keep on your phone or pin to the workshop wall. Free with a FixlyGuide account.
- Print-optimized layout
- Tools, materials & every step included
- Saved to your account
This article was independently written by FixlyGuide based on the source topic.
Frequently asked questions
Why does my toilet bubble when the shower or sink drains?+
A bubbling toilet indicates an airflow or drainage issue in your plumbing system. When water drains through a pipe that has a partial clog downstream or a blocked vent on the roof, it creates negative pressure (a vacuum) that pulls or pushes air directly through the water seal in the toilet bowl.
Can "flushable" wipes cause a toilet to gurgle?+
No, flushable wipes are the leading cause of residential pipe clogs. Unlike ordinary toilet paper, which begins dissolving in water within seconds, flushable wipes are made of woven synthetic fibers that stay intact for months, snagging on rough pipe walls and creating severe blockages that cause bubbling toilets.
Will plunging fix a bubbling toilet?+
Yes, but only if the blockage is located directly in the toilet's built-in porcelain trapway or immediate closet bend. Plunging creates hydraulic pressure that can push through localized clogs, but it will have no effect on a clogged roof vent stack or a main sewer lateral stoppage.
How do I know if the problem is my roof vent or my main sewer line?+
Gurgling caused by a clogged roof vent will produce bubbling noises and water siphoning, but clean water will continue to drain away. A main sewer line clog causes wastewater to back up into the lowest fixtures in your home, such as shower basins or floor drains, often accompanied by foul sewage odors and rising water levels.
Is a bubbling toilet an emergency?+
While the noise itself isn't immediately dangerous, it is an urgent warning sign. Ignoring it can lead to raw sewage backing up into your bathtubs, showers, and floors, or the siphoning of the toilet trapway, which allows toxic and flammable sewer gases (like hydrogen sulfide and methane) into your home.
Can I pour boiling water down the toilet to clear the gurgle?+
Never pour boiling water directly into a porcelain toilet. The sudden, extreme thermal shock can instantly crack the porcelain bowl or break the wax seal underneath, causing expensive water damage to your subfloor.
Can cold winter weather make my toilet gurgle?+
Yes. When temperatures drop below freezing, warm, moist air rising from your home's drainage system can freeze inside the roof vent opening. Over several days, frost and ice can accumulate into an ice cap that seals off the vent pipe, producing sudden toilet gurgling during cold snaps.
Should I use chemical drain cleaners to fix a bubbling toilet?+
Chemical drain cleaners are heavy, corrosive, and ineffective against the deep clogs or vent restrictions that cause bubbling. They generate high heat that can melt PVC joints or crack porcelain, and they pose severe chemical burn hazards if a plumber later needs to snake or auger the drain line.
Discussion
Loading comments…