- Your indoor AC unit, or air handler, is usually located in your attic, basement, crawl space, or a utility closet. Open the access panel (often secured with screws or clips) to expose the evaporator coil and the drain pan beneath it.
- Identify the PVC drain line, typically a 3/4-inch white or gray pipe, exiting the drain pan. It might have a T-shaped vent or an access port with a cap near the indoor unit. This is where you'll likely start clearing the clog.
- If the pan is full of water, you've likely identified the problem! You may need to use a wet/dry vac or sponges to manual remove excess water before proceeding.
Plumbing · Leak
| Project category | Plumbing |
|---|---|
| Problem type | Leak |
| Trade required | Plumbing |
| Urgency | Emergency — act now |
| Safety risk | High safety risk |
| DIY suitability | DIY for experienced homeowners |
| Cost category | Low cost |
| Typical timeline | Shut water off now; repair usually same or next day |
| Contractor type | Licensed plumber |
Repair option
Isolate at the shutoff, replace the failed component, and dry the cavity fully.
Replacement option
Repipe the run or the branch when corrosion is widespread.
Common causes
- Failed supply line or shutoff valve
- Worn washers, cartridges, or P-trap connections
- Pinhole corrosion in older copper
Relevant tools:emergency checklistdiy or hire a pro
Published July 20, 2026Last updated August 17, 2026
Tools & materials you'll need
Affiliate links- AmazonWet/dry vacuumWith a narrow nozzle or adapter to seal around the drain pipe.
- AmazonSafety glasses
- AmazonGloves
- AmazonFunnelTo pour vinegar into the access port.
- AmazonAdjustable wrenchIf your system has a P-trap to disassemble.
- AmazonStiff brush or pipe cleanerOptional, for cleaning the drain pan or P-trap.
As an Amazon Associate FixlyGuide earns from qualifying purchases — at no extra cost to you. Prices and availability are accurate as of publication and subject to change.
Quick Answer
A clogged AC drain line is a common and frustrating problem for homeowners, often manifesting as water stains, a musty odor, or reduced cooling. The culprit is usually a slimy buildup of algae, mold, and dirt that chokes the PVC pipe designed to carry condensation away from your unit. The good news is that most drain line clogs can be cleared in under an hour using a few simple tools, preventing costly water damage and restoring your AC's efficiency. The primary methods involve using a wet/dry vac to suction out the blockage or flushing the line with a diluted vinegar solution to dissolve the grime.
The Problem
Your air conditioner doesn't just cool your home; it dehumidifies it. As warm, humid air passes over the cold evaporator coils inside your indoor unit (air handler), moisture condenses out of the air, much like water droplets forming on a cold glass on a hot day. This condensation drips into a sloped collection pan, also known as the drain pan or drip pan, located directly beneath the coils. From the drain pan, the water flows into a PVC or copper pipe, the condensate drain line, which carries it outdoors or to a nearby drain, like a utility sink or floor drain. When this drain line becomes clogged, the water has nowhere to go. The drain pan overflows, leading to a host of problems including:
- Water Leaks and Damage: Overflowing water can drip into your ceiling, walls, or attic, causing noticeable water stains, damaging drywall, insulation, and electrical components. If it's in the attic, it can even collapse a ceiling.
- Musty Odors and Mold Growth: Standing water in the drain pan or within the clogged line creates a perfect breeding ground for mold and mildew. This can lead to unpleasant, persistent musty smells throughout your home and, worse, introduce mold spores into your indoor air, potentially triggering allergies or respiratory issues.
- Reduced Cooling Efficiency: Some AC systems have a safety float switch in the drain pan. If the water level rises too high, this switch automatically shuts off the AC unit to prevent water damage. This means your AC stops cooling until the clog is addressed, leading to an uncomfortable home and potentially higher energy bills as the unit struggles to catch up once restarted.
- System Shutdowns: Even without a float switch, a severely clogged system can put strain on components, though less directly than other issues. The primary concern remains water damage and mold.
Identifying a clogged drain line is usually straightforward: you see water where it shouldn't be (e.g., dripping from your indoor unit, water stains on the ceiling), or your AC unit is unexpectedly off, and upon inspection, you find water in the drain pan.
How It Works
Understanding the basic mechanics of your AC's condensation system helps in diagnosing and fixing a clogged drain line. Your AC's indoor unit houses the evaporator coil. This coil gets very cold as refrigerant circulates through it. When the warm, humid air from your home is drawn across this cold coil, the water vapor in the air rapidly condenses into liquid water. Think of it like a cold drink glass on a humid day – moisture collects on the outside.
This condensed water isn't just a few drops; a typical AC can remove several gallons of water from your home's air daily, especially in humid climates. All this water drips down from the evaporator coil into a sloped drain pan situated directly beneath it. This pan is designed with a slight incline, allowing gravity to draw the water towards a specific outflow opening. A PVC pipe, typically 3/4-inch in diameter, connects to this opening. This is your condensate drain line.
The drain line usually runs downhill from the indoor unit, either through a wall cavity, into your attic, or across a basement ceiling, eventually terminating outdoors near the foundation, into a dedicated floor drain, or sometimes into a utility sink. Many systems also incorporate a P-trap, similar to what you find under a sink. This P-trap uses a small water seal to prevent conditioned air from escaping the system and to block sewer gases (if connected to a sewer drain) or unpleasant odors from the drain line from entering your home.
Over time, as water continually flows through this relatively dark and often damp environment, it becomes a perfect breeding ground for algae, mold, and bacteria. These microscopic organisms thrive, forming a slimy, gelatinous biofilm on the inner surfaces of the drain line and within the drain pan. Dust and dirt particles present in the air drawn into the AC system can also get caught in this slime, further compounding the problem. Eventually, this buildup narrows the pipe's diameter until it completely blocks the flow of water. Once the path is blocked, the water backs up, filling the drain pan. When the pan overflows, that's when you start seeing the symptoms of a clogged AC drain.
Many modern AC systems are also equipped with a safety float switch. This switch is positioned either directly in the drain pan or as part of the condensate drain line near the indoor unit (often by the P-trap). If the water level in the pan or the pipe rises above a certain point due to a clog, the float switch is activated. This activation sends a signal to the AC's control board, which then shuts off the compressor, and sometimes the entire unit, to prevent widespread water damage. This safety mechanism is crucial but also means your AC stops cooling until the clog is cleared and the water level recedes.
Step-by-Step Fix
Before you begin any work, prioritize safety by shutting off power to your AC unit. You'll typically find two main power disconnections: one at the outdoor compressor/condenser unit (usually a disconnect box near the unit) and one at the indoor air handler/furnace (often a light switch-style toggle on or near the unit, or a dedicated circuit breaker in your electrical panel). Flip both to the 'OFF' position if accessible. If you're unsure, turn off the dedicated AC breaker in your main electrical panel.
Safety Note: Always ensure all power is completely OFF before touching any internal components of your AC unit. Water and electricity are a dangerous combination. Wear safety glasses to protect your eyes from debris or cleaning solutions.
1. Locate the Drain Pan and Access Port – Find the source and starting point
- Your indoor AC unit, or air handler, is usually located in your attic, basement, crawl space, or a utility closet. Open the access panel (often secured with screws or clips) to expose the evaporator coil and the drain pan beneath it.
- Identify the PVC drain line, typically a 3/4-inch white or gray pipe, exiting the drain pan. It might have a T-shaped vent or an access port with a cap near the indoor unit. This is where you'll likely start clearing the clog.
- If the pan is full of water, you've likely identified the problem! You may need to use a wet/dry vac or sponges to manual remove excess water before proceeding.
2. Clear the Initial Clog at the Drain Pan (If Visible) – Remove surface gunk
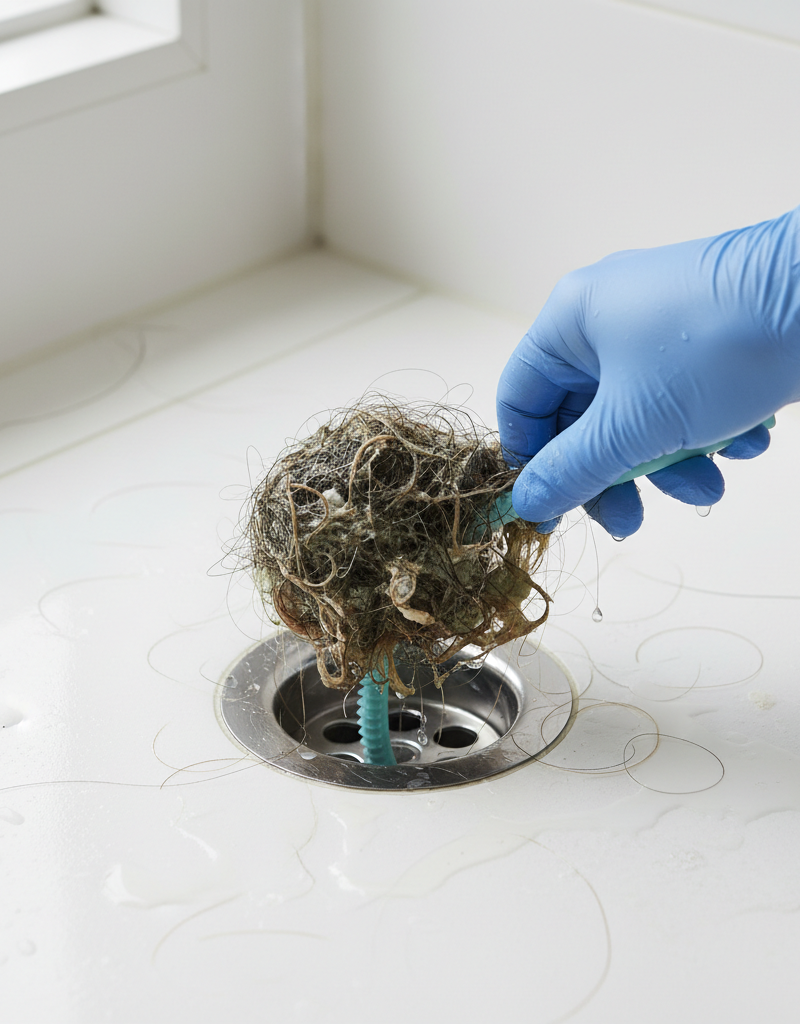
- If you see a significant buildup of slimy algae or debris in the drain pan's opening, carefully remove it with gloved hands, a paper towel, or a stiff brush. This can often be the primary blockage or at least contribute to it. Be gentle not to damage the pan.
3. Attempt Suction at the Outdoor Drain Line Opening – The most effective first attack
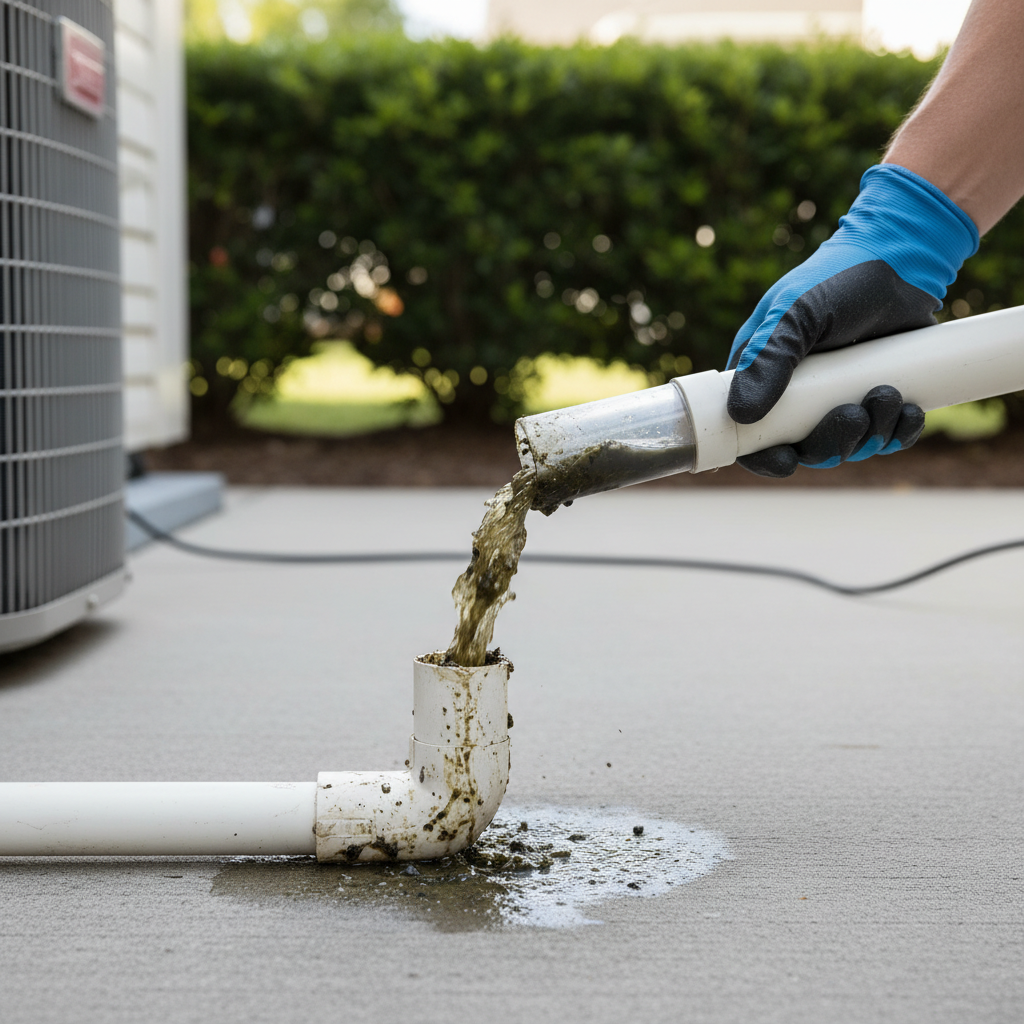
- Locate the other end of the condensate drain line. It's usually a small PVC pipe sticking out of your house's exterior wall, often near the outdoor condenser unit, or draining into a utility sink/floor drain.
- Tools: Wet/dry vacuum, gloves, safety glasses.
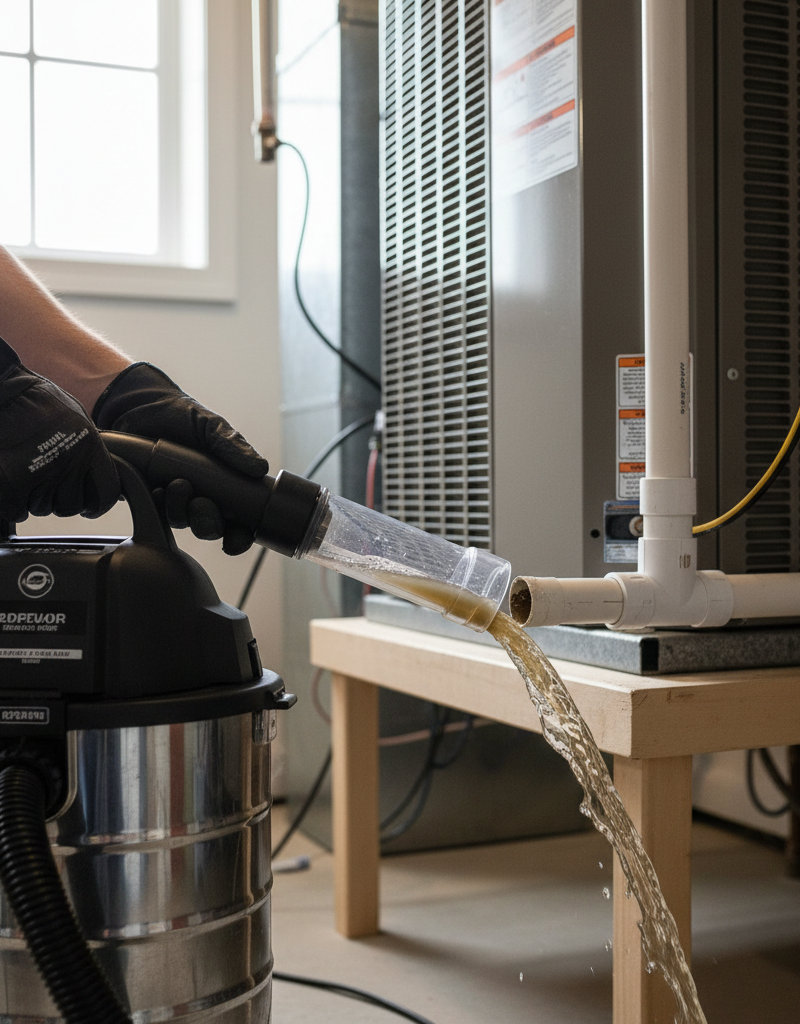
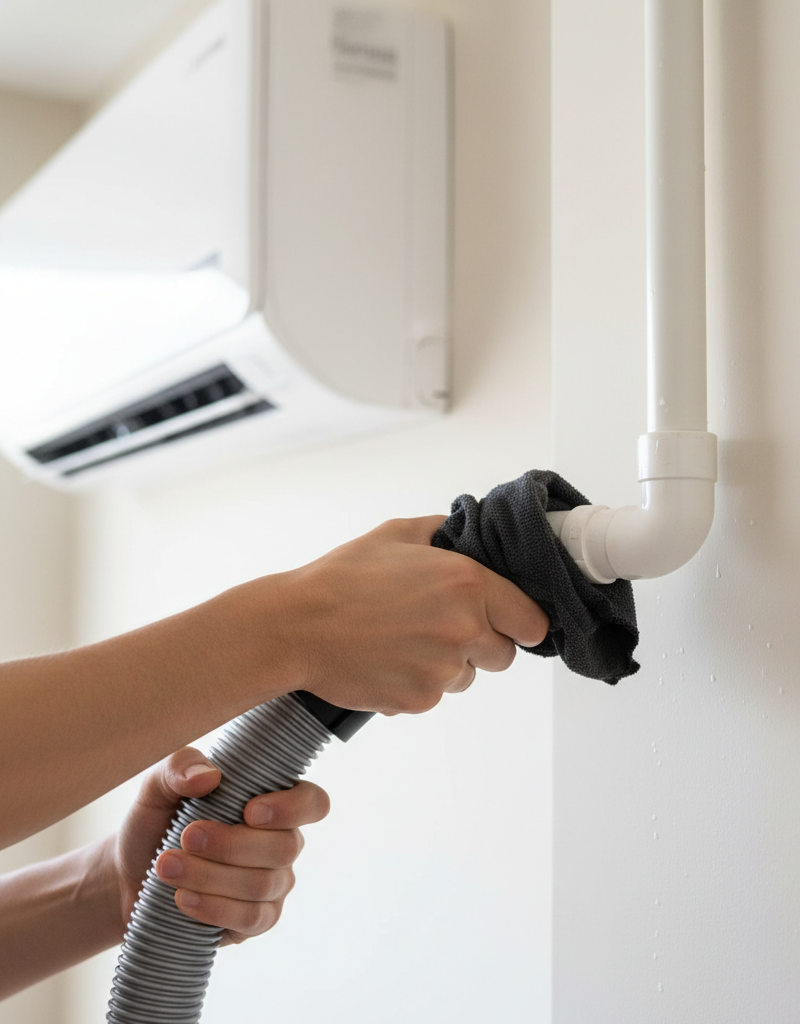
- Position the hose of your wet/dry vac tightly over the opening of the drain line. You might need to use a towel or duct tape to create a good seal around the vacuum hose to maximize suction.
- Turn on the wet/dry vac for 2-3 minutes. Listen for gurgling sounds, which indicate the clog is being pulled through. You might see a rush of slimy water and debris come into the vacuum reservoir.
- Repeat this process a few times until no more debris is suctioned out. Check the drain pan inside to see if the water level has dropped.
- If this doesn't work: The clog might be too far down or too stubborn for suction alone. Proceed to the next step.
4. Flush the Drain Line with a Cleaning Solution – Dissolve stubborn blockages
- If suction didn't entirely clear the clog, or as a preventative measure, you can flush the line. Never use harsh chemicals like drain cleaner, as they can damage PVC pipes and the drain pan.
- Tools: White distilled vinegar, warm water, funnel.
- Pour 1/4 to 1/2 cup of plain distilled white vinegar into the access port of the drain line near your indoor unit. If there's no T-shaped access port, you may have to pour it carefully directly into the drain pan, ensuring it flows into the pipe.
- Let the vinegar sit for 30 minutes to an hour. Vinegar is mildly acidic and will help break down algae and mold.
- After the waiting period, flush the line with 1-2 cups of warm water. This helps push any loosened debris through. You can repeat the vinegar and water flush if necessary.
- Consider this: Some homeowners use a very diluted bleach solution (1 part bleach to 16 parts water) for very stubborn clogs, but vinegar is generally safer for your system and the environment. Only use bleach if you know your system can handle it and in a well-ventilated area.
5. Check the P-Trap (If Present) – A common clog point
- Many AC drain lines have a P-trap, a U-shaped bend designed to hold a small amount of water. This trap can often collect debris.
- Tools: Adjustable wrench, bucket, towels.
- Place a bucket directly under the P-trap. Using an adjustable wrench, carefully loosen the union nuts on either side of the P-trap. Slowly lower the trap to drain any accumulated water and debris into the bucket.
- Clean out any visible gunk from the trap. You can use a small brush or a wire to help dislodge obstructions.
- Reconnect the P-trap, ensuring the union nuts are hand-tightened, then give them a slight turn with the wrench to seal, but do not overtighten, as this can crack the plastic.
6. Test the Drainage – Verify your work
- With the power still off, slowly pour 1-2 quarts of water into the drain pan. Observe if it drains freely out of the outdoor drain line opening.
- If the water flows out freely, you've likely cleared the clog. If it still backs up, you may have a more complex blockage requiring further attempts or a professional.
7. Restore Power and Monitor – Final check
- Once you're confident the clog is clear and all connections are secure, replace any access panels and restore power to your AC unit at both the indoor and outdoor disconnects or the electrical panel.
- Turn on your AC and let it run for at least 30 minutes. Periodically check the outdoor drain line for consistent water flow, indicating proper drainage. Also, check the indoor drain pan for any signs of water backing up.
Common Causes
- Algae and Slime Buildup: The primary culprit. The dark, damp environment of the drain line, combined with constantly flowing water, creates ideal conditions for algae, mold, and bacteria to thrive and form a sticky biofilm.
- Dust and Dirt: As air is pulled into the AC system, dust, dirt, and other airborne particulates can settle in the drain pan and adhere to the slimy buildup, accelerating blockages.
- No P-Trap or Dry P-Trap: If your system lacks a P-trap, or if the water in the trap evaporates (especially in dry climates or if the AC hasn't run for a while), air can be drawn into the drain line, inhibiting proper drainage and potentially pulling more debris into the line.
- Improper Slope: The drain line requires a continuous downward slope for gravity to do its job. If the line sags or has an improper pitch due to settling or poor installation, water can pool and create stagnant areas where clogs are more likely to form.
- Infrequent Maintenance: Neglecting to regularly clean or flush your AC drain line allows small buildups to become major obstructions over time.
- Pest Intrusion: In rare cases, small insects or rodents can build nests in the outdoor opening of the drain line, causing a blockage.
Common Mistakes
- Ignoring the Safety Shutoff: Failing to turn off electrical power to the AC unit before inspecting or working on it is extremely dangerous and can lead to electric shock or damage to the unit.
- Using Chemical Drain Cleaners: Harsh chemical drain cleaners, designed for household plumbing, can be corrosive to the PVC pipes of your AC drain line and potentially damage the plastic drain pan or other AC components. Stick to vinegar or specialized AC drain cleaners if needed.
- Not Locating Both Ends of the Drain Line: To effectively clear a clog, you need to understand the full path of the drain line, from the indoor unit to its outdoor or indoor termination point. Only addressing one end might temporarily alleviate the issue without fully resolving it.
- Over-tightening P-Trap Connections: When reassembling a P-trap, over-tightening the plastic union nuts can easily crack the PVC fittings, leading to leaks. Hand-tighten, then snug with a wrench a quarter-turn at most.
- Assuming the Clog is the Only Problem: While a clogged drain line is common, persistent water issues might indicate a damaged drain pan, a disconnected drain line, or even a frozen evaporator coil. If clearing the clog doesn't work, don't assume you've solved everything.
- Neglecting Regular Maintenance: Only addressing the drain line when it's fully clogged means you're constantly reacting to a problem instead of preventing it. Regular flushing (e.g., quarterly) can save you a lot of hassle.
Cost & Time Breakdown
| Task | DIY Cost | Pro Cost | Time |
|---|---|---|---|
| Gather Tools & Safety Prep | $0 | $0 | 5-10 minutes |
| Locate Clog & Initial Clear | $0 | Included | 10-15 minutes |
| Wet/Dry Vac Suction | $0 (if owned) $40-$100 (if rented/bought) | Included | 15-20 minutes |
| Vinegar Flush | $3-$5 | Included | 30-60 minutes (soak time) |
| P-Trap Cleaning/Reassembly | $0 | Included | 15-20 minutes |
| Professional Service Call | N/A | $100-$300 (per visit) | 30-60 minutes |
Tips & Prevention
- Regular Vinegar Flush (Quarterly): Every 3 months, especially during cooling season, pour 1/4 to 1/2 cup of distilled white vinegar into the AC drain line access port. Follow with 1-2 cups of warm water after 30 minutes. This helps prevent algae and mold buildup.
- Keep the Area Clean: Ensure the area around your outdoor drain line opening is clear of debris, grass, and insect nests. Trim back any foliage that might obstruct the opening.
- Check/Clean the Drain Pan: During your seasonal AC maintenance, visually inspect the drain pan for standing water or excessive slime. Clean it out as needed.
- Consider a Float Switch (If You Don't Have One): If your AC unit lacks a safety float switch, installing one can be a wise preventative measure. It will shut off your unit before significant water damage occurs due to a clog.
- Enroll in HVAC Maintenance: Many HVAC companies offer annual or bi-annual maintenance plans that include cleaning the condensate drain line as part of the service. This can catch issues before they become major problems.
- Change Air Filters Regularly: A dirty air filter restricts airflow, which can make your evaporator coil colder and potentially lead to more condensation and debris entering the drain pan. Change filters monthly during heavy use.
When to Call a Professional
While clearing an AC drain line is a common DIY task, there are specific situations where calling a licensed HVAC professional is the safest and most effective course of action. If, after following these steps, you continue to experience water leaks or your AC unit repeatedly shuts off due to an overflowing drain pan, the problem might be more complex than a simple clog. A professional should be called if you suspect the drain line itself is damaged or disconnected within a wall or ceiling, or if the clog is inaccessible or located deep within the system, especially if it's accompanied by other unusual noises or system malfunctions. Furthermore, if your AC unit is located in a difficult-to-access area, such as a cramped attic with poor flooring, it's safer to have an experienced technician handle the work to prevent accidents. If the problem persists after multiple attempts, or if you're uncomfortable working with power tools or around electrical components, don't hesitate to contact a professional. They have specialized tools, such as specialized drain augers and wet/dry vacs designed for HVAC systems, to diagnose and resolve even the most stubborn clogs without causing further damage to your expensive AC unit.
Related Articles
Keep troubleshooting with these hand-picked guides from FixlyGuide:
- The #1 Mistake Homeowners Make When Their AC Drain Clogs (And The $5 Fix) — Discover the most common error homeowners make when tackling a clogged AC drain line and learn a simple, inexpensive solution to prevent co…
- The $7 Secret Why Your AC is Leaking Water (And How to Fix It in 15 Minutes) — A clogged AC drain line is a common culprit for water leaks, but a simple and inexpensive fix can get your system running smoothly again.
- The Secret Culprit Behind Your Leaky Refrigerator (It’s Not Always a Hose) — Discover why your refrigerator might be leaking water and how to diagnose and fix the most common culprits, saving you from costly repairs.
- The Nasty Truth About Your Slow Shower Drain (And the DIY Fix) — A slow shower drain is more than an annoyance; it's often a sign of a blockage that chemical solutions can worsen. Learn how to clear it sa…
- The Nasty Truth: Your Bathroom Sink Smells Bad (And It's Not the Drainpipe) — A foul odor wafting from your bathroom sink often signals an issue beyond a simple clog, usually stemming from biofilm or a dry P-trap.
- The #1 Gutter Mistake You're Making (And 3 Hidden Causes of Overflow) — Overflowing gutters in heavy rain are often a sign of a deeper issue than just debris, leading to potential foundation damage and costly re…
Should you do this yourself?
Answer five quick questions before you start. Safety outranks savings every time.
Your experience with work like this
How high do you have to work?
Does the job involve any of these?
Will it need a permit?
Specialty tools
Free and instant. Educational guidance only — not a quote, inspection, or professional diagnosis.
Estimate your own project cost
National averages are a starting point. Enter your details for a range that fits your house.
HVAC replacement cost
- Equipment$2,200 – $3,800
- Installation labor$1,200 – $2,500
Always insist on a Manual J load calculation — sq-ft sizing is only a rough check. Federal heat-pump rebates may reduce cost significantly.
Educational estimate only — always confirm with written local bids.
What should this project cost?
Enter your project details for a realistic cost range before you call anyone.
Common repairs run $150–$650; repipes and water-heater replacements reach $1,500–$4,500.
- Regional adjustment
- National average
- Labor share (typical)
- ~$754
- Quotes to collect
- 3 written estimates
Educational estimate based on national averages — not a binding quote. Always confirm with written local estimates.
Fixly Project Decision Box
- DIY difficulty
- Advanced
- Estimated time
- Homeowner checks 20–30 minutes
- Cost level
- Moderate
Main tools / materials
- Clean air filter
- Garden hose for condenser coils
- Shop vac for the condensate line
When to stop and call a pro
- Burning smell, smoke, or a tripping breaker
- Refrigerant lines iced over or hissing
- Any work inside the sealed refrigerant circuit (EPA-licensed only)
- Gas smell near a furnace — leave and call the utility
Need professional help?
Find an HVAC Pro Near YouFrequently asked questions
How do you know if your AC drain line is clogged?+
The most common signs of a clogged AC drain line are water leaking from your indoor AC unit, water stains on your ceiling or walls, a musty odor coming from your vents, or your AC unit shutting off unexpectedly (if it has a safety float switch). You might also see standing water in the clear PVC pipe near your indoor unit if it's visible.
Can I use bleach to clear my AC drain line?+
While a very diluted bleach solution (1 part bleach to 16 parts water) can be used to kill algae and mold in a stubborn clog, plain white distilled vinegar is generally a safer and less corrosive option for regular maintenance. Harsh chemical drain cleaners should never be used as they can damage PVC pipes and other AC components.
How often should I clean my AC drain line?+
It's recommended to flush your AC drain line with distilled white vinegar and warm water at least once every three months, especially during peak cooling season. This proactive maintenance helps prevent the buildup of algae and mold, which are the primary causes of clogs.
What happens if I don't clear a clogged AC drain line?+
Ignoring a clogged AC drain line can lead to significant water damage to your home's ceiling, walls, and insulation. It can also create a breeding ground for mold and mildew, leading to musty odors and potential health issues. In many systems, a clogged drain will also cause your AC unit to shut down, leading to a loss of cooling.
Discussion
Loading comments…