- If you’ve got quarter-turn ball valves, rotate them 90 degrees until the handle sits perpendicular to the water line.
- Open both faucet handles to bleed off residual pressure and make sure the water’s truly dead.
- If the stops are frozen or dripping, go straight to your home’s main water shutoff and drain the house lines from an outside hose bibb.
Plumbing · Leak
| Project category | Plumbing |
|---|---|
| Problem type | Leak |
| Trade required | Plumbing |
| Urgency | Emergency — act now |
| Safety risk | High safety risk |
| DIY suitability | DIY for experienced homeowners |
| Cost category | Low cost |
| Typical timeline | Shut water off now; repair usually same or next day |
| Contractor type | Licensed plumber |
Repair option
Isolate at the shutoff, replace the failed component, and dry the cavity fully.
Replacement option
Repipe the run or the branch when corrosion is widespread.
Common causes
- Failed supply line or shutoff valve
- Worn washers, cartridges, or P-trap connections
- Pinhole corrosion in older copper
Relevant tools:emergency checklistdiy or hire a pro
Published October 21, 2026Last updated October 21, 2026
Tools & materials you'll need
Affiliate links- AmazonAdjustable crescent wrench1 · 8-inch or 10-inch
- Amazon#2 Phillips and flathead screwdrivers2 · Precision flathead helps pop decorative index caps
- AmazonHex key set (Allen wrenches)1 set · Standard 3/32-inch to 1/8-inch
- AmazonFaucet handle puller1 · Optional but recommended for badly seized handles
- AmazonMicrofiber cloth and nylon brush2 · Protects basin and scrubs cartridge splines
As an Amazon Associate FixlyGuide earns from qualifying purchases — at no extra cost to you. Prices and availability are accurate as of publication and subject to change.
Quick Answer
If your bathroom faucet handle’s stuck and won’t turn, you’re usually dealing with mineral scale from hard water that’s glued the internal brass stem or ceramic cartridge to the faucet body. Don’t grab a wrench and lean on it, because you’ll snap the stem inside the valve. Shut off the stop valves under the sink, pop the decorative cap off the handle, pull the retaining screw, spray penetrating catalyst like PB Blaster right into the stem recess, give it 20 minutes, then work the handle loose before you pull the cartridge and soak it in 100% white vinegar.
The Problem
A stuck bathroom faucet handle feels welded shut. You go to wash your hands or brush your teeth, turn the lever or cross-handle, and nothing. No give. Add a little muscle, and either the handle squeals like it’s mad at you or you feel metal starting to twist.
I see this all the time across North Texas and other places with hard municipal water. Calcium carbonate and magnesium sulfates come in through the supply line at 60 to 80 PSI. Over months, tiny droplets sneak past the stem seals, evaporate on the warm brass or zinc, and leave behind rock-hard crystals.
That mineral crust works like mortar between moving parts. If your faucet has a plastic or ceramic disc cartridge, the scale binds the cartridge spline to the broached handle pocket. If it’s a traditional two-handle compression faucet, the threaded brass stem seizes hard against the packing nut. Force it, and you shear the splines off the cartridge, round out the cast-zinc handle interior, or twist the whole valve body under the vanity deck—suddenly your twenty-dollar cleanup turns into a busted sink basin and a $400 plumber callout. No dice.
How It Works
Two-handle bathroom faucets (widespread or 4-inch centerset) control water with one of two internal setups: ceramic disc cartridges or threaded compression stems. In both cases, turning the handle spins an inner part while the outer valve body stays anchored to the countertop.
       [ Handle Cap / Index Button ]
                    |
           [ Retaining Screw ]
                    |
           [ Handle Casting ]
                    |
      [ Splined Cartridge Stem ] <--- Minerals bind HERE
                    |
             [ Packing Nut ]
                    |
        [ Valve Body / Sink Deck ]
The handle has a gear-like pattern inside called a spline broach (usually 16 to 24 teeth). That broach fits tight over the matching teeth on the brass cartridge stem. Once you tighten the top retaining screw, it clamps the soft pot-metal handle right against the harder brass stem.
Below that sit the packing nut and cartridge body. In ceramic disc faucets, two polished ceramic plates with matching cutouts slide across each other to start or stop water flow. In compression faucets, turning the handle moves a threaded brass shaft up and down against a rubber seat washer.
When water sneaks past the top O-ring, it gets into that tiny 0.005-inch tolerance zone between the handle cavity and the stem spline. As the water evaporates, dissolved lime drops out and turns into hard calcite crystals. Calcite expands a bit as it forms, and that’s what locks the parts together. You’re not just turning a valve anymore—you’re trying to shear solid limestone.
Step-by-Step Fix
Follow these steps in order. Take your time. Rushing with heavy leverage is how brittle fixtures break.
1. Shut Off the Water Below the Vanity — Kill supply pressure completely.
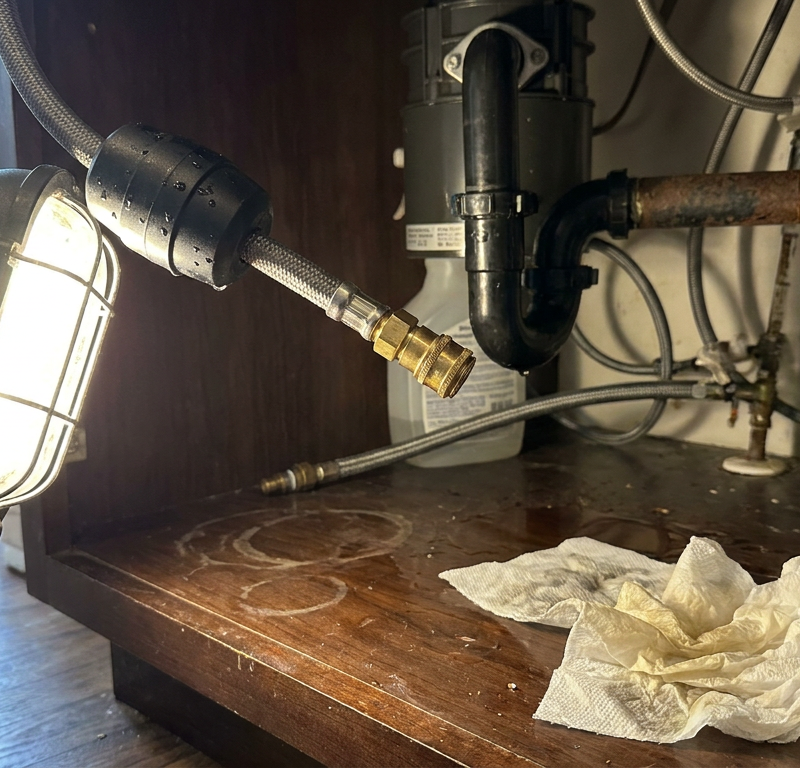
Crawl under the sink and find the hot and cold angle stop shutoff valves coming out of the wall. Turn both oval handles clockwise until they seat firmly.
- If you’ve got quarter-turn ball valves, rotate them 90 degrees until the handle sits perpendicular to the water line.
- Open both faucet handles to bleed off residual pressure and make sure the water’s truly dead.
- If the stops are frozen or dripping, go straight to your home’s main water shutoff and drain the house lines from an outside hose bibb.
2. Plug the Drain Basin — Don't feed screws to the P-trap.
Drop the mechanical pop-up stopper or shove a clean microfiber washcloth into the sink drain.
- Dropping tiny decorative index screws or Allen fasteners down the drain adds an irritating plumbing retrieval job to your day.
- Lay an old towel across the porcelain basin so a dropped wrench doesn’t chip anything.
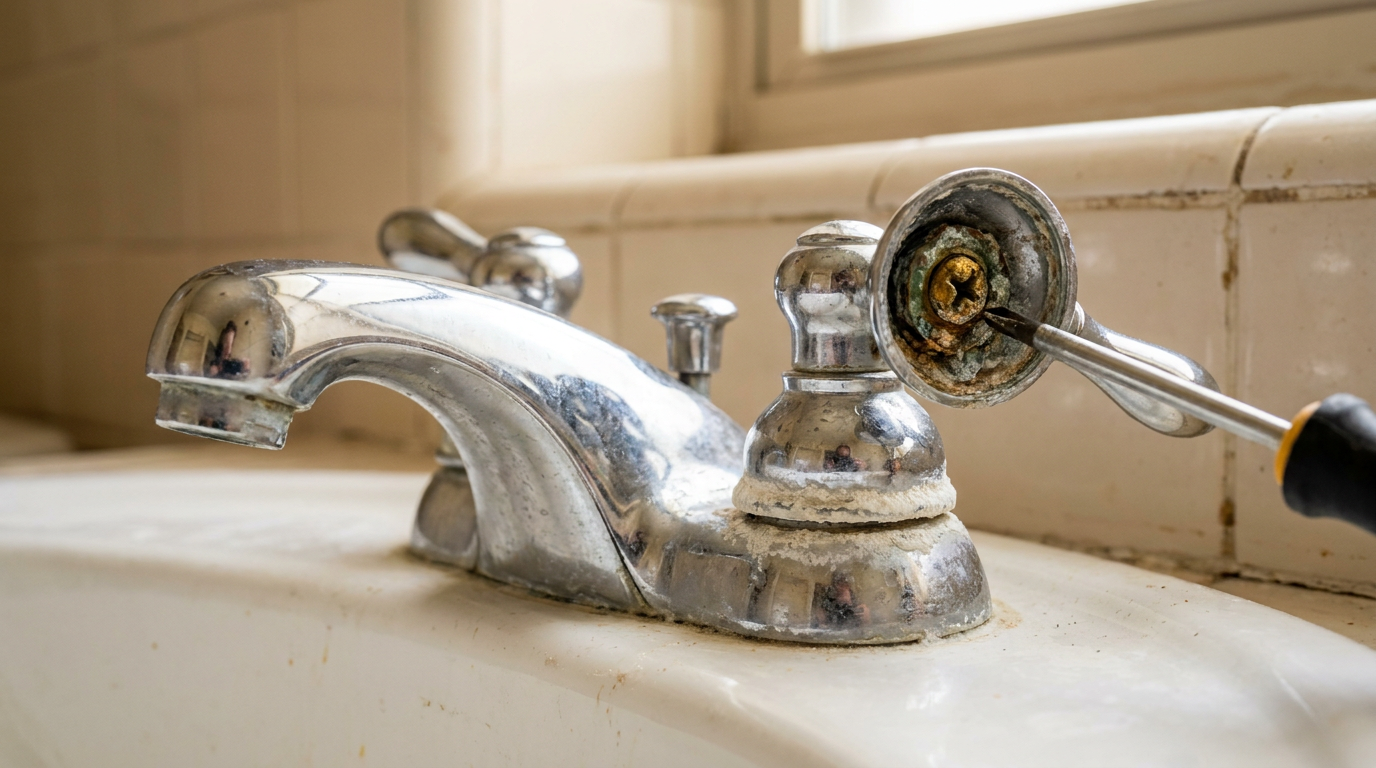
3. Expose the Handle Retaining Fastener — Locate the hidden mounting screw.
Modern faucet handles almost never show the screw out in the open.
- Look for a small plastic or metal "C" or "H" index button on top of the handle, or a tiny rubber plug on the side or back of the lever.
- Use a thin utility knife blade or a precision flathead screwdriver to gently pop the cap off.
- If your faucet uses lever-style handles with no top cap, look near the base of the handle skirt for a recessed hex set screw (usually 3/32-inch or 1/8-inch).
   Top-Mount Screw:             Side Set Screw:
   [ Pry Cap ]                  [ Lever Arm ]
        |                             |
     [Screw]                   [Allen Screw in Base]
        |                             |
   [Valve Stem]                  [Valve Stem]
4. Back Out the Retaining Screw — Free the mechanical fastener.
Use the right tool—either a #2 Phillips screwdriver or the matching imperial/metric Allen key—and go straight into the recess.
- Push down firm before you turn counterclockwise so you don’t strip the screw head.
- If the screw won’t budge, stop right there; soak the screw pocket with penetrating oil for 10 minutes instead of chewing up the Phillips slot.
- Set the screw somewhere safe on the vanity counter, away from the sink edge.
5. Apply Penetrating Oil to the Spline Junction — Break the chemical bond.
Spray a targeted shot of penetrating catalyst (like PB Blaster or Kano Kroil; standard WD-40 is too light for calcified bonds) straight into the screw hole where the handle meets the stem.
- Let it sit undisturbed for at least 15 to 20 minutes so it can wick down between the micro-splines.
- Wipe overspray off porous vanity stone right away — marble and granite will punish you if you let it sit.
6. Break the Handle Free Without Prying Against Porcelain — Apply controlled upward force.
Grab the handle with two hands and wiggle it back and forth in tiny movements—don’t twist hard against the valve rotation stop.
- Pull up gently while rocking the handle side to side.
- If it won’t move, thread an old rag underneath the handle base, cross the ends on top, and pull straight up with the fabric harness.
- Never jam a flathead screwdriver under there as a pry bar. You’ll crack the ceramic or chip the fixture finish.
- If it’s still locked solid, hook a dedicated faucet handle puller beneath the base, set the center pin against the stem, and gently tighten the puller’s T-handle.
       Faucet Handle Puller Setup:
              [ T-Handle ]
                   |
            (Center Screw)
                   |
     [Puller Arms] v [Stem]
         |                 |
     ===========================
           [Stuck Handle]
7. Remove the Decorative Escutcheon Bonnet Ring — Expose the working valve core.
With the handle off, unscrew the decorative dome collar or escutcheon shroud covering the valve mechanism.
- Most of these are hand-tight, but dried water deposits can lock them up.
- Wrap two layers of electrical tape around the jaws of slip-joint pliers or strap wrenches so you can grip the ring without scratching the chrome, nickel, or matte black finish.
- Twist counterclockwise and pull the trim ring off.
8. Back Off the Retaining Nut or Packing Nut — Release the internal cartridge.
Under the trim dome, you’ll see a flat-sided brass retaining nut holding the cartridge inside the valve body.
- Adjust a 10-inch crescent wrench to fit the flats of the nut exactly.
- Hold the valve body from beneath the sink with your other hand if you can, so the copper underbody tubes don’t twist.
- Put smooth counterclockwise torque on it until the nut breaks free, then spin it off by hand.
9. Extract and Inspect the Cartridge or Stem — Pull the seized core.
Grip the top of the exposed brass stem with locking pliers or a cartridge puller and pull straight out.
- If scale has locked the cartridge body inside the brass valve housing, pour 2 to 3 tablespoons of heated white vinegar right into the valve cavity and wait 15 minutes.
- Rock the cartridge gently until the rubber O-rings let go, then pull the whole unit out.
- Check the stem: Are the brass splines stripped bare? Are the rubber lower seals shredded? If the internal discs are cracked or the metal’s green with corrosion, replace the cartridge altogether.
  Clean vs. Scaled Cartridge:

  [New/Clean]                      [Scale-Seized]
  - Smooth brass splines           - White, chalky crust
  - Pliable, black O-rings         - Brittle, flattened seals
  - Slides freely with fingers     - Frozen solid, gritty feel
10. Dissolve the Mineral Scale in a Vinegar Bath — Clean the critical contact points.
If the cartridge internals are still in decent shape, submerge the cartridge, the retaining nut, and the handle casting in a small container of pure distilled white vinegar heated to approximately 120°F.
- Let the parts soak for 45 to 60 minutes. The acetic acid will fizz a little as it reacts with the calcium carbonate.
- Take an old nylon toothbrush or brass wire brush and scrub the splines, threads, and inside handle pockets clean.
- Rinse the parts well under warm running tap water and dry them completely.
11. Relubricate and Reassemble — Prevent the seizure from returning.
Smear a thin coat of NSF-61 certified food-grade silicone plumbers grease across all rubber O-rings, stem threads, and the brass spline teeth.
- Don’t use petroleum jelly (Vaseline) or motor grease; petroleum chews up synthetic rubber seals in months.
- Seat the cartridge back into the valve body, lining up any indexing tabs or brass alignment ears with the notches in the valve casing.
- Thread the retaining nut back down and snug it firmly with your adjustable wrench—aim for roughly 10 to 12 ft-lbs of torque (firm wrist tightness, don’t lean your whole body into it).
- Reinstall the trim collar, slide the handle onto the splines, reinstall the screw, and put the decorative cap back on.
12. Pressure Test the Assembly — Check for smooth operation and leaks.
Make sure the faucet handle is turned off.
- Slowly reopen the hot and cold supply stops underneath the vanity halfway, and watch for immediate leaks around the packing nut.
- Open the stops fully.
- Turn the newly freed faucet handle back and forth several times; it ought to rotate with light finger pressure.
- Check around the base of the handle with a dry paper towel for tiny weeping leaks while the water runs at full blast.
Common Causes
Why’d the handle freeze up in the first place? It usually comes down to four main mechanical failures:
- Hard Water Evaporation (Limescale Accumulation): Every time wet hands shut off the faucet, water drops run into the gap between the handle skirt and valve neck. As the moisture evaporates in dry indoor air, dissolved calcium carbonate deposits build up along the splines and weld the parts together.
- Degraded O-Ring Seals: The internal stem O-rings keep pressurized water contained inside the waterways. Once an O-ring flattens, hardens, or tears from age, a micro-leak escapes up the stem shaft every time the faucet runs, feeding a constant stream of mineral-rich water right into the handle broach.
- Galvanic Corrosion: In budget and mid-tier fixtures, manufacturers often pair a die-cast zinc handle with an internal brass stem. When minerals and water bridge the contact point between those dissimilar metals, galvanic action starts, and the zinc corrodes and chemically bonds to the brass.
- Stripped Splines Wedged at an Angle: A handle that’s been loose for weeks lets the metal teeth slip and deform. After a while, an off-axis turn jams the misaligned teeth together, and the handle won’t rotate at all.
- Dried Factory Lubricant: Faucet cartridges leave the factory coated in silicone grease. Over 5 to 10 years of hot water exposure (often reaching 120°F to 130°F), that lubricant washes away, leaving metal-on-metal or ceramic-on-ceramic surfaces to grind and seize.
Common Mistakes
Avoid these traps when you’re dealing with a stubborn faucet handle:
- Using brutal leverage: Slapping a pipe wrench onto the outside of a decorative handle and twisting with full body weight will snap the brass stem clean off, or tear the thin copper supply tubes hidden inside widespread faucet assemblies.
- Prying upward against the countertop: Homeowners constantly slide a flathead screwdriver or claw hammer under the handle base to pry it upward. That cracks porcelain sinks, chips marble vanity tops, and crushes the thin decorative escutcheon beneath the handle.
- Using petroleum-based lubricants on rubber parts: Spraying WD-40 or engine oils into the cartridge valve body swells and softens the internal rubber seats and O-rings, ruining the cartridge permanently. Stick with NSF-61 certified silicone grease for plumbing internals.
- Stripping the fastener with the wrong bit: Jamming a worn Phillips screwdriver into a stripped screw—or using an imperial Allen key in a metric hex socket—rounds out the fastener head, forcing you to drill the screw out with a specialized extractor.
- Forgetting to secure the under-sink valve body: Cranking on the top retaining nut with a wrench without stabilizing the valve underneath can twist the whole fixture base, warp the sink deck, or snap rigid supply lines below.
Cost & Time Breakdown
| Task | DIY Cost | Pro Cost | Time |
|---|---|---|---|
| Freeing handle & vinegar cleaning | $5–$15 (Vinegar & penetrating oil) | $150–$250 | 45–60 mins |
| Replacing seized cartridge/stem | $15–$45 (New cartridge kit) | $200–$325 | 30–45 mins |
| Replacing stripped handle & adapter | $20–$50 (New handle trim kit) | $175–$275 | 30 mins |
| Total faucet replacement (if seized solid) | $80–$250 (New faucet fixture) | $350–$550 | 1.5–3 hours |
Tips & Prevention
- Cycle guest bathroom handles weekly: Faucets in spare bathrooms seize twice as fast as the main bath because stagnant water sits there undisturbed, letting minerals crystallize without any mechanical interruption. Run and cycle guest fixtures for 15 seconds every week.
- Wipe the handle bases dry: When you clean the bathroom, dry the recessed groove where the handle meets the faucet collar. Keeping that gap free of standing water stops scale from creeping down the cartridge shaft.
- Apply fresh silicone grease every 3 to 5 years: Next time you pull a cartridge or replace a faucet aerator, pop the handle and apply a fingernail-sized dab of plumbers silicone grease over the splines to seal out water and keep galvanic bonding from starting.
- Watch for "creeping stiffness": Faucets rarely seize overnight. If a handle starts to feel gritty, squeaks when you turn it, or takes two hands to shut off, service it that weekend before it freezes completely.
- Install a whole-home water softening solution: If your local tap water tests above 7 to 10 grains per gallon (typical across large swaths of the South and Midwest), your plumbing will keep building scale; a water softener fixes the root chemistry problem.
When to Call a Professional
Breaking down a stuck handle is standard DIY work, but some situations mean you ought to put the tools down and call a licensed plumber.
If the shutoff valves under the vanity won’t close, show heavy white mineral crust around their stems, or start spraying water the second you touch them, stop. Forcing frozen shutoff valves can shear copper tubing inside the wall cavity and flood your home in minutes.
You should also bring in a pro if the retaining nut or cartridge brass has fused completely with the valve body through galvanic corrosion. When penetrating oil, heat, and standard leverage don’t do it, more brute force usually twists the copper transfer tubes hidden beneath widespread faucet sinks. Once those lines deform or rupture, the faucet can’t be salvaged and needs full replacement—often with basin wrenches and tight-clearance cutting tools most homeowners don’t own. And call a pro if you find degraded, leaking CPVC piping beneath the sink; old CPVC is brittle as glass and will snap with minor wrench vibration.
Frequently Asked Questions
Can I spray regular WD-40 onto a stuck faucet handle?
You can use standard WD-40 strictly to free a stuck exterior metal handle from its stem, but it isn’t ideal. Standard WD-40 is a solvent and light water displacer, not a heavy penetrating catalyst. Specialized penetrating oils like PB Blaster break down calcium and rust a lot faster. More importantly, don’t let standard WD-40 get inside the cartridge itself, because petroleum-based distillates will damage the internal rubber O-rings and seat washers.
How do I use a faucet handle puller without damaging anything?
A faucet handle puller works like a tiny gear puller. Place the two curved pulling arms beneath opposite sides of the handle base, making sure they rest securely against the metal edge without pinching the sink surface. Center the threaded drive shaft over the top of the faucet cartridge stem, with the retaining screw removed. Slowly tighten the puller’s T-handle clockwise by hand; the center bolt pushes down against the cartridge stem while the arms lift the handle straight up, popping it free without prying against delicate sink porcelain.
What should I do if the handle retaining screw is completely stripped?
If the screw head is stripped, first tap the screwdriver handle gently with a hammer while turning counterclockwise to see if the impact breaks it loose. If that doesn’t work, lay a wide rubber band across the tip of the screwdriver to give you extra grip against the stripped metal. When all else fails, use a high-speed rotary tool with a reinforced cutoff wheel to cut a clean flathead slot into the top of the screw, or drill out the center of the fastener with a #1 or #2 screw extractor bit.
Why is my bathroom faucet handle stiff, but only on the hot side?
The hot water side usually seizes faster and harder than the cold side. High water temperatures (usually 120°F to 140°F) make dissolved minerals like calcium and magnesium come out of the water faster. Hot water also breaks down factory silicone lubricants on the O-rings and cartridge tracks years sooner than cold water, leaving the hot stem dry, scaled, and ready to bind.
Can I pour boiling water on the handle to loosen it?
Boiling water can help expand the metal handle casting a little, which sometimes breaks the seal of dried mineral deposits. But be careful with ceramic or porcelain sinks: pouring boiling water onto cold porcelain can cause thermal shock and crack the basin with a hairline fracture. If you want to use heat, use a household hair dryer on its highest setting aimed right at the handle base for 3 to 4 minutes instead.
How do I know if I need a new cartridge or just a cleaning?
If you pull the cartridge and find intact brass splines, smooth ceramic discs inside, and rubber O-rings that are still pliable and free of tears, a 45-minute vinegar soak and fresh silicone grease will usually bring it back. But if the brass splines are rounded off, the plastic cartridge casing is cracked, the stem has a lot of vertical play, or the faucet was dripping from the spout before it seized, the internal seals are shot and you should replace the whole cartridge.
What is the difference between plumbers grease and plumbers putty?
They’re completely different materials built for opposite jobs. Plumbers grease is a 100% pure silicone lubricant used on moving mechanical parts—such as O-rings, stem threads, and rubber seals—to keep things rotating smoothly and prevent leaks without eating rubber. Plumbers putty is a pliable, clay-like sealing compound used strictly as a static gasket under faucet baseplates, pop-up drain flanges, and sink strainers to block water from leaking through deck holes.
Will vinegar ruin the finish on my bathroom faucet?
Pure white vinegar is safe for chrome, brushed nickel, and stainless steel fixtures for short soaking periods (under an hour). But if your faucet has an oil-rubbed bronze, matte black, or living brass finish, long contact with acidic vinegar can strip, discolor, or spot the coating. For delicate finishes, keep vinegar limited to a cotton swab on the hidden internal stem and leave the exterior finish alone.
Related Articles
Keep troubleshooting with these hand-picked guides from FixlyGuide:
- The $5 Secret to Silencing That Annoying Dripping Faucet (Single-Handle Fix) — Stop a dripping single-handle faucet with a simple and inexpensive DIY fix by replacing a worn-out o-ring or washer.
- The 5-Minute Trick to Stop a Dripping Single-Handle Faucet (No Plumber Needed) — A persistent drip from your single-handle faucet is usually caused by a worn-out cartridge, a repair you can typically complete yourself in…
- The 5-Minute Trick to Restore Your Kitchen Sink Sprayer's Lost Pressure — Restore your kitchen sink sprayer's low pressure with a quick, simple trick that often takes less than five minutes and requires no special…
- Kitchen Faucet Low Pressure? 10 Steps to Restore Weak Flow — Kitchen pull-out faucet suddenly lost water pressure? Learn how to clear clogged aerator screens, flush internal check valves, and fix unde…
- The $5 Secret to Fixing Your Drip: Why Single-Handle Faucets Leak (and the O-Ring Trick) — A persistent drip from your single-handle faucet is often caused by worn-out O-rings or seals, a common issue with a simple, inexpensive DI…
- Is Your Gutter Sagging After Every Storm? The Hidden Flaw Most Homeowners Miss — Discover the overlooked reason your gutters sag after every storm and learn the lasting fix that most homeowners miss.
Should you do this yourself?
Answer five quick questions before you start. Safety outranks savings every time.
Your experience with work like this
How high do you have to work?
Does the job involve any of these?
Will it need a permit?
Specialty tools
Free and instant. Educational guidance only — not a quote, inspection, or professional diagnosis.
What should this project cost?
Enter your project details for a realistic cost range before you call anyone.
Common repairs run $150–$650; repipes and water-heater replacements reach $1,500–$4,500.
- Regional adjustment
- National average
- Labor share (typical)
- ~$754
- Quotes to collect
- 3 written estimates
Educational estimate based on national averages — not a binding quote. Always confirm with written local estimates.
Fixly Project Decision Box
- DIY difficulty
- Moderate
- Estimated time
- 30 minutes – half a day
- Cost level
- Moderate
Main tools / materials
- Adjustable wrench
- Plunger or drain auger
- Bucket and towels
- Thread tape
When to stop and call a pro
- Water you cannot shut off at the fixture or main
- Sewage backing up into more than one fixture
- Water near electrical panels or outlets
- Gas water heater work beyond relighting a pilot
Need professional help?
Get a Licensed PlumberBefore you start
Check the difficulty, permits, and safety risk — then decide whether to call a pro.
- Estimate this projectGet a cost range for your scope and ZIP before you call anyone.Open
- Get local estimatesSend one request and compare written estimates from vetted pros.Open
Free, no signup required. Estimates are educational guidance, not a quote or an inspection.
Frequently asked questions
Can I spray regular WD-40 onto a stuck faucet handle?+
You can use standard WD-40 strictly to free a stuck exterior metal handle from its stem, but it is not ideal. Standard WD-40 is a solvent and light water displacer, not a heavy penetrating catalyst. Specialized penetrating oils like PB Blaster break down calcium and rust significantly faster. More importantly, never let standard WD-40 penetrate inside the cartridge itself, as petroleum-based distillates degrade the internal rubber O-rings.
How do I use a faucet handle puller without damaging anything?+
A faucet handle puller works like a miniature gear puller. Place the two curved pulling arms beneath opposite sides of the handle base, ensuring they rest securely against the metal edge without pinching the sink surface. Center the threaded drive shaft over the cartridge stem (with the retaining screw removed) and tighten the T-handle clockwise by hand to hoist the handle straight up without prying against porcelain.
What should I do if the handle retaining screw is completely stripped?+
If the screw head is stripped, first try placing a wide rubber band across the tip of the screwdriver to provide extra friction against the stripped metal. If that fails, place a rotary tool with a reinforced cutoff wheel to cut a clean flathead slot into the top of the screw, or drill out the center of the fastener with a #1 or #2 screw extractor bit.
Why is my bathroom faucet handle stiff, but only on the hot side?+
The hot water side always seizes up faster and more aggressively than the cold side. High water temperatures (usually 120°F to 140°F) cause dissolved minerals like calcium to precipitate out of the water at an accelerated rate. Hot water also breaks down factory silicone lubricants on the O-rings and cartridge tracks years faster than cold water.
Can I pour boiling water on the handle to loosen it?+
Boiling water can help expand the metal handle casting slightly, but you should exercise extreme caution on ceramic or porcelain sinks: pouring boiling water onto cold porcelain can trigger thermal shock, creating a hairline crack that destroys the basin. If you use heat, use a household hair dryer on its highest heat setting aimed directly at the handle base for 3 to 4 minutes instead.
How do I know if I need a new cartridge or just a cleaning?+
If you pull the cartridge and find intact brass splines, smooth ceramic discs, and rubber O-rings that are still pliable and free of tears, a 45-minute vinegar soak and fresh silicone grease will restore function. However, if the brass splines are rounded off, the plastic casing is cracked, or the faucet was dripping from the spout prior to seizing, replace the entire cartridge.
What is the difference between plumbers grease and plumbers putty?+
They are completely different materials for opposite jobs. Plumbers grease is a 100% pure silicone lubricant used on moving mechanical parts—such as O-rings, stem threads, and rubber seals—to ensure smooth rotation. Plumbers putty is a pliable, clay-like sealing compound used strictly as a static gasket beneath faucet baseplates and pop-up drain flanges.
Will vinegar ruin the finish on my bathroom faucet?+
Pure white vinegar is safe for chrome, brushed nickel, and stainless steel fixtures for short soaking periods (under an hour). However, if your faucet features an oil-rubbed bronze, matte black, or living brass finish, prolonged contact with acidic vinegar can strip, discolour, or spot the delicate coating. Keep vinegar contact restricted to internal parts.
Discussion
Loading comments…