
Tools & materials you'll need
Affiliate links- AmazonSprinkler adjustment tool/keyOften specifically for your sprinkler brand
- AmazonScrewdriver setVarious sizes to adjust heads
- AmazonRulerFor measuring water in catch cans
- AmazonSmall brush or needleFor cleaning clogged nozzles
- AmazonCore aerator (rental or service)If soil compaction is suspected
- AmazonWater pressure gaugeOptional, but useful for diagnostics
As an Amazon Associate FixlyGuide earns from qualifying purchases — at no extra cost to you. Prices and availability are accurate as of publication and subject to change.
Quick Answer
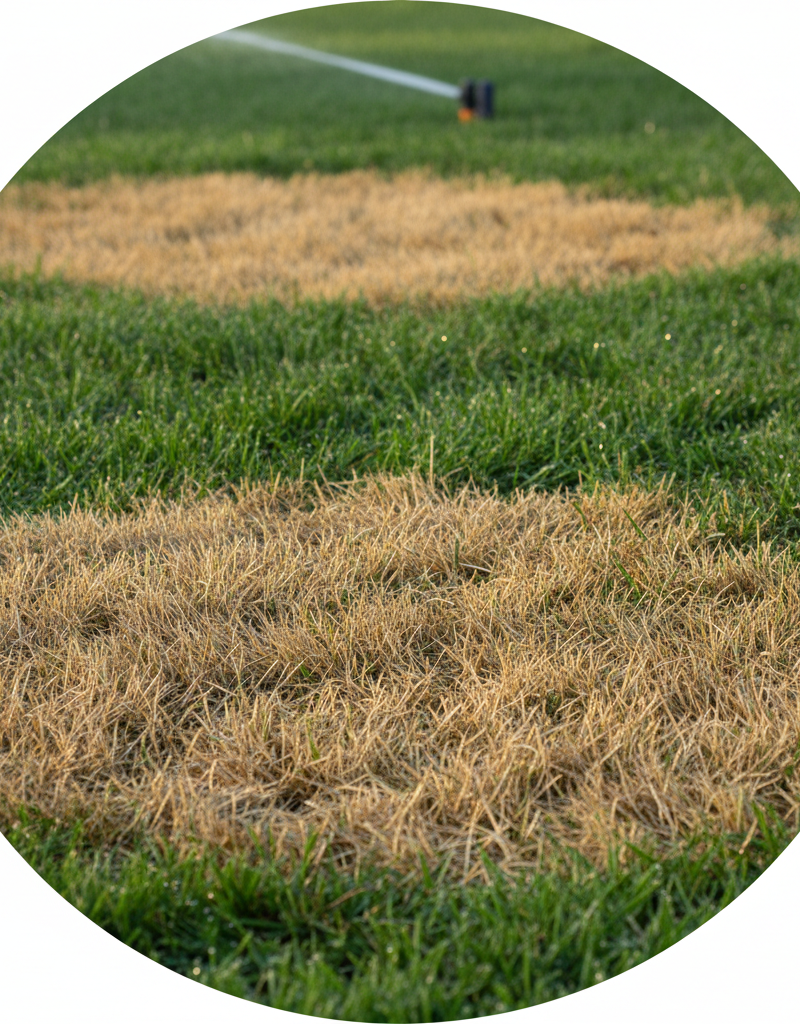
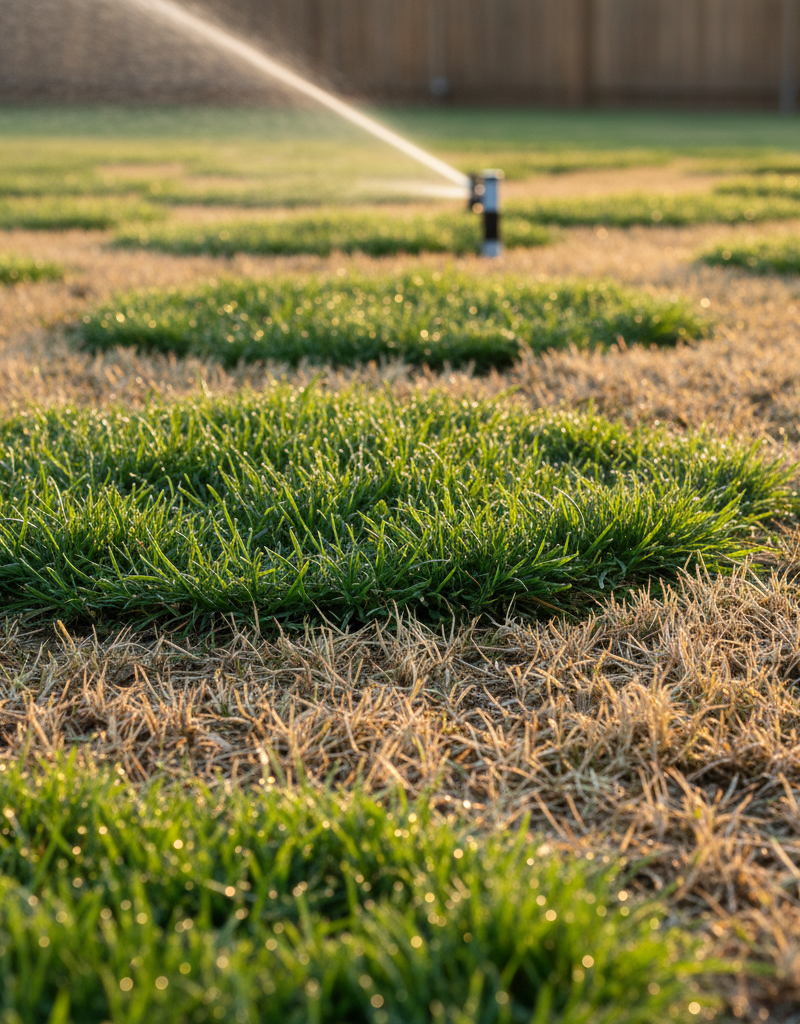
Brown spots appearing in your lawn shortly after you've watered often signal a problem with how your lawn is receiving that water, not necessarily a lack thereof. The most frequent cause is uneven water distribution from a sprinkler system that's either poorly adjusted, has clogged nozzles, or suffers from low water pressure. These issues create 'dry zones' where the grass doesn't get enough moisture, even while adjacent areas are well-watered. Less common but equally important causes include compacted soil, certain fungal diseases that thrive in specific moisture conditions, or insect damage becoming more obvious against a green backdrop.
The Problem
You diligently water your lawn, expecting a vibrant, green expanse. Instead, you're greeted with frustrating brown patches, often amidst perfectly healthy, green grass. This isn't just an aesthetic issue; it's a clear indicator that something is fundamentally wrong with how your lawn is receiving and utilizing moisture. These brown areas are essentially stressed or dying grass, struggling to survive due to inconsistent hydration. This problem can escalate, leading to larger dead zones, increased weed growth in stressed areas, and a higher susceptibility to pests and diseases if left unaddressed. It's a common headache for homeowners, often leading to wasted water and a less-than-ideal curb appeal.
How It Works
A healthy lawn relies on a consistent and adequate supply of water delivered to its root zone. Grass roots typically extend anywhere from 2 to 6 inches deep, depending on the species and soil type. When you water, the goal is for moisture to penetrate this root zone uniformly. Soil acts like a sponge, holding water in its pores for the roots to absorb. Over time, grass plants transpire, releasing water vapor and drawing more moisture up from the soil. This entire process depends on a steady intake of water through the topsoil.
Sprinkler systems are designed to distribute water evenly across a given area. However, several factors can disrupt this ideal distribution. Nozzles can become clogged with mineral deposits or debris, leading to reduced flow or misdirected streams. Sprinkler heads can be knocked out of alignment by lawnmowers, foot traffic, or even shifting soil, causing them to water sidewalks or concentrate water in small circles. Low water pressure can prevent heads from popping up fully or from reaching their intended spray radius, creating 'under-watered' zones. Conversely, high pressure can atomize the water too much, making it more susceptible to wind drift and evaporation before it reaches the ground. Compacted soil, often caused by heavy foot traffic or machinery, reduces pore space, making it difficult for water to penetrate deeply. Instead, water may simply run off, leaving the underlying root zone parched. Fungal diseases, like brown patch or dollar spot, often manifest under specific moisture and temperature conditions, creating circular or irregular brown areas that can be mistaken for simple drought stress.
Step-by-Step Fix
1. Inspect Sprinkler Heads Thoroughly — The fastest way to diagnose uneven watering is a visual check during operation.
- Run your sprinkler system: Turn on each zone one by one during daylight hours. Observe 360 degrees.
- Look for: Clogged nozzles (weak or erratic spray), broken heads (not popping up fully or shooting water in one direction), misaligned heads (watering sidewalks, driveways, or overlapping too much/too little). Check for leaks at the base of heads.
- Action: Adjust heads using a sprinkler key or screwdriver. Clean nozzles with a small brush or needle. Replace broken heads (usually twist-off or unscrew). Remember, even a slight misalignment can create a dry spot.
2. Perform a Catch Can Test — This scientific approach reveals exact water distribution patterns.
- Gather containers: Place 5-10 empty tuna cans or straight-sided containers randomly within each sprinkler zone. Ensure they are evenly spaced, not just near the heads.
- Run sprinklers: Operate the zone for 15-30 minutes, noting the exact time.
- Measure water: Use a ruler to measure the amount of water in each can. Significant variations (more than 1/4-inch difference) indicate uneven coverage.
- Adjust and retest: Adjust sprinkler arcs, pressure, and run times based on the results. If one area is getting 1/2 inch and another 1/8 inch, you might need to adjust head types, positions, or add supplementary heads. Repeat the test until distribution is as uniform as possible.
3. Check for Water Pressure Issues — Inadequate or excessive pressure impacts sprinkler performance.
- Observe spray: If heads aren't popping up fully, or the spray distance is significantly reduced, you might have low pressure. If water is atomizing excessively and creating a fine mist, pressure might be too high.
- Pressure gauge: Attach a water pressure gauge to an outdoor spigot to check your home's static pressure. Most sprinkler systems operate optimally between 30-50 PSI.
- Troubleshoot: Low pressure can be due to a partially closed main valve, undersized pipes, or a city water issue. High pressure might require a pressure reducing valve installed on your main line or within the sprinkler system itself. This might require a plumber.
4. Aerate Compacted Soil — Sometimes the water is there, but it can't get in.
- Identify compaction: If water pools and runs off quickly even after a short watering, or if your soil feels very hard, it's likely compacted.
- Core aeration: Rent a core aerator (a machine that pulls out small plugs of soil) or hire a lawn care service. This creates通道 for water, air, and nutrients to reach the roots.
- Timing: Aerate in spring or early fall when grass is actively growing and can recover quickly.
5. Address Potential Fungal Diseases — Look for specific patterns of discoloration.
- Inspect symptoms: Brown patch often appears as circular brown areas with a darker, smoke-ring-like border. Dollar spot creates small, silver-dollar-sized circular brown spots. Red thread has reddish-pink fungal strands visible on the blades.
- Cultural practices: Adjust watering schedule to mornings to allow grass to dry during the day. Improve air circulation. Avoid excessive nitrogen fertilizer if you suspect fungal issues.
- Fungicides: Consider an appropriate fungicide as a last resort, following package directions carefully. Consult a lawn care professional for identification and treatment recommendations.
6. Investigate Insect Pests — Some pests cause browning that mimics drought.
- Tug test: Grab a handful of brown grass and tug. If it pulls up easily with no roots, grubs are likely present, feeding on roots just below the surface.
- Visual inspection: Look for chinch bugs (small, black, white-winged insects) in dry-looking patches, especially in hot, sunny areas. Sod webworms leave silken tunnels at the base of grass blades.
- Treatment: Apply appropriate grub control or insecticide, following product instructions. Often, pest damage becomes more visible as surrounding areas green up.
Common Causes
- Uneven Sprinkler Coverage: This is the overwhelming leader. Clogged nozzles, broken heads, misaligned spray patterns, or incorrect water pressure lead to some areas receiving too much water and others too little. The 'brown spots' are the under-watered sections.
- Compact Soil: Hard, dense soil prevents water from penetrating deeply to the root zone. Instead, water pools on the surface and runs off, leaving the grass thirsty even after irrigation.
- Fungal Diseases: Conditions like brown patch or dollar spot thrive in specific temperature and moisture environments. These diseases cause grass to die in distinct patterns, often circular or irregular brown patches.
- Insect Infestations: Pests such as grubs (which eat roots) or chinch bugs (which suck sap) can cause widespread browning that mimics drought stress. Their damage often becomes more noticeable against a backdrop of otherwise healthy, green grass.
- Overwatering in Specific Spots: While less common for brown spots, localized overwatering can lead to root rot in specific areas, ironically causing browning due to the inability of roots to absorb nutrients and oxygen.
- Dry Spots from Landscape Features: Trees, shrubs, or hardscaping can block sprinkler spray or create microclimates that dry out nearby grass more quickly, leading to localized brown areas.
Common Mistakes
- Assuming More Water is the Cure: When brown spots appear, the natural reaction is often to water more. If the problem is uneven distribution, compacted soil, or disease, simply adding more water can exacerbate the issue, leading to runoff, fungal growth, or even root rot.
- Ignoring a Catch Can Test: Skipping this diagnostic step means you're guessing at water distribution rather than knowing for sure. Without it, you might fix the wrong thing or miss the root cause of the problem.
- Overlooking Sprinkler Maintenance: Many homeowners neglect annual sprinkler tune-ups. Skipping checks for clogged, broken, or misaligned heads ensures that uneven watering problems will persist or worsen.
- Watering at the Wrong Time: Watering in the evening leaves grass wet overnight, creating ideal conditions for fungal diseases. Watering in the middle of a hot, sunny day leads to excessive evaporation. The best time is early morning, allowing grass to dry before nightfall.
- Mowing Too Short: Scalping your lawn (cutting it too short) stresses the grass, reducing its ability to withstand drought and making it more susceptible to browning, especially in already challenged areas.
- Misdiagnosing the Problem: Confusing drought stress with fungal disease or insect damage can lead to applying the wrong treatment, wasting time and money, and allowing the actual problem to worsen.
Cost & Time Breakdown
| Task | DIY Cost | Pro Cost | Time |
|---|---|---|---|
| Sprinkler Head Replacement | $5-$25 per head | $75-$150 per head | 15-30 mins per head |
| Sprinkler Adjustment/Cleaning | $0 | $75-$150 (service call) | 30-60 minutes |
| Catch Can Test | $5-$10 (cans) | $0 (if part of service) | 1 hour per zone |
| Core Aeration (Rental) | $80-$150/day | $150-$300 (service) | 2-4 hours |
| Grub/Insect Control | $20-$50 (product) | $100-$250 (service) | 30 minutes |
| Fungicide Application | $25-$75 (product) | $100-$250 (service) | 30 minutes |
Tips & Prevention
- Annual Sprinkler System Audit: At the beginning of each watering season, thoroughly inspect every sprinkler head for clogs, breaks, and alignment. Run a catch can test annually to ensure even distribution.
- Water Deeply and Infrequently: Aim for 1-1.5 inches of water per week in 1-2 watering sessions, rather than daily shallow watering. This encourages deeper root growth, making your lawn more drought-resistant.
- Water in the Early Morning: This minimizes evaporation and allows the grass blades to dry off before nightfall, significantly reducing the risk of fungal diseases.
- Mow at the Correct Height: Most turfgrass types prefer a mowing height of 2.5 to 3.5 inches. Taller grass shades the soil, retains moisture better, and promotes deeper roots.
- Fertilize Appropriately: Avoid over-fertilizing, especially with nitrogen, as this can lead to excessive top growth and can encourage some fungal diseases. A balanced fertilizer program is best.
- Consider Soil Testing: A professional soil test can reveal nutrient deficiencies or pH imbalances that might be contributing to stress and browning, even with adequate water.
When to Call a Professional
While many brown spot issues can be resolved with DIY adjustments, several situations warrant calling a licensed professional. If, after performing a thorough sprinkler system inspection and catch can test, you still can't achieve uniform water distribution, an irrigation specialist can often diagnose complex pressure issues, underground leaks, or system design flaws that are beyond a homeowner's typical repair ability. Similarly, if you suspect a fungal disease or significant insect infestation and your initial DIY treatments are ineffective, a certified lawn care professional can accurately identify the specific pest or disease and recommend targeted, effective treatments. They have access to commercial-grade products and expertise in integrated pest management. Lastly, if you have persistent brown spots despite addressing all watering and pest concerns, a professional might be able to identify underlying soil issues, nutrient deficiencies, or other environmental stresses that require specialized knowledge and equipment to correct.
Related Articles
Keep troubleshooting with these hand-picked guides from FixlyGuide:
- The #1 Mistake Turning Your Healthy Lawn Brown After Watering — Discover the most common, overlooked reason your lawn develops brown spots right after you water it, and how to fix it with simple steps.
- The #1 Mistake Turning Your Healthy Lawn Brown After Watering — Discover the hidden culprit behind brown spots appearing in your lawn immediately after watering and learn how to correct this common mista…
- The #1 Summer Lawn Mistake Turning Your Grass Yellow (It's Not Overwatering) — Discover the most common, often overlooked reason your summer lawn is turning yellow despite your best efforts, and learn how to fix it.
- Thatched Lawn Secret: Why Brown Spots Bloom AFTER Watering (and the $15 Fix) — Brown spots appearing after watering your lawn often point to underlying thatch issues, hindering water absorption and nutrient delivery.
- The #1 Mistake That Leaves Brown Spots After Watering (It's Not Overwatering) — Uncover the surprising truth behind brown spots appearing in your lawn immediately after watering, and learn how to fix this common issue.
- The #1 Mistake Homeowners Make When Diagnosing Low Water Pressure (It's Not Your Pipes) — Discover the most common, overlooked culprit behind low water pressure impacting your entire home and learn how to fix it yourself with bas…
Frequently asked questions
Why do I have brown spots after watering?+
The most common reason for brown spots after watering is uneven water distribution from your sprinkler system. This means certain areas aren't getting enough water to penetrate the root zone, even though other parts of your lawn might be well-hydrated. Clogged or misaligned sprinkler heads, low water pressure, or compacted soil are frequent culprits.
How can I tell if my sprinklers are watering evenly?+
The best way to check for even watering is to perform a 'catch can test.' Place several empty, straight-sided cans (like tuna cans) across your lawn in a sprinkler zone, run the sprinklers for a set time, and then measure the water collected in each can. Significant differences indicate uneven coverage, requiring sprinkler head adjustments or repairs.
Can overwatering cause brown spots?+
Yes, indirectly. While localized overwatering doesn't typically cause dry brown spots, constantly saturated soil can lead to root rot, which may manifest as browning because the roots are unable to absorb oxygen and nutrients. Overwatering can also create ideal conditions for certain fungal diseases that cause brown patches.

Discussion
Loading comments…