Tools & materials you'll need
Affiliate linksAs an Amazon Associate FixlyGuide earns from qualifying purchases — at no extra cost to you. Prices and availability are accurate as of publication and subject to change.
Quick Answer
When rain causes your chimney to leak, the most common culprits are typically problems with the chimney crown, the flashing around the base of the chimney, or deteriorating mortar joints within the brickwork. It's less often a structural issue with the chimney itself and more frequently a breakdown in the protective layers designed to shed water. Addressing these issues promptly is crucial to prevent extensive water damage to your ceiling, walls, and potentially your chimney's internal structure.
The Problem
You've noticed the tell-tale signs: a damp stain spreading across your ceiling near the fireplace, water dripping down the firebox, or perhaps even a musty odor emanating from the chimney area after a heavy rain. A leaking chimney isn't just an unsightly nuisance; it's a serious issue that can lead to significant structural damage, mold growth, and compromised indoor air quality within your home. Water is a relentless adversary, and even a small, persistent leak can cause rot in wood framing, degrade drywall, rust metal components, and accelerate the deterioration of your chimney's masonry. Understanding the specific points where water is breaching your chimney's defenses is the first step toward a lasting repair.
How It Works
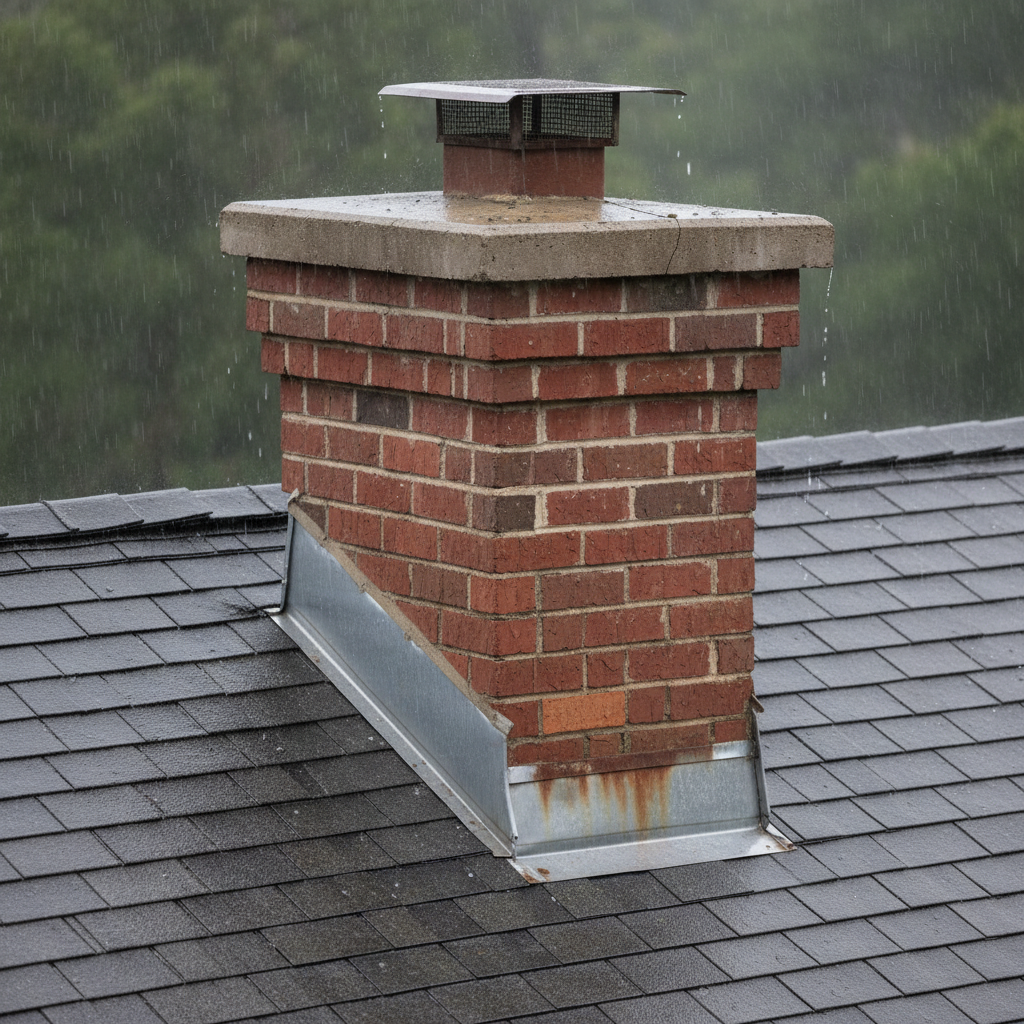
Understanding how a chimney is designed to shed water is key to diagnosing a leak. Picture your chimney as a multi-layered defense system against precipitation. At the very top, the chimney cap (if present) prevents rain from directly entering the flue, while the chimney crown – a concrete slab or stone cap – slopes slightly outwards to direct water away from the flue opening and the top course of bricks. This crown is critical; cracks in its surface can funnel water directly into the chimney structure below. Below the crown, the vertical masonry (bricks and mortar) forms the main body of the chimney. Mortar joints, though durable, are porous and can deteriorate over time, creating pathways for water intrusion. Finally, where the chimney meets the roofline, a system of metal flashing (typically aluminum, copper, or galvanized steel) creates a watertight seal. This flashing usually consists of two parts: base flashing that slides under the shingles and up the chimney, and counter-flashing that is embedded into the chimney's mortar joints and bent down over the base flashing. This overlapping design allows for thermal expansion and contraction while keeping water out. If any of these layers – the crown, the mortar, or the flashing – are compromised, water will find its way in, leading to leaks visible inside your home.
Critical Components for Water Shedding:
- Chimney Cap: Sits atop the flue, blocking direct rainfall and preventing animal entry. Not all chimneys have them, but they are highly recommended.
- Chimney Crown: The concrete or stone slab capping the chimney masonry. Its sloped design sheds water away from the flue and exterior brickwork.
- Mortar Joints: The material binding individual bricks. Over time, these can crack, crumble, or become porous.
- Flashing: A multi-piece metal system that seals the intersection of the chimney and the roof, accommodating movement.
- Soffit and Fascia: The overhang components of your roof that a chimney might pass through. Damage here can sometimes be confused with actual chimney leaks.
When any of these elements fail, water exploits the weakness. A cracked crown directs water into the top of the masonry. Deteriorated mortar allows water to soak into the brickwork. Failed flashing lets water creep under shingles and into your attic or ceiling. The path water takes after it enters can be circuitous, making precise leak detection challenging, but a systematic inspection can pinpoint the entry point.
Step-by-Step Fix
Safety Note: Working on a roof can be dangerous. Always use a sturdy ladder, wear non-slip shoes, and ideally, have a helper present. If you are uncomfortable with heights or roof work, call a professional.
-
Inspect the Chimney Crown — Look for cracks and deterioration
- What to do: Carefully ascend to your roof. Visually inspect the concrete or stone slab at the top of the chimney. Look for hairline cracks, larger fissures, or areas where the crown has chipped away or is crumbling. Pay close attention to the perimeter where the crown meets the flue liner and the brickwork.
- If you find cracks: Clean the crown thoroughly with a wire brush and apply a flexible crown repair sealant. For larger cracks or damaged sections, you might need a patching compound specifically designed for chimney crowns. Follow product instructions meticulously for application and curing times.
-
Examine the Mortar Joints — Check for crumbling, missing, or porous mortar
- What to do: Starting from the top, systematically inspect all the mortar joints between the bricks. Look for crumbling, loose, or missing mortar. Also, check for efflorescence (white, powdery residue), which indicates water penetration.
- If you find damaged mortar (Tuckpointing): Use a cold chisel and hammer to carefully remove loose or crumbling mortar to a depth of about 1/2 to 1 inch. Mix new mortar according to manufacturer instructions (Type N or S are common for chimneys). Use a tuckpointing trowel to tightly pack the new mortar into the joints, making sure it's flush with the brick faces. Allow to cure as directed.
- Tools: Cold chisel, hammer, wire brush, tuckpointing trowel, mortar mix, mixing bucket, safety glasses.
- Safety: Wear gloves and eye protection when chiseling and working with mortar.
-
Assess the Flashing — Identify bent, rusted, or poorly sealed flashing
- What to do: Closely examine the metal flashing where the chimney meets the roof. Look for bent, rusted, missing, or loose pieces. Check for gaps where the counter-flashing meets the mortar joints or where sealant has failed. Also, inspect for inadequate overlap between the base and counter-flashing.
- If you find minor issues: Clean any rusted areas with a wire brush. For small gaps or cracks in sealant, thoroughly clean the area and apply a high-quality, exterior-grade polyurethane sealant or flashing cement. Ensure good adhesion.
- If serious damage: Significantly rusted, bent, or missing flashing requires replacement. This is a more involved task that may require removing surrounding shingles. Consider consulting a roofing professional for this if you are not experienced.
-
Check for Missing or Damaged Chimney Cap — Ensure proper coverage of the flue opening
- What to do: Verify that your chimney has a cap, and if so, inspect its condition. Look for rust, holes in the mesh, or detachment from the flue liner.
- If issues found: A missing cap should be installed. A rusted or damaged cap should be replaced. Measure your flue dimensions carefully to get the correct size. Caps are essential for keeping rain, debris, and animals out.
-
Examine for Porous Bricks (Spalling) — Identify deteriorating brickwork itself
- What to do: Look for bricks that are flaking, crumbling, or showing signs of efflorescence. This indicates the bricks themselves are absorbing water.
- If found: While individual spalled bricks can be replaced (a process similar to tuckpointing but replacing the whole brick), widespread spalling suggests a larger moisture problem. After brick replacement, consider applying a breathable silane/siloxane-based masonry water repellent to the entire chimney exterior. This adds a layer of protection without sealing in moisture.
-
Inspect the Soffit and Fascia (External Check) — Rule out other roof leaks
- What to do: While on the roof, cast a glance at the soffit and fascia boards around the general area of the chimney. Look for any signs of water staining, rot, or sagging, which could indicate a roof leak near the chimney but not from the chimney itself.
- If issues found: Depending on the severity, these might be patched with wood filler and painted, or a section might need to be replaced. Ensure proper ventilation in the attic to prevent moisture buildup that leads to rot.
-
Water Test (Controlled Experiment) — Pinpoint the exact leak entry
- What to do: With a helper and a garden hose, systematically wet down sections of the chimney while observing for leaks inside your home (e.g., in the attic or at the ceiling line). Start at the very top (crown and cap), then work your way down to the flashing, wetting each area for several minutes. Observe if the leak starts when a specific section is wet.
- If a leak appears: The area being actively sprayed is likely the source. This targeted approach can help confirm your diagnosis before costly repairs.
- Tools: Garden hose, helper, possibly a flashlight for attic inspection.
- Safety: Ensure your helper can communicate clearly. Do not spray water near electrical components.
-
Internal Inspection (Attic/Firebox) — Verify the extent of damage inside
- What to do: If safe to do so, access your attic or crawl space directly above the fireplace. Look for water stains on the rafters, ceiling joists, or insulation. Inside the firebox, look for drips or puddles. This helps confirm a leak and estimate the extent of interior damage.
- If damage is extensive: Be prepared for repairs that extend beyond the chimney components, such as replacing damaged drywall or insulation.
Common Causes
- Cracked Chimney Crown: The most frequent culprit. The concrete cap at the top protects the brickwork below. Cracks allow water to seep into the masonry, leading to deterioration and leaks.
- Damaged or Improperly Installed Flashing: The metal sheets sealing the chimney-to-roof joint are critical. Rusted, bent, lifted, or poorly sealed flashing allows water to run down the chimney exterior and under the shingles.
- Deteriorated Mortar Joints: Over time, exposure to weather causes mortar to crumble, crack, or become porous. This creates direct pathways for water to penetrate the brickwork, a process known as spalling.
- Missing or Damaged Chimney Cap: While not always the primary cause of a leak into the masonry, a missing or damaged cap allows rain, snow, and debris to fall directly into the flue, often appearing as a leak into the firebox.
- Porous Bricks: Some older or lower-quality bricks can become saturated with water, which then wicks its way through the chimney structure. This is often exacerbated by freeze-thaw cycles.
- Condensation: Less common for direct 'rain' leaks, but excessive internal moisture (e.g., from high-efficiency furnaces venting into an unlined flue) can create condensation that mimics a leak. This usually produces a black, oily stain rather than clear water.
Common Mistakes
- Ignoring the Leak: Hoping a small drip will go away is a recipe for disaster. Small leaks quickly become big, expensive problems involving extensive water damage and mold.
- Relying Solely on Sealant on Flashing: While temporary, simply applying caulk over rusted or lifting flashing rarely provides a long-term fix. The underlying problem of bent or compromised metal needs to be addressed, often by replacement.
- Not Cleaning Surfaces Before Repair: Whether it's the crown for sealant or mortar joints for tuckpointing, failing to thoroughly clean away dirt, loose debris, and efflorescence will result in poor adhesion and a failed repair.
- Using the Wrong Mortar Type: For chimney work, specific mortar types (like Type N or S) are recommended due to their flexibility and weather resistance. Using general-purpose mortar can lead to premature failure.
- Not Checking the Chimney Cap: Overlooking a missing or damaged cap means water will continue to pour directly into the flue, even if other external repairs are made.
- Confusing Roof Leaks with Chimney Leaks: Water can travel. A leak originating from a compromised shingle several feet away can sometimes appear near the chimney inside the house. A thorough roof inspection beyond just the chimney is sometimes necessary.
Cost & Time Breakdown
| Task | DIY Cost | Pro Cost | Time |
|---|---|---|---|
| Inspect and minor crown seal | $20–$50 | Included in inspection / $150–$300 | 30 minutes – 1 hour |
| Tuckpointing (small section) | $30–$80 | $300–$800 | 1–3 hours |
| Flashing repair (minor seal) | $15–$40 | $200–$500 | 30 minutes – 1 hour |
| Chimney cap replacement | $50–$200 | $200–$400+ install | 30 minutes – 1 hour |
| Masonry water repellent | $40–$100 | $300–$1,000 (entire chimney) | 1–2 hours |
| Full flashing replacement | $100–$300 (materials) | $500–$1,500+ | 4–8 hours (pro) |
Tips & Prevention
- Annual Visual Inspection: Make it a habit to visually inspect your chimney from the ground with binoculars once a year. Look for obvious cracks, missing mortar, or damaged flashing. Schedule a professional chimney inspection every 1-2 years.
- Clear Gutters and Downspouts: Ensure gutters around the chimney are always clear. Clogged gutters can cause water to back up and spill over, often directly against the chimney, exacerbating any existing weaknesses.
- Maintain Your Chimney Cap: If you have a cap, check it regularly for rust or damage. If you don't have one, consider installing one to prevent water and critter entry into the flue.
- Apply Masonry Water Repellent: Every 5-10 years, consider applying a breathable silane/siloxane-based water repellent to your chimney. This can significantly reduce water absorption by the bricks and mortar.
- Proper Venting: Ensure all appliances venting through the chimney (especially modern high-efficiency furnaces or water heaters) are correctly lined and that the flue is sized appropriately to prevent excessive condensation, which can lead to acid damage and leaks.
- Address Small Issues Promptly: Don't wait for a small crack in the crown or a minor gap in the flashing to become a major leak. Early intervention is always less costly and time-consuming.
When to Call a Professional
While many minor chimney leaks can be addressed by a DIY-savvy homeowner, there are clear instances when calling a licensed professional is the safest and most effective course of action. If you suspect the leak is due to widespread mortar deterioration (requiring extensive tuckpointing), if the flashing around your chimney needs complete replacement (which often involves roofing work and specialized bending of metal), or if you identify significant structural damage to the chimney masonry, it's time to call in a professional. Additionally, if the leak persists after your attempts at repair, or if you are uncomfortable working at heights on your roof, a certified chimney sweep or a qualified roofing contractor will have the expertise, equipment, and insurance to diagnose and fix the problem safely and correctly. They can often spot subtle issues that an untrained eye might miss, such as internal flue liner problems or complex flashing details that are beyond the scope of a homeowner.
Related Articles
Keep troubleshooting with these hand-picked guides from FixlyGuide:
- The Secret Culprit Behind Your Leaky Chimney (It’s Not Always the Obvious Flashing) — Discover the often-overlooked causes of chimney leaks during rain and how to tackle them with effective DIY solutions and prevention tips.
- The Secret Culprit Behind Your Leaky Chimney (It's Not Always the Roof) — Discover the often-overlooked causes of a leaky chimney during rain and how to fix them, from flashing issues to masonry problems.
- The Secret Culprit Behind Your Leaky Chimney (It's Not Always the Obvious Fix) — Discover the often-overlooked causes of a leaky chimney during rain, beyond just a faulty cap, and learn practical steps to fix it.
- The 4 Hidden Reasons Your Chimney Leaks During Rain (And the $50 Fix) — A leaky chimney during rain can signify several underlying issues, from a damaged chimney cap to degraded flashing, leading to significant…
- Why Your Chimney Leaks in the Rain (It's Not Always the Roof) — Discover the hidden causes of a leaky chimney during rain, from flashing failures to damaged crowns, and how to fix them for good.
- The #1 Gutter Mistake That Causes Overflow (It's Not Clogs!) — Discover the often-overlooked culprit behind overflowing gutters during heavy rain and learn the surprising, easy fix most homeowners miss.
Get the print-ready PDF of this guide
A clean, ad-free, printable version you can keep on your phone or pin to the workshop wall. We'll also send occasional weekly tips matched to your home situation.
- Print-optimized layout
- Tools, materials & every step included
- Unsubscribe anytime
Frequently asked questions
How do I know if my chimney leak is from the crown or flashing?+
The best way to differentiate is a controlled water test. Spray water directly onto the chimney crown first, observing for leaks. If no leak, then spray the flashing area. If a leak appears, the sprayed section is likely the culprit. Also, visually inspect for obvious cracks (crown) or bent/missing metal (flashing).
Can a chimney leak fix itself?+
No, absolutely not. Chimney leaks almost always worsen over time, leading to more extensive and costly damage to your chimney, roof, and interior. Addressing the issue promptly is crucial.
What kind of sealant should I use for chimney crown cracks?+
Use a flexible, exterior-grade, 100% silicone or polyurethane sealant specifically designed for masonry or chimney crowns. Avoid asphalt-based or latex sealants as they may not withstand temperature fluctuations and weather exposure as effectively.
Is it safe to go on my roof to inspect the chimney?+
Working on a roof can be dangerous. Only proceed if you are comfortable with heights, have a stable, properly secured ladder, wear non-slip shoes, and ideally, have a helper present. If there's any doubt, or if your roof is steep, always call a professional.
How much does it cost to fix a leaky chimney professionally?+
Professional repair costs vary widely depending on the cause and extent of the damage. Minor crown repairs might be a few hundred dollars, while full flashing replacement or extensive tuckpointing can range from $500 to over $1,500. Getting multiple quotes is advisable.


Discussion
Loading comments…