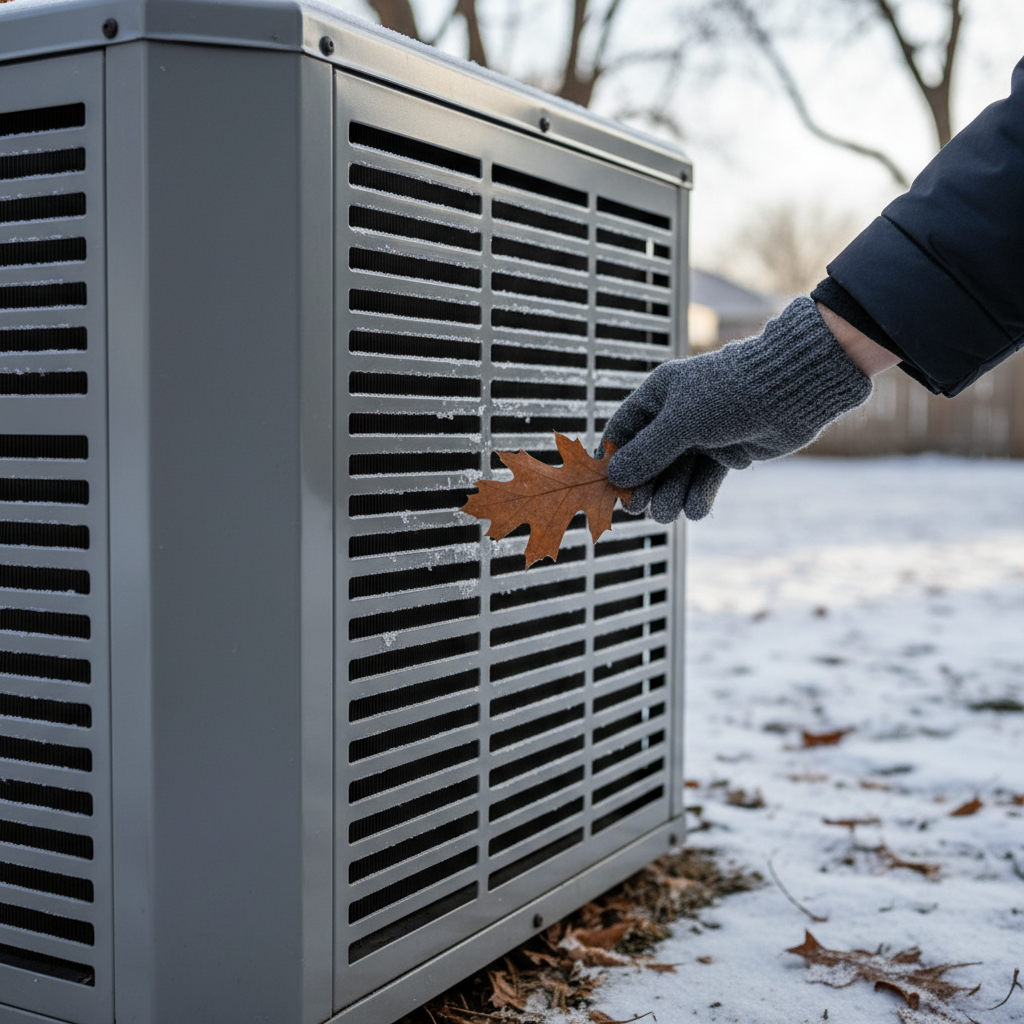
- Safety First: Always turn off power to the outdoor unit at the service disconnect switch (usually on the wall near the unit) and at your main electrical panel before working on the unit. This prevents accidental startup.
- Visually inspect the outdoor coil for excessive dirt, leaves, grass clippings, or other debris. Use a soft brush or a garden hose (without a high-pressure nozzle) to gently clean the fins. Ensure not to bend delicate fins.
- Remove any snow, ice, or vegetation within 2 feet of the unit on all sides. Clear snow from the top of the unit as well. A snow shovel or broom works best; avoid scraping the unit directly.
- If this doesn't work: If the coil is heavily impacted with grime and dirt, a professional cleaning might be necessary. They have specialized coil cleaners that won't damage the unit.
HVAC · High energy usage
| Project category | HVAC |
|---|---|
| Problem type | High energy usage |
| Trade required | HVAC |
| Urgency | Planned project |
| Safety risk | Low safety risk |
| DIY suitability | DIY for experienced homeowners |
| Cost category | High cost |
| Typical timeline | Assessment within weeks; replacement planned off-season |
| Contractor type | Licensed HVAC technician |
Repair option
Duct sealing, insulation, and a tune-up before touching the equipment.
Replacement option
High-efficiency replacement sized by a load calculation, not a rule of thumb.
Common causes
- Aging, low-efficiency equipment
- Leaking ducts losing conditioned air
- Insufficient attic insulation
- Oversized system short-cycling
Relevant tools:project cost estimatorrepair or replace
Published July 22, 2026Last updated August 17, 2026
Tools & materials you'll need
Affiliate linksAs an Amazon Associate FixlyGuide earns from qualifying purchases — at no extra cost to you. Prices and availability are accurate as of publication and subject to change.
Quick Answer
When outdoor temperatures plummet below 40°F (~4°C), many homeowners notice their heat pump struggling to maintain their desired indoor warmth. This isn't always a sign of a major breakdown; often, it's related to the unit's normal defrost cycles, a dirty outdoor coil, or minor electrical issues preventing auxiliary heat from engaging. Simple diagnostic steps like checking for ice accumulation, ensuring clear airflow around the outdoor unit, and verifying thermostat settings can often resolve these performance dips, potentially saving an expensive service call.
The Problem
Your heat pump is designed to efficiently transfer heat, not generate it, making it an excellent choice for moderate climates. However, as winter truly sets in and temperatures consistently dip below 40°F (4°C), you might notice your home feeling cooler than usual, or the heat pump running constantly but failing to reach the thermostat setting. This is a common pain point for homeowners, often leading to discomfort and increased energy bills as backup heating elements (auxiliary heat) kick in more frequently. The core issue lies in the physics of heat transfer at lower ambient temperatures and potential underlying maintenance neglect or minor component malfunctions that exacerbate the problem.
How It Works
A heat pump operates by moving heat from one place to another, rather than burning fuel to create it. In heating mode, the outdoor coil, even in cold air, absorbs latent heat from the surroundings. A refrigerant circulates through the system, absorbing this heat in the outdoor coil and then releasing it into your home via the indoor coil. This process is highly efficient until outdoor temperatures fall significantly. Below roughly 40°F (4°C), several factors come into play.
Firstly, the amount of heat available in the cold outdoor air diminishes, forcing the heat pump to work harder to extract what little heat exists. Secondly, and more critically, as the outdoor coil extracts heat from cold, moist air, moisture in the air can freeze onto the coil, forming a layer of ice. This ice acts as an insulator, severely impeding the coil's ability to absorb heat. To combat this, heat pumps enter a 'defrost cycle.' During defrost, the unit briefly reverses its operation, sending hot refrigerant through the outdoor coil to melt the ice. Simultaneously, the outdoor fan typically shuts off to accelerate melting, and the auxiliary electric heating strips (or a furnace, in a dual-fuel system) engage to prevent cold air from blowing into your home.
If the defrost system malfunctions, or if the outdoor unit is excessively dirty, ice can accumulate too frequently or not melt completely, leading to a significant drop in heating performance. Additionally, the reversing valve, which changes the refrigerant flow direction between heating and cooling, can sometimes get stuck, preventing the unit from properly entering heating mode. Finally, if the auxiliary heat isn't activating when needed—whether due to a thermostat setting, a tripped breaker, or a faulty heating element—the heat pump alone simply can't keep up in very cold weather.
Step-by-Step Fix
Here are three common issues and their DIY fixes to get your heat pump back to peak performance in cold weather.
1. Clear and Clean the Outdoor Unit — Obstructions and dirt are primary heat stealers.
- Safety First: Always turn off power to the outdoor unit at the service disconnect switch (usually on the wall near the unit) and at your main electrical panel before working on the unit. This prevents accidental startup.
- Visually inspect the outdoor coil for excessive dirt, leaves, grass clippings, or other debris. Use a soft brush or a garden hose (without a high-pressure nozzle) to gently clean the fins. Ensure not to bend delicate fins.
- Remove any snow, ice, or vegetation within 2 feet of the unit on all sides. Clear snow from the top of the unit as well. A snow shovel or broom works best; avoid scraping the unit directly.
- If this doesn't work: If the coil is heavily impacted with grime and dirt, a professional cleaning might be necessary. They have specialized coil cleaners that won't damage the unit.
2. Diagnose and Address Ice Buildup (Defrost System Check) — A malfunctioning defrost system is a common culprit.
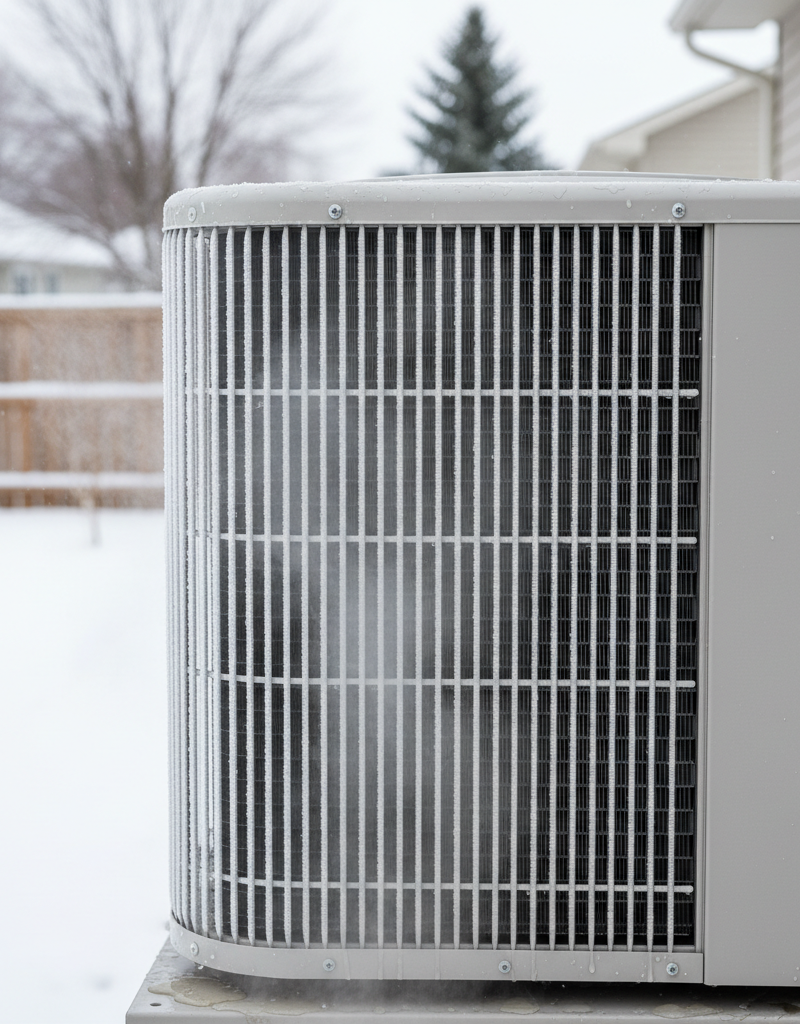
- Understanding Normal Defrost: In cold, icy conditions, it's normal to see a light layer of frost or ice on the outdoor coil. The heat pump should periodically go into defrost mode (typically every 30-90 minutes for 5-15 minutes). During this time, the outdoor fan will stop, and you might see steam rising from the unit as ice melts. Water will drain from the bottom of the unit. This is normal.
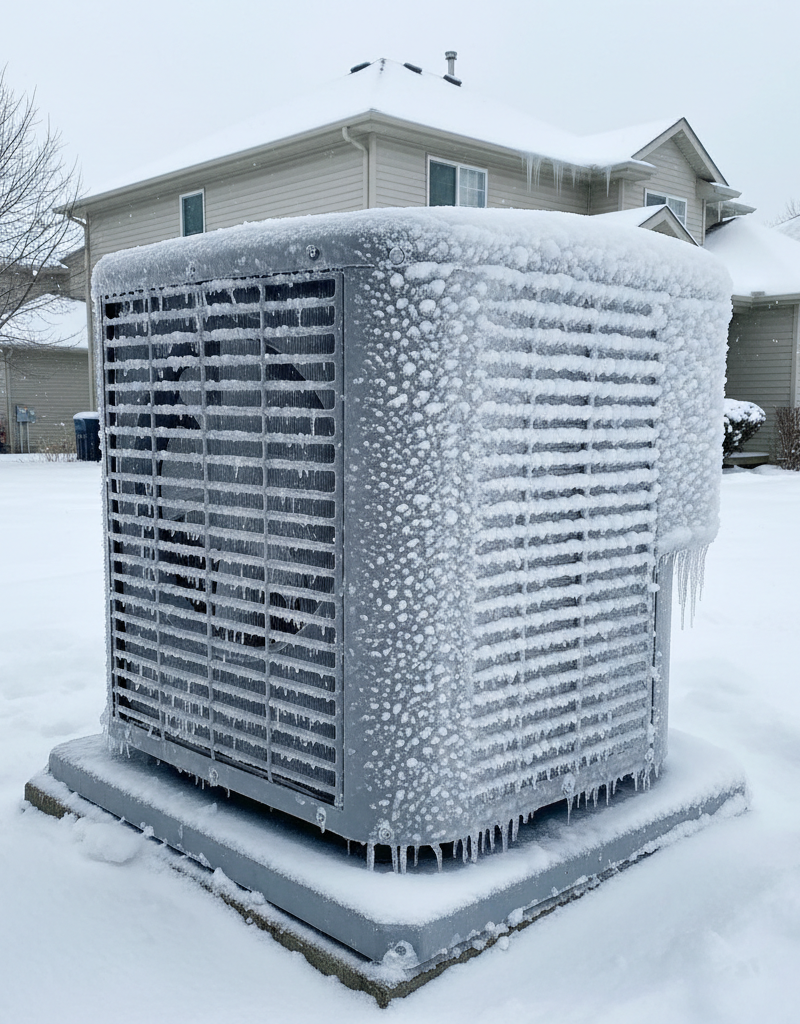
- When It's Not Normal: If the entire outdoor coil (or a significant portion) is covered in a thick layer of ice, resembling a block of ice, or if ice persists for more than an hour, your defrost system might be failing.
- Temporary Thaw: You can gently pour warm (not hot!) water over the iced coil to temporarily melt the ice. Do not use sharp objects, hot water, or a heat gun, as these can damage the coil.
- Check Defrost Sensor & Board: The defrost sensor (a small probe usually clipped to the outdoor coil) and the defrost control board are critical. While replacing these is typically a professional job requiring electrical knowledge, you can visually inspect for obvious physical damage (e.g., loose wires, corroded contacts) after ensuring power is off.
- If this doesn't work: A continuously iced-over coil despite temporary thawing indicates a definite defrost system issue (sensor, board, or reversing valve) that requires a qualified HVAC technician.
3. Verify Auxiliary Heat Functionality — Your backup heat is crucial when the air handler heat pump alone isn't enough.
- Thermostat Settings: Many smart thermostats have settings that control when auxiliary heat is allowed to engage. Ensure your thermostat is set to 'Auto' or 'Heat' and that the 'Emergency Heat' setting is only used for actual emergencies (as it's far less efficient) and not as a primary heating mode.
- Force Auxiliary Heat: On your thermostat, raise the set temperature significantly (e.g., 5-10 degrees above ambient). Listen for a different, often louder, 'whooshing' sound coming from your indoor unit/air handler; this indicates the electric heating strips are likely engaging. You should also feel warmer air from the vents almost immediately.
- Check Breakers: Go to your main electrical panel. Look for breakers labeled 'Heat Pump' or specificially 'Auxiliary Heat' or 'Emergency Heat.' These are often 30-60 amp double-pole breakers. If any are tripped (usually midway between ON and OFF), firmly flip them all the way to OFF, then back to ON. Tripped auxiliary heat breakers are common when the system is working hard.
- Listen for Contactor: If you suspect an issue with the auxiliary heat elements themselves, and you're comfortable and safety-conscious around electrical components (with power OFF!), you can very carefully check the auxiliary heat sequencer/contactor in the indoor air handler. A click should be heard when auxiliary heat is called for. If you are unsure or uncomfortable, call a professional.
- If this doesn't work: If auxiliary heat isn't engaging despite correct thermostat settings and untripped breakers, the heating elements or their sequencers/relays might be faulty, requiring a professional diagnosis and repair.
Common Causes
- Dirty Outdoor Coil: Reduces heat absorption, leading to inefficiency and more frequent, less effective defrost cycles.
- Malfunctioning Defrost System: A bad defrost sensor, control board, or reversing valve can cause persistent ice buildup on the outdoor coil.
- Low Refrigerant Charge: While less common as a cold-weather-specific issues, low refrigerant exacerbates all heating problems and can lead to coil icing.
- Stuck Reversing Valve: Prevents the heat pump from properly switching into heating mode or defrost mode.
- Auxiliary Heat Failure: If the backup electric strips or furnace aren't engaging, the heat pump alone can't keep up in very cold temperatures.
- Incorrect Thermostat Settings: Thermostat programmed to prevent auxiliary heat from kicking in, or set to 'Emergency Heat' when it shouldn't be.
- Oversized or Undersized Unit: An improperly sized heat pump will struggle to maintain comfort, especially during extreme temperatures.
Common Mistakes
- Ignoring a Frozen Outdoor Unit: Thinking a thick layer of ice is normal. While some frost is okay, significant ice buildup always indicates a problem that needs addressing.
- Using Sharp Objects to Remove Ice: Scraping or chipping ice can easily damage the delicate aluminum fins and refrigerant lines, leading to very costly repairs.
- Running on 'Emergency Heat' Continuously: Emergency heat (auxiliary heat) is very energy-intensive. Using it as your primary heat source will skyrocket your electricity bills.
- Setting Thermostat Too High in Cold Weather: Constantly calling for a very high temperature when it's frigid outside forces the heat pump to run inefficiently and overuse expensive auxiliary heat.
- Neglecting Filter Changes: A dirty indoor air filter restricts airflow, making the entire system work harder and reducing overall efficiency, impacting heating performance.
- Forgetting to Clear Unit Surroundings: Allowing snow, leaves, or shrubs to block airflow around the outdoor unit significantly reduces its efficiency and can promote icing.
Cost & Time Breakdown
| Task | DIY cost | Pro cost | Time |
|---|---|---|---|
| Clean Outdoor Unit | $0–$10 | $100–$250 | 15–30 min |
| Check Breakers/Thermostat | $0 | $75–$150 (service) | 5–10 min |
| Thaw Ice (Temporary) | $0 | N/A | 15–30 min |
| Defrost Sensor Replacement | $30–$80 | $200–$400 | 1–2 hours |
| Auxiliary Heat Element Repair | $100–$300 (part) | $300–$700 | 2–4 hours |
| Reversing Valve Replacement | N/A | $600–$1,200 | 4–8 hours |
Tips & Prevention
- Regular Coil Cleaning: Annually clean your outdoor coil, especially before the heating season. Keeping it free of debris ensures optimal heat absorption.
- Maintain Clearances: Ensure there's at least 2 feet of clear space around your outdoor unit at all times, free from snow, ice, leaves, and vegetation.
- Air Filter Replacement: Change your indoor air filter every 1-3 months, or more frequently if you have pets or allergies. A clean filter ensures good airflow.
- Annual Professional Tune-up: Schedule a professional HVAC inspection and tune-up every fall. A technician can identify potential issues (like a failing defrost sensor or low refrigerant) before they become major problems.
- Thermostat Programming: Optimize your thermostat for winter. Use setback temperatures only if the recovery period isn't too long, minimizing reliance on auxiliary heat. Program it to let the heat pump work without constantly calling for a large temperature swing.
- Check Condensate Drain: In cooling mode, the indoor coil produces condensate. A clogged drain line can cause issues. While less directly related to heating in cold weather, it's good practice to ensure it's clear during milder seasons.
When to Call a Professional
While some checks and minor cleanings are homeowner-friendly, several issues with a heat pump struggling in cold weather absolutely warrant a professional HVAC technician. If your outdoor unit is consistently covered in a thick block of ice that doesn't melt, even after temporary thawing efforts, it signals a deeper problem with the defrost system—be it a faulty defrost sensor, a control board malfunction, or a stuck reversing valve. These components require specialized knowledge, diagnostic tools, and often, specific refrigerant handling certifications. Likewise, if your auxiliary heat isn't engaging despite checking breakers and thermostat settings, an electrician or HVAC tech should diagnose the heating elements or sequencers. Any issues involving refrigerant leaks, loud unusual noises coming from the unit, or if the heat pump simply isn't blowing any warm air at all, are clear indicators to stop DIY efforts and call a licensed professional to ensure safe and correct repair.
Related Articles
Keep troubleshooting with these hand-picked guides from FixlyGuide:
- The #1 Mistake Homeowners Make When Their Heat Pump Stops Heating in Winter — Discover the most common reason your heat pump struggles in cold weather and how a simple homeowner fix can restore warmth to your home.
- Why Your Heat Pump Auxiliary Heat Won't Turn Off — Discover why your heat pump's auxiliary heat keeps running, driving up your energy bills. Learn to troubleshoot common issues and know when…
- The #1 Mistake Homeowners Make When Heat Pumps Stop Heating in Winter — Discover the crucial mistake most homeowners make when their heat pump struggles in cold weather and how to fix it, potentially saving hund…
- The $5 Part That Stops Your Dryer From Heating (And How to Replace It in 30 Min) — Discover the most common, inexpensive culprit behind a dryer not heating up and learn how to quickly diagnose and replace it yourself.
- The #1 Reason Your AC Blows Warm Air (And It's Not What You Think) — Discover the most common and often overlooked reason your AC might be blowing warm air, and how a simple capacitor fix can restore cool air.
- The Invisible War Beneath Your Sidewalk: 3 Ways Tree Roots Cause Havoc — Discover how tree roots cause sidewalk damage and learn actionable DIY and professional solutions to restore safety and appearance.
Should you do this yourself?
Answer five quick questions before you start. Safety outranks savings every time.
Your experience with work like this
How high do you have to work?
Does the job involve any of these?
Will it need a permit?
Specialty tools
Free and instant. Educational guidance only — not a quote, inspection, or professional diagnosis.
Estimate your own project cost
National averages are a starting point. Enter your details for a range that fits your house.
HVAC replacement cost
- Equipment$2,200 – $3,800
- Installation labor$1,200 – $2,500
Always insist on a Manual J load calculation — sq-ft sizing is only a rough check. Federal heat-pump rebates may reduce cost significantly.
Educational estimate only — always confirm with written local bids.
What should this project cost?
Enter your project details for a realistic cost range before you call anyone.
Service calls and common repairs run $150–$900; full system replacement typically $6,000–$12,000.
- Regional adjustment
- National average
- Labor share (typical)
- ~$1,935
- Quotes to collect
- 3 written estimates
Educational estimate based on national averages — not a binding quote. Always confirm with written local estimates.
Fixly Project Decision Box
- DIY difficulty
- Advanced
- Estimated time
- Homeowner checks 20–30 minutes
- Cost level
- Moderate
Main tools / materials
- Clean air filter
- Garden hose for condenser coils
- Shop vac for the condensate line
When to stop and call a pro
- Burning smell, smoke, or a tripping breaker
- Refrigerant lines iced over or hissing
- Any work inside the sealed refrigerant circuit (EPA-licensed only)
- Gas smell near a furnace — leave and call the utility
Need professional help?
Find an HVAC Pro Near YouBefore you start
Check the difficulty, permits, and safety risk — then decide whether to call a pro.
Free, no signup required. Estimates are educational guidance, not a quote or an inspection.
Frequently asked questions
Why does my heat pump blow cold air sometimes in winter?+
During very cold weather, your heat pump may go into a defrost cycle to melt ice off the outdoor coil. During this time, it might circulate cooler air or activate auxiliary heat to compensate. If it's constantly blowing cold air, there might be a problem with the reversing valve or a low refrigerant charge.
Is it normal for a heat pump to have ice on it?+
A light layer of frost or thin ice on the outdoor coil is normal in cold, humid conditions, especially before a defrost cycle. However, a thick block of ice covering the entire coil is not normal and indicates a problem with the defrost system or airflow.
How often should my heat pump go into defrost mode?+
The frequency of defrost cycles varies depending on outdoor temperature and humidity, but typically a heat pump will defrost every 30 to 90 minutes for about 5 to 15 minutes in icy conditions. Seeing steam rise and water drain during this time is normal.
What's the difference between 'Heat' and 'Emergency Heat' on my thermostat?+
'Heat' uses your heat pump as the primary heating source, which is energy-efficient. 'Emergency Heat' bypasses the heat pump and solely uses your auxiliary electric heating strips (or furnace), which is much less efficient and should only be used as a last resort when the heat pump isn't working at all.
Can a dirty air filter affect my heat pump's heating ability?+
Yes, absolutely. A dirty air filter restricts airflow through your indoor unit, making the entire system work harder. This reduces overall efficiency, puts strain on components, and can lead to diminished heating performance and even frozen coils due to lack of airflow.
Discussion
Loading comments…