Tools & materials you'll need
Affiliate linksAs an Amazon Associate FixlyGuide earns from qualifying purchases — at no extra cost to you. Prices and availability are accurate as of publication and subject to change.
Quick Answer
Many homeowners only discover a roof leak when water is actively dripping into their living space, but by then, significant damage has often occurred. The key to preventing expensive repairs is to recognize the more subtle, hidden indicators of a leak before it becomes a crisis. These include faint, unexplainable discoloration on ceilings or walls, compromised roof flashing around chimneys or vents, and the telltale musty odor or visible mold growth in your attic, even without obvious water stains. Proactive inspection and a targeted, early intervention can often mitigate these issues for minimal cost and effort.
The Problem
Roof leaks are insidious. They start small, often in an unnoticed or hard-to-reach area, and silently wreak havoc. What begins as a pinhole breach can, over time, saturate insulation, rot structural wood, foster mold and mildew growth, damage drywall and paint, and even create electrical hazards. The traditional image of a bucket catching drips is usually the endpoint of a much longer, more damaging process. Homeowners unknowingly allow these problems to escalate by not knowing what to look for, turning a minor repair into a major, costly restoration project involving thousands of dollars and weeks of disruption. The real problem isn't just the water; it's the delayed detection that amplifies the consequences.
How It Works
A roof's primary function is to shed water. It achieves this through a carefully integrated system of shingles, underlayment, flashing, and proper drainage. When rain falls, it's designed to flow down the shingle surfaces and off the edge of the roof into gutters. However, several weak points exist where this system can fail.
Shingles, over time, can crack, curl, or lose granules due to UV exposure, hail, or strong winds, creating small openings. The underlayment beneath the shingles provides a secondary barrier, but it can also degrade or be breached. Crucially, the most common areas for leaks are penetrations: chimneys, vent pipes, skylights, and valleys where two roof planes meet. These areas rely on flashing—thin sheets of metal or rubber—to create a watertight seal. If flashing is improperly installed, tears, lifts, or corrodes, water can bypass the protective layers and seep directly into the roof decking, attic, and eventually, the living space below.
Once water enters the roof structure, it doesn't necessarily drip straight down. It often travels horizontally along rafters, joists, or the underside of the roof deck until it finds a low point or a seam in a ceiling panel, sometimes emerging a significant distance from the actual entry point. This migratory path makes diagnosing the exact source of a leak challenging without a thorough inspection. The constant presence of moisture then creates an ideal environment for mold and rot, turning a simple water intrusion into a complex structural and health hazard.
Step-by-Step Fix
Addressing a roof leak effectively requires careful inspection and targeted repair. This guide focuses on identifying and mitigating early signs, potentially preventing escalation.
-
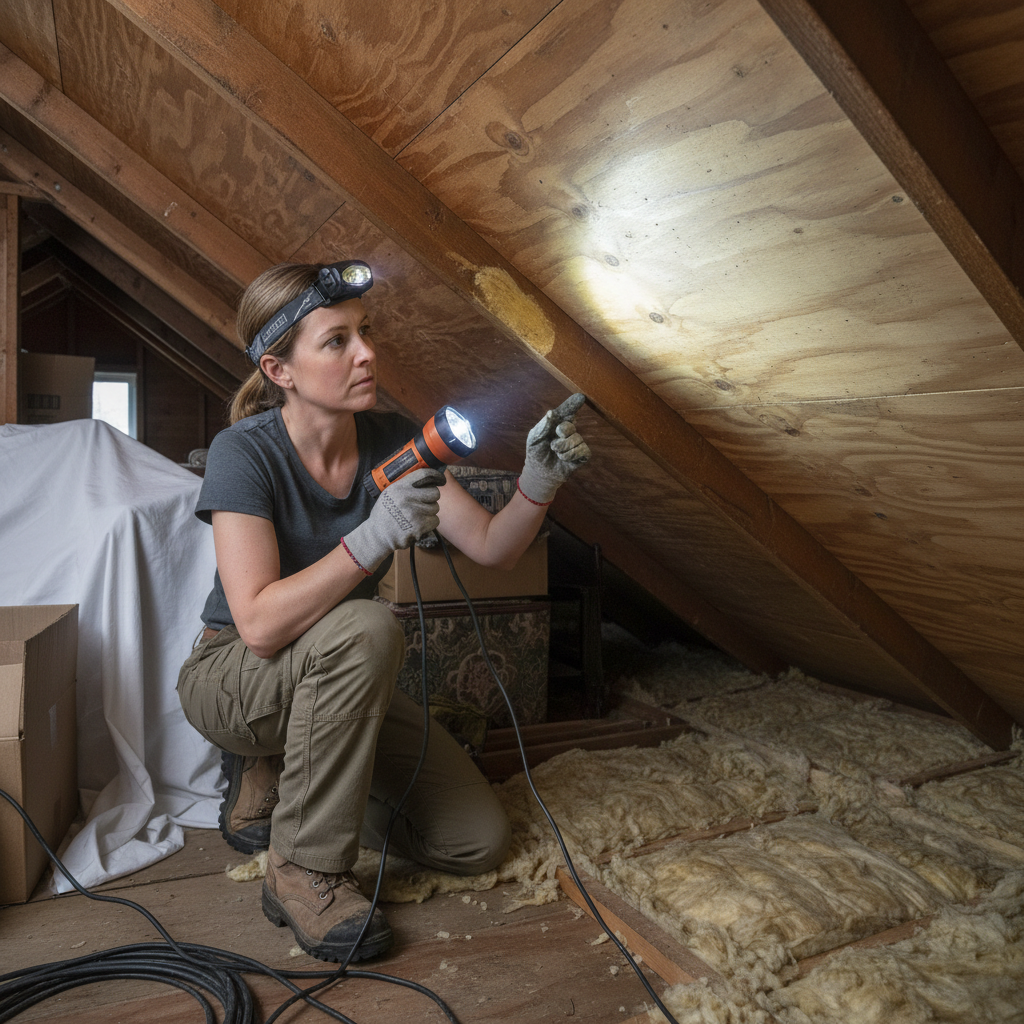
Safety First – Inspect the Interior: Before anything else, prioritize safety. When inspecting an attic, always wear a headlamp, sturdy shoes, and long sleeves/pants to avoid insulation irritation and accidental scrapes. Bring a reliable flashlight, even in daylight, to illuminate dark corners. Be mindful of exposed nails, wires, and unstable items. If your attic has limited or no flooring, step only on joists. If walking on a roof, always use a safety harness and have a spotter if possible, particularly on sloped roofs. Never go on a wet or icy roof. If you're uncomfortable with heights or attic exploration, call a professional.
-
The Faint Stain Detective – Identify Subtle Discoloration: Begin by systematically examining ceilings and walls in rooms directly below attic spaces. Look for faint, yellowish, light brown, or even greyish discoloration. These aren't always dark, obvious water rings. Sometimes, they present as slight ripples in drywall or peeling paint spots without a visible water stain. Use a strong flashlight held at an angle to highlight textures and slight variations. Mark any suspicious areas with a pencil or painter's tape to monitor them.
-
Attic Expedition – Seek Moisture and Mold Below the Deck: Arm yourself with a powerful flashlight and head into the attic on a dry, sunny day. Scan the underside of the roof deck (the plywood or OSB sheathing). Look for water stains, dark spots, or any areas that appear darker than the surrounding wood. Pay close attention to areas around vent pipes, chimneys, skylights, and valleys. Check insulation for dampness, compression, or a musty smell. Use the back of your hand to feel for subtle moisture on wooden surfaces. If you see visible mold, do not disturb it, as this can release spores. Photograph anything suspicious.
-
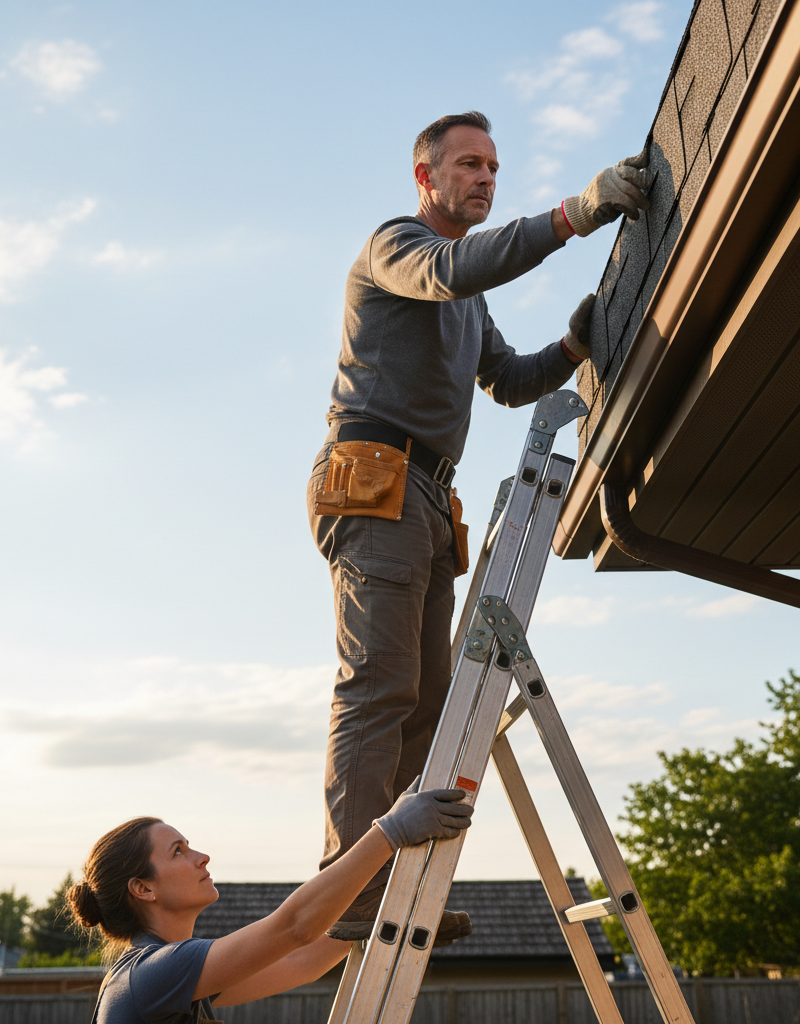
Flashing Faultline – Examine Exterior Penetrations: From the ground with binoculars, or safely from a ladder (with a spotter), inspect the flashing around any roof penetrations: chimney, roof vents, exhaust fans, and skylights. Look for bent, rusted, or missing pieces of flashing. Check the sealant around these areas. Is it cracked, peeling, or missing? Even small gaps can allow water to enter. If you can safely reach them, gently press on the flashing to see if it's loose.
-
Gutter & Downspout Check – Ensure Proper Drainage: Clogged gutters can cause water to back up and overflow, sometimes seeping under shingles at the eaves. Ensure gutters are clear of debris and pitched correctly towards downspouts. Confirm downspouts are securely attached and direct water away from the foundation. While not a direct roof leak, poor drainage can exacerbate or mimic roof leak symptoms.
-
The Hose Test (Carefully!) – Simulate Rain to Pinpoint: This is a diagnostic step for pinpointing, not for initial general inspection. Always have a helper. One person is in the attic with a flashlight, the other on the roof with a garden hose. Start at the lowest possible point on the roof (e.g., near the eaves) above where the internal stain was found. Apply water in a small, controlled area for a few minutes. Communicate with your helper. Slowly move the water stream up the roof, section by section. The moment the helper sees a drip or moisture in the attic, you've located the approximate entry point. Never spray water directly under shingles or forcefully, as this can create new leaks.
-
Temporary Patch – Stop the Immediate Threat: For minor flashing issues or small shingle cracks, a temporary repair can buy you time. Clean the area thoroughly. For small cracks in shingles, apply a generous bead of roofing cement or patch compound, spreading it slightly beyond the crack. For minor flashing separations, clean the area, then apply a high-quality, exterior-grade silicone sealant or flashing cement. These are not permanent solutions but can prevent further damage immediately. For more extensive damage, consult a pro.
-
Post-Repair Monitoring – Confirm Effectiveness: After any repair, especially a temporary one, regularly check the problem area during the next several rainfalls. Continue to monitor the interior ceiling/wall stain. If the stain grows or reappears, the leak is likely still active or coming from a different source.
Common Causes
- Damaged or Missing Shingles: Age, strong winds, hail, or even foot traffic can crack, curl, or completely remove shingles, exposing the underlayment to water.
- Faulty or Deteriorated Flashing: This is the number one culprit. Flashing around chimneys, skylights, vents, and in roof valleys can rust, crack, bend, or become dislodged over time or due to improper installation, creating direct pathways for water.
- Clogged Gutters and Downspouts: When gutters overflow, water can back up under the eave shingles, saturating the fascia board, and eventually leading to leaks into the attic or walls.
- Ice Dams: In cold climates, melting snow can refreeze at colder roof edges, forming ice dams that prevent subsequent meltwater from draining. This water then backs up under shingles and into the home.
- Improperly Sealed Roof Penetrations: Anything that goes through your roof (e.g., satellite dishes, antenna mounts, solar panel mounts) can be a source if not properly sealed during installation or if the sealant deteriorates.
- Old Age and Wear: Roofing materials have a lifespan. Beyond their expected service life, shingles, underlayment, and flashing simply degrade, becoming brittle and less effective at shedding water.
- Ventilation Issues: Poor attic ventilation can lead to excessive heat or moisture buildup, which can prematurely age roofing materials or cause condensation issues that mimic leaks.
Common Mistakes
- Ignoring Subtle Signs: Many homeowners wait for a drip, missing the faint discoloration or musty smell that indicates an early, easier-to-fix leak. Instead: Act on the first hint of an issue.
- Patching Without Pinpointing: Applying a patch to an interior stain without finding the actual roof entry point is a wasted effort. Water travels, so the stain isn't always directly below the leak. Instead: Methodically trace the water's path back to the roof using the hose test or careful inspection.
- DIY High-Risk Roof Work: Climbing on a steep, high, or damaged roof without proper safety equipment is extremely dangerous and can lead to serious injury. Instead: If uncomfortable or unsure, always call a licensed professional, especially for multi-story homes or complex rooflines.
- Using the Wrong Sealants or Techniques: Applying standard caulk instead of roofing cement or attempting to patch large sections of damaged shingles without proper tools/knowledge won't last and can worsen the problem. Instead: Use products specifically designed for roofing repairs and follow manufacturer instructions. Understand that temporary patches are just that — temporary.
- Neglecting Gutter Maintenance: Assuming gutters aren't related to roof leaks is a common oversight. Clogged gutters are a significant contributor to eave-related water intrusion. Instead: Clean gutters at least twice a year, especially in autumn after leaves fall.
- Skipping Professional Inspections: Even with DIY vigilance, a professional can spot issues you might miss, especially on complex roofs. Instead: Consider a professional roof inspection every 3-5 years, or after a severe storm, even if you don't suspect a leak.
Cost & Time Breakdown
| Task | DIY Cost | Pro Cost | Time |
|---|---|---|---|
| Interior Stain Inspection | $0 | $100–$250 | 15–30 min |
| Attic Inspection (Mold/Moisture) | $0 | Part of roof inspection | 30–60 min |
| Exterior Flashing Visual Check | $0 (binoculars) | Part of roof inspection | 15–30 min |
| Gutter Cleaning/Inspection | $0–$20 (tools) | $75–$200 | 30–60 min |
| Hose Test (with helper) | $0 | Part of Leak Detection Svc | 1–2 hours |
| Temporary Patch (minor shingle/flashing) | $10–$30 | NA | 30–60 min |
Tips & Prevention
- Annual Visual Check: At least once a year, preferably in spring or fall, perform a ground-level visual inspection of your roof with binoculars. Look for missing, cracked, or curling shingles, damaged flashing, and excess granule loss in your gutters.
- Keep Gutters Clear: Clean your gutters and downspouts twice a year to ensure proper water drainage. Clogged gutters are a leading cause of fascia rot and can contribute to roof eave leaks.
- Trim Overhanging Branches: Trees brushing against your roof can abrade shingles over time, introduce moisture, and drop debris that clogs gutters. Keep branches trimmed back at least 6-10 feet.
- Check Attic Ventilation: Ensure your attic is properly ventilated year-round. Good ventilation prevents excessive heat buildup in summer (which can cook shingles) and moisture accumulation in winter (which can lead to condensation mistaken for leaks).
- Monitor Energy Bills: Unexplained spikes in heating or cooling costs can sometimes indicate damaged insulation due to a undetected leak, reducing your home's thermal efficiency.
- Regular Professional Inspections: Consider a professional roof inspection every 3-5 years, or after any major storm (hail, high winds). Professionals can spot subtle issues before they become major problems and advise on your roof's remaining lifespan.
When to Call a Professional
If you discover widespread mold in your attic, extensive water staining across multiple rafters, or significant structural damage to the roof decking, it's time to call a professional. Serious leaks, especially those involving the main structural components of your roof or affecting electrical wiring, require immediate expert attention. If you're uncomfortable identifying the leak source safely, or if the repair involves working on a steep, high, or damaged roof, a licensed and insured roofing contractor is essential. Attempting complex roof repairs without proper experience and safety equipment can lead to further damage, personal injury, or voided warranties. A professional can accurately diagnose the source, recommend the most effective long-term repair, and ensure the work is done safely and to code, often at a lower overall cost than repeated DIY attempts that fail.
Related Articles
Keep troubleshooting with these hand-picked guides from FixlyGuide:
- The One Hidden Sign of a Roof Leak Most Homeowners Miss (And the $10 Fix) — Catching a roof leak early can save thousands in repairs. Learn the elusive signs and a simple, effective fix before minor issues become ma…
- The $5 Single-Handle Faucet Fix Most Homeowners Ignore (And Pros Charge $200 For) — A single-handle leaky faucet can often be fixed with a simple, inexpensive DIY repair, saving you hundreds on a plumber.
- The Surprising Culprit Behind Your Refrigerator's Water Leak (It's Not Always the Ice Maker) — Discover the most common, often overlooked reason your refrigerator is leaking water and how to fix it with simple steps.
- The 4 Hidden Reasons Your Chimney Leaks During Rain (And the $50 Fix) — A leaky chimney during rain can signify several underlying issues, from a damaged chimney cap to degraded flashing, leading to significant…
- The #1 Overlooked Reason Your Chimney Leaks (It Rots Your Roof!) — Discover the surprising, often-missed culprit behind your leaky chimney and how this common issue can silently damage your home.
- The 9 Sneaky Signs Your Roof Is Failing (And How to Spot Them From the Ground) — Learn to spot critical signs of roof damage from the safety of the ground, potentially saving thousands in repairs.
Get the print-ready PDF of this guide
A clean, ad-free, printable version you can keep on your phone or pin to the workshop wall. Free with a FixlyGuide account.
- Print-optimized layout
- Tools, materials & every step included
- Saved to your account
Frequently asked questions
How soon do I need to fix a small roof leak?+
Even a small roof leak should be addressed immediately. What seems minor can quickly lead to extensive damage, including mold growth, rotting wood, and compromised insulation, costing significantly more to repair if left unattended for even a few weeks.
Can I temporarily stop a roof leak myself?+
For very minor leaks, like a small crack in a shingle or a tiny gap in flashing, you can apply roofing cement or a suitable sealant as a temporary measure. However, this is not a permanent fix and you should plan for a proper repair or professional assessment as soon as possible.
What's the most common cause of roof leaks?+
The most common causes of roof leaks are issues with flashing around chimneys, vents, and skylights, followed by damaged or missing shingles due to age, weather, or impact. Poor attic ventilation and clogged gutters are also frequent culprits.
How often should I inspect my roof for leaks?+
It's advisable to perform a visual inspection of your roof from the ground with binoculars at least annually, preferably in the spring and fall. A more thorough attic inspection should be done every 2-3 years, or immediately after severe weather events. Consider a professional inspection every 3-5 years.
Discussion
Loading comments…