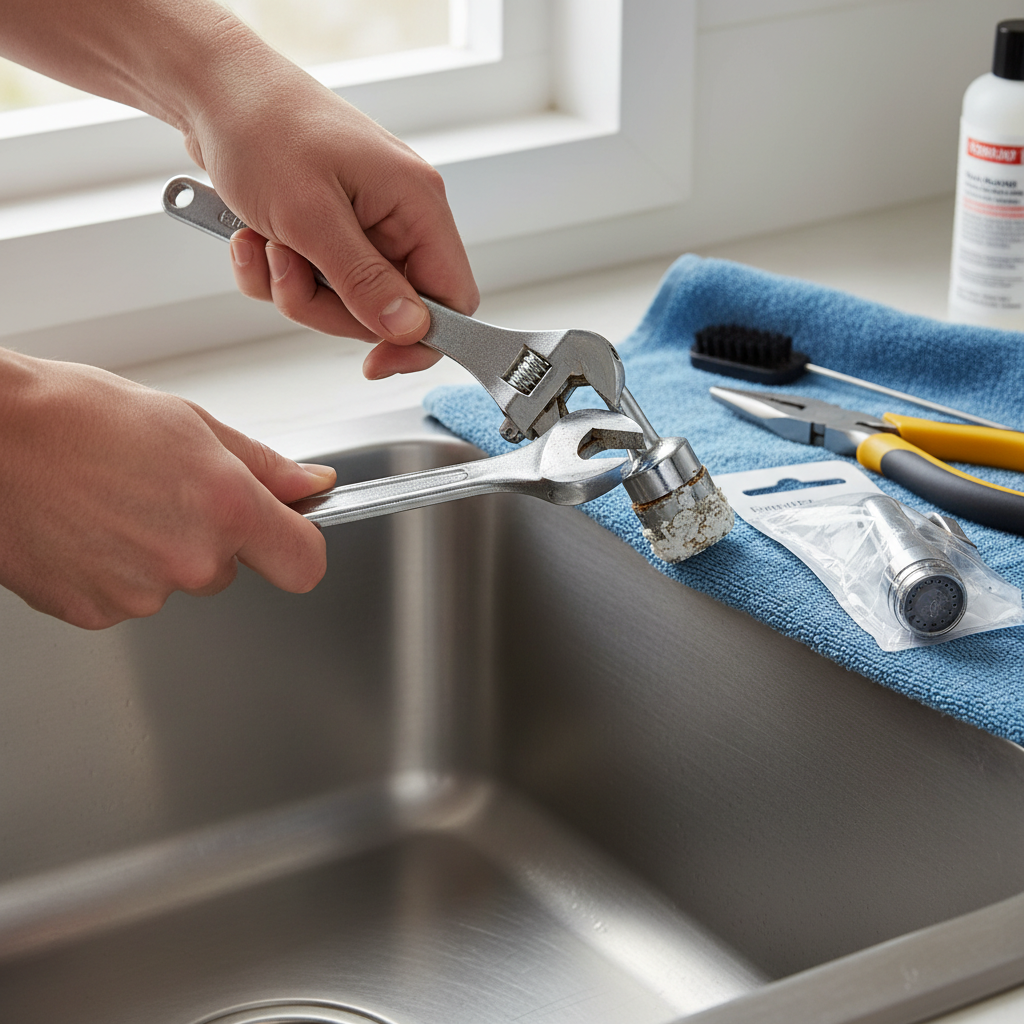
Tools & materials you'll need
Affiliate linksAs an Amazon Associate FixlyGuide earns from qualifying purchases — at no extra cost to you. Prices and availability are accurate as of publication and subject to change.
Quick Answer
A low-pressure kitchen sink sprayer is almost always caused by one of three issues: mineral buildup clogging the spray head nozzles, a kink or obstruction in the sprayer hose, or a malfunctioning diverter valve inside the faucet body. The good news is that most of these problems are easily fixable with basic tools and a bit of patience, often taking less than 30 minutes to diagnose and resolve yourself, saving you a plumbing call.
The Problem
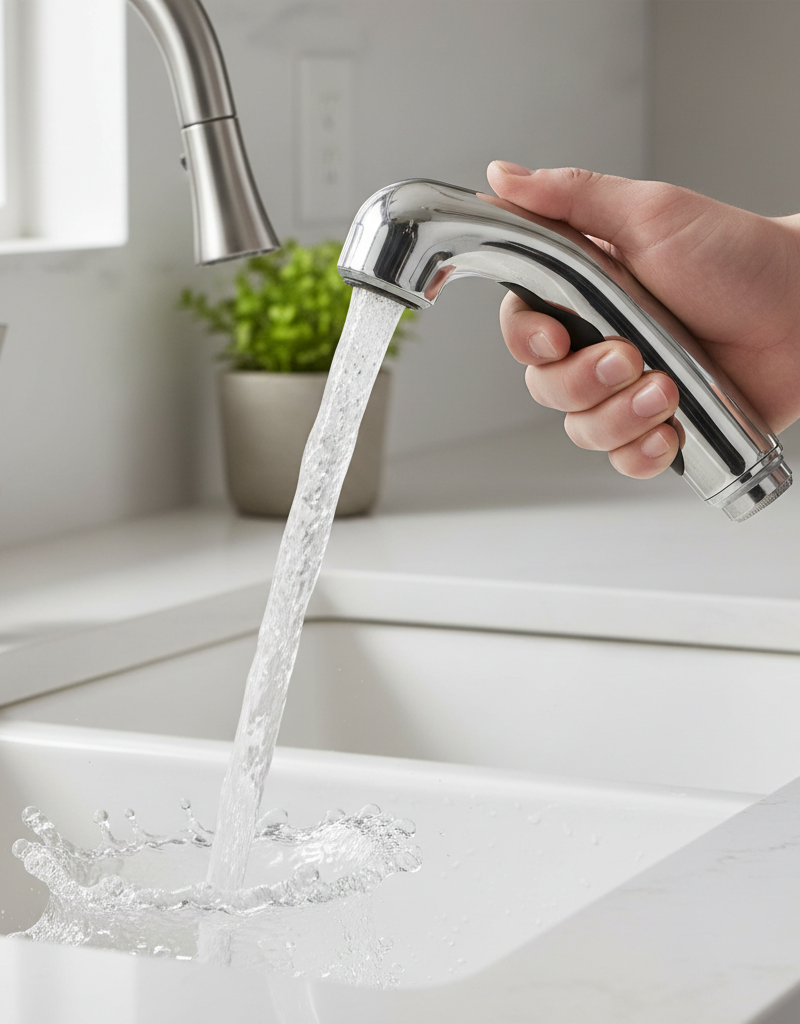
You're trying to rinse dishes or clean your sink, but your kitchen sprayer just dribbles water out instead of delivering a powerful stream. This lack of pressure makes the sprayer frustratingly inefficient and can even leave suds and food particles behind. It's a common household complaint, particularly in homes with hard water, and it can disrupt your kitchen routine, making simple tasks feel much more arduous. While seemingly minor, a perpetually weak sprayer often signals a preventable issue that can worsen over time if left unaddressed.
How It Works
To understand how to fix your sprayer, it helps to know how it operates. When you engage your kitchen sink sprayer, water from your main hot or cold supply (depending on your faucet's setting) flows through a series of components. First, water enters the faucet body. Inside, there's a crucial component called the diverter valve. This small, often spring-loaded valve is responsible for redirecting water flow. When the main faucet spout is open, water flows primarily to the spout. However, when you press the sprayer trigger, the diverter valve shifts, diverting water away from the spout and into the dedicated sprayer hose.
The sprayer hose itself is a flexible line, typically made of reinforced rubber or braided stainless steel, that connects from the diverter outlet within the faucet body down through a hole in your sink or countertop, and then connects to the spray head. This hose needs to be sturdy enough to handle water pressure but flexible enough to move freely without kinking or getting tangled under the sink.
Finally, the spray head is where the water exits. Modern spray heads usually contain a series of small nozzles or a aerator screen designed to distribute water evenly and create a powerful spray pattern. Some advanced spray heads may also have flow restrictors or check valves built in to prevent backflow and conserve water. Mineral deposits, primarily calcium and magnesium found in hard water, tend to accumulate in these narrow pathways – both in the diverter and especially in the small nozzles of the spray head – gradually restricting water flow and reducing pressure. Kinks or blockages in the hose also physically impede water movement, leading to the same frustrating low-pressure symptom.
Step-by-Step Fix
1. Test Both Hot and Cold Water — Determine if the issue is pressure-related or specific to one line.
First, test your sprayer with both hot and cold water settings. If the pressure is low on both, the problem is likely in the sprayer head, hose, or diverter. If it's only low on one, the issue could be with that specific water supply line or angle stop valve under the sink. This quick diagnostic step helps narrow down your troubleshooting efforts before you start disassembling anything.
2. Check for Hose Kinks — The simplest fix often involves untangling.
Look inside the cabinet under your sink. The sprayer hose runs from the faucet body down to the spray head. Oftentimes, this hose gets twisted, caught on other items, or simply kinks, restricting water flow.
- Action: Gently pull the sprayer hose to extend it fully, checking for any bends or twists. Untangle it and ensure it has a clear path. Remove any items stored under the sink that might be pressing against or tangling the hose.
- If this doesn't work: If the hose appears fine but is stiff, it might be collapsed internally, requiring replacement.
3. Clean the Sprayer Head — Mineral buildup is the most common culprit.
Mineral deposits from hard water frequently clog the small nozzles of the spray head, causing drastically reduced pressure. This is the most common reason for a weak sprayer.
- Tools: Adjustable wrench (or channel locks), small pick or toothpick, white vinegar, old toothbrush or scrub brush.
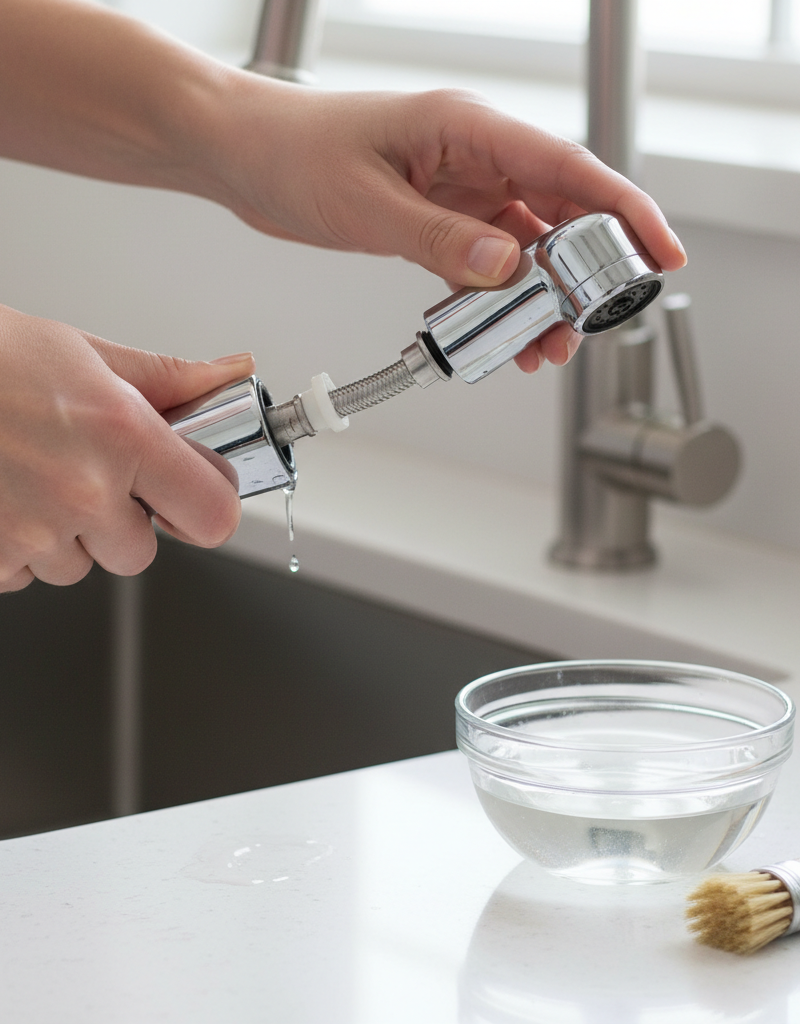
- Action: Unscrew the spray head from the hose. Most spray heads can be twisted off by hand; others may require an adjustable wrench. Be careful not to damage the hose. Once removed, inspect the screen and nozzles for visible mineral buildup or debris. Use a small pick or toothpick to clear any visible clogs from the individual spray holes. For stubborn buildup, soak the entire spray head in a bowl of white vinegar for at least 30 minutes, or even overnight, to dissolve mineral deposits. Scrub with an old toothbrush afterward to remove loosened debris. Rinse thoroughly with clean water before reattaching.
- Safety: Always turn off the water supply to the faucet (using the angle stop valves under the sink) before disconnecting any part of the plumbing, especially if you fear splashing. Place a towel down to catch any drips.
4. Test the Hose Independently — Is the problem the head or further back?
If cleaning the spray head didn't restore pressure, the problem might be in the hose itself or further back in the diverter valve. Testing the hose separately helps isolate the issue.
- Action: With the spray head still removed, point the end of the hose into the sink or a bucket (ensure it's secured so it doesn't spray wildly) and turn on the water. If the water flows out of the hose with good pressure, then the problem is definitely with your spray head and it likely needs replacement. If the flow is still weak, the issue is either the hose itself or the diverter valve.
- If this doesn't work: Proceed to checking the diverter valve.
5. Check and Clean the Diverter Valve — A common, but slightly more involved, fix.
The diverter valve redirects water to the sprayer. If it's clogged or faulty, your sprayer will have low pressure. Accessing it requires opening the faucet body.
- Tools: Screwdriver (Phillips or flathead, depending on your faucet), adjustable wrench, spray penetrant (optional), white vinegar, small brush.
- Action: First, turn off both hot and cold water supply valves under the sink. Turn on the faucet to release any remaining pressure. Locate the decorative cap on the faucet handle (if applicable) and pop it off to reveal a screw. Unscrew the handle and lift it off. You may then need to remove a retaining nut or collar to access the diverter valve, which is usually a small cylindrical cartridge or a simple rubber diaphragm/spring mechanism located where the sprayer hose connects inside the faucet body. Carefully remove the diverter (you might need a flathead screwdriver to gently pry it). Inspect it for mineral buildup or debris. Soak the diverter in white vinegar for 30 minutes to an hour. Use a small brush to scrub away any deposits. Rinse thoroughly and reassemble, ensuring all O-rings are seated correctly. Test the sprayer.
- Safety: The diverter can be delicate. Work gently to avoid damaging plastic components or O-rings. Have a bucket and towels ready for potential spills.
6. Consider Hose Replacement — When the hose itself is failed.
If the hose test (Step 4) showed low pressure even with the head removed, and you've confirmed no kinks, the hose itself might be internally collapsed or blocked. This is more common in older, cheaper hoses.
- Tools: Adjustable wrench, flashlight, replacement sprayer hose (ensure it's compatible with your faucet model).
- Action: Turn off the water supply. Disconnect the old hose from both the spray head (if still attached) and the diverter valve connection point under the sink. You might need to use a flashlight and reach deep into the cabinet to access the connection to the faucet body. Install the new hose, tightening connections firmly but without overtightening. Test for leaks before closing the cabinet.
7. Check Water Supply Valves — Sometimes the simplest explanation is true.
Occasionally, the angle stop valves under your sink might not be fully open, restricting water flow to the entire faucet, including the sprayer.
- Action: Locate the hot and cold water shut-off valves under your sink. Ensure they are turned completely counter-clockwise to the fully open position. If they feel stiff, they might be partially seized. If adjusting them fixes the pressure, it was a simple flow restriction.
8. Replace the Sprayer Head — When all else fails.
If you've cleaned the head, checked the hose, and cleaned the diverter, but pressure is still low, the internal components of the spray head might be irreversibly damaged or clogged.
- Action: Purchase a new, compatible spray head. They are relatively inexpensive and easy to install. Simply screw it onto your existing hose connection.
9. Inspect the Main Faucet Aerator — A quick check for overall pressure issues.
While not directly related to the sprayer, if your main faucet also has low pressure, checking its aerator can offer clues about overall water pressure to the faucet assembly.
- Action: Unscrew the aerator at the tip of your main faucet spout. Clean any mineral deposits or debris from the screen. If cleaning this improves main faucet pressure, but not the sprayer, it reinforces the sprayer-specific issues already addressed.
Common Causes
- Mineral Buildup (Hard Water): The most frequent culprit. Calcium and magnesium deposits accumulate in the small nozzles of the spray head and inside the diverter valve, restricting water flow.
- Kinked or Crimped Hose: The flexible hose under the sink can get twisted, tangled with stored items, or bent sharply, physically blocking water flow.
- Faulty Diverter Valve: The diverter valve inside the faucet body is responsible for directing water to the sprayer. If it's stuck, clogged, or broken, it won't fully divert water, leading to low sprayer pressure.
- Damaged Sprayer Head: Internal components, seals, or flow restrictors within the spray head can fail or become irreparably clogged over time.
- Low Water Supply: Less common, but sometimes a partially closed angle stop valve under the sink or an issue with the home's main water pressure can affect all fixtures, including the sprayer. If all faucets have low pressure, investigate the main water supply.
Common Mistakes
- Forgetting to Turn Off Water Supply: Always shut off the hot and cold water supply valves under the sink before attempting any repairs. Forgetting to do so will result in a messy flood and potential damage.
- Overtightening Connections: When reassembling hoses or spray heads, overtightening can strip threads, crack plastic components, or damage washers, leading to leaks. Hand-tighten and then give a quarter-turn with a wrench.
- Using Harsh Chemicals: While vinegar is excellent for mineral deposits, avoid using harsh chemical cleaners or abrasive tools on your faucet components, as they can damage finishes or delicate rubber seals.
- Ignoring the Diverter Valve: Many DIYers focus only on the spray head, overlooking the diverter valve. If cleaning the head doesn't work, the diverter is the next most likely cause.
- Not Checking for Kinks First: It's easy to jump to more complex solutions, but a simple kink in the hose is often the quickest and easiest fix. Always check this first.
- Buying the Wrong Replacement Part: Faucet components aren't universally interchangeable. If replacing a head or hose, ensure it's compatible with your specific faucet make and model, or choose a universal option designed for broad compatibility.
Cost & Time Breakdown
| Task | DIY cost | Pro cost | Time |
|---|---|---|---|
| Check for hose kinks | $0 | $50–$100 | 1–5 minutes |
| Clean sprayer head | $0–$5 | $50–$100 | 15–45 minutes |
| Clean diverter valve | $0–$10 | $100–$250 | 30–90 minutes |
| Replace sprayer hose | $15–$50 | $100–$200 | 20–40 minutes |
| Replace sprayer head | $15–$40 | $80–$150 | 10–20 minutes |
| Full faucet replacement (if needed) | $80–$300+ | $200–$500+ | 1–3 hours |
Tips & Prevention
- Regular Cleaning: If you have hard water, periodically unscrew your sprayer head and soak it in white vinegar for an hour or two to prevent mineral buildup. Do this every 3-6 months.
- Use a Water Softener: For widespread hard water issues, consider installing a whole-home water softener to protect all your plumbing fixtures from mineral accumulation.
- Mind Your Under-Sink Storage: Keep the area under your sink tidy and free of bulky items that could snag or kink the sprayer hose. Use storage bins to organize cleaning supplies.
- Inspect Hoses Annually: Once a year, take a peek under the sink to ensure the sprayer hose isn't showing signs of wear, internal collapse, or developing stubborn kinks.
- Don't Force Components: If a part is difficult to unscrew, apply a penetrating oil or try gently wiggling it rather than forcing it, which can cause breakage.
When to Call a Professional
While many low-pressure sprayer issues are DIY-friendly, there are specific situations where calling a licensed plumber is the wisest course of action. If you've diligently followed all troubleshooting steps—cleaning the spray head, checking the hose, and meticulously cleaning or replacing the diverter valve—and the problem persists, the issue might be more complex, residing deeper within your faucet's internal mechanism or even your main water supply. If you're uncomfortable disassembling sensitive faucet components, fear causing further damage, or encounter unexpected difficulties like seized nuts or leaks after reassembly, stop and call a pro. Additionally, if the issue affects multiple fixtures in your home, indicating a potential whole-house water pressure problem, a plumber can diagnose and address the root cause, which could be anything from a faulty pressure regulator to issues with your main water line. Do not attempt to repair issues related to your home's main water supply without professional help, as this can affect your entire plumbing system.
Related Articles
Keep troubleshooting with these hand-picked guides from FixlyGuide:
- The 5-Minute Trick to Restore Your Kitchen Sink Sprayer's Lost Pressure — Restore your kitchen sink sprayer's low pressure with a quick, simple trick that often takes less than five minutes and requires no special…
- The 5-Minute Trick to Fix a Weak Kitchen Sink Sprayer (No Plumber Needed) — Restore full power to your kitchen sink sprayer with simple, DIY steps that tackle common culprits like clogs and diverter issues.
- The 5-Minute Trick to Fix Your Kitchen Sprayer's Weak Stream — Restore your kitchen sink sprayer's full power with a simple, quick fix tackling common pressure culprits.
- The 5-Minute Trick to Stop a Dripping Single-Handle Faucet (No Plumber Needed) — A persistent drip from your single-handle faucet is usually caused by a worn-out cartridge, a repair you can typically complete yourself in…
- The $5 Secret to Silencing That Annoying Dripping Faucet (Single-Handle Fix) — Stop a dripping single-handle faucet with a simple and inexpensive DIY fix by replacing a worn-out o-ring or washer.
- The #1 Hidden Culprit Behind Your Whole-House Low Water Pressure (It's Not Your City!) — Discover the most common, often overlooked cause of low water pressure throughout your entire home and how to fix it yourself.
Frequently asked questions
Why is my kitchen sink sprayer suddenly weak?+
The most common reasons for a sudden drop in kitchen sink sprayer pressure are mineral buildup in the spray head nozzles, a kink or obstruction in the sprayer hose, or a malfunctioning diverter valve inside the faucet body. Hard water is a significant contributor to mineral clogs.
How do I clean a clogged kitchen sprayer head?+
To clean a clogged kitchen sprayer head, unscrew it from the hose. Use a small pick or toothpick to clear any visible debris from the nozzles. For mineral buildup, soak the entire spray head in a bowl of white vinegar for at least 30 minutes, then scrub with an old toothbrush and rinse thoroughly.
Can a kinked hose cause low sprayer pressure?+
Yes, absolutely. A kink or sharp bend in the flexible sprayer hose under your sink can severely restrict water flow, leading to very low or no pressure at the spray head. Always check under the sink first for hose obstructions or kinks.
Where is the diverter valve in my kitchen faucet?+
The diverter valve is typically located inside the main body of your kitchen faucet, often near where the sprayer hose connects internally. You usually need to remove the faucet handle and possibly a retaining nut or collar to access and inspect it. It's a small mechanism that directs water flow either to the main spout or the sprayer.

Discussion
Loading comments…