- Doorknob Impacts: Lack of a doorstop allows doorknobs to repeatedly hit and eventually puncture the drywall. This is one of the most frequent culprits for small, circular holes.
- Picture Frame Removal: Improper removal of nails or screws when taking down wall art can tear the drywall paper and create small divots or holes.
- Furniture Collisions: Moving furniture, especially large pieces, can lead to accidental scrapes, dents, or holes if they bump into a wall.
- Falling Objects: Items falling from shelves or wall-mounted fixtures can sometimes impact and damage the drywall below.
- Anchor Pull-Outs: Wall anchors that fail or are incorrectly installed can pull out, leaving behind a larger, ragged hole than a simple nail.
General remodeling · Renovation planning
| Project category | General remodeling |
|---|---|
| Problem type | Renovation planning |
| Trade required | General contracting |
| Urgency | Planned project |
| Safety risk | Low safety risk |
| DIY suitability | Pro recommended |
| Cost category | Major investment |
| Typical timeline | Design and permitting often 2–4 months before work starts |
| Contractor type | General contractor |
Repair option
Phase the work and fix the building envelope first.
Replacement option
Full renovation with permits, design, and a general contractor.
Common causes
- Space no longer fits how the household lives
- Resale preparation
- Deferred maintenance stacking up
Relevant tools:project cost estimatorcompare quoteshome improvement material prices
Published July 17, 2026Last updated August 17, 2026
Tools & materials you'll need
Affiliate linksAs an Amazon Associate FixlyGuide earns from qualifying purchases — at no extra cost to you. Prices and availability are accurate as of publication and subject to change.
Quick Answer
Patching small drywall holes (anything under about 4 inches in diameter) doesn't require complex cuts or a professional's touch. The quickest and most homeowner-friendly method involves a self-adhesive drywall repair patch. These patches come with a mesh backing and a thin metal plate, providing instant reinforcement. Skimmed over with a couple of layers of joint compound, they create a strong, seamless repair that's ready for paint, often without the need for extensive sanding.
The Problem
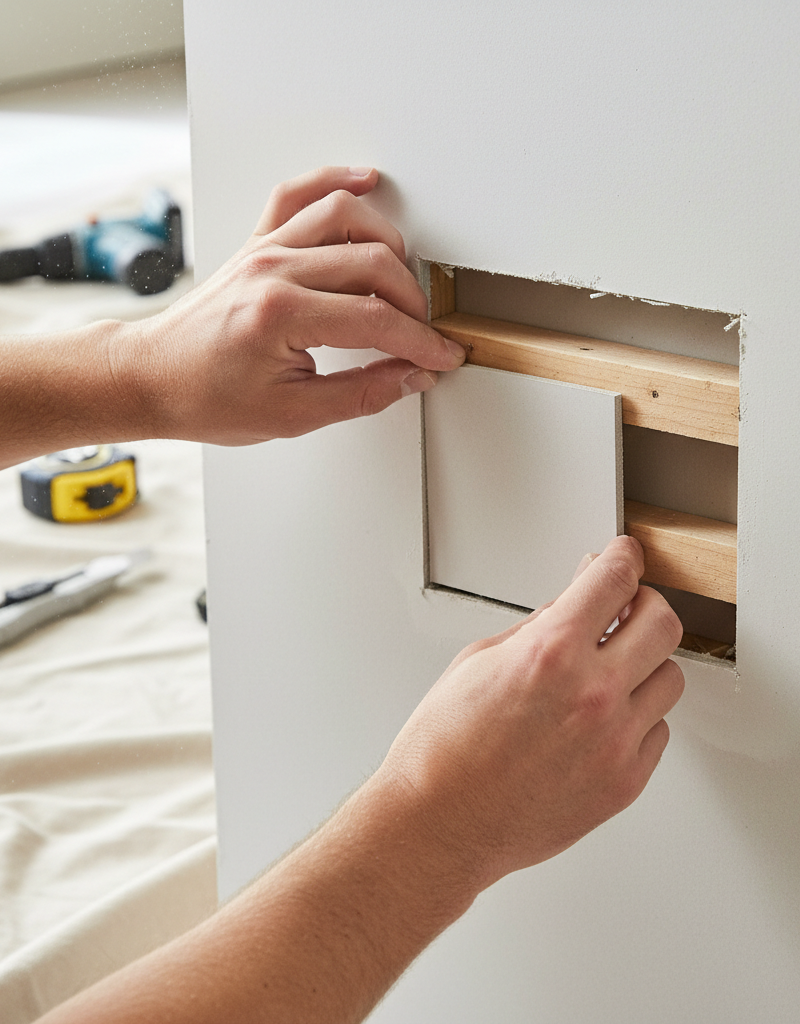
Small holes in drywall are an almost inevitable part of homeownership. Whether from an errant doorknob, a picture hook pulled out incorrectly, or a furniture mishap, these imperfections detract from your home's appearance. While seemingly minor, ignoring them can lead to further damage if the wall is exposed to moisture or continued impact. Traditional repair methods often involve cutting out a larger section, fitting new drywall, taping, mudding, and extensive sanding – a process that can be intimidating and time-consuming for many homeowners.
How It Works
Drywall, also known as plasterboard or gypsum board, is a panel made of gypsum plaster pressed between two sheets of thick paper. It's the standard material for interior walls and ceilings due to its ease of installation and fire-resistant properties. When a small hole occurs, the surrounding paper and gypsum can be compromised. Our goal is to bridge this gap and restore the wall's integrity and smooth surface. Self-adhesive drywall patches work by creating an instant, rigid bridge over the hole. These patches typically feature an aluminum or fiberglass mesh screen with a thin metal center. The mesh provides an excellent substrate for joint compound to adhere to, essentially becoming integral to the wall surface once dry. The metal center reinforces the weak spot, preventing future breakthroughs. When joint compound is applied over the patch, it fills the mesh, creating a feathered edge that blends seamlessly with the existing wall. The compound hardens, creating a durable, paintable surface. This method bypasses the need for framing, cutting, and taping individual seams, significantly simplifying the repair process.
Step-by-Step Fix
-
Prepare the Area – Clean around the hole
- Use a utility knife or sandpaper to remove any loose drywall fragments, paper, or protruding edges around the hole. The area should be as smooth and clean as possible to ensure good adhesion of the patch. You want a flat, stable surface for the patch to stick to. Wipe away any dust with a damp cloth.
- Safety Note: Always use caution when handling a utility knife. Cut away from your body.
-
Apply the Self-Adhesive Patch – Center and press firmly
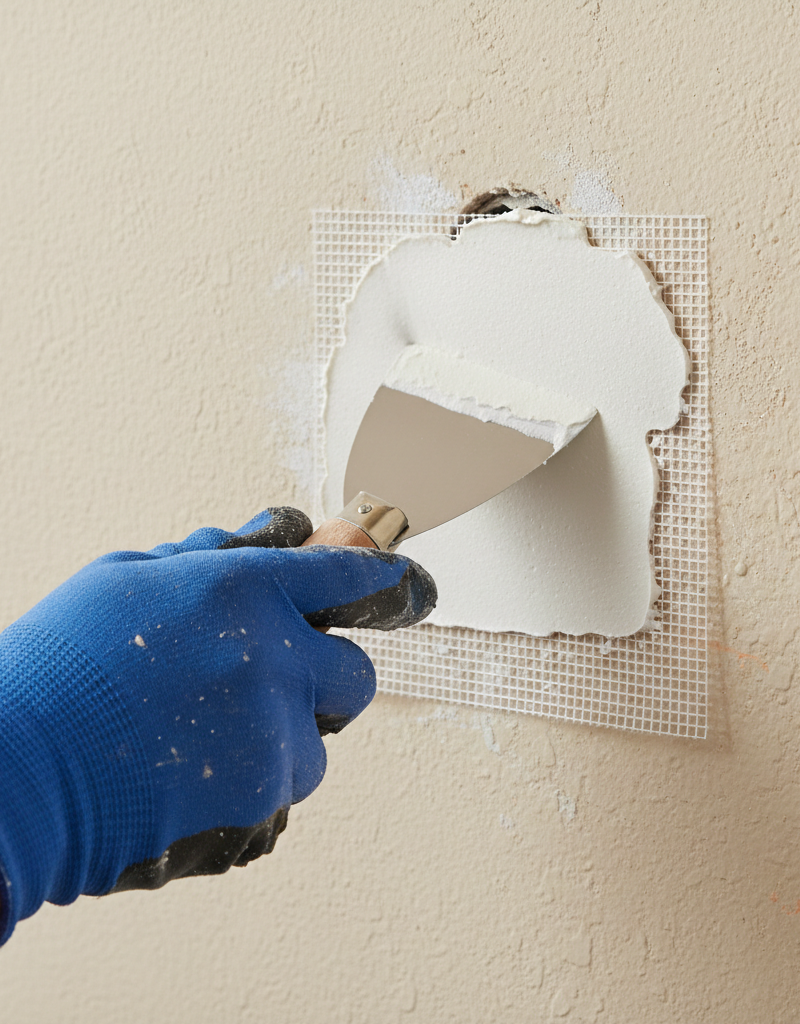
- Peel the backing off the self-adhesive drywall patch. Center the patch over the hole, ensuring it completely covers the damaged area and extends at least an inch beyond the hole in all directions. Press the patch firmly onto the wall, working from the center outwards to remove any air bubbles and ensure it adheres securely. The mesh should be fully bonded to the existing drywall.
-
Apply the First Coat of Joint Compound – Work from the center out
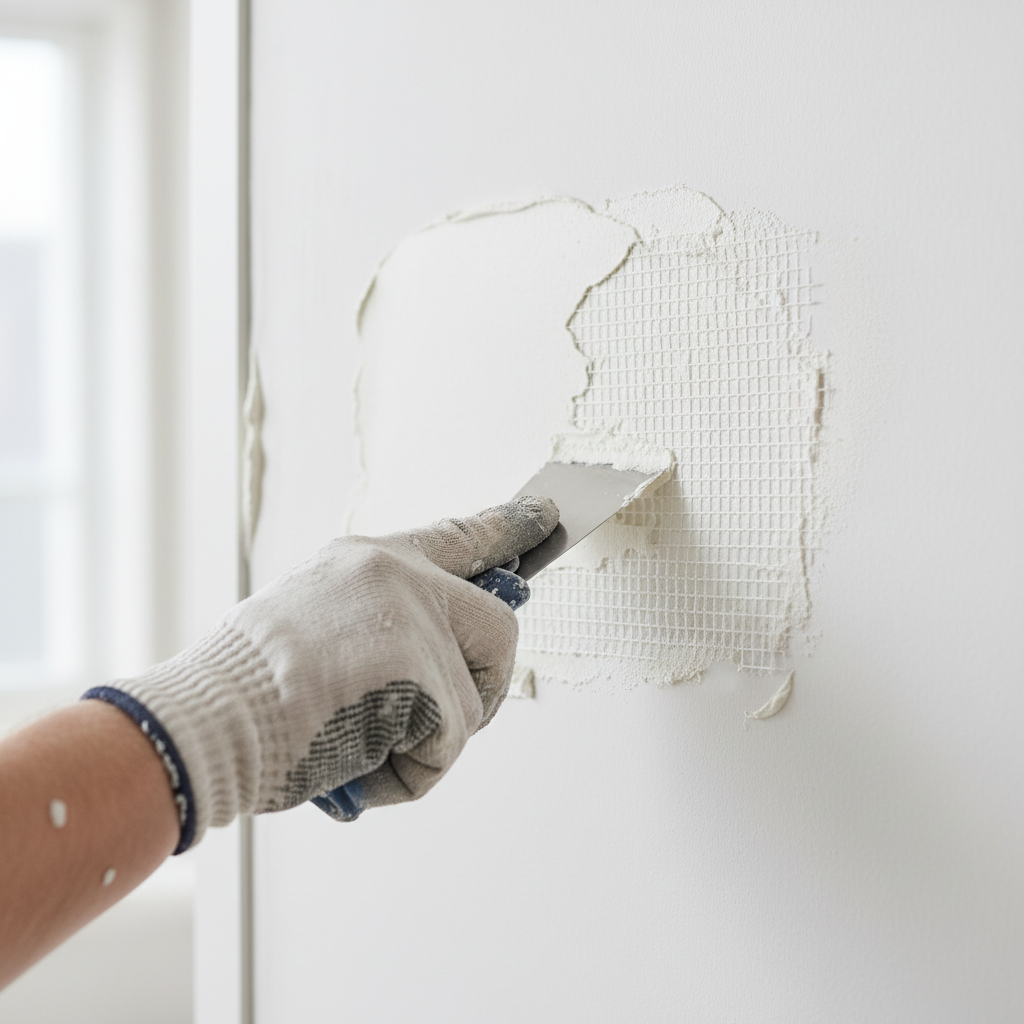
- Using a 6-inch drywall knife, apply a thin, even layer of all-purpose joint compound directly over the patch. Start by applying a dollop of mud in the center and spread it outwards, forcing the compound through the mesh. The goal is to fill the mesh completely and feather the edges of the compound smoothly onto the surrounding wall. Don't worry about perfection; this is just the first coat. Aim for a thickness of about 1/16 to 1/8 inch over the patch.
-
Allow to Dry Thoroughly – Patience is key
- Let the first coat of joint compound dry completely. This can take anywhere from 1 to 4 hours, or even longer in humid conditions, depending on the thickness of the application and the type of compound. The compound will change from a bright white to an off-white when dry. Rushing this step will lead to cracking or poor adhesion for subsequent layers.
- Tip: Using a fan can help speed up drying, but avoid direct heat, which can cause cracking.
-
Lightly Sand (Optional, if needed) – Smooth out imperfections
- Once the first coat is completely dry, very lightly sand any high spots or rough edges with 150-grit sandpaper or a sanding sponge. The goal is just to knock down any obvious ridges, not to fully smooth it. Wipe away all dust with a damp cloth before the next coat.
- If this doesn't work: If you find significant unlevel areas, you may need to apply a slightly thicker second coat to fill them.
-
Apply the Second Coat of Joint Compound – Feather wider
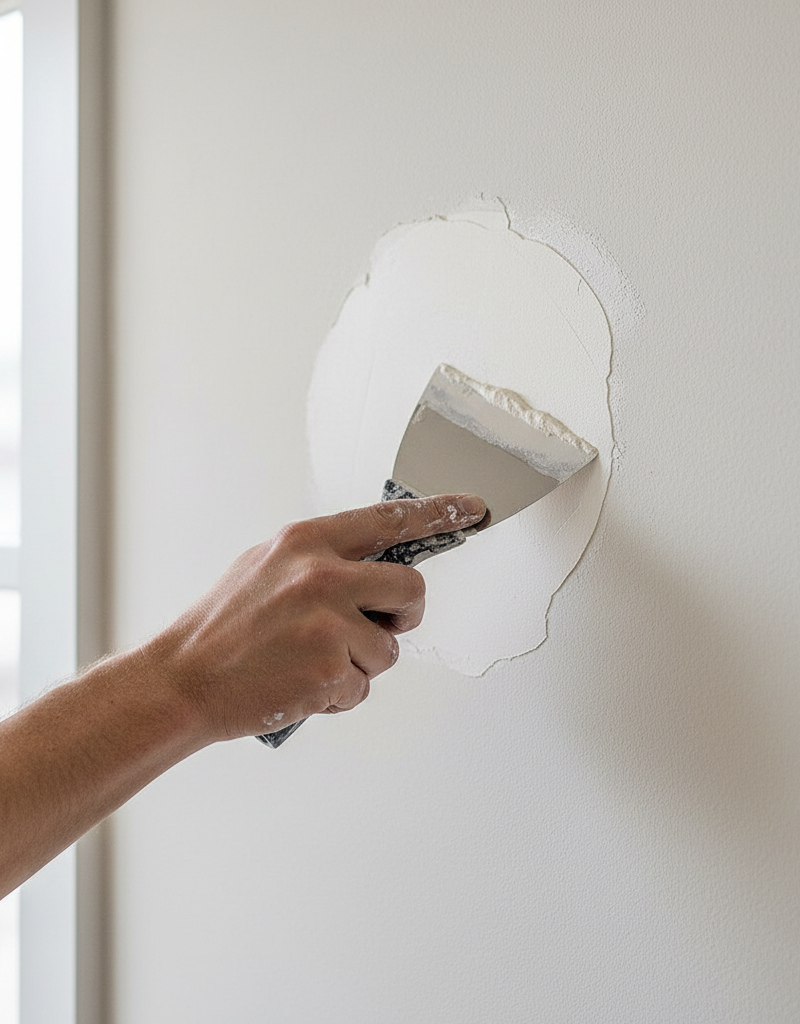
- Apply a second, slightly wider and thinner coat of joint compound using an 8-inch or 10-inch drywall knife. This coat should extend about 2-3 inches beyond the edges of the first coat, further feathering the repair into the existing wall. Use light pressure, holding the knife at a slight angle, to create a smooth, seamless transition. The wider knife helps achieve a flatter surface. This coat is crucial for achieving a truly invisible repair.
-
Allow to Dry and Sand – Achieve a professional finish
- Let the second coat dry completely (another 1-4 hours). Once dry, generously sand the entire patched area with 150-grit or 220-grit sandpaper or a sanding sponge until it is perfectly smooth and flush with the surrounding wall. Run your hand over the area to feel for any imperfections. Take your time here – good sanding makes for an invisible patch. Wipe away all sanding dust with a damp cloth. You may need a third very thin coat for perfectionists, followed by another light sanding.
-
Prime and Paint – Finish the job
- Apply a coat of quality primer specifically designed for drywall repair. This will help seal the joint compound, prevent flashing (where the patch shows through the paint), and provide an even base for your finish paint. Once the primer is dry, paint the patched area to match the rest of your wall. For best results, paint corner to corner or an entire wall to avoid visible paint lines.
Common Causes
- Doorknob Impacts: Lack of a doorstop allows doorknobs to repeatedly hit and eventually puncture the drywall. This is one of the most frequent culprits for small, circular holes.
- Picture Frame Removal: Improper removal of nails or screws when taking down wall art can tear the drywall paper and create small divots or holes.
- Furniture Collisions: Moving furniture, especially large pieces, can lead to accidental scrapes, dents, or holes if they bump into a wall.
- Falling Objects: Items falling from shelves or wall-mounted fixtures can sometimes impact and damage the drywall below.
- Anchor Pull-Outs: Wall anchors that fail or are incorrectly installed can pull out, leaving behind a larger, ragged hole than a simple nail.
Common Mistakes
- Not Cleaning the Area: Failing to remove loose debris and uneven edges around the hole before applying the patch will result in poor adhesion and a lumpy repair.
- Applying Too Much Compound Too Quickly: Trying to fill the entire depth of the patch with one thick layer causes cracking, prolonged drying times, and makes it difficult to achieve a smooth finish.
- Not Feathering the Edges: Applying compound only directly over the patch creates a noticeable bump. Always spread the compound out wider than the patch, gradually tapering it down to seamlessly blend with the existing wall.
- Rushing Drying Time: Applying subsequent coats or paint before the joint compound is fully dry will lead to cracks, bubbling, and an unstable, weak patch.
- Inadequate Sanding: Insufficient sanding leaves visible ridges and textures that will be highlighted once painted, making the repair obvious. Conversely, over-sanding can expose the patch's mesh or create depressions.
- Skipping Primer: Without a primer, the patched area can
Related Articles
Keep troubleshooting with these hand-picked guides from FixlyGuide:
- The 4-Inch Drywall Hole Fix: Why Most DIY Patches Fail (And How to Do It Right) — Don't let a small drywall hole become a recurring nightmare – discover the secret to a seamless, lasting repair that disappears into your w…
- The 15-Minute Drywall Patch Secret (No Mudding Skills Required) — Discover how to quickly and easily patch a small hole in drywall using a simple method that doesn't require advanced mudding skills.
- The 4-Step Drywall Patch Secret That Makes Large Holes Vanish — Discover how to flawlessly repair a large hole in drywall using a simple, effective method that makes the damage disappear without a trace.
- The 15-Minute Drywall Hole Fix Plumbers Don't Want You to Know — Discover the surprisingly simple, super-fast method for patching small drywall holes that avoids messy muds and sanding.
- The 4-Inch Drywall Hole Fix: Why Spackle Alone Always Fails — Fix a small drywall hole (up to 4 inches) properly with a simple patch kit and avoid common mistakes that lead to visible repairs.
- That Drywall Hole Isn't Just Ugly, It's a Bat Signal — Learn the pro-approved method for patching drywall holes of any size. We cover the surprising science behind a lasting repair and common mi…
Should you do this yourself?
Answer five quick questions before you start. Safety outranks savings every time.
Your experience with work like this
How high do you have to work?
Does the job involve any of these?
Will it need a permit?
Specialty tools
Free and instant. Educational guidance only — not a quote, inspection, or professional diagnosis.
What should this project cost?
Enter your project details for a realistic cost range before you call anyone.
Cost depends heavily on which system turns out to be the source.
- Regional adjustment
- National average
- Labor share (typical)
- ~$1,620
- Quotes to collect
- 3 written estimates
Educational estimate based on national averages — not a binding quote. Always confirm with written local estimates.
Get the print-ready PDF of this guide
A clean, ad-free, printable version you can keep on your phone or pin to the workshop wall. Free with a FixlyGuide account.
- Print-optimized layout
- Tools, materials & every step included
- Saved to your account
Recommended for DIYers & woodworkers
Sponsored
The Top 20 Tools for Workshops of Any Budget
No stationary machines or power tools required — plus 3 fundamental tools that can't be bought at any price.
Get the free guide
Ted's Woodworking — The #1 Woodworking Resource
Detailed instructions, dimensioned drawings, materials & cutting lists, and 3D schematics for every skill level.
See the plansSponsored: links above are affiliate links. FixlyGuide may earn a commission on qualifying purchases — at no extra cost to you.
Frequently asked questions
How small of a hole can I patch without cutting drywall?+
You can effectively patch holes up to about 4 inches in diameter using a self-adhesive mesh patch without needing to cut out and install new drywall.
How long does a drywall patch take to dry?+
Each layer of joint compound typically takes 1 to 4 hours to dry, depending on humidity and thickness. Always allow adequate drying time before applying the next coat or sanding.
Do I need to prime after patching drywall?+
Yes, it's highly recommended to prime the patched area. Primer seals the joint compound, ensures even paint absorption, and prevents the patch from 'flashing' or showing through the topcoat.
Can I use spackle instead of joint compound for a drywall patch?+
For very small nail holes (pin-sized), spackle is fine. However, for anything larger than about a quarter-inch, especially when using a mesh patch, all-purpose joint compound provides better adhesion, durability, and a smoother finish.
Discussion
Loading comments…