- Identify the Line Type — Is it supply or drain?
- Supply lines carry fresh water, are under pressure, and are generally smaller in diameter (1/2" to 1"). They connect to faucets, toilets, water heaters.
- Drain, Waste, and Vent (DWV) lines are larger (1 1/4" to 4" or more), rely on gravity, and take wastewater away.
Plumbing · Leak
| Project category | Plumbing |
|---|---|
| Problem type | Leak |
| Trade required | Plumbing |
| Urgency | Emergency — act now |
| Safety risk | High safety risk |
| DIY suitability | DIY for experienced homeowners |
| Cost category | Low cost |
| Typical timeline | Shut water off now; repair usually same or next day |
| Contractor type | Licensed plumber |
Repair option
Isolate at the shutoff, replace the failed component, and dry the cavity fully.
Replacement option
Repipe the run or the branch when corrosion is widespread.
Common causes
- Failed supply line or shutoff valve
- Worn washers, cartridges, or P-trap connections
- Pinhole corrosion in older copper
Relevant tools:emergency checklistdiy or hire a pro
Published July 25, 2026Last updated August 17, 2026
Tools & materials you'll need
Affiliate linksAs an Amazon Associate FixlyGuide earns from qualifying purchases — at no extra cost to you. Prices and availability are accurate as of publication and subject to change.
Quick Answer
Look, here’s the deal: picking the right pipe isn’t just about grabbing whatever’s cheapest or easiest to cut. It’s about keeping your water safe to drink, making sure that thing won’t split open in five years, and staying on the right side of code. For most DIY fixes, you’re probably looking at PEX for water supply or PVC/ABS for drains. But once you poke around a little, you’ll see why some pipes are fine for hot water, others belong underground, and some you should just hand off to the pros.
The Problem
I’ve seen it a hundred times. A homeowner tries to save a buck, grabs whatever pipe’s cheapest at the hardware store, slaps it in, and then calls me six months later with a mess. Maybe it’s a burst pipe in the winter because they used PVC instead of something more flexible like PEX. Or maybe they ran a chemical drain cleaner down a pipe not rated for it, and now they’ve got a leak. The worst? When folks use something like galvanized steel for potable water in an old house, and the water starts looking like rusty tea. That’s not just ugly; it can be a health hazard, too. Picking the wrong pipe for the job isn’t just an inconvenience; it can lead to massive water damage, unsafe drinking water, or even structural issues if a leak goes unnoticed.
How It Works
Think of your home’s plumbing system as having two main arteries: one bringing fresh water in and another taking wastewater out. Each job puts the pipe through a different kind of abuse.
Water Supply Lines: These carry water under pressure—often 40-80 PSI (pounds per square inch) in a typical residential system. They need to handle temperature swings, from freezing cold groundwater to scorching hot water from your water heater. They also need to be non-corrosive and non-toxic, especially if they’re carrying potable (drinking) water. Materials like copper, PEX (cross-linked polyethylene), and CPVC (chlorinated polyvinyl chloride) are common here. Each one connects a little differently: copper needs soldering or compression fittings, PEX uses crimp rings or expansion fittings, and CPVC is typically solvent-welded. These pipes have thinner walls to maximize internal diameter for flow but are designed for high internal pressure.
Drain, Waste, and Vent (DWV) Lines: These are your low-pressure pipes, relying on gravity to move wastewater and solids out of your house, and vents to stop siphoning. They don’t deal with high pressure, but they do need to handle chemicals (think drain cleaners, soaps, food waste) and be tough enough for solids. Materials like PVC (polyvinyl chloride), ABS (acrylonitrile butadiene styrene), and cast iron (in older homes) are the usual suspects. Connections are typically made with solvent cement for plastic pipes or hub-and-spoke joints for cast iron. These pipes generally have thicker walls than supply lines but are not designed for high pressure. They’re also usually larger in diameter to handle solids and help keep clogs down.
Then you’ve got specialty pipes. Some are made for outdoor irrigation and aren’t rated for indoor potable water use. Others are for gas lines, and that’s a whole different ballgame—something you should never DIY. Knowing the difference—pressure vs. gravity, potable vs. waste, hot vs. cold—is the foundation for choosing the right material. Miss that, and you’re asking for trouble.
Step-by-Step Fix
Okay, so you’ve got a plumbing repair or maybe a small renovation. Here’s how I’d think it through on a jobsite.
-
Identify the Line Type — Is it supply or drain?
- Supply lines carry fresh water, are under pressure, and are generally smaller in diameter (1/2" to 1"). They connect to faucets, toilets, water heaters.
- Drain, Waste, and Vent (DWV) lines are larger (1 1/4" to 4" or more), rely on gravity, and take wastewater away.
-
Determine the Location & Environment — Inside or outside? Buried or exposed? Hot or cold?
- Indoors, visible: Aesthetics might matter here, or you may need to snake around obstructions. PEX is great for this.
- Indoors, hidden (behind walls): Durability, leak resistance, and ease of installation are key. PEX shines here, mostly because you’ve got fewer fittings to worry about.
- Outdoors, buried: Needs to resist soil chemicals, freezing, and root intrusion. HDPE or PVC can work, but make sure it’s rated for underground.
- Hot water specific: Not all pipes handle sustained high temperatures. PEX and copper are good for this; some PVC types are not.
-
Check Local Codes — What does your jurisdiction allow?
- Call your city's building department or check their website. Some areas have specific requirements that might restrict certain pipe types, especially for potable water. I had a job in Plano, Texas, a few years back where they had very specific rules about the type of PEX connections allowed. Saved the homeowner a re-do just by making a quick call.
- Don’t assume what works across town works at your house.
-
Consider Pressure and Flow — How much water, how fast?
- For standard residential supply, 1/2-inch and 3/4-inch are common. Bumping the pipe size slightly can sometimes help if you’ve got low pressure, but don’t go nuts—it can also reduce efficacy of fixtures.
- Never use DWV pipe for pressure applications. It’ll burst, often explosively.
-
Evaluate Material Options — Match the pipe to the problem.
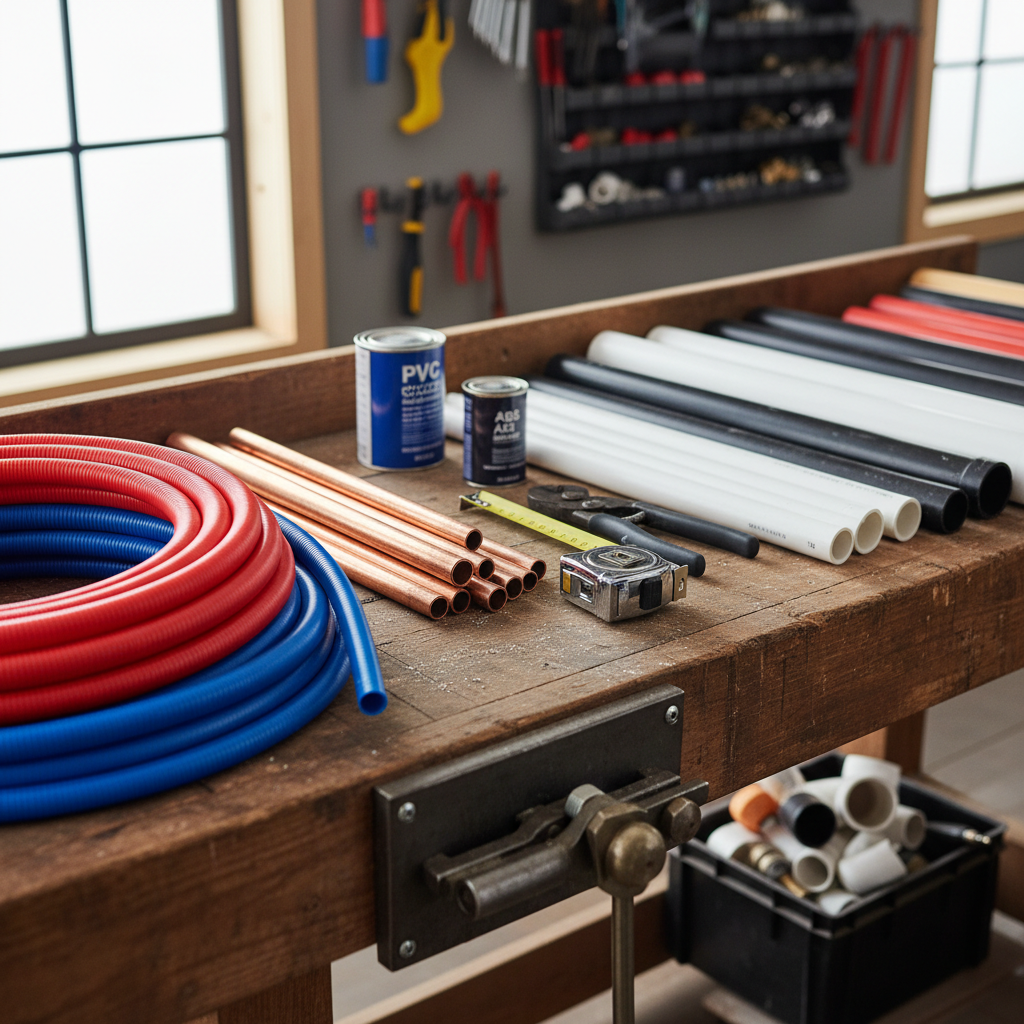
- PEX (Cross-linked Polyethylene): Flexible, great for water supply (hot & cold). Resistant to freezing bursts (it expands). Easy to install with crimp or expansion tools. Often cheaper than copper. Rated up to 180°F and 100 PSI. Comes in red, white, and blue for hot, cold, and general.
- Copper (Type L or M): The old standard for supply. Durable, long-lasting, withstands high temps and pressure. But it’s pricey, harder to install (soldering), and can corrode over time in certain water conditions.
- CPVC (Chlorinated Polyvinyl Chloride): Rigid plastic, good for hot and cold water supply. Glued connections. Can become brittle over time, especially with hot water. Max temp usually 180°F. Not as flexible as PEX.
- PVC (Polyvinyl Chloride): White, rigid plastic. Excellent for DWV systems. Not for potable water supply (unless specifically marked "NSF-PW" or "NSF-61" for potable water, which is rare for standard Schedule 40 PVC) or hot water. Comes in different "schedules"—Schedule 40 is standard for residential DWV. Very common for outdoor irrigation. Max temp usually 140°F.
- ABS (Acrylonitrile Butadiene Styrene): Black, rigid plastic. Similar to PVC, mostly used for DWV. Slightly more impact resistant in cold weather than PVC, but can deform with hot water over 180°F.
- Galvanized Steel: Old-school. Heavy, prone to corrosion and mineral buildup, restricts flow, usually replaced on sight. If you have it, plan to replace it. Not recommended for any new plumbing.
-
Consider Fittings & Tools — Do you have what you need?
- PEX requires specific crimping or expansion tools.
- Copper requires a torch for soldering (and flux, solder).
- PVC/CPVC need primer and solvent cement.
-
Calculate Costs — Material vs. labor, short-term vs. long-term.
- PEX is often cheapest for materials and DIY labor costs. Copper is expensive up front but lasts a long time.
-
Test Thoroughly — No, really, REALLY test.
- Once everything’s connected, turn the water on slowly and check every single connection point for leaks. Do it for at least 15-30 minutes, or even longer for bigger jobs. A tiny drip now is a flood later.
Common Causes
When I get calls about pipe failures, it’s almost always because of one of these:
- Incorrect Pipe Type for Pressure/Temp: Using PVC for a hot water supply line is a classic mistake. It can soften, sag, and eventually burst under heat and pressure it wasn’t built for. I once saw a DIYer use Schedule 40 PVC to run a sprinkler line directly off his main house pressure. Boom. Sprinkler system worked for a week, then shot water like a geyser through his front yard.
- Material Incompatibility: Mixing different metals without a dielectric union—like connecting copper directly to galvanized steel—causes galvanic corrosion, eating away at the weaker metal.
- Poor Installation: Bad soldering on copper, not enough primer/cement on plastic, or badly crimped PEX fittings are all recipes for leaks.
- Freezing: Water expands by about 9% when it freezes. That expansion is why pipes burst. PEX has some flexibility to resist this, but rigid pipes like copper or PVC are very susceptible if they’re not properly insulated or drained.
- Chemical Exposure: Certain drain cleaners with harsh chemicals can degrade plastic pipes over time, leading to leaks. Always read the cleaner’s label and the pipe manufacturer’s recommendations.
- Aging & Corrosion: All materials have a lifespan. Galvanized steel clogs with rust, copper can pit, and older plastics can become brittle.
Common Mistakes
Here are the traps I see homeowners fall into time and again:
- Using PVC for Hot Water Supply: I can’t stress this enough. Unless it’s specifically rated for hot potable water (which is almost never standard PVC), don’t do it. It softens, deforms, and will eventually fail, especially under pressure.
- Skipping Primer on PVC/CPVC: The primer isn’t just for cleaning; it chemically prepares the pipe surface for the solvent cement to properly bond. Skipping it leads to weak, leaky joints. Always purple first, then glue.
- Over-Tightening Compression Fittings: You think tighter means no leaks, but it can actually deform the ferrule or crack the pipe/fitting, causing a leak down the line. Snug plus a quarter turn is usually enough.
- Mixing Metals Without a Dielectric Union: Directly connecting, say, a brand new copper water heater to old galvanized steel pipes is a fast track to corrosion at the connection point. Always use a dielectric union to separate dissimilar metals.
- Not Supporting Long Pipe Runs: Whether it’s PEX or copper, pipes need proper support every few feet to prevent sagging, stress on joints, and noise. Check manufacturer specs for support distances—it’s usually around 32 inches for PEX and 6 feet for copper.
- Ignoring Code: Guessing about code requirements can lead to failed inspections, fines, and having to redo the work. A quick call to your local building department can save you a world of hurt.
Cost & Time Breakdown
| Task | DIY cost | Pro cost | Time |
|---|---|---|---|
| Repairing a Small PEX Leak | $10–$30 (fittings) | $150–$300 | 30–60 minutes |
| Replacing 5ft of Copper Pipe | $30–$70 (pipe/fittings) | $200–$400 | 1–2 hours |
| Installing a New Faucet Supply (PEX) | $15–$50 (lines/adapter) | $100–$250 | 45–90 minutes |
| Replacing a Broken PVC Drain Section | $20–$60 (pipe/couplings) | $180–$350 | 1–2 hours |
| Whole House Re-pipe (PEX) | $1,500–$4,000 (materials) | $4,000–$15,000+ | 3–7 days |
| Whole House Re-pipe (Copper) | $3,000–$8,000 (materials) | $8,000–$25,000+ | 5–10 days |
Note: "DIY cost" is for materials only; "Pro cost" includes labor and materials.
Tips & Prevention
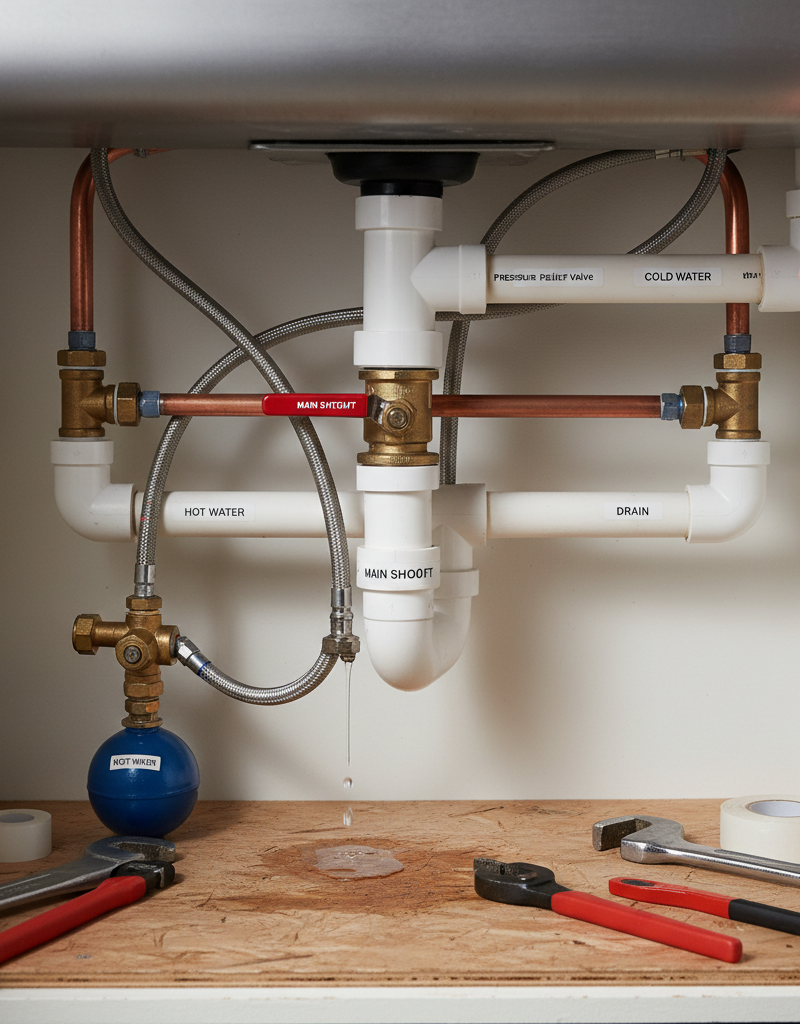
- Know Your Home's Plumbing: Take some time to actually trace your water lines and drain lines. Understand where your main shut-off is, and what types of pipes you currently have. This knowledge is priceless.
- Insulate Pipes in Cold Climates: Especially pipes in unheated areas like basements, crawl spaces, or exterior walls. Foam pipe insulation is cheap and easy to install, preventing frozen pipes. For pipes in exterior walls, consider spray foam insulation.
- Use the Right Drain Cleaner (or None at All): Chemical drain cleaners can be corrosive. For clogs, try a snake first. If you must use a chemical cleaner, ensure it’s safe for your specific pipe material—enzymatic cleaners are generally safer for all pipe types.
- Regular Visual Inspections: Periodically check exposed pipes in your basement, under sinks, and in utility closets for any signs of corrosion, drips, or discoloration. Catching a small leak early can prevent a huge problem later.
- Understand Water Chemistry: If you have well water or live in an area with particularly hard or acidic municipal water, certain pipe materials (like copper) might be more prone to corrosion. A water test can inform your choices.
- Plan Ahead for Future Access: When installing new pipes, especially behind walls or ceilings, think about how you’d access them for future repairs. Don’t bury shut-off valves or critical connections where you can’t get to them.
- Keep a Small Supply of Common Fittings: For PEX, a few crimp rings and couplings; for PVC, a few slip couplings and some cement. Having these on hand can save you a trip to the store when a small emergency pops up.
When to Call a Professional
Look, some jobs are just too big or too risky for a typical DIYer, and that’s okay. If you’re dealing with your main water supply line, any gas lines (absolutely never DIY gas!), or if you’re thinking about doing a whole-house re-pipe, call a licensed plumber. Any project that involves opening up load-bearing walls and running substantial new piping, or if you encounter asbestos around old pipes, also falls into the "pro only" category. If you turn off the water to your whole house and can’t get it back on, or you’ve sprung a leak that you can’t stop, it’s time to pick up the phone. A pro has the tools, the experience, and the insurance to handle these jobs safely and correctly, preventing a lot more expensive problems down the road. Especially when potable water safety or structural integrity is on the line, don’t gamble.
Related Articles
Keep troubleshooting with these hand-picked guides from FixlyGuide:
- The Surprising Trick to Cutting Your Dryer Bill By $100 Per Year — Installing a clothesline can significantly reduce your energy bills and add a fresh scent to your laundry. This guide covers how to choose…
- The #1 Chainsaw Mistake That Wrecks Your Yard (and Your Back) — Avoid common chainsaw errors that lead to frustration, damage, and unnecessary physical strain.
- The 12 Checks That Prevent 80% of Costly Home Repairs — Don't wait for a disaster. Our comprehensive monthly home maintenance checklist reveals the surprising, simple tasks that catch small issue…
- Is a Wall-Mounted Pressure Washer Right for Your Garage? The Unvarnished Truth — Discover if a wall-mounted pressure washer is the right cleaning solution for your home, offering a powerful and space-saving alternative t…
- The 4 Critical Dimensions of a Bluebird House (Most DIY Plans Miss One) — Discover the precise measurements and often-overlooked design elements essential for building a bluebird house that truly attracts nesting…
- The #1 Backsplash Mistake Most DIYers Make (And How to Fix It Before It's Too Late) — Discover the most overlooked mistake in beginner backsplash installations and how to prevent or fix it for a professional-looking finish.
Should you do this yourself?
Answer five quick questions before you start. Safety outranks savings every time.
Your experience with work like this
How high do you have to work?
Does the job involve any of these?
Will it need a permit?
Specialty tools
Free and instant. Educational guidance only — not a quote, inspection, or professional diagnosis.
What should this project cost?
Enter your project details for a realistic cost range before you call anyone.
Common repairs run $150–$650; repipes and water-heater replacements reach $1,500–$4,500.
- Regional adjustment
- National average
- Labor share (typical)
- ~$754
- Quotes to collect
- 3 written estimates
Educational estimate based on national averages — not a binding quote. Always confirm with written local estimates.
Before you start
Check the difficulty, permits, and safety risk — then decide whether to call a pro.
- Estimate this projectGet a cost range for your scope and ZIP before you call anyone.Open
- Get local estimatesSend one request and compare written estimates from vetted pros.Open
Free, no signup required. Estimates are educational guidance, not a quote or an inspection.
Get the print-ready PDF of this guide
A clean, ad-free, printable version you can keep on your phone or pin to the workshop wall. Free with a FixlyGuide account.
- Print-optimized layout
- Tools, materials & every step included
- Saved to your account
This article was independently written by FixlyGuide based on the source topic.
Frequently asked questions
Can I use PVC pipe for hot water?+
No, absolutely not. Standard PVC (Polyvinyl Chloride) pipe is not rated for hot water. It will soften, deform, and eventually fail under sustained hot water temperatures and pressure, leading to leaks or bursts. Always use materials like PEX or CPVC for hot water supply lines.
What is the best pipe for water supply lines?+
For most modern installations, PEX (cross-linked polyethylene) is often considered the best due to its flexibility, burst resistance (especially to freezing), ease of installation, and cost-effectiveness. Copper is also excellent, offering superior durability and higher temperature resistance, but it's more expensive and harder to install.
What's the difference between PVC and CPVC?+
PVC (Polyvinyl Chloride) is typically used for drain, waste, and vent (DWV) systems and cold-water irrigation due to its lower temperature rating. CPVC (Chlorinated Polyvinyl Chloride) is chemically treated to withstand higher temperatures and is suitable for both hot and cold potable water supply lines, though it can become brittle over time.
Do I need a dielectric union between copper and galvanized pipe?+
Yes, always. Connecting dissimilar metals like copper and galvanized steel directly will cause galvanic corrosion, which rapidly degrades the weaker metal (usually the steel). A dielectric union acts as an insulator, preventing this electrochemical reaction and extending the life of your plumbing.
How long do different plumbing pipes last?+
Copper pipes can last 50-70 years or more. PEX pipes have an estimated lifespan of 40-50 years. PVC and ABS drain pipes typically last 50-70 years. Galvanized steel pipes often fail within 20-50 years due to internal corrosion and mineral buildup.
Can I bury PEX pipe underground?+
Yes, PEX can be buried underground for water supply lines. However, it should be protected from direct sunlight (UV rays) before burial and from sharp objects in the soil. Always ensure it's buried below the frost line in cold climates to prevent freezing, even though PEX has some freeze-resistance.
What are pipe Schedules (e.g., Schedule 40)?+
Pipe 'Schedule' refers to the pipe's wall thickness. A higher schedule number (like Schedule 80 vs. Schedule 40) means a thicker pipe wall. Thicker walls generally mean the pipe can handle higher pressures. For residential DWV applications, Schedule 40 PVC is most common.
When should I use ABS pipe instead of PVC?+
ABS (Acrylonitrile Butadiene Styrene) is very similar to PVC for drain, waste, and vent (DWV) applications. It's often preferred in colder climates because it can be slightly more impact-resistant than PVC at lower temperatures. However, many areas only permit one or the other, so always check local plumbing codes.
Is it safe to drink water from PEX pipes?+
Yes, PEX pipes manufactured to current standards are safe for potable (drinking) water. They are tested and certified by organizations like NSF International (e.g., NSF/ANSI Standard 61) to ensure they do not leach harmful chemicals into the water.
What's the best way to cut plastic pipes?+
For PVC, CPVC, or ABS, a ratcheting pipe cutter provides the cleanest, quickest cut. A fine-tooth hacksaw can also work, but generally leaves a rougher edge that needs deburring. Always make sure your cut is square for a good solvent weld.


Discussion
Loading comments…