- For rectangular pools: Measure length (L) x width (W) in feet to get square footage. (e.g., 20 ft x 40 ft = 800 sq ft).
- For round pools: Measure the diameter (D) in feet, then calculate using π (D/2)^2. (e.g., for a 24 ft diameter pool: 3.14 (1212) = 452.16 sq ft).
- For irregular shapes: Break the pool into approximate rectangles or circles, calculate each section, and sum them up. Aim for accuracy, as this number directly impacts collector area.
HVAC · High energy usage
| Project category | HVAC |
|---|---|
| Problem type | High energy usage |
| Trade required | HVAC |
| Urgency | Planned project |
| Safety risk | Low safety risk |
| DIY suitability | DIY for experienced homeowners |
| Cost category | High cost |
| Typical timeline | Assessment within weeks; replacement planned off-season |
| Contractor type | Licensed HVAC technician |
Repair option
Duct sealing, insulation, and a tune-up before touching the equipment.
Replacement option
High-efficiency replacement sized by a load calculation, not a rule of thumb.
Common causes
- Aging, low-efficiency equipment
- Leaking ducts losing conditioned air
- Insufficient attic insulation
- Oversized system short-cycling
Relevant tools:project cost estimatorrepair or replace
Published June 19, 2026Last updated August 17, 2026
Tools & materials you'll need
Affiliate linksAs an Amazon Associate FixlyGuide earns from qualifying purchases — at no extra cost to you. Prices and availability are accurate as of publication and subject to change.
Quick Answer
Many homeowners dream of a warmer pool without the sky-high energy bills. The secret lies in a well-sized solar pool heating system. The most common pitfall is underestimating the collector area needed, which means your system won't effectively warm your pool. Aim for a collector size that is at least 50% of your pool's surface area, and up to 100% or more in cooler climates or for extended swimming seasons. This ensures robust heating, typically raising water temperature by 10-15°F on sunny days, making your pool enjoyable for more months of the year, all while using free energy from the sun.
The Problem
You've invested in a beautiful backyard pool, but the water is often too chilly for comfortable swimming, especially during shoulder seasons. Traditional gas or electric heaters can be incredibly expensive to operate, making daily use an extravagance. Solar pool heaters offer an attractive, eco-friendly alternative, promising to extend your swimming season and reduce operational costs to nearly zero. However, many homeowners install systems that simply don't deliver on their promise. The core problem usually isn't a faulty system, but rather an improperly sized one. An undersized system struggles to keep up with heat loss, resulting in only a marginal temperature increase, frustrating owners and leading to the misconception that solar pool heating doesn't "work." Conversely, an oversized system isn't necessarily bad but can be an unnecessary upfront expense if not truly needed for your climate or desired temperature.
How It Works
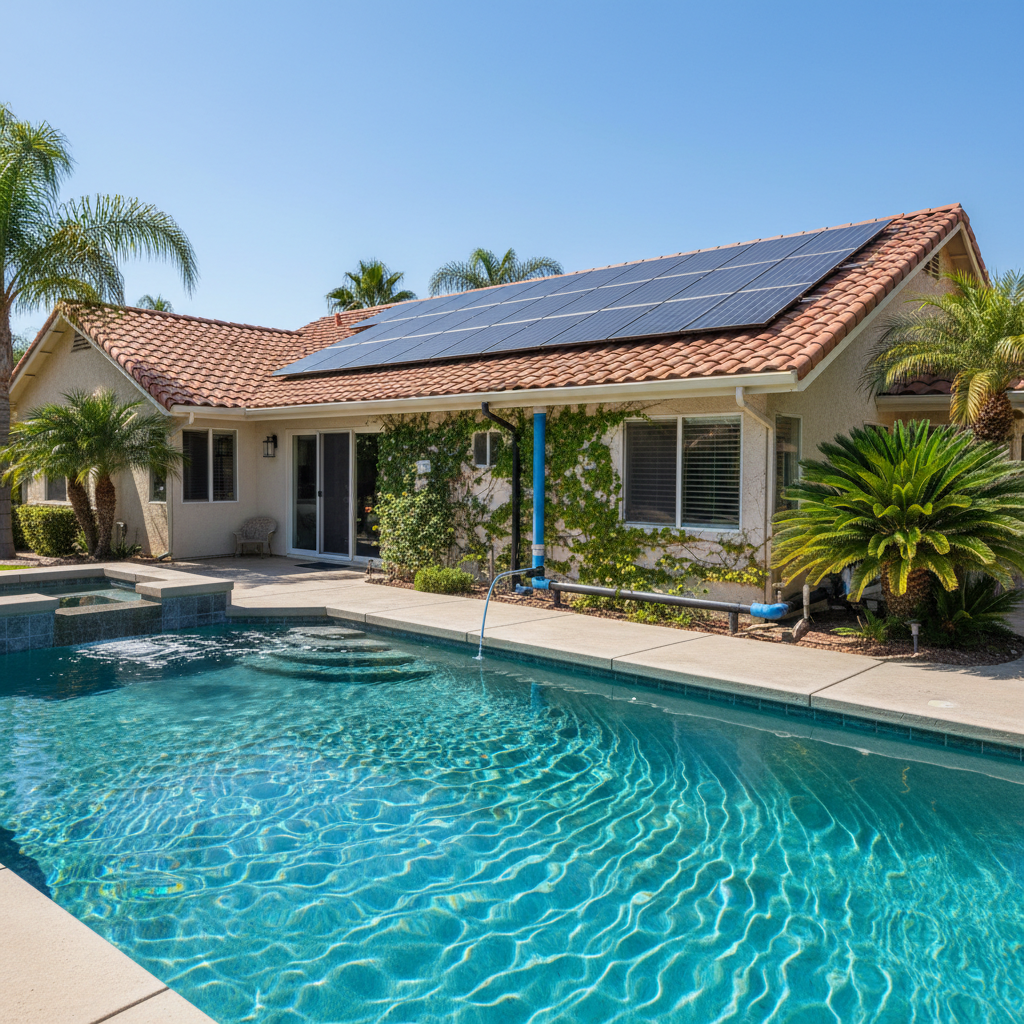
Solar pool heating systems operate on a beautifully simple principle: they use the sun's free energy to warm your pool water. The heart of the system is the solar collector, typically a series of black rubber or plastic mats, often installed on a roof. Here's the cycle:
- Water Diversion: Your existing pool pump, or a dedicated booster pump, diverts pool water through a three-way valve to the solar collectors.
- Solar Absorption: As pool water circulates through the maze of tubes within the collector, it absorbs heat from the sun. The black material of the collectors efficiently absorbs solar radiation, transferring that thermal energy directly to the water.
- Heated Water Return: The warmed water then flows from the collectors, back through the three-way valve, and exits through your pool's return jets, gradually increasing the overall pool temperature.
- Automatic Control: A differential controller often manages the system. It monitors the temperature of the water in the collectors and the temperature of the pool water. When the collectors are significantly warmer (typically 4-8°F) than the pool, the controller opens the valve, allowing water to flow to the collectors. When the sun isn't shining, or the pool reaches its target temperature, the controller closes the valve, bypassing the collectors.
This continuous circulation allows for a gradual, consistent warming of the entire pool volume. Unlike traditional heaters that burn fuel or use electricity to rapidly heat water, solar systems work passively and incrementally throughout the day, making them highly efficient and cost-effective over the long term. The key is ensuring enough collector surface area to capture sufficient solar energy relative to your pool's heat loss.
Step-by-Step Fix
If your current solar pool heater isn't performing, or you're planning a new installation, the "fix" primarily revolves around proper sizing, installation, and optimization. Here's how to approach it:
Step 1: Accurately Measure Your Pool's Surface Area – The foundation of effective solar heating is knowing your pool's dimensions.
- For rectangular pools: Measure length (L) x width (W) in feet to get square footage. (e.g., 20 ft x 40 ft = 800 sq ft).
- For round pools: Measure the diameter (D) in feet, then calculate using π * (D/2)^2. (e.g., for a 24 ft diameter pool: 3.14 * (12*12) = 452.16 sq ft).
- For irregular shapes: Break the pool into approximate rectangles or circles, calculate each section, and sum them up. Aim for accuracy, as this number directly impacts collector area.
Step 2: Determine Your Target Collector-to-Pool Ratio – This ratio depends on your climate, desired swimming season, and specific pool characteristics.
- General Guideline: Start with a minimum of 50% of your pool's surface area in collector area. This is suitable for warmer climates or if you only need a slight temperature boost.
- Cooler Climates/Extended Season: For significant heating or to extend your swimming season into cooler months, aim for 75% to 100% (or even 120%) of your pool's surface area in collectors. Regions with less intense sun or higher wind exposure will require more collector area.
- Factors to Consider: Wind exposure (causes significant heat loss), shading (reduces sun exposure to the pool), desired temperature (higher temps need more collectors), and your local climate.
Step 3: Evaluate Available Roof or Mounting Space – Not all roof space is created equal for solar collectors.
- Orientation: South-facing roofs (in the Northern Hemisphere) are ideal for maximum sun exposure. East or west-facing roofs can work but may require a larger collector area to compensate for less optimal sun angles.
- Shading: Avoid areas with significant shading from trees, chimneys, or other structures, especially during peak sun hours (10 AM to 4 PM).
- Structural Integrity: Ensure your roof can support the weight of the collectors, especially when filled with water. Consult a structural engineer if unsure.
- Plumbing Runs: Consider the distance from your pool equipment pad to the proposed collector location. Long plumbing runs can increase installation cost and lead to minor heat loss.
Step 4: Select the Right Type of Solar Collector – The most common types are glazed and unglazed.
- Unglazed Collectors: Most common for pool heating. Made of UV-stabilized rubber or plastic. Less expensive, very efficient at lower temperature differentials, and robust. Best for climates where freezing is rare or where systems can be easily drained.
- Glazed Collectors: Enclosed in a glass or polycarbonate casing, with an insulated backing. More expensive, but more efficient at higher temperatures and in colder, windier conditions. Often used for domestic hot water, but can be used for pools where very high temperatures are desired or in extreme climates, though less common due to cost.
- Material Considerations: Ensure the materials are compatible with pool chemicals and UV resistant. Ethylene propylene diene monomer (EPDM) rubber is a popular choice for its durability.
Step 5: Prepare the Mounting Surface and Plumbing – Proper installation is crucial for efficiency and longevity.
- Clean Surface: Ensure the roof or mounting rack is clean and free of debris.
- Secure Mounting: Collectors must be securely fastened to withstand wind loads. Use appropriate mounting hardware that penetrates the roof correctly and is sealed to prevent leaks.
- Plumbing Connections: Use PVC piping for main runs and specific high-temperature flexible hoses or unions for connecting collectors. Ensure all connections are watertight and pressure-tested. Proper venting is also critical to prevent airlocks and ensure even flow through the collectors.
- Bypass Valve: Install a three-way diverter valve to allow you to bypass the collectors when not needed (e.g., at night, during maintenance, or when too much heat is undesirable).
Step 6: Install the Control System – An automatic controller optimizes performance.
- Differential Controller: This electronic brain senses the temperature of the collector and the pool water. When the collector is sufficiently warmer (typically 6-8°F), it activates the diverter valve to send water to the collectors. When temperatures equalize or the sun sets, it bypasses the collectors.
- Sensors: Install temperature sensors (typically thermistors) in the collector outlet and in the pool return line (before the solar return), following the manufacturer's instructions.
- Wiring: Connect the controller to your pool pump's power circuit and the actuator on the three-way valve. Always turn off power at the breaker before working on electrical components.
Step 7: Test the System and Optimize Flow – Verify proper operation and maximize efficiency.
- Leak Check: Pressurize the system and carefully check all plumbing connections for leaks immediately after installation.
- Flow Rate: Ensure adequate flow through the collectors. Manufacturers typically specify desired flow rates, which can sometimes be adjusted via a flow restrictor or valve. Insufficient flow reduces heating efficiency, while excessive flow can cause undue wear on the pump or system.
- Temperature Monitoring: Monitor your pool temperature and collector temperature over several sunny days to gauge performance. Adjust controller settings if necessary.
- Winterization (If Applicable): In climates with freezing temperatures, establish a routine for draining and preparing your solar collectors for winter to prevent freeze damage.
Common Causes
Under-sizing the Collector Array
The most prevalent reason for an underperforming solar pool heater is simply not having enough collector surface area relative to your pool's size and the climate. Homeowners often aim for the smallest array to save on upfront costs, but this compromises the system's ability to effectively heat the mass of water in the pool. A rule of thumb of "50% of pool surface area" is a minimum, not an ideal, especially in cooler regions or for extended swimming seasons.
Improper Orientation or Shading
Collectors placed on north-facing roofs, or those significantly shaded by trees, chimneys, or neighboring buildings, will not receive sufficient direct sunlight to heat the pool effectively. Even partial shading during peak hours (10 AM to 4 PM) can drastically reduce performance.
High Heat Loss from the Pool
Even with a perfectly sized and oriented system, a pool that loses heat rapidly will struggle to warm up. Major culprits include: no pool cover (evaporation is the biggest heat killer), high winds over the pool surface, and lack of insulation around an above-ground pool.
Inadequate Water Flow
If the pool pump is too small, clogged, or there's an issue with plumbing (e.g., restricted pipes, airlocks), water may not flow efficiently through the collectors. Insufficient flow means the water spends less time in the collectors to absorb heat, or the collectors don't fill properly.
Leaks or Air Ingress
Leaks in the collector array or plumbing lines can reduce pressure, introduce air into the system, and hinder proper water circulation and heat transfer. Air accumulation (airlocks) can prevent water from flowing through entire sections of the collector, rendering them useless.
Common Mistakes
- Ignoring a Pool Cover: Many DIYers invest in solar but skip a quality pool cover. Evaporation accounts for 70-80% of pool heat loss. Without a cover, your solar heater constantly battles this loss, severely diminishing its effectiveness and wasting the heat it generates.
- Incorrect Pipe Sizing: Using undersized plumbing (e.g., 1.5-inch PVC where 2-inch is needed) for the solar loop can restrict flow, reduce efficiency, and put undue strain on your pool pump. Always match plumbing to the manufacturer's recommendations and typical pool equipment standards.
- Poor Roof Integration: Running pipes directly over high traffic pathways or without proper support can lead to damage and leaks. Ensure pipes are neatly routed, secured, and properly insulated, especially on longer runs, to minimize heat loss.
- Failing to Winterize (in Cold Climates): In regions with freezing temperatures, forgetting to drain your solar collectors and plumbing lines before winter hits is a costly mistake. Water trapped in the system will freeze, expand, and crack collectors or pipes, requiring expensive repairs or full replacement.
- Not Considering Shading Throughout the Day/Year: What looks like a sunny spot in the morning might be shaded by a tree or fence in the afternoon. Pay attention to shade patterns throughout the day and even across different seasons as the sun
Related Articles
Keep troubleshooting with these hand-picked guides from FixlyGuide:
- The Secret to Lush Raised Beds? It's Not Just About How You Water — Smart irrigation for raised garden beds isn't just about automation; it's about delivering the right amount of water precisely when your pl…
- The 4-Hour — Transform your garden into a self-sufficient oasis with smart strategies for watering, weeding, and pest control, minimizing your effort.
- The One Item Every DIYer Needs (And Why You're Probably Using the Wrong Kind) — Unlock comfort and prevent long-term joint damage with the right knee pads for every home project, from gardening to flooring installation.
- The Hidden Reason Your GFCI Trips (It's Not Always a Faulty Outlet) — A continuously tripping GFCI outlet is a critical safety warning, often indicating moisture, a faulty appliance, or a wiring problem that r…
- The Hidden Reason Your AC Isn't Cooling (It's Not Just Freon) — A central AC system that isn't cooling your home can often be traced back to a surprising culprit: airflow obstruction, which mistakenly le…
- The $7 Secret Why Your AC is Leaking Water (And How to Fix It in 15 Minutes) — A clogged AC drain line is a common culprit for water leaks, but a simple and inexpensive fix can get your system running smoothly again.
What should this project cost?
Enter your project details for a realistic cost range before you call anyone.
Cost depends heavily on which system turns out to be the source.
- Regional adjustment
- National average
- Labor share (typical)
- ~$1,620
- Quotes to collect
- 3 written estimates
Educational estimate based on national averages — not a binding quote. Always confirm with written local estimates.
This article was independently written by FixlyGuide based on the source topic.
Frequently asked questions
How much does a solar pool heater raise the temperature?+
A properly sized and installed solar pool heating system can typically raise your pool's water temperature by 10-15°F (6-8°C) on sunny days, making your pool much more comfortable for swimming.


Discussion
Loading comments…