
- Look for water stains, discoloration, or dripping. Pay close attention to rafters, ceiling joists, the underside of the roof decking, and insulation. Even small, faint stains can indicate a developing problem. Use a powerful flashlight.
- Check insulation for dampness or compression. Wet insulation loses its R-value and can harbor mold. Press on it gently; if it feels heavy or soggy, you have a leak.
- Note unpleasant musty odors. This is a strong indicator of mold or mildew growth due to moisture, even if you can't see the water itself.
- If you find a drip, try to trace it upwards. This can help pinpoint the general area on the roof. Place a bucket to catch drips to prevent further damage.
Plumbing · Leak
| Project category | Plumbing |
|---|---|
| Problem type | Leak |
| Trade required | Plumbing |
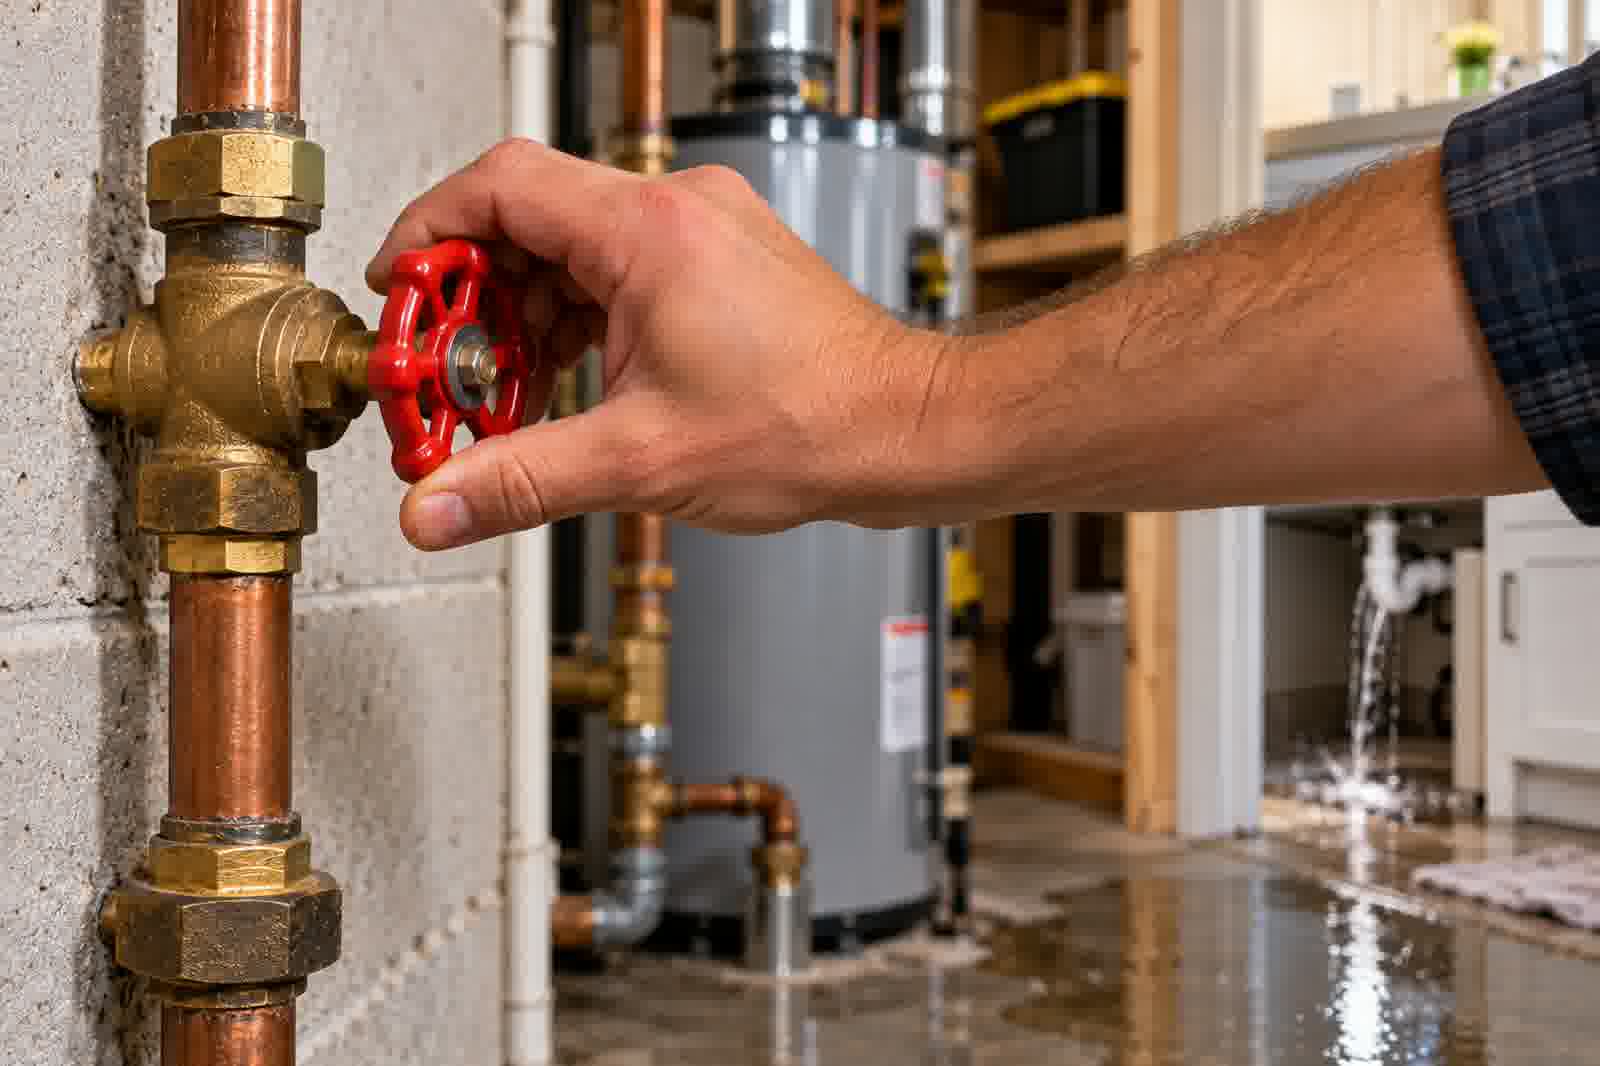
| Urgency | Emergency — act now |
| Safety risk | High safety risk |
| DIY suitability | DIY for experienced homeowners |
| Cost category | Low cost |
| Typical timeline | Shut water off now; repair usually same or next day |
| Contractor type | Licensed plumber |
Repair option
Isolate at the shutoff, replace the failed component, and dry the cavity fully.
Replacement option
Repipe the run or the branch when corrosion is widespread.
Common causes
- Failed supply line or shutoff valve
- Worn washers, cartridges, or P-trap connections
- Pinhole corrosion in older copper
Relevant tools:emergency checklistdiy or hire a pro
Published May 22, 2026Last updated August 17, 2026
Tools & materials you'll need
Affiliate links- AmazonStep ladder or extension ladderEnsure it's stable and tall enough for safe attic access or ground-level roof viewing.
- AmazonPowerful flashlightFor examining dark attic spaces and roof crevices.
- AmazonBinocularsFor safe, close-up inspection of roof from the ground.
- AmazonGarden hose with adjustable nozzleFor controlled water testing if the leak source is elusive.
- AmazonBucket or plastic tarpTo catch drips during inspection or water testing.
- AmazonSafety glovesWhen handling insulation or potentially sharp roof debris.
- AmazonRoofing nailsIf re-securing a loose shingle (check existing type).
- AmazonRoofing cement / sealantFor minor flashing repairs or sealing small cracks (optional, for very minor fixes only).
As an Amazon Associate FixlyGuide earns from qualifying purchases — at no extra cost to you. Prices and availability are accurate as of publication and subject to change.
Quick Answer
Early detection of a roof leak is crucial for preventing extensive damage and costly repairs. Homeowners often miss subtle indicators, focusing only on ceiling stains. The quickest way to spot a leak before it worsens is by regularly checking your attic or crawl space, inspecting flashing around chimneys and vents, and looking for damaged or missing shingles after storms. Addressing these issues promptly can save thousands.
The Problem
You hear a drip, then you see a stain – by the time water shows up on your ceiling, a roof leak has likely been active for a while, potentially causing significant, hidden damage to your attic, insulation, framing, and even electrical systems. The real problem isn't just the water itself, but the insidious nature of its travel. Water can enter through a tiny pinhole far from where it eventually appears, wicking along rafters, pipes, and wires, slowly deteriorating materials and fostering mold growth in unseen cavities. This delay in detection means what starts as a small, inexpensive fix can quickly escalate into a several-thousand-dollar renovation project involving structural repairs, mold remediation, and even a full roof replacement. The challenge for homeowners is understanding that visible ceiling stains are often the last symptom, not the first, and taking proactive steps to identify the leak's source much earlier.
How It Works
Your roof is a complex system designed to shed water. Shingles or other roofing materials form the primary barrier, overlapping to direct water downward. Beneath these is an underlayment, typically felt or synthetic, which acts as a secondary waterproof layer, especially critical if shingles are damaged. Flashing—thin sheets of metal, usually aluminum or galvanized steel—are installed around critical junctures like chimneys, skylights, vents, and valleys where roof planes meet. These are exceptionally important because they seal areas where the roofing material itself cannot provide a continuous barrier. When rain falls, it hits the roof surface, flows over the shingles, and is channeled off the roof. However, if a shingle is cracked, lifted, or missing, water can seep underneath. If flashing is improperly installed, corroded, or damaged, water can penetrate the seal. Once water breaches the primary roof layers, gravity pulls it downwards. It doesn't necessarily drip straight down; instead, it tends to follow the path of least resistance. This means it can travel horizontally along roof decking, rafters, or even electrical conduits and plumbing pipes until it encounters a low point or a penetration, eventually soaking insulation and staining your ceiling. This indirect path is why the visible leak location inside your home rarely aligns with the exact entry point on the roof, making early detection and source identification challenging but critical.
Step-by-Step Fix
1. Survey Your Attic or Crawl Space – Start indoors for the clearest signs.
- Look for water stains, discoloration, or dripping. Pay close attention to rafters, ceiling joists, the underside of the roof decking, and insulation. Even small, faint stains can indicate a developing problem. Use a powerful flashlight.
- Check insulation for dampness or compression. Wet insulation loses its R-value and can harbor mold. Press on it gently; if it feels heavy or soggy, you have a leak.
- Note unpleasant musty odors. This is a strong indicator of mold or mildew growth due to moisture, even if you can't see the water itself.
- If you find a drip, try to trace it upwards. This can help pinpoint the general area on the roof. Place a bucket to catch drips to prevent further damage.
2. Check Your Ceiling and Walls for Subtle Clues – Don't wait for obvious drips.
- Look for faint yellow or brown water stains. These often appear as rings or irregular shapes and can be very subtle at first. Stains around light fixtures or vents are common.
- Inspect paint for bubbling, peeling, or sagging. These are signs that moisture is present behind the drywall or plaster.
- Feel walls and ceilings for dampness. Even if not visible, a slight dampness can indicate a leak in progress.
- If a stain is present, gently press on the area. If it feels soft or spongy, the drywall is compromised and saturated with water.
3. Inspect Your Roof from the Ground with Binoculars – Safety first; avoid climbing if unsure.
- Look for missing, cracked, or curled shingles. These are common entry points for water. Curled edges can lift, allowing water underneath.
- Identify damaged or deteriorated flashing. Pay special attention to areas around chimneys, skylights, vents, and in roof valleys. Look for gaps, rust, or sealant that is cracking or pulling away.
- Examine roof vents and exhaust pipes. Check for damaged seals, cracked vent caps, or loose connections.
- Look for piles of shingle granules in gutters. While normal aging causes some granule loss, excessive amounts can indicate significant shingle deterioration and a weakened protective layer.
4. Check Your Gutters and Downspouts – Preventing overflow issues.
- Ensure gutters are clear of leaves, twigs, and debris. Clogged gutters can cause water to back up and overflow, potentially soaking fascia boards and eventually finding its way into your home.
- Verify downspouts are properly directing water away. Water should be channeled at least 5-10 feet from your foundation to prevent saturation and potential basement leaks that might seem like roof leaks.
- Look for signs of overflow or rust. These can indicate chronic clogging issues.
5. Carefully Inspect Flashing on the Roof (If Safe and Accessible) – This is where many leaks originate.
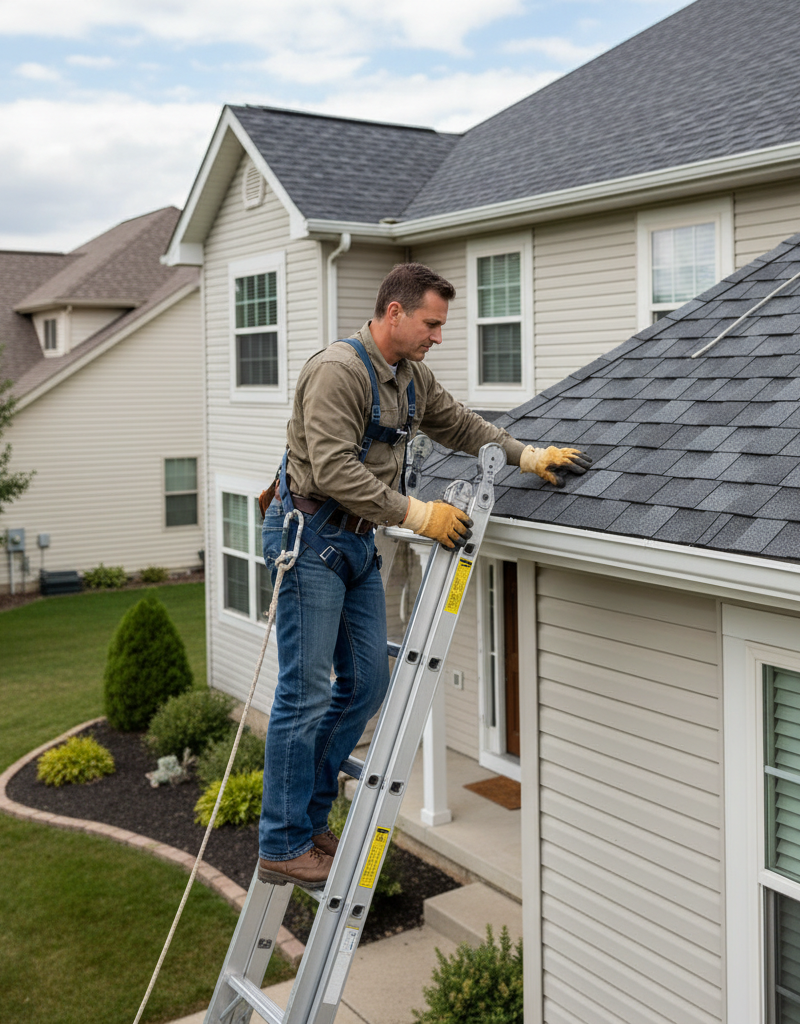
- Prioritize safety. Use a sturdy ladder, wear appropriate footwear, and have a spotter if possible. If you are uncomfortable or the roof is steep/wet, do not climb – call a professional.
- Examine all flashing points. Gently press on metal flashing to ensure it's firmly attached and not loose. Look for signs of corrosion or holes.
- Check sealant around flashing. Caulking or roof cement around flashing, vents, and skylights can dry out, crack, and fail over time. Look for any signs of degradation or gaps.
6. Perform a Controlled Water Test (If Leak Source is Elusive) – Simulate rain to pinpoint the entry point.
- Have a helper inside the attic with a flashlight and communication. This is crucial for pinpointing the leak location.
- Start watering the lowest suspect area first (e.g., around a single vent) using a garden hose with a moderate stream. Let it run for several minutes.
- Move upwards systematically. If no leak is observed, move the water stream to the next highest suspect area (e.g., higher up a chimney or a new section of shingles). This prevents water from running down from an upper source and misleading you.
- Wait for the leak to appear. The helper inside will signal when water is spotted. This method helps isolate the exact entry point.
- Stop immediately once the leak is found. Don't over-saturate. Make a clear note of the area.
Safety Note: Never climb onto a wet, icy, or excessively steep roof. Always use a ladder safely, ensuring it's on stable ground and extends at least three feet above the roofline. If you are unsure or uncomfortable with any roof work, contact a licensed roofing professional.
Common Causes
- Damaged or Missing Shingles: The most common culprit. High winds, hail, or even general wear and tear can lift, crack, or completely remove shingles, exposing the underlayment to water.
- Failed Flashing: Metal flashing around chimneys, skylights, vents, and in valleys is a frequent leak source. Over time, sealant can degrade, metal can corrode, or improper installation can allow water penetration. This accounts for a significant percentage of roof leaks.
- Clogged Gutters and Downspouts: When gutters overflow, water can pool at the roof's edge, soak into fascia boards, and seep under the eaves or behind siding, mimicking a roof leak.
- Poorly Sealed Vents or Pipes: Any penetration through the roof, such as plumbing vent pipes, exhaust fan vents, or satellite dish mounts, requires a watertight seal. If these seals crack or degrade, they become entry points.
- Ice Dams: In colder climates, ice dams form when heat escapes through the roof, melting snow which then refreezes at the colder eaves. This ridge of ice prevents meltwater from draining, causing it to back up under shingles and into the home.
- Skylight Leaks: Skylights are notorious for leaks due to improper installation, degraded seals around the glass, or compromised flashing where the skylight meets the roof.
- Age and Wear: Simply put, roofs don't last forever. As materials age, they become brittle, less flexible, and more susceptible to damage, making leaks more likely.
Common Mistakes
- Ignoring Small Stains: Many homeowners dismiss a small ceiling stain as an anomaly, waiting until it grows significantly before investigating. Small stains are always signals of potential bigger problems and should be addressed immediately.
- Assuming the Leak is Directly Above the Stain: Water travels. A stain on your living room ceiling could originate from a compromised shingle or flashing several feet away, uphill from the visible leak. Always trace upward if possible.
- Using Too Much Sealant as a Fix: Slathering silicone or roof cement over a suspected leak point without properly diagnosing the source usually doesn't work and can make future repairs harder. Address the underlying issue rather than patching.
- DIYing Dangerous Roof Repairs: Climbing onto a steep, wet, or damaged roof without proper safety equipment or experience is extremely hazardous. If in doubt, call a professional. No repair is worth a serious injury.
- Neglecting Gutter Maintenance: Clogged gutters are a leading cause of roof-edge leaks and can lead to fascia rot and foundation issues. Regular cleaning is a simple, cost-effective preventative measure often overlooked.
- Failing to Check the Attic: Many homeowners only look at the exterior of the roof. The attic provides invaluable internal evidence of leaks – wet insulation, drips on rafters, and mold growth can be seen long before exterior damage is obvious to the untrained eye.
Cost & Time Breakdown
| Task | DIY cost | Pro cost | Time |
|---|---|---|---|
| Initial Attic/Visual Check | $0 | N/A | 15–30 min |
| Minor Shingle Repair | $5–$20 (shingles, cement) | $150–$400 | 30 min–1 hour |
| Flashing Resealing | $10–$30 (sealant, brush) | $200–$500 | 1–2 hours |
| Gutter Cleaning | $0 (if you own ladder) | $75–$200 | 30 min–1 hour |
| Water Testing | $0 (just a hose) | Included in inspection | 30 min–1 hour |
| Extensive Leak Repair (Pro) | N/A | $500–$3,000+ (depending on damage) | 4+ hours |
Tips & Prevention
- Annual Roof Inspections: Make it a habit to inspect your roof visually from the ground with binoculars at least once a year, preferably in spring and fall. Look for damaged shingles, flashing issues, or excessive granule loss.
- Clean Gutters Regularly: Clear leaves, debris, and shingle granules from your gutters at least twice a year. Ensure downspouts direct water away from the foundation.
- Trim Overhanging Branches: Trees too close to the roof can cause abrasion, drop debris, and provide pathways for pests. Trim branches to prevent direct contact.
- Check Attic After High Winds/Storms: High winds can lift or damage shingles. A quick check of your attic after a significant storm can catch new leaks before they spread.
- Examine Skylights and Chimneys: These are common leak points. Periodically check their seals and flashing for cracks or deterioration.
- Consider a Roof Tune-Up: Many roofing companies offer inexpensive annual
tune-upservices that include minor repairs, re-caulking, and inspection, proactively preventing larger issues.
When to Call a Professional
You should absolutely call a licensed roofing professional if you identify a roof leak and are uncomfortable or unable to safely access the roof. If the roof is steep, wet, covered in ice or snow, or if you lack a stable ladder and proper safety equipment, avoid climbing. Any suspected structural damage, widespread water stains in the attic, or signs of mold and mildew warrant professional inspection and remediation. If you've attempted the controlled water test but can't pinpoint the source, a professional has specialized tools and experience to diagnose complex leaks. Furthermore, if the leak is extensive, involves multiple failed flashing points, or requires replacing more than a few shingles, the job likely exceeds typical DIY scope and skill. A professional can ensure the repair is done correctly, often backed by a warranty, preventing recurrence. For any issues involving significant roof decking damage or major structural compromise, a professional assessment is critical to ensure the long-term integrity and safety of your home.
Related Articles
Keep troubleshooting with these hand-picked guides from FixlyGuide:
- The One Hidden Sign of a Roof Leak Most Homeowners Miss (And the $10 Fix) — Catching a roof leak early can save thousands in repairs. Learn the elusive signs and a simple, effective fix before minor issues become ma…
- The #1 Mistake Homeowners Make with a Slow Kitchen Sink (And Its Dead Simple Fix) — Before you reach for harsh chemicals, learn the most common, easily fixable reason your kitchen sink is draining slowly and how to fix it y…
- The #1 Mistake Homeowners Make Caulking a Bathroom Sink (And How to Fix It) — Discover the most common caulking mistake homeowners make around bathroom sinks and how to achieve a waterproof, professional-looking seal…
- The #1 Mistake Homeowners Make with a Slow Kitchen Drain (and How to Undo It) — A slow kitchen sink drain is a common and frustrating problem, but often stems from a single preventable mistake that's easily fixed with t…
- The #1 Overlooked Reason Your Chimney Leaks (It Rots Your Roof!) — Discover the surprising, often-missed culprit behind your leaky chimney and how this common issue can silently damage your home.
- The #1 Gutter Mistake That Leads to $10,000 Roof Damage — Learn the most common gutter-cleaning mistake homeowners make and how to properly maintain your gutters to prevent expensive roof damage.
Should you do this yourself?
Answer five quick questions before you start. Safety outranks savings every time.
Your experience with work like this
How high do you have to work?
Does the job involve any of these?
Will it need a permit?
Specialty tools
Free and instant. Educational guidance only — not a quote, inspection, or professional diagnosis.
Questions to ask before you sign
Ask every contractor the same questions and the cheapest bid stops looking cheapest. Check them off as you go — your progress is saved on this device.
Free, no signup. Bring this to every walkthrough so you compare bids on the same terms.
What should this project cost?
Enter your project details for a realistic cost range before you call anyone.
Common repairs run $150–$650; repipes and water-heater replacements reach $1,500–$4,500.
- Regional adjustment
- National average
- Labor share (typical)
- ~$754
- Quotes to collect
- 3 written estimates
Educational estimate based on national averages — not a binding quote. Always confirm with written local estimates.
Fixly Project Decision Box
- DIY difficulty
- Professional Recommended
- Estimated time
- Inspection 1–2 hours · repairs 1–3 days
- Cost level
- High
Main tools / materials
- Binoculars for a ground-level look
- Flashlight for attic checks
- Moisture meter
- Roofing cement (temporary patch only)
When to stop and call a pro
- Active leak near lights, fans, or any wiring
- Sagging, bulging, or water-filled ceiling
- Steep, wet, or two-story roof — do not climb it
- Storm or hail damage you plan to claim on insurance
Need professional help?
Free roof assessment first — no phone calls until you ask for them.
Get Local Roofing HelpGet help with your roof now
Stay off the roof. These free tools help you protect the house and reach the right professional fast.
- Emergency repair checklistThe first steps that limit damage before a pro arrives.Open
- Repair or replace your roof?Answer 10 questions about age, leaks, and damage to get a clear next step.Open
- Get local estimatesSend one request and compare written estimates from vetted pros.Open
Free, no signup required. Estimates are educational guidance, not a quote or an inspection.
Frequently asked questions
How do you find a small roof leak?+
To find a small roof leak, start by thoroughly inspecting your attic for water stains, damp insulation, or musty odors. From the ground, use binoculars to check shingles for cracks or missing pieces, and flashing around vents and chimneys for damage. If needed, perform a controlled water test with a hose, isolating sections of the roof.
What are the first signs of a roof leak?+
The first signs of a roof leak are often subtle, including faint yellow or brown stains on attic rafters or ceiling drywall, damp or compressed insulation, and a musty smell in the attic or upper living spaces. Granules in gutters and curled or cracked shingles visible from the ground can also indicate early problems.
Can a roof leak fix itself?+
No, a roof leak will not fix itself. While some minor leaks might seem to stop temporarily during dry periods, the underlying cause (e.g., damaged shingle, compromised flashing) persists and will allow water to re-enter with the next rain. Neglecting a leak will inevitably lead to more significant and costlier damage over time.
Discussion
Loading comments…