
Tools & materials you'll need
Affiliate linksAs an Amazon Associate FixlyGuide earns from qualifying purchases — at no extra cost to you. Prices and availability are accurate as of publication and subject to change.
Quick Answer
Drafty windows are a leading cause of heat loss and discomfort in many homes, often adding significantly to energy bills. Sealing these leaks yourself is a straightforward and cost-effective DIY project that can dramatically improve your home's energy efficiency and comfort. The most common culprits are worn weatherstripping, cracked caulk around the window frame, or loose sashes. Addressing these issues typically involves cleaning the area, applying new weatherstripping, or re-caulking, and ensuring all window locks are fully engaged.
The Problem
That chilling breeze you feel standing near your window isn't just unpleasant; it's a clear sign of energy escaping your home. Drafty windows allow conditioned air (heated in winter, cooled in summer) to leak out, and unconditioned outside air to seep in. This forces your HVAC system to work harder, leading to increased energy consumption and higher utility bills. Beyond the financial impact, drafts create uncomfortable cold spots, reduce indoor air quality by allowing dust and allergens to enter, and can even contribute to moisture problems if cold, humid air condenses on interior surfaces. Many homeowners overlook the constant trickle of air from seemingly minor gaps, mistakenly believing that only visibly damaged windows are problematic. However, even hairline cracks or slightly deteriorated seals can cumulatively lead to significant energy loss over time.
How It Works
To understand how to seal a drafty window effectively, it helps to know how windows are designed to prevent air infiltration in the first place. A window assembly is a complex system of interconnected components, each playing a role in creating a weather-tight seal. At its most basic, a window consists of a frame (the stationary part connected to your wall), a sash (the movable part that holds the glass), and the glass panes themselves. Air leaks commonly occur at three primary points:
-
Between the window frame and the house frame/wall: The gap where the stationary window frame meets the rough opening in your wall is typically sealed with insulation and caulk during installation. Over time, caulk can dry out, crack, or pull away, creating pathways for air. Likewise, if the initial insulation wasn't sufficient or has settled, air can pass through.
-
Between the sash and the frame: This is where weatherstripping comes into play. Weatherstripping is a material (often foam, rubber, vinyl, or felt) designed to compress when the sash is closed, creating a seal that prevents air from passing between the movable sash and the stationary frame. Constant friction from opening and closing the window, exposure to temperature extremes, and general aging can cause weatherstripping to become brittle, flattened, or fall off entirely, compromising the seal.
-
Around the glass panes (glazing): In older windows, glass panes are often held in place with glazing putty or small clips and a bead of caulk or putty around the edges. As this material ages, it can shrink, crack, or pull away from the glass or the sash, allowing air to leak directly around the glass itself. Newer windows often use sealed insulated glass units (IGUs) which are factory-sealed; a leak here usually indicates a failure of the IGU itself, which typically requires professional replacement.
Understanding these points of failure allows you to systematically inspect your windows and apply the appropriate sealing method, treating the root cause of the draft instead of just the symptom.
Step-by-Step Fix
Before you begin, gather all your tools and materials. Choose a day with mild weather for exterior work. Always approach window sealing methodically to ensure you catch all potential draft sources.
-
Assess the Draft Source – Identify where the cold air is entering.
- Method 1: The Hand Test. On a cold or windy day, slowly move your hand around the perimeter of the closed window, including the frame, sash, and where the glass meets the frame. You'll feel distinct cold spots where air is leaking. Note these locations.
- Method 2: The Smoke Test. Light an incense stick or a thin piece of tissue paper. Hold it near your window's edges. Any deflection or movement of the smoke/tissue indicates an air leak. Be careful with open flames.
-
Clean the Window Area – Prepare surfaces for maximum adhesion.
- Use a utility knife or scraper to remove old, cracked caulk or peeling paint from around the window frame, both interior and exterior. Ensure the surface is smooth and free of debris.
- Thoroughly clean all surfaces where you plan to apply new caulk or weatherstripping with a damp cloth and mild soap, then dry completely. Any dirt, grease, or moisture will prevent proper adhesion.
- Safety Note: When scraping old paint, especially in homes built before 1978, be aware of potential lead paint. Use a respirator and wear gloves, and clean up thoroughly.
-
Inspect and Repair Caulk (Exterior and Interior) – Seal gaps between the window frame and the house.
- Examine the caulk lines around the entire exterior perimeter of the window frame. Look for cracks, gaps, or areas where the caulk has pulled away from the siding or the window itself.
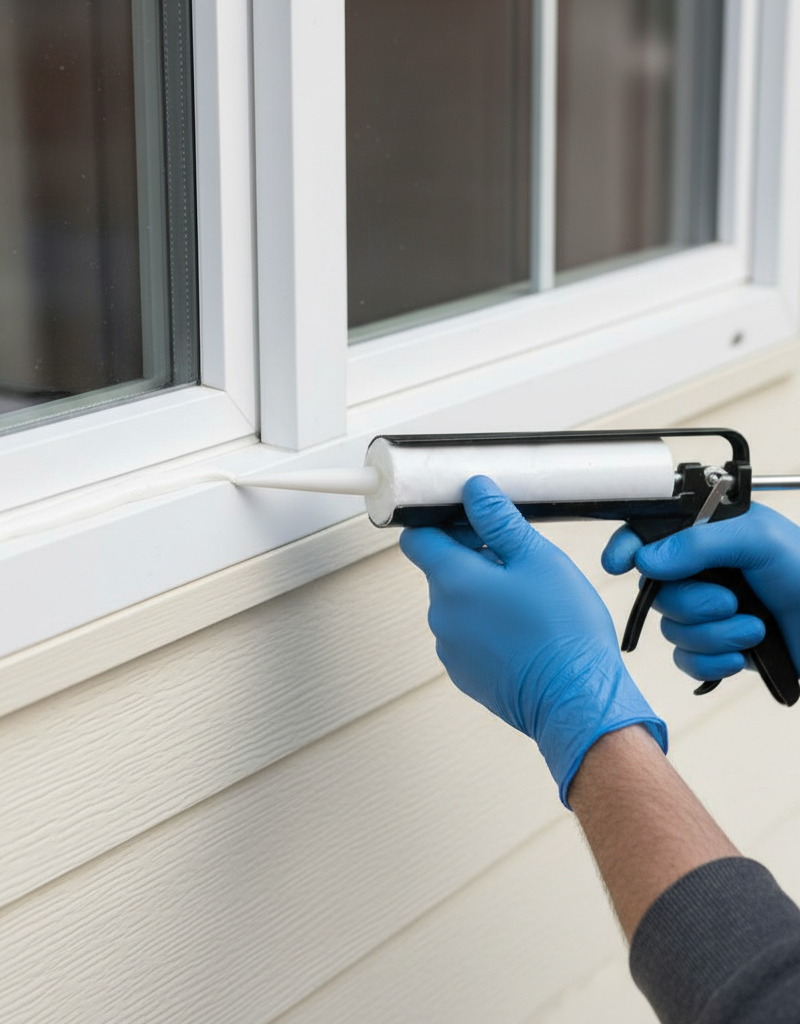
- Carefully cut the tip of your caulk tube at a 45-degree angle, making an opening just wide enough for the gap you're filling. Puncture the inner seal with a long nail or wire.
- Apply a consistent bead of exterior-grade, paintable caulk along all gaps. Maintain steady pressure on the caulk gun and move at a consistent pace. Smooth the caulk bead with a wet finger, caulk tool, or damp sponge immediately after application for a neat finish.
- Repeat the inspection and application process for interior caulk lines where the window trim meets the wall, using an interior-grade, paintable caulk.
- If this doesn't work: If large gaps exist (over 1/4 inch), caulk may not be enough. Consider backer rod inserted into the gap before caulking to provide a base for the caulk and prevent excessive use of material.
-
Replace or Add Weatherstripping (Sash to Frame Leaks) – Create a tight seal around movable parts.
- Open the window and inspect the existing weatherstripping along the sash and frame. Look for flattened, brittle, cracked, or missing sections. If it's worn, carefully peel it off.
- Measure the lengths of weatherstripping you need for all sides of the sash (top, bottom, and sides of both active and inactive sashes for double-hung windows). Cut the new weatherstripping to size.
- Apply self-adhesive foam, V-strip, or compression weatherstripping directly to the clean, dry surfaces of the window sash or frame where it will compress when the window is closed. Ensure a tight, continuous seal without impeding window operation.
- Tip for sliding windows: Apply weatherstripping to the top and bottom rails, and the vertical meeting rail between the two sashes.
- If this doesn't work: For very loose sashes, consider thicker compression weatherstripping or even spring-metal strips, which are more durable but harder to install.
-
Address Glazing Leaks (Around Glass Panes) – Seal gaps where the glass meets the sash.
- For older windows with glazing putty: Inspect the putty around the edges of each glass pane. If you see cracks, crumbling, or separation from the glass or wood, it needs repair.
- Carefully remove loose or failing glazing putty with a putty knife or chisel. Clean the area thoroughly.
- Apply new glazing putty according to product instructions. Roll it into a rope, press it firmly into the rabbet, and then tool it smooth with a putty knife, creating a sloped surface to shed water.
- For windows with a bead of caulk around the glass: Scrape away old, cracked caulk and apply a fresh bead of clear or paintable window and door caulk around the perimeter of the glass, smoothing it as you go.
-
Tighten/Adjust Window Hardware – Ensure sashes are pulled tightly against the frame.
- Check all window locks (sash locks, cam latches). Often, simply tightening these or fully engaging them can pull the sash more snugly against the weatherstripping, significantly reducing drafts. A loose lock is a frequent, overlooked cause of drafts.
- For double-hung windows, inspect the sash balances or cords to ensure the sashes aren't sagging, which can create gaps at the top or bottom when closed.
-
Consider Temporary Solutions (If Needed) – For extreme drafts or temporary fixes.
- Window Insulation Film Kits: These kits involve applying a clear plastic film to the inside of your window frame and heating it with a hairdryer to shrink it taut, creating an insulating air pocket. This is a very effective temporary solution for severe drafts.
- Draft Snakes: Fabric tubes filled with rice or sand placed along the bottom of the window can block drafts, though they are more of a band-aid than a permanent seal.
-
Re-assess and Test – Confirm your efforts have paid off.
- Once all caulk is cured and weatherstripping is in place, repeat the hand test or smoke test to confirm that the drafts have been eliminated or significantly reduced. Address any remaining leaks. This iterative process ensures a truly draft-free window.
Common Causes
Identifying the specific cause of a draft is key to an effective fix. Here are the most common culprits:
- Aged or Damaged Weatherstripping: This is perhaps the most frequent cause. Over years of exposure to sun, cold, and friction from window operation, weatherstripping can become brittle, compressed, torn, or simply fall off, losing its ability to seal gaps between the moving sash and the stationary frame.
- Cracked or Deteriorated Caulk: Caulk provides a crucial seal between the window frame and the wall of your home, both inside and out. UV exposure, temperature fluctuations, and house movement can cause caulk to shrink, crack, or pull away, creating significant air leaks.
- Loose or Misaligned Sashes: If window sashes don't close tightly against the frame, or if hinges/tracks are worn, gaps can form. This might be due to worn hardware, a house settling, or simply the absence of proper locking mechanism engagement.
- Failing Glazing Putty or Gaskets: In older windows, the putty holding the glass in place can dry out, crack, and fall away, creating direct air pathways around the glass panes. Newer windows might have failing glazing beads or gaskets.
- Poor Original Installation: Sometimes, drafts stem from improper installation, such as insufficient insulation or sealing around the window's rough opening when it was first put in. This often manifests as drafts coming from the wall around the window, not just the window components themselves.
- Warped Window Frames or Sashes: Extreme temperature and moisture changes can cause wood window frames or sashes to warp, creating irregular gaps that are difficult to seal with standard methods.
Common Mistakes
Avoiding these common pitfalls will save you time, money, and frustration when tackling drafty windows:
- Not Cleaning Surfaces Thoroughly: Applying caulk or self-adhesive weatherstripping to dirty, dusty, or greasy surfaces is a recipe for failure. The new material won't adhere properly and will quickly peel away, wasting your effort.
- Using the Wrong Type of Caulk: Interior caulk isn't designed for exterior exposure and will fail quickly under UV and weather. Conversely, using exterior, high-performance caulk where a paintable, smooth finish is desired indoors can be overkill and harder to work with. Always match the caulk type to its intended application (interior/exterior, paintable/clear, silicone/latex).
- Over-Sealing or Impeding Window Function: While sealing is good, applying too much weatherstripping or caulk in the wrong spots can make it difficult or impossible to open and close your windows properly. This is especially true for movable window parts. Test function frequently during application.
- Ignoring the Systemic Issue: Simply caulking one small gap without inspecting the entire window for other leaks or underlying issues (like a loose sash) might solve one draft but leave several others, leading to ongoing discomfort and energy loss.
- Rushing the Job: Caulk needs time to cure, and proper surface preparation takes time. Rushing through steps, especially surface prep or smoothing caulk, often leads to a sloppy finish and less effective, shorter-lasting seals.
- **Not Considering the
Related Articles
Keep troubleshooting with these hand-picked guides from FixlyGuide:
- The 5 Hidden Culprits Behind Your Drafty Windows (and the $15 Fix) — Don't let drafty windows steal your home's warmth and inflate your energy bills; learn how to diagnose and seal common air leaks yourself.
- The $7 Secret Why Your Windows Leak Air (And How to Seal Them in an Hour) — Discover the hidden culprits behind drafty windows and learn how to seal them effectively in about an hour with common, inexpensive materia…
- The 3 Hidden Reasons Your Window Won't Stay Up (And the Easy Fixes) — Before you call a repairman, learn the three most common reasons your double-hung window won't stay open and how to fix them yourself.
- The 4 Hidden Causes of Drafty Windows (and How to Seal Them Tight) — Uncover the surprising reasons your windows are letting in cold air and learn practical, DIY solutions to seal them, saving energy and impr…
- The 5-Minute Trick to Fix a Sagging Window (No New Parts Needed) — Discover the simple, often overlooked cause of a window that won't stay open and how to fix it in minutes using common household items.
- The #1 Gutter Mistake That Causes Overflow (It's Not Clogs!) — Discover the often-overlooked culprit behind overflowing gutters during heavy rain and learn the surprising, easy fix most homeowners miss.
Get the print-ready PDF of this guide
A clean, ad-free, printable version you can keep on your phone or pin to the workshop wall. Free with a FixlyGuide account.
- Print-optimized layout
- Tools, materials & every step included
- Saved to your account
Recommended for DIYers & woodworkers
Sponsored
The Top 20 Tools for Workshops of Any Budget
No stationary machines or power tools required — plus 3 fundamental tools that can't be bought at any price.
Get the free guide
Ted's Woodworking — The #1 Woodworking Resource
Detailed instructions, dimensioned drawings, materials & cutting lists, and 3D schematics for every skill level.
See the plansSponsored: links above are affiliate links. FixlyGuide may earn a commission on qualifying purchases — at no extra cost to you.
Frequently asked questions
How do I find where a draft is coming from?+
The easiest way is the 'hand test' on a cold, windy day – slowly move your hand around the window frame, sash, and glass to feel for cold air. Alternatively, use the 'smoke test' with an incense stick or a thin piece of tissue; any deflection indicates a leak.
What kind of caulk should I use for windows?+
For exterior gaps between the window frame and the house, use an exterior-grade, paintable, flexible caulk (silicone or siliconized acrylic latex are good choices). For interior gaps around trim, an interior-grade, paintable acrylic latex caulk is usually sufficient.
Can I use temporary film kits to seal windows?+
Yes, window insulation film kits are an excellent temporary solution, especially for very drafty windows or during extreme cold. They create an insulating air pocket and can significantly reduce heat loss. They are usually applied to the interior frame and sealed with a hairdryer.


Discussion
Loading comments…