
Tools & materials you'll need
Affiliate linksAs an Amazon Associate FixlyGuide earns from qualifying purchases — at no extra cost to you. Prices and availability are accurate as of publication and subject to change.
Quick Answer
Drafty windows are a major source of energy loss and discomfort in many homes. The good news is that most common causes—such as deteriorated weatherstripping, hardened caulk, or gaps in the window casing—can be diagnosed and sealed by a homeowner in about an hour using inexpensive materials like self-adhesive weatherstripping, acrylic latex caulk, or window insulation film. These fixes drastically improve your home's energy efficiency and comfort without requiring professional help or window replacement.
The Problem
You feel a noticeable chill when standing near your windows, even when they're closed. Your furnace or air conditioner seems to run constantly, but certain rooms remain colder in winter or warmer in summer than others. These are classic signs of air infiltration, meaning conditioned indoor air is escaping and unconditioned outdoor air is entering your home through gaps and cracks around your windows. This problem isn't just a minor annoyance; it significantly increases your energy bills, reduces indoor comfort, and can even contribute to moisture issues if warm, moist air condenses on cold surfaces.
While a brand-new window unit looks sealed, over time, the materials designed to block air movement degrade. Caulking dries out, shrinks, and cracks. Weatherstripping—the flexible seals around moving parts of the window—becomes brittle, compresses, or falls off. Even the house settling slightly can create microscopic gaps that allow a surprising amount of air to pass through. Identifying the exact source of these drafts is the first step to a targeted, effective, and budget-friendly repair.
How It Works
Windows are complex assemblies designed to provide light, ventilation, and a view while also forming a critical part of your home's thermal envelope. They achieve this seal through a combination of components. The main barrier against air infiltration is typically a multi-layered system of weatherstripping, caulk, and the window's fit within its frame.
Weatherstripping is usually made of foam, rubber, vinyl, or metal strips, installed along the perimeter of the window sash where it meets the frame. Its purpose is to compress when the window is closed, creating a flexible, airtight seal that accommodates minor movements due to thermal expansion and contraction. Different types of windows use different weatherstripping: fin seals for sliding windows, compression bulbs for casements, and pile strips for double-hung windows. Over years of use, exposure to UV light and temperature extremes, this material can lose its elasticity, tear, or simply degrade, creating direct pathways for air.
Caulking forms a rigid, long-lasting seal around the stationary parts of the window, specifically where the window frame meets the exterior siding or trim, and sometimes on the interior where the frame meets the drywall or casing. Caulk primarily blocks airflow and water penetration. As homes settle, and as caulk ages (typically 5-10 years for acrylic latex), it can shrink, crack, or pull away from the surfaces it's meant to join, leaving visible or invisible gaps. These gaps act like miniature chimneys, allowing air to leak in or out.
The window itself, particularly for double-hung or sliding types, also relies on the snugness of the sash within the frame. If the sash locks are loose, or if the sash balances (the mechanisms that help hold a double-hung window open) are worn, the sash might not seat tightly enough against the weatherstripping, bypassing your seals entirely. Even tiny gaps around jambs and sills, often hidden behind trim, can allow significant airflow when pressure differences exist between the inside and outside of your home.
Step-by-Step Fix
1. Pinpoint the Draft's Origin — The first step is always diagnosis.
Light an incense stick or hold a damp hand near the edges of your closed window on a breezy day. Watch where the smoke wavers or where you feel a distinct cold spot. Pay close attention to the perimeter of the window sash, the meeting rail (for double-hung windows), and the entire frame where it meets the wall. This will tell you if the problem is with the moving sash, the fixed frame, or both.
2. Inspect and Clean Existing Seals — Sometimes, a simple clean is all it takes.
Examine all existing weatherstripping around the sashes and the caulk lines around the frame. Look for cracks, tears, brittle spots, or areas where seals are missing. Use a stiff brush or a vacuum cleaner with a brush attachment to remove any dirt, dust, or debris from the weatherstripping and window tracks. Accumulated grime can prevent seals from compressing fully.
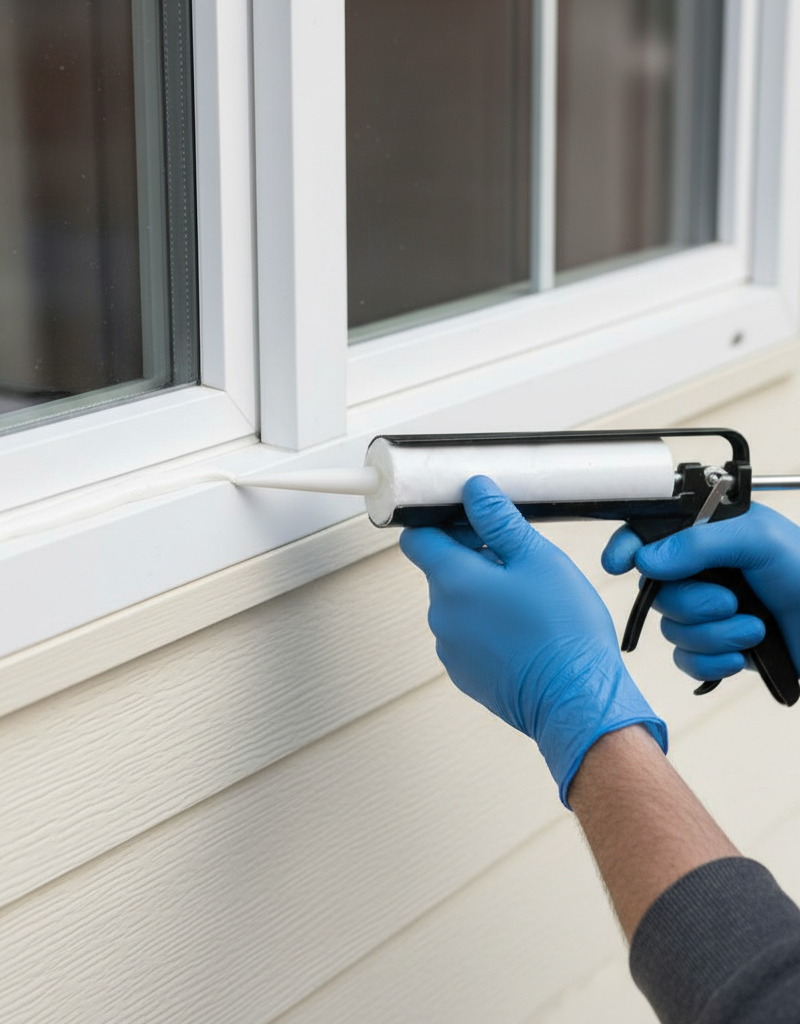
3. Re-caulk Exterior Gaps — Seal the fixed parts of the window from the elements.
- Tools: Utility knife, scraping tool, caulk gun, exterior-grade acrylic latex caulk.
- Safety: Wear gloves to protect your hands.
- Use a utility knife and scraping tool to carefully remove any old, cracked, or loose caulk from around the exterior perimeter of the window frame. Clean the surface thoroughly with a damp cloth and let it dry. Load a tube of exterior-grade acrylic latex caulk into a caulk gun. Cut the tip of the caulk tube at a 45-degree angle, making an opening just large enough to bridge the gap. Apply a continuous, even bead of caulk along all seams where the window frame meets the siding or trim. Smooth the bead with a wet finger or a caulk tool for a clean finish. Allow adequate drying time as per manufacturer instructions (typically 24 hours before exposure to rain).
- If this doesn't work: If new caulk still pulls away or cracks quickly, the underlying frame might be loose or rotting. This indicates a more serious structural issue requiring professional assessment.
4. Apply New Weatherstripping to Moving Sashes — Restore the flexible seal that moves with your window.
- Tools: Scissors, measuring tape, cleaning supplies, self-adhesive foam or V-strip weatherstripping.
- For gaps identified around the moving sash (e.g., where a double-hung sash meets the jamb or the meeting rail), measure the length of each section requiring a seal. Clean the application surface thoroughly with rubbing alcohol and let it dry completely. Cut pieces of self-adhesive foam or V-strip weatherstripping to size. Peel off the backing and firmly press the weatherstripping onto the clean surface, ensuring good adhesion. Test the window's operation immediately to ensure it closes and locks properly without pinching or binding the new seal.
- Pro Tip: For sliding windows, focus on the bottom and top rails, and the vertical meeting stile where the sashes overlap.
5. Address Loose Window Sashes — A common, overlooked cause of drafts.
If your double-hung or sliding window sashes feel loose or rattle when closed, ensuring they are tightly locked can often improve the seal. Some window hardware might have tension screws that can be tightened slightly. For double-hung windows, ensure the sash locks are fully engaged. For older windows, sometimes tightening hinge screws or adjusting sash balance springs (consult a professional for this if unsure) can help pull the sash more snugly against the frame. If the locks themselves are worn, they may need replacement.
6. Install Interior Window Insulation Film (Seasonal Fix) — An effective temporary barrier.
- Tools: Scissors, measuring tape, hairdryer, window insulation film kit.
- Safety: Be careful with scissors and the heat gun/hairdryer around delicate surfaces.
- This is an excellent option for particularly drafty windows, especially during winter. Clean the window frame thoroughly around the interior. Apply the double-sided tape (included in the kit) securely around the entire window frame, ensuring it's flat and wrinkle-free. Carefully unroll and attach the plastic insulation film to the tape, starting from the top and working your way down, gently pulling taught to minimize wrinkles. Once the film is fully attached, use a hairdryer on a medium setting, moving it evenly over the film. The heat will shrink the film, pulling it drum-tight and creating an insulating air pocket and an effective air seal. This film is generally removed in the spring.
Common Causes
- Degraded Weatherstripping: The flexible seals around moving window parts become brittle, torn, or compressed over time, losing their ability to block airflow.
- Cracked or Aged Caulk: Exterior caulk around the window frame dries out, shrinks, and cracks, creating gaps for air leakage. Interior caulk can suffer the same fate.
- Loose Window Sashes or Locks: If window sashes don't close tightly against the frame or if locks are worn, air can easily pass through the gaps.
- Gaps in Window Casing/Trim: Air can leak through unseen gaps between the window frame and the rough opening in the wall, often hidden behind interior trim.
- Poor Window Installation: In some cases, the original installation may have left shim space uninsulated or poorly sealed, leading to persistent drafts.
Common Mistakes
- Skipping the Draft Test: Trying to seal based on a hunch without identifying the actual leak points leads to wasted effort. Always test first.
- Not Cleaning Surfaces: Applying caulk or weatherstripping to dirty, dusty, or greasy surfaces will result in poor adhesion and premature failure of the seal.
- Using the Wrong Caulk: Using interior caulk for exterior applications will lead to quick cracking and failure due to weather exposure. Always use exterior-grade, paintable caulk for outdoor perimeter sealing.
- Over-applying Caulk/Weatherstripping: Too much caulk creates a mess and doesn't improve the seal. Too much weatherstripping can prevent the window from closing properly or jam its operation.
- Ignoring the Frame-to-Wall Seal: Focusing only on the window sash and ignoring gaps where the window frame meets the house structure will leave major leak pathways unaddressed.
- Failing to Cure Properly: Not allowing caulk to fully cure before exposing it to rain or temperature fluctuations can compromise its integrity and longevity.
Cost & Time Breakdown
| Task | DIY cost | Pro cost (hourly) | Time |
|---|---|---|---|
| Diagnose drafts | $0 | n/a | 10–15 min |
| Re-caulk (exterior) | $5–$15 | $75–$150 | 30–60 min |
| Apply weatherstripping | $10–$25 | $75–$150 | 20–40 min |
| Install insulation film | $15–$30 | Not typically offered | 15–30 min/window |
Tips & Prevention
- Annual Inspection: At the beginning of heating and cooling seasons, perform a quick visual inspection of all window seals. Look for cracked caulk or deteriorating weatherstripping.
- Regular Cleaning: Keep window tracks and seals clean from dirt and debris. This prevents material breakdown and ensures full compression of weatherstripping.
- Proper Latching: Always ensure your window sashes are fully closed and latched. This simple act often helps compress existing seals more effectively.
- Consider High-Quality Sealants: When replacing caulk, invest in a good quality acrylic latex or silicone blend that offers better flexibility and durability.
- Address Water Intrusion Promptly: If you notice water leaking, prioritize that fix immediately. Water damage can quickly compromise window frames and seals.
- Know Your Window Type: Different windows (double-hung, casement, sliding) may require specific types of weatherstripping or sealing techniques. Research your window type if you're unsure.
When to Call a Professional
While many draft issues are DIY-friendly, certain situations warrant calling a professional. If, after attempting the common fixes, you still experience significant drafts, the problem might be deeper than surface-level seals. Persistent drafts could indicate issues with the window's installation, such as insufficient insulation in the rough opening, structural settling around the frame, or even a compromised window unit itself. If you identify deteriorated wood in the window frame or sash, or if windows are exceedingly difficult to open or close, moisture damage or frame distortion may be at play, requiring a professional carpenter or window technician. Furthermore, if your windows are older and have single-pane glass, sealing superficial drafts will only go so far; a professional might recommend considering high-efficiency window replacements for a long-term solution to energy loss and comfort issues. When in doubt, especially if repairs seem beyond superficial fixes or involve complex window mechanics, consulting a window specialist is the safest and most effective course of action.
Related Articles
Keep troubleshooting with these hand-picked guides from FixlyGuide:
- The 5-Minute Trick to Fix a Window That Won't Stay Open (No Tools Needed!) — Discover the surprisingly simple reasons why your window keeps sliding shut and how to fix it in minutes, often without any tools.
- The Secret to Silencing Squeaky Floors (Without Tearing Up Your Room) — Discover the surprisingly simple methods to eliminate annoying floor squeaks from above or below, preserving your flooring and your peace.
- The 3 Hidden Reasons Your Door Won't Latch (And the Easy DIY Fixes) — Frustrated by a door that refuses to latch? Discover the common culprits behind this annoying problem and learn simple, effective DIY fixes…
- The 15-Minute Deadbolt Swap: Why Your Old Lock Is a Security Risk (And the Easy Fix) — Upgrade your home security in just 15 minutes by replacing an old or faulty deadbolt lock with a new, more secure model.
- The 4 Hidden Causes of Drafty Windows (and How to Seal Them Tight) — Uncover the surprising reasons your windows are letting in cold air and learn practical, DIY solutions to seal them, saving energy and impr…
- The #1 Mistake Homeowners Make After Finding Missing Shingles (And How to Fix It Right) — Discover the crucial steps to take after a storm rips shingles from your roof, ensuring a proper, lasting repair and preventing costly futu…
Recommended for DIYers & woodworkers
Sponsored
The Top 20 Tools for Workshops of Any Budget
No stationary machines or power tools required — plus 3 fundamental tools that can't be bought at any price.
Get the free guide
Ted's Woodworking — The #1 Woodworking Resource
Detailed instructions, dimensioned drawings, materials & cutting lists, and 3D schematics for every skill level.
See the plansSponsored: links above are affiliate links. FixlyGuide may earn a commission on qualifying purchases — at no extra cost to you.
Frequently asked questions
How do I find air leaks around my windows?+
The easiest way is to perform an incense stick test. On a breezy day, hold a lit incense stick around the perimeter of your closed window. Where the smoke wavers noticeably, you've found an air leak. A damp hand can also detect cold spots.
What's the best type of caulk for sealing windows?+
For exterior window perimeters, use an exterior-grade acrylic latex caulk with silicone. This type offers good flexibility, adhesion, and paintability, standing up to weather exposure. For interior gaps, a standard paintable acrylic latex caulk is usually sufficient.
Can I use bubble wrap to insulate windows?+
Yes, bubble wrap can provide a temporary, low-cost insulation, primarily by trapping a layer of air. You can spray the window glass with a light mist of water and press the bubble wrap against it (bubbles facing the glass). It's effective but can obstruct your view.
How long does weatherstripping last?+
The lifespan of weatherstripping varies depending on the material and exposure, but generally ranges from 3 to 10 years. Foam and felt strips may degrade faster, while higher-quality vinyl or compression weatherstripping can last longer. Regular inspection is key.
Is it worth sealing old windows, or should I replace them?+
Sealing old, drafty windows is almost always worth the effort as a cost-effective first step to improve comfort and energy efficiency, especially if the windows are otherwise sound. You can achieve significant savings for minimal investment. However, if windows have extensive damage (rotting frames, broken panes, severe operational issues) or are single-pane, replacement might be a more effective long-term solution for significant energy savings and home value.


Discussion
Loading comments…