Tools & materials you'll need
Affiliate links- AmazonNew duplex receptacle (15A, 125V)If replacement is needed
As an Amazon Associate FixlyGuide earns from qualifying purchases — at no extra cost to you. Prices and availability are accurate as of publication and subject to change.
Quick Answer
When you have an electrical outlet where one receptacle works but the other doesn't, the most common culprit is a loose or improperly connected wire within the outlet's terminals, or sometimes, a tripped GFCI/AFCI breaker further upstream if it's a specific type of outlet. This issue is particularly prevalent in 'half-hot' outlets where one receptacle is intended to be switch-controlled. The good news is that for basic outlets, the fix often involves carefully inspecting and tightening the wire connections after safely cutting off power to the circuit.
The Problem
You plug in your phone charger into the top receptacle, and it works. Great. Then you try to plug in a lamp into the bottom receptacle of the very same outlet, and nothing happens. No light, no power. It's frustrating to have what appears to be a perfectly good outlet deliver only half of its intended function. This isn't just an inconvenience; it can be a sign of underlying electrical issues, albeit usually minor ones. Understanding why this happens is the first step toward a safe and effective repair. The half-working outlet usually points to a breakdown in the electrical path to one of the receptacles, while the other remains correctly wired and energized.
How It Works
To understand why only half an outlet works, it's essential to know how a standard duplex receptacle is wired. A typical 120-volt duplex outlet has two independent receptacles, each with its own set of hot, neutral, and ground contacts. Internally, these two receptacles are designed to share a common hot feed, a common neutral return, and a common ground. This internal connection is made via small metal tabs, often called 'bridge tabs,' located on the sides of the outlet between the two sets of terminal screws (one tab on the hot side, one on the neutral side).
Normally, the incoming hot wire (black or red) connects to one of the brass-colored screws, and the incoming neutral wire (white) connects to one of the silver-colored screws. The ground wire (bare copper or green) connects to the green ground screw. When both bridge tabs are intact, power is distributed to both receptacles. Each receptacle essentially acts as a tiny, individual circuit that shares the main incoming wires.
However, in situations where one receptacle needs to be switched independently (common in living rooms for lamps), the hot-side bridge tab is deliberately broken off. This allows the top receptacle, for example, to be constantly hot (wired to an unswitched hot), while the bottom receptacle receives its hot feed from a switch loop. If this is the case, and your switch is off or faulty, the switched half of the outlet won't work.
More often, for a standard, unswitched outlet with a half-working problem, the issue stems from a loose wire connection. The hot wire, neutral wire, or even the ground wire (less common for a half-outage) might not be making secure contact with the terminal screw for the non-functioning receptacle's internal wiring. Electricity needs a complete, tight circuit to flow. A loose connection acts like an open switch, breaking the path to one side of the outlet while the other remains connected and operational. It's often subtle – just enough contact to pass a basic multimeter test, but not enough to carry a load, or sometimes, no contact at all due to oxidation or a poorly tightened screw. This is why a visual inspection and retightening of all terminal screws are critical diagnostic steps.
Step-by-Step Fix
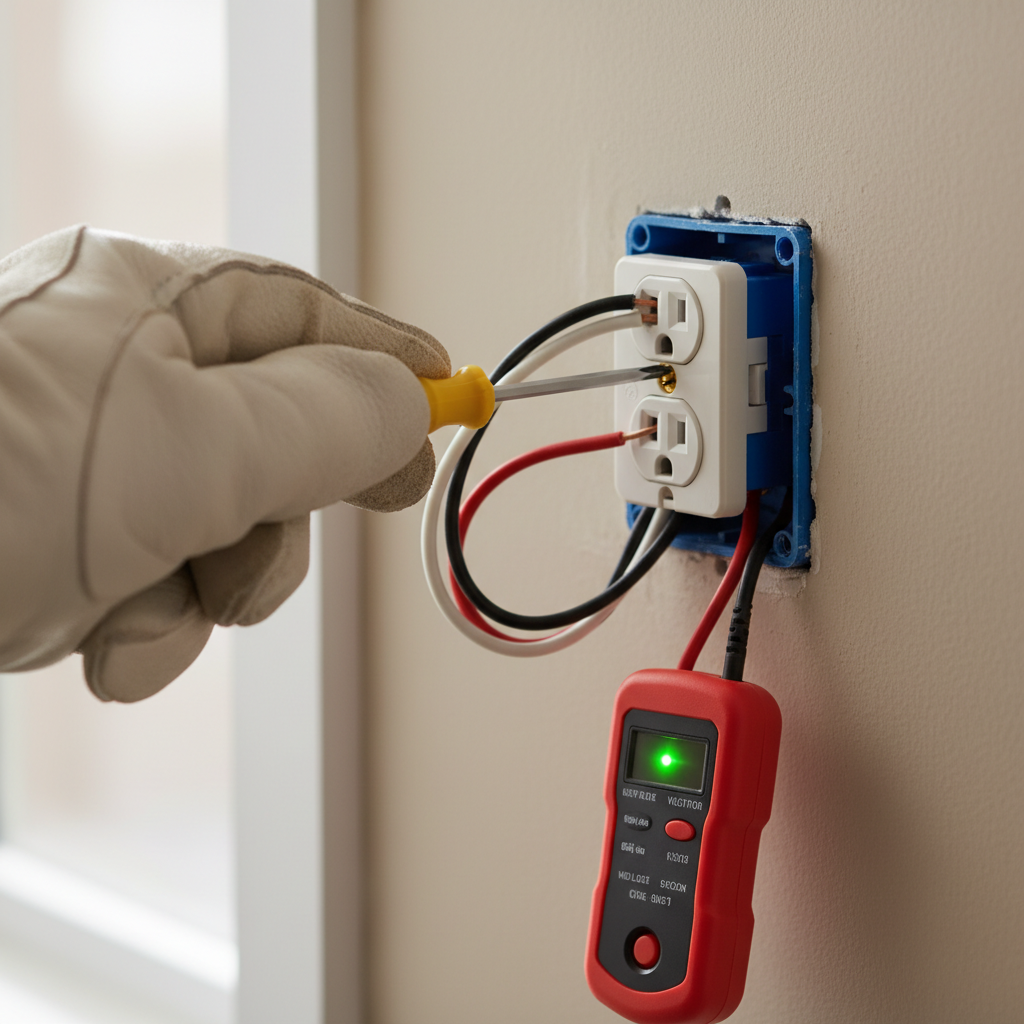
1. Safety First: Kill the Power — Before you touch anything electrical, locate the circuit breaker that controls the faulty outlet. Flip it to the “OFF” position. * How to check: Plug a lamp or a voltage tester into the non-working part of the outlet, then to the working part. The lamp should go out, or the tester should show no voltage on both. If unsure, turn off the main breaker to your entire home. * Safety Note: Always verify the power is off with a non-contact voltage tester on both receptacles of the outlet, even after flipping the breaker. Never assume.
2. Remove the Outlet Cover Plate — Using a manual screwdriver (flathead or Phillips, depending on your cover plate screws), carefully remove the screws holding the plastic cover plate in place. Set the cover plate and screws aside.
3. Unscrew and Gently Pull Out the Outlet — There will be two screws, typically one at the top and one at the bottom, holding the outlet yoke (the metal strap) to the electrical box. Loosen these screws until the outlet is free. Gently pull the outlet straight out from the wall box, providing enough slack to inspect the wiring. * Caution: Wires will still be attached. Do not yank them.
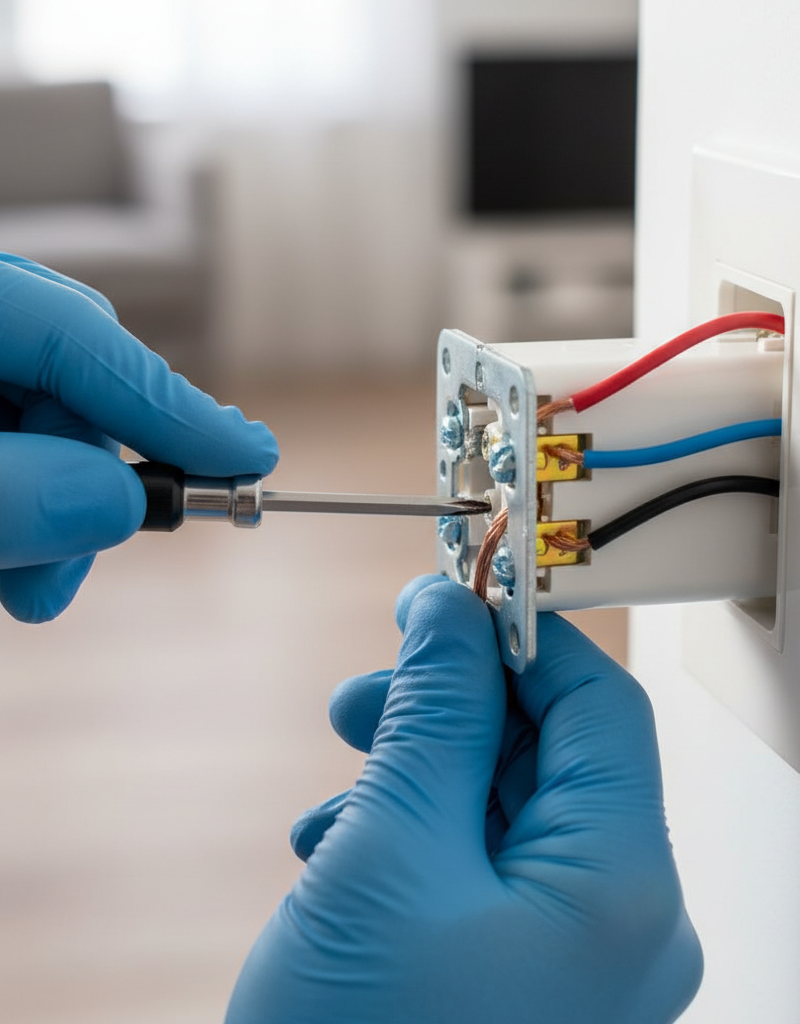
4. Inspect All Wire Connections — With the outlet pulled forward, carefully examine all the wire connections. Pay close attention to: * Brass (hot) screws: Usually black or red wires. * Silver (neutral) screws: Usually white wires. * Green (ground) screw: Bare copper or green wire. * Look for: Loose wires that appear to be barely hanging on, wires with frayed insulation near the terminals, wires that have slipped out of the screw terminals, or back-stab connections (wires pushed into small holes on the back of the outlet) that might be faulty.
5. Tighten Loose Connections (or Re-wire) — For any loose wires, gently pull on each one to see if it's secure. If a wire is loose or has slipped out: * Turn off power again (if you forgot or turned it back on). * Loosen the corresponding terminal screw. * If the wire is back-stabbed, gently twist and pull to remove it. * Form a J-hook with the bare end of the wire, if it's not already. Ensure about 3/4 inch of insulation is stripped. * Wrap the J-hook clockwise around the screw terminal, ensuring no insulation is under the screw head and no bare wire is exposed beyond the screw head. * Tighten the screw firmly, but don't overtighten to strip the screw or damage the wire. * Repeat for all other wires, even if they appear secure. "When in doubt, tighten it out" is a good rule for outlet wiring.
6. Check Bridge Tabs (If Applicable) — If you suspect a 'half-hot' setup (one receptacle switched) and it's not working, verify the small metal tab on the hot (brass) side between the two screws. If this tab is broken, that's why one is switched and the other isn't. If you want both to be constantly hot, you'll need to replace the outlet and ensure the tab remains intact when installing. If the tab is intact and you're certain it's a standard outlet where both should be live, the issue is definitely a loose wire.
7. Inspect for Burn Marks or Damage — While the outlet is out, look for any signs of heat damage, such as discoloration, melted plastic, or burn marks on the outlet itself or the wires. If you see any, the outlet is compromised and should be replaced. This is a sign of a bad connection that has been arcing.
8. Gently Push Outlet Back Into Box — Once all connections are secure, carefully fold the wires accordion-style back into the electrical box. Avoid pinching wires. Push the outlet gently until it sits flush with the wall.
9. Secure the Outlet — Fasten the top and bottom screws that hold the outlet yoke to the electrical box. Don't overtighten, but ensure the outlet is firmly seated and doesn't wobble.
10. Reinstall the Cover Plate — Attach the cover plate with its screws, tightening them until snug.
11. Restore Power and Test — Go back to your electrical panel and flip the circuit breaker back to the “ON” position. Test both receptacles of the outlet with a known working device, like a lamp or a cell phone charger.
Common Causes
- Loose Terminal Connections: This is by far the most frequent culprit. Over time, vibrations, thermal expansion/contraction, or improper initial installation can cause wires to loosen from their terminal screws, breaking the circuit to one of the receptacles.
- Severed Bridge Tab: In some installations, the small metal tab on the hot side (brass screws) of the outlet is intentionally broken to allow one receptacle to be constantly hot while the other is controlled by a wall switch. If you expect both to be unswitched, but the tab is broken, that's your reason.
- Faulty Back-stab Wiring: Many older and cheaper outlets use
Related Articles
Keep troubleshooting with these hand-picked guides from FixlyGuide:
- Only Half Your Outlet Works? The Hidden Split-Receptacle Culprit — Discover why only half of your electrical outlet might be working and how to safely troubleshoot and fix the common culprit: a split-recept…
- The Secret Reason Half Your Wall Outlet Dies (And It's Not What You Think) — Discover why only half of your electrical outlet might be working and how to diagnose and fix the common culprit, saving you from a costly…
- Why Only Half Your Outlet Works (And The Simple 15-Minute Fix) — Discover why only one receptacle of your electrical outlet might be working and how to fix this common issue in under 15 minutes.
- Why Your Outlet Died (Even If the Breaker's ON): The Hidden Causes Everyone Misses — Discover the surprising reasons why an electrical outlet might stop working even when the circuit breaker appears to be on, and learn how t…
- Why Your Outlet Died, But the Breaker Isn't Tripped: The GFCI Secret — Discover why your electrical outlet might stop working even when the breaker hasn't tripped, and how a hidden GFCI outlet could be the surp…
- The 90-Second Trick to Fix a Weak Kitchen Sprayer (No Plumber Needed) — Restore full power to your kitchen sink sprayer with simple DIY steps, addressing common causes like clogs and diverter issues.
Frequently asked questions
Why does only one plug work on my outlet?+
The most common reason for only one plug working on a duplex outlet is a loose wire connection to one of the terminal screws inside the outlet. Less commonly, a metal tab connecting the two receptacles might be broken for a switched outlet setup, or there could be damage to the internal wiring of the outlet itself.
Is a half-working outlet dangerous?+
While often just an inconvenience, a loose wire connection causing a half-working outlet can potentially be dangerous. Loose connections can lead to arcing, overheating, and even electrical fires over time. It's best to address the issue promptly and safely.
Can a breaker cause only half an outlet to work?+
Typically, a standard circuit breaker protects the entire circuit, meaning if it trips, the entire outlet (and potentially other outlets on the same circuit) would lose power, not just half of one. However, specific types of outlets like GFCI or AFCI receptacles have their own internal trip mechanisms that *could* theoretically affect only one half if faulty, though this is less common than a loose wire. It's more likely a loose connection at the outlet first.


Discussion
Loading comments…