
Tools & materials you'll need
Affiliate linksAs an Amazon Associate FixlyGuide earns from qualifying purchases — at no extra cost to you. Prices and availability are accurate as of publication and subject to change.
Quick Answer
The most common problem with landscape edging is improper installation depth and a lack of a solid trench, leading to gaps, heaving, and an ineffective border. To fix this, carefully remove existing edging, re-dig a proper V-shaped trench to the correct depth (typically half the edging’s height), and use stakes or anchoring tabs to secure it firmly against the soil, ensuring a tight, long-lasting barrier.
The Problem
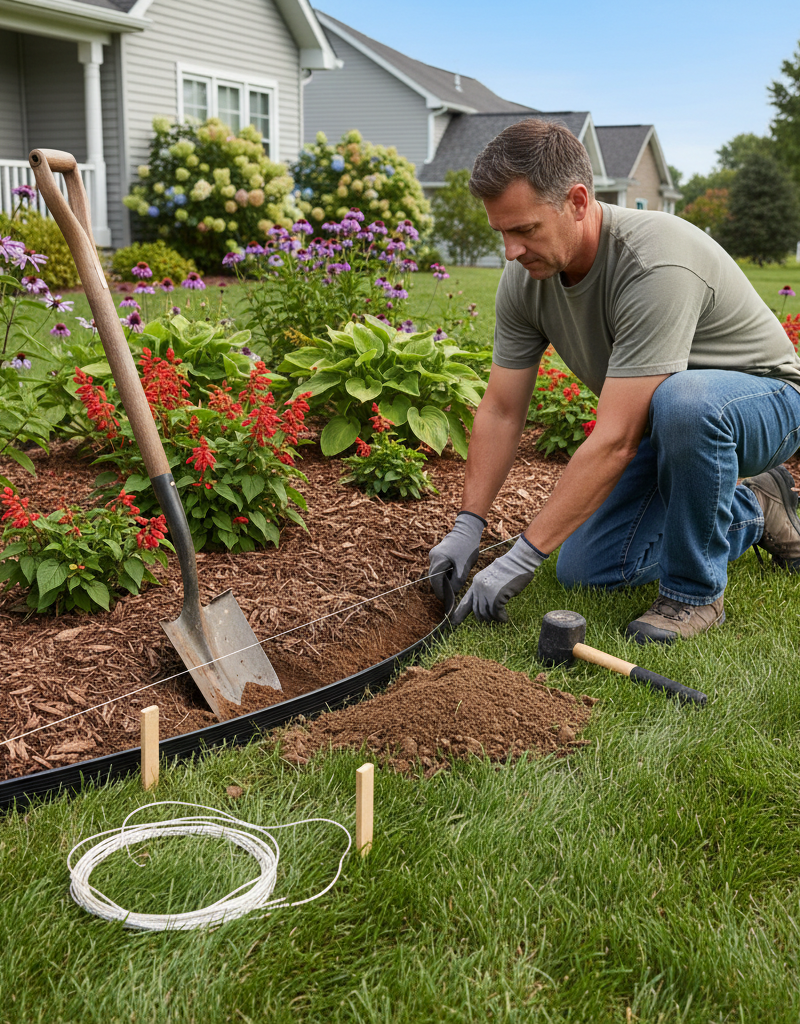
You meticulously installed your landscape edging last season, envisioning a crisp, clean line between your lush flower beds and pristine lawn. Fast forward a few months, and now you're facing annoying gaps, sections that have heaved out of the ground, or a wavy appearance that completely defeats its purpose. Not only does this look unsightly, but it also allows grass and weeds to creep into your beds, creates tripping hazards, and undermines the effort you put into defining your garden spaces. This isn't just a cosmetic issue; it's a structural failure of the edging's ability to perform its core functions: containing mulch, blocking turf invasion, and providing a neat border. Many homeowners jump into edging installation without fully understanding the critical role of proper trenching and anchoring, leading to these all-too-common frustrations. The good news is that most of these problems stem from a few key installation errors that are entirely fixable with the right approach and a little patience.
How It Works
Landscape edging, whether it's made of plastic, metal, or paver stone, works by creating a physical barrier between two different landscaping zones, most commonly a lawn and a garden bed. For this barrier to be effective, it needs to be stable and properly seated. Gravel and paver edging relies on weight and a well-compacted base to stay in place. Flexible plastic or metal edging, on the other hand, depends heavily on being buried to the correct depth and secured with stakes or anchoring tabs. When you dig a trench, you're creating a stable environment for the edging. The depth is crucial: typically, about half the height of flexible edging should be below ground. This buried section acts like the root of a tooth, providing stability against lateral movement (like someone stepping on it) and vertical movement (like frost heave). The soil on either side of the buried portion, when compacted, locks the edging in place. Without adequate depth, or if the soil isn't properly compacted against it, the edging lacks the necessary friction and support to resist forces like thawing and freezing cycles, foot traffic, or even just the pressure of shifting soil from rain. Gravity and subtle ground movement will inevitably cause insufficiently anchored edging to lift, creating gaps, or to lean, resulting in uneven lines. Stakes, which are typically driven through pre-formed holes or anchoring tabs, provide additional downward and outward pressure, further securing the edging against these forces. The goal is to make the edging feel like a natural, immovable extension of the earth itself, not a temporary border laid on top.
Step-by-Step Fix
1. Clear the Area – Remove existing edging and debris. Carefully pull up any existing landscape edging that is buckled, gapped, or heaving. Use a spade to remove any loose soil, rocks, or weeds that have accumulated around the old perimeter. This step is crucial for clearing the slate and ensuring you have a clean workspace for re-installation. Take your time to get rid of all the old material. * If your old edging is reusable: Clean it thoroughly and set it aside. Inspect it for damage; cracked or brittle plastic should be replaced.
2. Re-Define Your Edge – Mark the new, crisp line. Lay a garden hose or string along the desired edge of your flower bed. Step back and observe the line from multiple angles to ensure it creates a pleasing, natural curve or a straight, intentional border. Adjust until you're satisfied. This will be your guide for the trench. * Pro Tip: Use spray paint (specifically landscaping paint) to mark the line on the grass or soil for a more permanent guide.
3. Dig a Proper V-Shaped Trench – The secret to stability. Using a flat-blade spade or a trenching tool, dig a V-shaped or L-shaped trench along your marked line. For most flexible landscape edging (plastic, metal), the trench should be about 4-6 inches deep and slightly wider than the edging material. The key is to create a firm, flat bottom for the edging to rest on, with sloped sides for backfilling. Aim for approximately half the height of your edging to be below ground level when installed. For stone or paver edging, the trench should be wider and have a compacted gravel base. * Safety Note: Always wear sturdy gloves to protect your hands from blisters and sharp objects in the soil. * For stubborn roots: Use heavy-duty pruning shears or a root saw to cut through small roots. For larger roots, you may need a digging bar or a small axe, but exercise extreme caution.
4. Install a Base (for Pavers/Stones) – Ensure a level, stable foundation. If you are using paver or stone edging, spread a 2-inch layer of paver base or gravel into the trench and compact it thoroughly with a hand tamper. Follow with a 1-inch layer of coarse sand, screeding it level with a 2x4. This creates a stable, well-draining foundation that prevents settling and shifting.
5. Position the Edging – Place accurately along the trench. Carefully unroll or place your edging material into the trench, ensuring it follows your marked line precisely. For flexible edging, overlap ends by 4-6 inches if joining lengths. For pavers, place them tightly together. Confirm the height: roughly half the edging should be below grade, with the top edge slightly above grade to effectively contain mulch and block turf creep. * If using rigid edging: Make sure joints are tight and components interlock correctly.
6. Secure with Stakes/Anchors – Crucial for long-term stability. For flexible plastic or metal edging, drive landscape anchoring stakes through the pre-drilled holes or anchoring tabs provided by the manufacturer. Space stakes every 2-3 feet on straight runs and every 1-2 feet on curves to prevent bowing and shifting. Use a rubber mallet to drive stakes flush with the top of the edging. More stakes are always better than too few. * If stakes break: You might be hitting a rock. Try a different spot or consider heavy-duty metal stakes.
7. Backfill and Compact (First Pass) – Lock it in place. Once the edging is positioned and staked, carefully push soil back into the trench on both sides of the edging. Pack the soil firmly against the edging using your foot or a hand tamper. This initial compaction helps lock the edging into its vertical position before final grading.
8. Check for Level and Straightness – Adjust before final backfill. Step back and visually inspect the entire run of edging. Use a 2-foot level on top of the edging to check for consistency. Make any necessary adjustments by gently lifting or pushing down on sections. For wavy sections, dig out a little more soil or add some beneath the edging until it's straight and level.
9. Final Backfill and Grade – Finish for a seamless look. Complete the backfilling process, ensuring that soil is compacted tightly against both sides of the edging. For the lawn side, make sure the soil is flush with the top of the buried portion of the edging, leaving only the desired amount (usually 1-2 inches) exposed. For the garden bed side, backfill with soil or mulch, grading it gradually away from the edging. This final grading prevents water from pooling and helps the edging blend naturally into the landscape.
10. Water In – Settle the soil naturally. Once installation is complete, gently water the soil along the newly installed edging. This helps settle the soil around the edging, filling any minor air pockets and further compacting the material. You may need to add a bit more soil after watering if significant settling occurs.
Common Causes
- Insufficient Trench Depth: This is the most prevalent cause. If the edging isn't buried deep enough (typically half its height for flexible types), it simply doesn't have enough purchase in the ground to resist forces like frost heave, foot traffic, or lateral soil movement, leading to lifting and gapping.
- Poor Soil Compaction: After placing the edging, if the soil isn't firmly compacted back into the trench on both sides, it leaves voids and loose areas. This allows the edging to shift, lean, or lift over time as the soil naturally settles or gets saturated with water.
- Lack of Anchoring: Flexible plastic or metal edging requires stakes or anchoring pins at regular intervals to hold it securely. Without these, the material can easily bow, heave, or pull away from its intended line, especially on curves.
- Improper Joint Connections: If sections of edging aren't properly overlapped or connected (e.g., in paver edging), they can separate, creating unsightly gaps and allowing grass to grow through.
- Using the Wrong Type of Edging: Some flimsy plastic edgings are simply not robust enough for certain soil types, heavy traffic areas, or climates prone to significant frost heave. Choosing a heavier-gauge material or a more rigid option like pavers might be necessary.
- Tree Root Interference: Over time, expanding tree roots can push edging up and out of the ground. This is harder to prevent, but proper trenching can deter smaller roots, and using a root barrier might be an option in affected areas.
Common Mistakes
- Laying Edging Directly on Surface: A common shortcut is to simply lay flexible edging on top of the soil and just backfill slightly. This is guaranteed to fail, as there's no depth for stability, leading to immediate heaving and separation.
- Shallow, Wide Trenching: Digging a shallow but wide trench instead of a deeper, V-shaped or L-shaped one provides insufficient support. The edging needs to be cradled deeply within the soil, not just sitting on a wide, flat bottom.
- Not Using Enough Stakes/Anchors: Homeowners often underestimate the number of stakes needed, especially on curves. Skimping on anchors leads to bowing and shifting over time, ruining the clean line.
- Ignoring the Grade: Failing to grade the soil correctly means water can pool against the edging, saturating the soil and making it easier for the edging to shift, or it can create drainage issues for your flower bed.
- Overlooking Overlap at Joints: When connecting flexible edging, homeowners sometimes don't overlap the ends enough (4-6 inches is ideal) or don't use connectors, leading to gaps where sections meet.
- Rushing Compaction: Simply pushing soil back with a spade isn't enough. It needs to be tamped down firmly against both sides of the edging to create a dense, supportive barrier that resists movement.
Cost & Time Breakdown
| Task | DIY Cost | Pro Cost | Time |
|---|---|---|---|
| Remove old edging & clear area | $0 | Included in labor | 30–60 min per 50 ft |
| Re-dig proper trench | $0 (manual labor) | Included in labor | 1–2 hours per 50 ft |
| Install new/reused edging & stakes | $15–$150 (stakes/new edging) | Included in labor | 1–2 hours per 50 ft |
| Backfill & compact soil | $0 | Included in labor | 30–60 min per 50 ft |
| Total (per 50 linear feet) | $15–$150 | $200–$400 | 3–5 hours |
Tips & Prevention
- Choose the Right Material: For areas prone to frost heave or heavy foot traffic, consider more rigid materials like paver edging or thicker-gauge metal edging instead of flimsy plastic. Read reviews to ensure durability.
- Deep and Narrow Trench: Always aim for a V-shaped or L-shaped trench that allows at least half of your flexible edging to be buried underground. This
Related Articles
Keep troubleshooting with these hand-picked guides from FixlyGuide:
- The #1 Secret to Edging Flower Beds That Last Years (and Resist Weeds) — Discover the crucial, often-skipped step that ensures your landscape edging stays put and keeps weeds out for years, transforming your flow…
- The #1 Mistake Homeowners Make with Landscape Edging (and How to Fix It) — Discover the most common error in landscape edging installation that leads to weeds and an uneven look, and learn the easy fix for a clean,…
- The 3 Hidden Mistakes That Make Landscape Edging Fail (And How to Fix Them) — Discover common mistakes homeowners make when installing landscape edging and learn the correct methods to achieve a durable, professional-…
- The 3 Glaring Mistakes Most Homeowners Make with Landscape Edging (and How to Fix Them) — Avoid common pitfalls when installing landscape edging to keep your flower beds neat and prevent grass invasion with these simple fixes.
- The #1 Mistake Homeowners Make with Landscape Edging (and How to Fix It) — Discover the most common error in landscape edging installation and a simple, step-by-step fix to achieve a professional, long-lasting bord…
- The #1 Gutter Mistake That Leads to $10,000 Roof Damage — Learn the most common gutter-cleaning mistake homeowners make and how to properly maintain your gutters to prevent expensive roof damage.
Frequently asked questions
Why does my landscape edging keep lifting out of the ground?+
Landscape edging primarily lifts due to insufficient trench depth and poor compaction of the surrounding soil. If the edging isn't buried deeply enough (about half its height for flexible types) and the soil isn't firmly packed against it, it lacks the necessary stability to resist forces like frost heave, foot traffic, and natural soil movement.
How deep should landscape edging be buried?+
For most flexible landscape edging materials (plastic, metal), approximately half of the edging's total height should be buried below ground level. This typically translates to a trench depth of 4-6 inches. This depth provides crucial stability and helps anchor the edging against shifting.
What's the best way to keep landscape edging straight?+
To keep landscape edging straight, first, ensure you've dug a consistent, V-shaped trench along a clearly marked line. During installation, use a level frequently to check for straightness and make adjustments. Most critically, use plenty of anchoring stakes (every 2-3 feet on straight runs, closer on curves) and compact the backfill soil very firmly against both sides of the edging.
Can I reuse old landscape edging?+
Yes, you can often reuse old landscape edging if it's still in good condition. Inspect it carefully for cracks, brittleness, or significant damage. Clean off any old dirt or debris. If the material is still pliable and intact, it can be reinstalled after preparing a proper trench and using new stakes if needed.
When should I call a professional for landscape edging?+
While fixing landscape edging is a common DIY task, consider calling a professional if you have very extensive areas to re-edge, if you're dealing with significant tree root systems, or if you plan to install heavier, more complex edging materials like extensive paver borders that require specialized equipment for proper base compaction and cutting. A pro can ensure a long-lasting, aesthetically pleasing result.


Discussion
Loading comments…