
Tools & materials you'll need
Affiliate links- AmazonGarden hose or spray paint1 · For marking layout
- AmazonFlat-bladed shovel or turf edger1 · For clearing and initial cut
- AmazonTrenching shovel or straight-edged spade1 · For digging the trench
- AmazonTorpedo level1 · For checking trench and edging level
- AmazonRubber mallet1 · For seating the edging
- AmazonUtility knife or snips1 · For cutting flexible edging
As an Amazon Associate FixlyGuide earns from qualifying purchases — at no extra cost to you. Prices and availability are accurate as of publication and subject to change.
Quick Answer
Many homeowners struggle with landscape edging that heaves, shifts, or fails to create a crisp line. The primary culprit is often inadequate site preparation and insufficient anchoring. The quick fix is to properly excavate a level, consistent trench, firmly seat the edging, and secure it robustly with stakes, interlocking mechanisms, or a gravel base, ensuring it can withstand frost heave and garden activity.
The Problem
You've spent a weekend meticulously laying out your new flower beds, envisioning clean, defined lines that separate the lush hostas from the manicured lawn. You install landscape edging, only to find it bowing, popping out, or becoming uneven after a season or two. This common problem undermines the aesthetic appeal of your garden, creates trip hazards, and allows grass or weeds to creep into your beds, defeating the very purpose of the edging.
Often, the issue stems from underestimating the forces at play: soil expansion and contraction, root growth, foot traffic, and even the impact of lawnmowers. Without a stable foundation and secure anchoring, your carefully placed edging becomes a temporary feature rather than a durable border. Homeowners frequently rush the trenching process, fail to level adequately, or skimp on the number of stakes needed, especially on curved sections where outward pressure is greater.
How It Works
Landscape edging functions by creating a physical barrier between two distinct areas, typically a lawn and a garden bed. This barrier prevents materials like mulch from spilling out and, more critically, deters grass runners and weeds from invading the cultivated space. The effectiveness of this barrier hinges on its stability and resistance to movement.
There are several types of landscape edging, each with a slightly different installation mechanism but sharing core principles. Plastic and composite edgings often come in rolls or pre-formed sections, relying on stakes driven through dedicated slots or tabs into the subsoil. Metal edging (steel or aluminum) is typically more rigid and uses integrated spikes or separate stakes through pre-drilled holes. Paver or stone edging relies on its weight and often an underlying bed of compacted gravel and sand for stability.
Regardless of the material, the critical factor is the interface between the edging and the ground. Soil dynamics play a significant role. When soil freezes, moisture within it expands (frost heave), pushing objects upwards. As it thaws, the soil settles, but the edging may not return to its original position, leading to an uneven line over time. Similarly, heavy rains can wash away soil around poorly installed edging, destabilizing it. The goal of proper installation is to provide consistent, firm support along the entire length of the edging, allowing it to move minimally with environmental changes and resist lateral forces from roots, mowers, or foot traffic.
Types of Edging and Their Mechanics:
- Plastic/Composite: Flexible, often installed with a lip facing the bed to hold mulch, and secured with plastic or metal stakes. The lip helps with stability against lateral movement from inside the bed.
- Metal (Steel/Aluminum): More rigid, creating a crisp, thin line. Often has a small flange or spikes to be driven into the ground, sometimes with additional stakes for very long runs or curves. Its rigidity helps it maintain a straight line.
- Pavers/Stones: Heavy, relying on a compacted base of gravel and sand for stability. The interlocked weight of the stones prevents shifting. Mortar can be used for extreme permanence but makes removal difficult.
- Wood (Logs/Timbers): Often uses rebar stakes driven through pre-drilled holes or secured with landscaping spikes. Rot resistance is a key consideration, so treated lumber or naturally rot-resistant wood is preferred. The mass of the timber contributes to its stability.
In all cases, a well-prepared trench that mirrors the desired contour and provides a snug fit for the edging is paramount. This minimizes the amount of soil that needs to hold the edging in place unilaterally and distributes forces more effectively.
Step-by-Step Fix
1. Plan Your Edge — Map the Layout Precisely
— Before you dig, clearly mark the lines for your edging. Use a garden hose, rope, or spray paint to define the exact curves and straightaways of your flower bed. Step back and view it from different angles to ensure you like the shape. This is your blueprint; a good plan prevents wasted effort and materials.
- Tip: For intricate curves, use two garden hoses laid parallel to each other to define the width of your trench.
- If this doesn't work: If you're struggling with smooth curves, try drawing the outline on graph paper first to visualize the proportions.
2. Prepare the Area — Clear and Level the Ground
— Remove any existing edging, loose debris, rocks, and as much grass as possible along your marked line. Use a flat-bladed shovel or a turf edger to create a clean, shallow cut. The goal is to have a relatively clear area to work in before you start trenching. This step reduces obstacles that can make precise trenching difficult.
- Safety Note: Wear sturdy gloves and closed-toe shoes to protect against cuts and scrapes.
3. Dig the Trench — Create a Consistent and Level Base
— Using a trenching shovel or a straight-edged spade, dig a shallow trench along your marked line. The trench depth and width should be appropriate for your chosen edging type – generally, deep enough so about 2/3 to 3/4 of the edging will be below grade, with the top edge flush with or slightly above the lawn. Crucially, the trench bottom must be level. Use a torpedo level to check frequently, adding or removing soil as needed. Compact the bottom of the trench with your foot or a hand tamper.
- For plastic/metal edging: Aim for a trench depth that allows the top of the edging to be about 0.5 to 1 inch above your finished soil/mulch level, or flush with the lawn for a mowing strip.
- For stone/paver edging: Dig a deeper trench (4-6 inches) and add 2-3 inches of compacted gravel, topped with 1 inch of bedding sand before placing stones. This provides a stable, draining base.
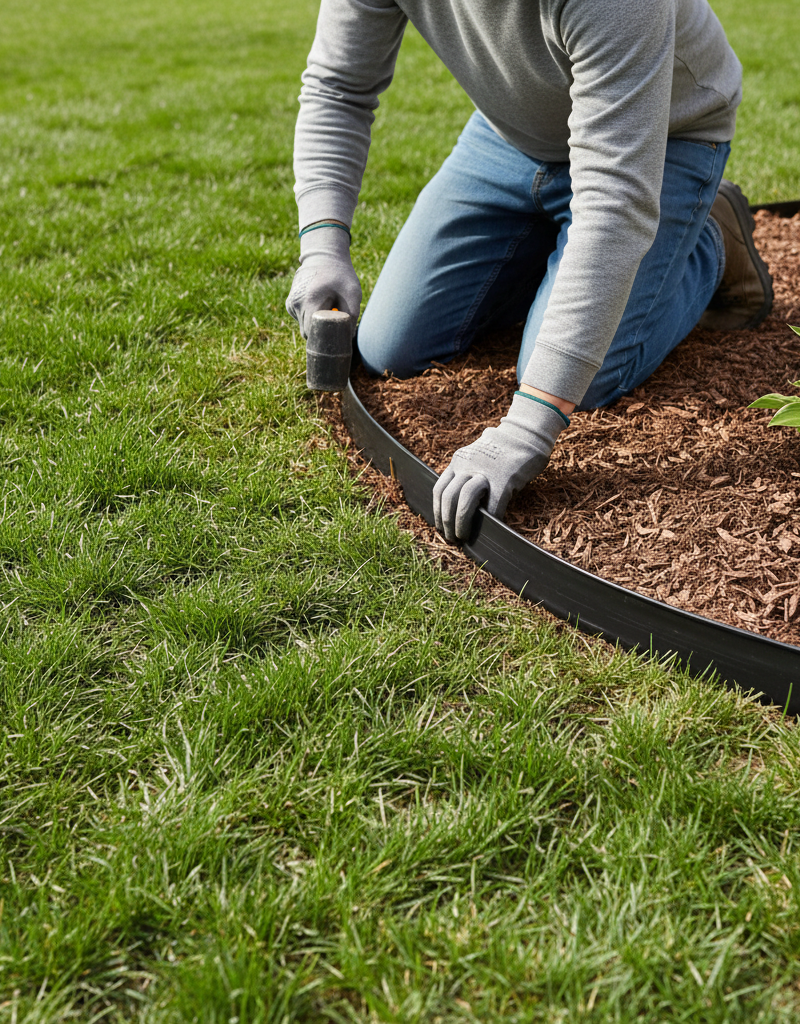
4. Place the Edging — Seat it Firmly and Squarely
— Begin placing your edging into the prepared trench. For roll-type edging, unroll it gradually, forcing it into the trench. For pre-formed sections, align them carefully. Ensure the edging is straight and not leaning. Use a rubber mallet to gently tap the top edge of the edging to seat it firmly into the trench. Routinely check for plumb (vertical straightness) with your level.
- Tip: When working with flexible plastic/composite edging, let it warm in the sun for a while; it will be easier to manage and shape.
- If your edging is rigid/metal: You may need to use a block of wood over the top and strike the wood with a hammer to avoid damaging the edging itself.
5. Secure the Edging — Anchor It Against Movement
— This is where many DIYers fail. For plastic or metal edging, drive staking pins or landscape spikes through the designated holes or tabs into the ground. Space stakes every 2-3 feet on straight runs and every 12-18 inches on curves, where forces are greater. For paver edging, ensure each stone is nestled securely in the sand/gravel base, tapping with a mallet to set.
- Tool Tip: An inexpensive post-hole digger for soft soil or a pry bar for compact soil can help create pilot holes for stakes in tough spots.
- Pro Tip: If you encounter stubborn rocks, try to reposition the stake slightly or use a wider, heavier spike.
6. Connect Sections — Maintain Continuity
— If your edging comes in sections, ensure they are securely joined using the manufacturer's connectors, overlap tabs, or by butting them tightly together. A continuous, well-connected line prevents separation and weaknesses.
- For plastic edging: Some types have interlocking ends; for others, you might need special connecting clips or even overlap two pieces by a few inches and stake them together.
7. Backfill and Compact — Provide Essential Support
— Once the edging is in place and secured, backfill both sides of the trench with the excavated soil. On the garden bed side, pack the soil firmly against the edging to provide lateral support. On the lawn side, ensure the soil is brought up to grade, flush with the top of the edging, and compacted. This prevents the edging from shifting and also allows a lawnmower wheel to ride smoothly over the top, if desired.
- Important: Water the backfilled soil gently to help it settle, then add more soil if needed before final compaction.
8. Check and Adjust — Fine-Tune for Perfection
— Perform a final review of your entire edging installation. Look for any areas that are uneven, bowed, or not properly anchored. Make adjustments as necessary. Ensure the top edge is consistently at the desired height relative to the surrounding ground. This final check ensures a professional and durable finish.
- Long-Term Check: After a week or two, especially after rain, re-inspect for any settling or movement and re-compact/add soil as needed.
Common Causes
- Insufficient Trenching and Leveling: The most frequent cause of unstable edging is a trench that isn't deep enough, consistently level, or properly compacted. Without a solid, even foundation, the edging will eventually sink or shift.
- Lack of Anchoring: Skimping on stakes or using stakes that are too short or flimsy allows the edging to move, especially with frost heave, soil expansion, or incidental contact from lawn equipment.
- Improper Corner/Curve Management: Curves and corners place extra stress on edging. Without additional stakes or proper shaping (e.g., scoring rigid plastic on the underside for tight bends), the material will bow outwards or create unsightly gaps.
- Poor Material Choice for Conditions: Selecting flexible plastic edging for a high-traffic area or heavy clay soil without sufficient preparation can lead to quick failure. Similarly, using non-UV stabilized plastic in direct sunlight can lead to embrittlement.
- Ignoring Soil Dynamics: Assuming the ground will remain static is a mistake. Soil expands and contracts with moisture and temperature changes, constantly putting pressure on any border installed within it.
- Backfilling Errors: Not properly compacting the soil on both sides of the edging leaves voids that allow for future settling and movement. Loose backfill simply isn't an effective support.
Common Mistakes
- Skipping the Planning Stage: Rushing to dig without clearly mapping out your design often leads to uneven lines, wasted material, and a need to restart sections.
- Uneven Trench Depth: Digging a trench that varies in depth means your edging will have an inconsistent height or won't be fully supported, leading to bowing or sinking in spots.
- Not Enough Stakes on Curves: Curves exert outward pressure. Using the same stake spacing on a tight curve as on a straight run guarantees the curve will eventually bulge or pull away.
- Placing Edging Too High: If the edging sits too proud of the ground, it can become a trip hazard, get caught by lawnmowers, or allow grass to easily grow underneath.
- Failing to Compact Backfill: Simply dumping soil back into the trench without firm compaction leaves air pockets that will cause the edging to settle unevenly over time.
- Butting Sections Without Connectors: For plastic or composite edging especially, relying only on sections pushed together leads to separation and gaps as the material expands and contracts with temperature changes.
Cost & Time Breakdown
| Task | DIY Cost | Pro Cost | Time |
|---|---|---|---|
| Materials (edging, stakes) | $50 – $300 | Included in labor | N/A |
| Site Prep & Trenching | $0 (labor) | $100 – $250 | 1 – 3 hours |
| Edging Installation | $0 (labor) | $150 – $400 | 2 – 5 hours |
| Backfilling & Compaction | $0 (labor) | $50 – $100 | 0.5 – 1 hour |
| Total (Average Flower Bed) | $50 – $300 | $300 – $750 | 3.5 – 9 hours |
Tips & Prevention
- Choose the Right Type: Select an edging material appropriate for your climate, soil type, and aesthetic. Flexible plastic is good for intricate curves, while rigid metal or stone provides a more formal, permanent look.
- Regular Inspection: Periodically walk your garden beds. Look for any signs of shifting, bowing, or areas where grass is starting to creep under the edging. Address small issues before they become major problems.
- Deep and Consistent Trench: Always prioritize a well-dug, level, and compacted trench. This is the foundation for lasting edging.
- Ample Anchoring: Don't skimp on stakes, especially on curves and areas prone to frost heave. Use longer stakes in softer soils.
- Mowing Strip Consideration: If you want to use your lawnmower wheel to guide along the edging, ensure the top of the edging is flush with the lawn level. This creates a clean
Related Articles
Keep troubleshooting with these hand-picked guides from FixlyGuide:
- The 3 Hidden Mistakes That Make Landscape Edging Fail (And How to Fix Them) — Discover common mistakes homeowners make when installing landscape edging and learn the correct methods to achieve a durable, professional-…
- The #1 Mistake Homeowners Make with Landscape Edging (and How to Fix It) — Discover the most common error in landscape edging installation that leads to weeds and an uneven look, and learn the easy fix for a clean,…
- The #1 Mistake Homeowners Make When Testing Soil pH (And How to Get It Right Every Time) — Learn the critical mistake most homeowners make when testing lawn soil pH and how to perform accurate tests at home for a healthier, greene…
- The 3 Hidden Reasons Your Sprinkler Head Won't Pop Up (And How to Fix Them) — Frustrated by a sprinkler head that won't rise? Discover the top three culprits behind this common irrigation issue and how to resolve them…
- The #1 Watering Mistake That Kills Lawns (And How to Fix Yours in 10 Minutes) — Discover the most common watering mistake homeowners make and how to adjust your watering routine for a healthier, more resilient lawn.
- The #1 Mistake Homeowners Make After Finding Missing Shingles (And How to Fix It Right) — Discover the crucial steps to take after a storm rips shingles from your roof, ensuring a proper, lasting repair and preventing costly futu…
Frequently asked questions
Why does my landscape edging keep moving?+
Landscape edging often moves due to insufficient trenching (not deep or level enough), lack of adequate anchoring (too few or flimsy stakes), and soil expansion/contraction caused by temperature and moisture changes like frost heave. Improper backfilling also leaves voids that allow for movement.
How deep should a trench be for landscape edging?+
For most plastic or metal landscape edging, the trench should be deep enough so that 2/3 to 3/4 of the edging is below ground level, leaving about 0.5 to 1 inch visible above grade or flush with the lawn for a mowing strip. For stone or paver edging, a deeper trench (4-6 inches) with a compacted gravel and sand base is required.
How do I keep grass from growing under my landscape edging?+
To prevent grass from growing under your edging, ensure the bottom edge of the barrier is fully buried and no gaps exist. Digging a slightly deeper trench and compacting the soil firmly against the base of the edging helps prevent grass runners from finding a path underneath. Using a landscape fabric weed barrier directly under the bed and against the edging can also help.
Can I install landscape edging without digging a trench?+
While some very shallow or flexible edgings *can* be installed with minimal digging by just driving stakes, it's generally not recommended for long-term stability. A proper, level trench provides crucial support against shifting, frost heave, and lateral pressure, leading to a much more durable and professional result.


Discussion
Loading comments…