
Tools & materials you'll need
Affiliate links- AmazonLandscape spikes (8-10 inch)10-20, depending on length of edging
As an Amazon Associate FixlyGuide earns from qualifying purchases — at no extra cost to you. Prices and availability are accurate as of publication and subject to change.
Quick Answer
Many homeowners struggle with landscape edging that won't stay put, leading to an untidy appearance around flower beds. The root cause is almost always inadequate preparation of the trench and insufficient anchoring. By taking the time to excavate a precise trench, ensure proper drainage, and use the correct type and quantity of anchors, you can prevent future heaving and maintain crisp, clean lines for years to come. This guide will walk you through diagnosing common edging failures and implementing the necessary fixes for a professional finish.
The Problem
You've spent hours meticulously planting a vibrant flower bed, only to have your landscape edging buckle, heave, or shift within a season or two. This common frustration undermines the aesthetic appeal of your garden, allowing mulch or soil to spill out, and requiring constant, tedious adjustments. The edging may pop out of the ground in places, create tripping hazards, or simply look uneven and unkempt. This isn't just an eyesore; it's a structural failure that defeats the entire purpose of installing edging: to create a clean, defined boundary and retain your landscaping materials.
The most frequent culprit behind these edging woes is a combination of poor site preparation and improper installation techniques. Without a stable foundation and secure anchoring, factors like soil expansion and contraction due to temperature changes, water runoff, frost heave, and even foot traffic or pets can easily displace the edging. Understanding the underlying mechanisms is the first step toward a permanent solution.
How It Works
Landscape edging, whether it's made of plastic, metal, stone, or pavers, relies on a combination of frictional resistance and mechanical anchoring to stay in place. When installed correctly, the edging sits partially below the ground's surface, leveraging the surrounding soil to resist lateral movement. The deeper the edging is embedded, the more soil acts as a counterweight and provides stability.
Mechanical anchors, typically spikes or pins, drive through the edging material and deep into the subsoil. These anchors create a direct physical connection, preventing vertical movement (lifting or heaving) and helping to resist horizontal forces. The number and spacing of these anchors are crucial; too few, and the edging acts like a lever, lifting at unsupported points. The type of soil also plays a significant role: loose, sandy soils offer less friction and require more robust anchoring than dense, clay-rich soils.
Proper trenching is the foundational step. A trench that is too shallow or uneven won't allow the edging to sit properly, leaving it vulnerable to displacement. The base of the trench needs to be firm and level, providing a consistent bearing surface for the edging. Backfilling the trench with compacted soil further locks the edging in, increasing the frictional resistance and distributing the forces that act upon it. Without this precise preparation and secure anchoring, external forces will inevitably win, leading to the common and frustrating problems of shifting or heaving edging that homeowners frequently encounter.
Step-by-Step Fix
For most landscape edging issues, the fix involves a partial reinstallation with improvements to trenching and anchoring. This guide addresses common situations where edging has lifted or shifted.
1. Clear the Area and Assess Damage — Remove mulch and debris, then examine the entire perimeter.
Carefully remove any mulch, decorative gravel, or soil that has spilled over or accumulated around the affected section of edging. Use a shovel, hand rake, or stiff brush. Once the area is clear, visually inspect the entire length of your landscape edging. Look for sections that have lifted, shifted horizontally, buckled, or separated. This assessment will help you determine how much of the edging needs to be addressed – sometimes it's just a small section, other times it might be extensive.
- Tools: Garden gloves, shovel, hand rake, stiff brush.
- Note: Pay attention to areas where water might collect, as this can be a sign of improper grading.
2. Carefully Remove the Problematic Edging — Extract the loose or damaged sections of edging without causing further damage.
Using a trowel or small shovel, gently dig out the soil around the base of the lifted or shifted edging. Locate and remove any existing anchors (spikes, pins). Once freed, carefully pull the edging sections out of the ground. Try to keep them as intact as possible, especially if you plan to reuse them. If the edging is damaged (cracked, bent, or severely warped), it's best to replace those specific sections. Lay the removed edging aside in an organized manner.
- If concrete or stone pavers: Use a rubber mallet to gently tap them apart if mortar was used, or pry them up carefully if they were dry-stacked.
- Safety: Wear sturdy gloves to protect your hands.
3. Excavate or Re-dig a Precise Trench — Create a level, consistently deep trench for stable edging placement.
With the old edging removed, it's time to prepare the foundational trench. Use a trenching shovel or a flat-edged spade to dig a trench that is slightly wider than your edging and deep enough so that approximately one-third to one-half of the edging will be buried (for plastic or metal edging). For stone or brick, ensure the trench allows the pavers to sit level with the desired finished grade, typically with 1-2 inches below the surface for stability. The key is consistency: the bottom of the trench must be perfectly level to prevent future heaving. Use a string line and line level for accuracy, especially on longer runs, and a hand tamper or a piece of 2x4 to compact the trench bottom thoroughly.
- Measurement: Check the depth and levelness frequently along the entire length of the trench.
- Drainage: If your soil has poor drainage, consider adding a 1-inch layer of gravel (e.g., pea gravel) to the bottom of the trench before placing edging, then compact it.
4. Install or Reinstall the Edging — Place the edging securely in the prepared trench, ensuring a tight fit.
Begin placing your landscape edging into the newly prepared trench. For flexible plastic or composite edging, unroll and lay it out, following the contours of your flower bed. For rigid sections of metal, wood, or stone, butt pieces tightly together. For curved designs, use a gradual bend rather than sharp angles. Use a rubber mallet to gently tap the top edge of the material to ensure it's fully seated and level with the desired finished grade, making minor adjustments as you go. For stone or brick pavers, place them individually, using a level across multiple stones to ensure an even surface.
- Overlap: If using overlapping sections (common with flexible plastic), ensure a secure connection.
- Leveling: Check the level frequently with a torpedo level on top of the edging.
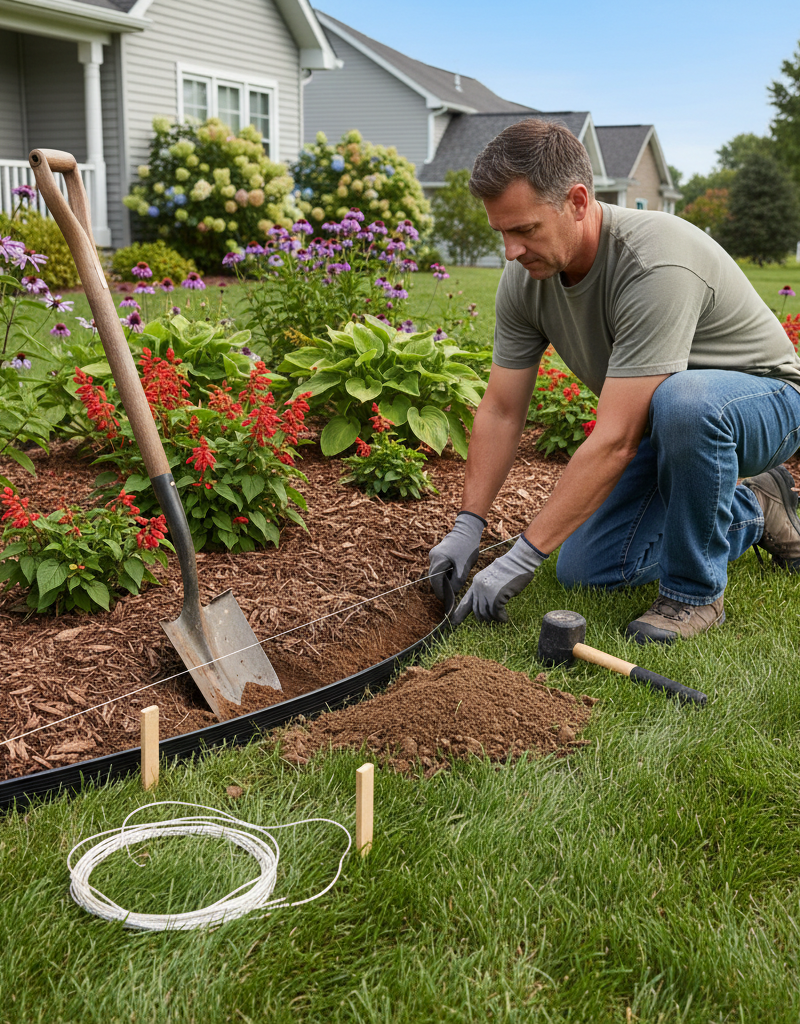
5. Drive Anchors for Stability — Securely fasten the edging to the ground with appropriate stakes or pins.
This is a critical step often overlooked or performed inadequately. For most plastic and metal edging, use landscape spikes (typically 8-10 inches long, made of steel or heavy-duty plastic). Drive these spikes through the designated holes in the edging, or directly adjacent to the inner side of the edging if no holes are present, every 2-4 feet. On curves, you'll need more frequent anchoring, potentially every 1-2 feet, to hold the shape. Drive the spikes in at a slight angle towards the bed for maximum holding power. For stone or concrete edging that doesn't have holes, you might need to use rebar stakes driven into the ground just behind the edging, or consider a concrete haunch (a small concrete reinforcement). Ensure all anchors are driven flush with or slightly below the top of the edging to avoid creating tripping hazards or impeding mowing.
- Tools: Small sledgehammer or rubber mallet.
- If rocky soil: You might need to pre-drill pilot holes for the spikes using an electric drill with a masonry bit, then drive the spikes.
6. Backfill and Compact the Trench — Fill the trench with soil and compact it thoroughly to lock the edging in place.
Once the edging is anchored, backfill the trench on both sides of the edging with the soil you removed earlier. Fill in layers of 2-3 inches, and with each layer, use a hand tamper, the back of a shovel, or your foot to firmly compact the soil. This compaction is essential; it eliminates air pockets and creates a dense, stable environment around the edging, providing additional lateral support and preventing settling. Continue until the soil is flush with the top of the buried portion of the edging. Once backfilled, check the level of the edging one last time and make any final, minor adjustments.
- Watering: Lightly wetting the soil before compaction can help it settle more densely, especially with sandy soils.
- Slope: Ensure the finished grade slopes slightly away from the edging to encourage water runoff and prevent pooling against the bed.
7. Apply Landscape Fabric and Mulch (Optional but Recommended) — Enhance weed control and moisture retention, adding to the finished look.
If you use landscape fabric for weed suppression, lay it down over the prepared bed, running it up to the inner edge of your newly installed border. Secure it with fabric staples. Then, apply your chosen mulch or decorative gravel inside the bed, ensuring it doesn't pile up against the edging in a way that would encourage moisture buildup against plants or compromise the edging's stability. Maintain a consistent depth for a professional appearance. The edging will now effectively contain these materials.
- Mulch depth: Aim for 2-4 inches of mulch for effective weed suppression and moisture retention.
- Edge clearance: Keep mulch slightly away from plant stems and tree trunks to prevent rot.
Common Causes
- Shallow or Uneven Trenching: The most frequent offender. If the trench isn't deep enough, or if its bottom is irregular, the edging won't have sufficient soil to anchor it, making it prone to lifting and shifting. Uneven trenches also mean uneven pressure points, leading to buckling.
- Insufficient Anchoring: Using too few spikes, too short of spikes, or failing to drive them deep enough into the soil. Without adequate mechanical fastening, especially on curves or slopes, the edging simply doesn't have enough resistance against ground movement.
- Poor Soil Compaction: After installing the edging, if the soil around it isn't firmly compacted, it leaves air pockets that allow the edging to move freely when exposed to water, frost, or pressure. This
Related Articles
Keep troubleshooting with these hand-picked guides from FixlyGuide:
- The #1 Mistake Homeowners Make Installing Landscape Edging (and How to Fix It) — Discover the most common mistake DIYers make with landscape edging and learn how to perfect your flower beds with a long-lasting, professio…
- The #1 Mistake Homeowners Make with Landscape Edging (and How to Fix It) — Discover the most common error in landscape edging installation, leading to instability and an untidy appearance, and learn how to correct…
- The #1 Mistake Homeowners Make with Landscape Edging (and How to Fix It) — Discover the most common error in landscape edging installation that leads to weeds and an uneven look, and learn the easy fix for a clean,…
- The 3 Glaring Mistakes Most Homeowners Make with Landscape Edging (and How to Fix Them) — Avoid common pitfalls when installing landscape edging to keep your flower beds neat and prevent grass invasion with these simple fixes.
- The 3 Hidden Mistakes That Make Landscape Edging Fail (And How to Fix Them) — Discover common mistakes homeowners make when installing landscape edging and learn the correct methods to achieve a durable, professional-…
- Is Your Gutter Sagging After Every Storm? The Hidden Flaw Most Homeowners Miss — Discover the overlooked reason your gutters sag after every storm and learn the lasting fix that most homeowners miss.
Frequently asked questions
Why does my landscape edging keep lifting?+
Landscape edging typically lifts due to inadequate trenching and insufficient anchoring. If the trench isn't deep and level, or if there aren't enough spikes driven deep enough into the ground, soil expansion, frost heave, and general pressure can easily displace the edging over time.
How deep should landscape edging be buried?+
For most flexible plastic or metal landscape edging, you should aim to bury approximately one-third to one-half of its height. This provides sufficient soil contact for stability against lateral movement and helps resist lifting. Concrete or stone pavers should also have a stable foundation, usually 1-2 inches below the finished grade.
What kind of spikes should I use for landscape edging?+
For most flexible landscape edging materials (plastic, composite, metal), use heavy-duty landscape spikes that are 8-10 inches long. Steel spikes offer superior durability and holding power, especially in challenging soil conditions. Space them every 2-4 feet, or more frequently on curves, for optimal stability.
Can I reuse old landscape edging?+
Yes, you can often reuse old landscape edging if it's still in good condition—meaning it's not cracked, severely bent, or brittle. Inspect removed sections carefully for signs of damage or deterioration. If it has lost its structural integrity or is significantly warped, it's best to replace those sections to ensure a long-lasting and aesthetically pleasing result.


Discussion
Loading comments…