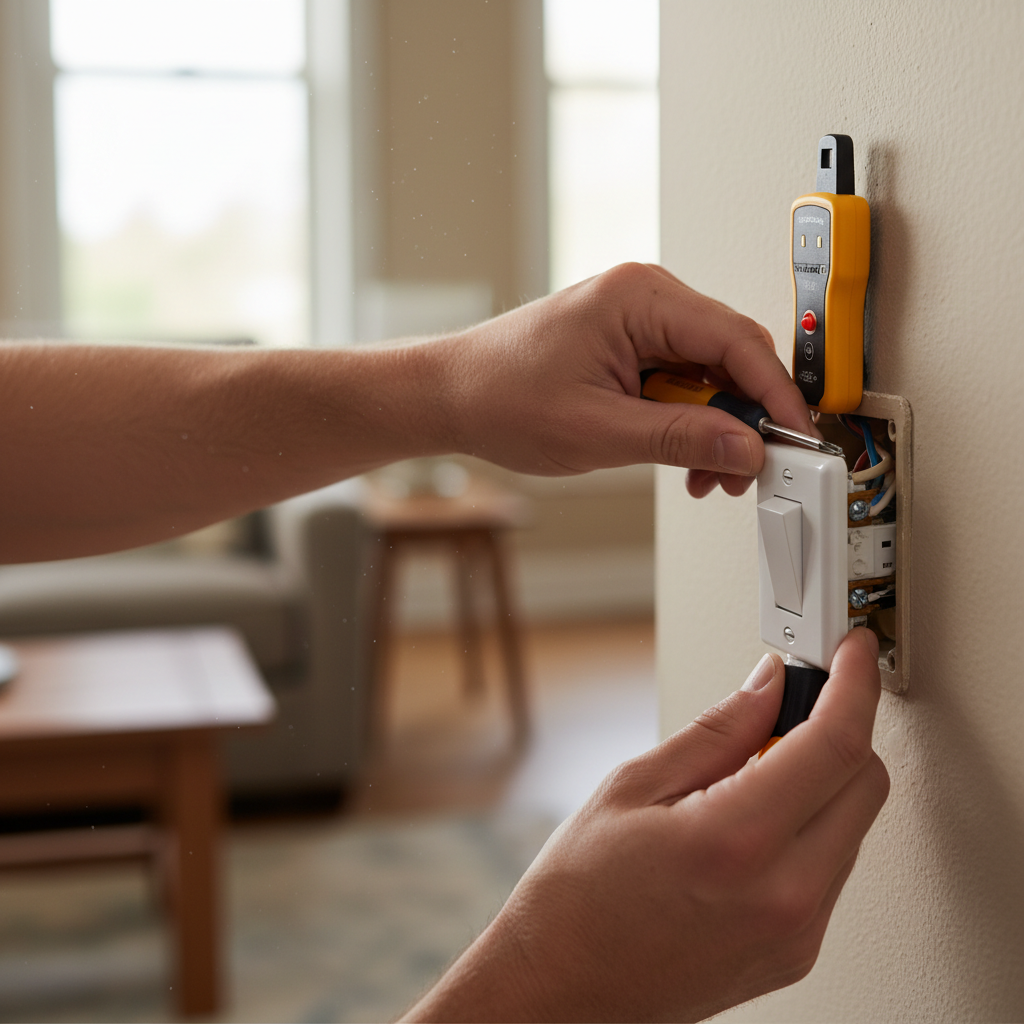
- Forgetting to Turn Off the Power: The most dangerous mistake. Working on live electrical components without turning off the circuit breaker exposes you to severe electrical shock. Always verify with a voltage tester.
- Ignoring a Loose Screw Terminal: Sometimes, homeowners tighten one loose wire but overlook another that might be subtly loose, leading to a persistent flicker or recurrence of the problem.
- Over-tightening or Under-tightening Screws: Screws should be snug, but not so tight that they strip the screw head or damage the wire. Under-tightening, conversely, leaves the connection vulnerable to loosening.
- Assuming a Faulty Bulb: Often, the first instinct is to replace the bulb. While sometimes the solution, it can延误 diagnosing the actual electrical problem at the switch or fixture if it's not the bulb's fault.
- Not Inspecting Beyond the Switch: If tightening the switch connections doesn't solve the problem, many DIYers stop there. The next step should always involve checking the wiring at the light fixture itself, as the issue could be there.
Electrical · Panel or service upgrade
| Project category | Electrical |
|---|---|
| Problem type | Panel or service upgrade |
| Trade required | Electrical |
| Urgency | Planned project |
| Safety risk | High safety risk |
| DIY suitability | Licensed pro only |
| Cost category | High cost |
| Typical timeline | Permit plus utility scheduling, commonly 2–6 weeks |
| Contractor type | Licensed electrician |
Repair option
Add a subpanel when the main service is adequate.
Replacement option
Full service upgrade with utility coordination and permits.
Common causes
- Obsolete or recalled panel brands
- Service capacity too small for added loads
- No room for required AFCI/GFCI breakers
Relevant tools:project cost estimatorcompare quotes
Published July 8, 2026Last updated August 17, 2026
Tools & materials you'll need
Affiliate linksAs an Amazon Associate FixlyGuide earns from qualifying purchases — at no extra cost to you. Prices and availability are accurate as of publication and subject to change.
Quick Answer
A flickering light switch is a common household nuisance, often indicating a loose electrical connection rather than a faulty fixture or bulb. The good news is that this is typically a straightforward fix for the average homeowner. By safely switching off the breaker, you can access the switch's wiring, identify any loose connections, and tighten them. In some cases, the switch itself may be past its prime and require replacement. Always prioritize safety by verifying the power is off before beginning any work.
The Problem
Imagine walking into a room, flipping the light switch, and instead of a steady glow, you get an irritating flicker. Sometimes it's constant, sometimes intermittent, but it's always annoying and can even shorten the lifespan of your light bulbs. This isn't just a cosmetic issue; flickering lights are a sign of an inconsistent electrical flow, most commonly due to loose wiring connections either at the light switch itself, inside the electrical box for the fixture, or where the fixture connects to the ceiling or wall wiring. While it's rarely an immediate danger, persistent flickering can indicate an overloaded circuit (though less common with a single light switch) or, in rare cases, a faulty component that could degrade further. Diagnosing the exact source of the flicker is the first step towards a lasting solution, helping you restore consistent illumination and peace of mind.
How It Works
Understanding how a light switch works provides insight into why it might flicker. A light switch is essentially a gate that controls the flow of electricity to a light fixture. When you flip the switch to the "on" position, it completes a circuit, allowing electrical current to travel from your home's main electrical panel, through the switch, to the light fixture, and then back to the panel through the neutral wire. When the switch is in the "off" position, it breaks this circuit, stopping the flow of electricity.
Inside a typical single-pole light switch, there are two terminals (or three, if it includes a ground screw). The "hot" wire (usually black) from the power source connects to one terminal, and another "hot" wire (often black or sometimes red, acting as a switch leg) goes from the other terminal up to the light fixture. A ground wire (bare copper or green) is typically connected to a green screw on the switch itself, providing a safety path for electricity in case of a fault. The neutral wire (white) usually bypasses the switch entirely, running directly from the main panel to the light fixture to complete the circuit.
Flickering occurs when this electrical path is interrupted or unstable. A loose connection at any point in this circuit – at the switch terminals, where wires are spliced in the electrical box, or at the fixture itself – can cause the current to intermittently flow and stop, resulting in the flicker. This instability can also be caused by wear and tear within the switch mechanism itself, where the internal contacts become corroded or fatigued over time. When these contacts don't make consistent, firm contact, the flow of electricity becomes erratic, manifesting as a flicker. Identifying where this break or instability occurs is key to resolving the problem.
Step-by-Step Fix
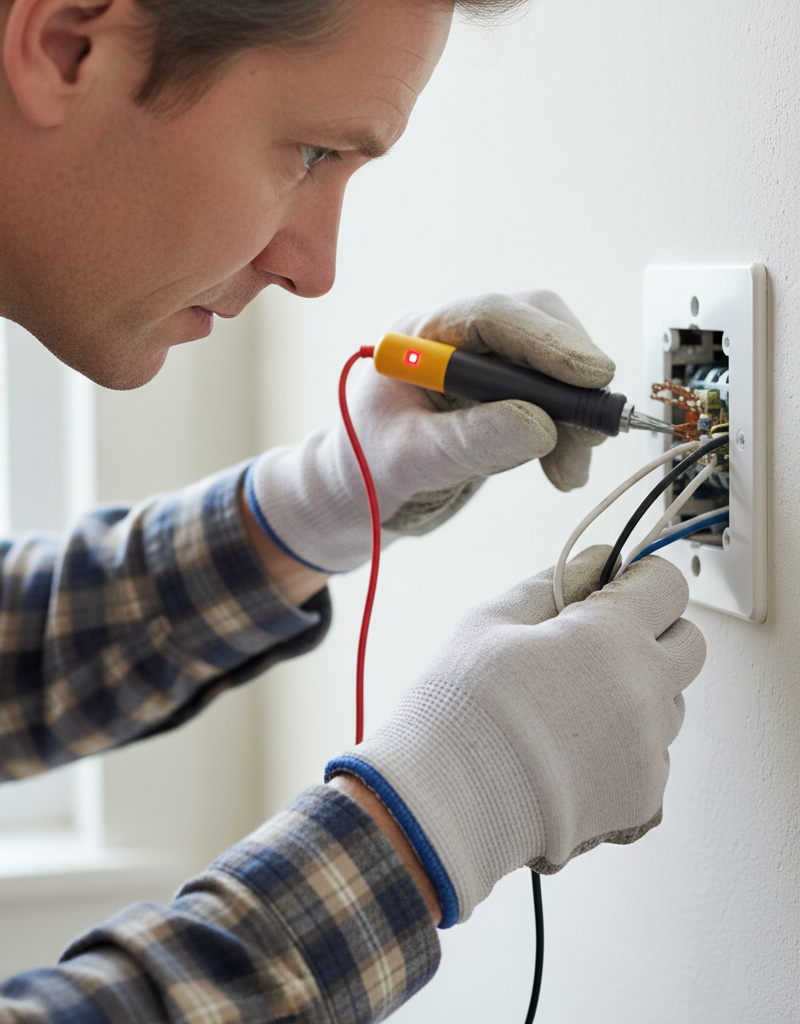
1. Safety First – Power Down – Always turn off the power to the light switch circuit at your home's main electrical panel before beginning any work. This is the most crucial step for your safety.
*   **Locate Breaker:** Find the circuit breaker labeled for the room or switch you're working on. If not clearly labeled, you may need to flip breakers until the light no longer works.
*   **Test for Power:** After flipping the breaker, use a non-contact voltage tester to confirm that no power is present at the switch. Insert the tester into the outlet if there's one nearby on the same circuit, or directly touch it to the switch itself after partially removing the switchplate.
2. Remove the Switchplate – Unscrew the two small screws holding the switchplate to the wall. Carefully set the screws and plate aside in a safe place where they won't be lost.
* **Gentle Prying:** If the switchplate is stuck due to paint, gently score around the edges with a utility knife before attempting to remove it to prevent cracking.
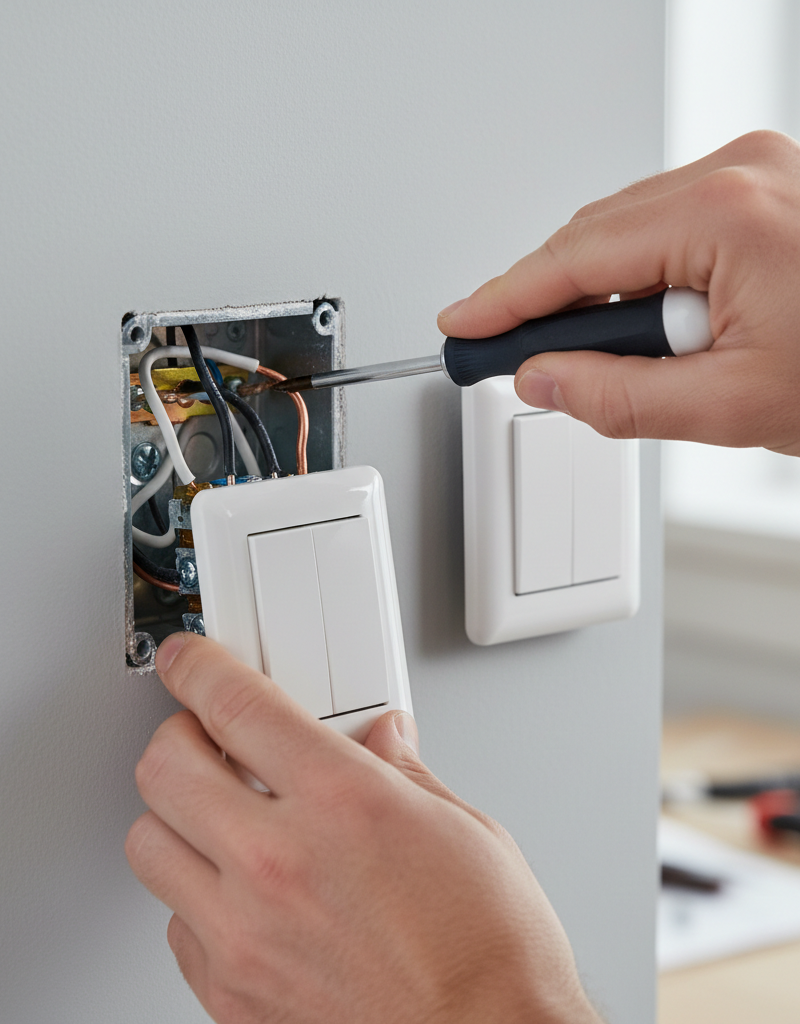
3. Pull Out the Switch – Carefully pull the light switch assembly out from the electrical box. It will still be connected by wires.
* **Support the Switch:** Support the switch with one hand while inspecting the wiring. Avoid putting strain on the wires.
4. Inspect Wire Connections – Examine all wire connections to the switch. Look for any wires that appear loose, frayed, or corroded. The most common connections are typically screw terminals or push-in (backstab) connections.
*   **Screw Terminals:** Wires should be wrapped clockwise around the screw terminals and tightly secured.
*   **Backstab Connections:** These are notorious for becoming loose over time. If your switch uses backstab terminals, consider moving the wires to the more secure screw terminals if available, or replacing the switch if it only has backstab connections.
5. Tighten All Connections – Using an appropriate screwdriver, firmly tighten all screw terminals on the switch. Ensure that no bare wire strands are exposed around the screw head, which could cause a short circuit.
* **Re-wrap Wires:** If a wire seems poorly wrapped around a screw, gently unwrap it, create a new hook, and re-wrap it clockwise, ensuring it's snug against the screw shaft before tightening.
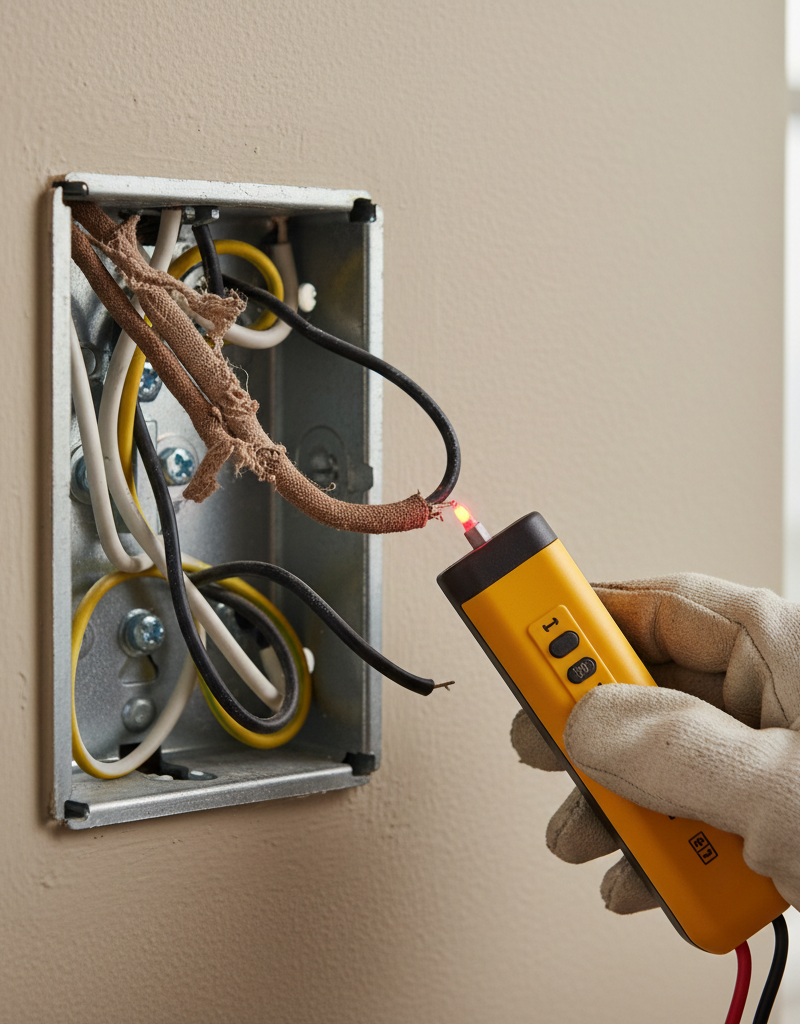
6. Check Junction Box Wires – Peer into the electrical box behind the switch. Sometimes, the loose connection isn't at the switch itself but with the wire nuts connecting wires inside the box.
* **Twist and Pull:** Gently twist and pull on each wire nut to ensure it's secure. If any feel loose, remove them, twist the wires together tightly with lineman's pliers (clockwise), and then reapply a new wire nut.
7. Examine the Switch Itself – Inspect the switch body for any signs of damage, such as scorch marks, melted plastic, or unusual odors. If the switch appears damaged or feels loose internally when you toggle it, it's likely faulty and needs replacement.
* **Internal Wear:** Older switches can simply wear out internally, leading to inconsistent contact and flickering.
8. Replace a Damaged Switch (If Necessary) – If you determined the switch is faulty, proceed with replacement. Disconnect the wires from the old switch, ensuring you note which wire goes to which terminal (taking a picture can help).
*   **Match New Switch:** Ensure the new switch is of the same type (e.g., single-pole, 3-way).
*   **Connect Wires:** Connect the wires to the new switch's corresponding terminals, following local electrical codes (usually black to brass/dark screw, white to silver, bare/green to green ground screw).
9. Reinstall and Test – Gently push the switch and wires back into the electrical box. Screw the switch securely to the box, then replace the switchplate. Turn the power back on at the circuit breaker and test the light.
* **Observe Carefully:** Operate the switch several times and observe the light for any lingering flicker. If the flicker persists, you may need to investigate the light fixture itself.
Common Causes
- Loose Wire Connections at the Switch: This is by far the most frequent culprit. Over time, due to expansion/contraction, vibration, or initial improper installation, wires connected to the switch's screw terminals or (especially) backstab terminals can loosen, causing intermittent electrical contact and flickering. This accounts for roughly 70% of flickering switch issues.
- Loose Wire Nuts in the Junction Box: Inside the electrical box, wires are often joined using wire nuts. If these connections aren't twisted tightly enough, they can become loose, creating an unstable circuit anywhere between the switch and the fixture.
- Faulty Light Switch: The internal mechanism of a light switch can wear out or become damaged. Corrosion, pitting of contacts, or a weakened spring can prevent the switch from making consistent electrical contact, leading to flickering. This is more common in older switches or those subjected to heavy use.
- Loose Bulb or Fixture Wiring: While not strictly a 'switch' problem, a loose bulb in the socket or loose wiring connections within the light fixture itself can manifest as flickering that appears to originate from the switch. Always ensure bulbs are tightly screwed in.
- Poor Grounding: An inadequate or loose ground connection, though less common for flickering, can sometimes contribute to unstable electrical behavior by not providing a clear path for fault currents, potentially impacting overall circuit stability.
- Underlying Circuit Issues (Less Common): In rare cases, especially if flickering is widespread, it could point to a larger issue like an overloaded circuit, loose wiring at the main panel, or even utility power fluctuations. However, for an isolated light switch flicker, the cause is almost always local to the switch or fixture.
Common Mistakes
- Forgetting to Turn Off the Power: The most dangerous mistake. Working on live electrical components without turning off the circuit breaker exposes you to severe electrical shock. Always verify with a voltage tester.
- Ignoring a Loose Screw Terminal: Sometimes, homeowners tighten one loose wire but overlook another that might be subtly loose, leading to a persistent flicker or recurrence of the problem.
- Using Backstab Connections: While convenient for quick installation, backstab connections (where a wire is pushed into a small hole) are known to be less secure than screw terminals and are a common point of failure for loose connections. Ditch them for screw terminals if your switch offers both.
- Over-tightening or Under-tightening Screws: Screws should be snug, but not so tight that they strip the screw head or damage the wire. Under-tightening, conversely, leaves the connection vulnerable to loosening.
- Assuming a Faulty Bulb: Often, the first instinct is to replace the bulb. While sometimes the solution, it can延误 diagnosing the actual electrical problem at the switch or fixture if it's not the bulb's fault.
- Not Inspecting Beyond the Switch: If tightening the switch connections doesn't solve the problem, many DIYers stop there. The next step should always involve checking the wiring at the light fixture itself, as the issue could be there.
Cost & Time Breakdown
| Task | DIY cost | Pro cost | Time |
|---|---|---|---|
| Diagnose & Tighten Connections | $0–$10 | $75–$150 | 15–30 minutes |
| Replace Single-Pole Switch | $10–$25 | $100–$250 | 30–60 minutes |
| Replace 3-Way/Dimmer Switch | $20–$50 | $150–$350 | 45–90 minutes |
| Additional Wire Nuts/Tape | $2–$5 | Included | 5 minutes |
| Troubleshooting Fixture | $0 | $50–$100 (add-on) | 15–30 minutes |
| Electrician Minimum Callout | N/A | $75–$150 | N/A |
Tips & Prevention
- Routine Checks: Every few years, especially in high-traffic areas, consider gently pulling out switches (after turning off power) to inspect and re-tighten screw connections. This proactive step can prevent future flickering.
- Use Quality Components: When replacing switches, opt for reputable brands and avoid the cheapest options. Higher-quality switches often have more robust internal mechanisms and better screw terminals.
- Avoid Backstab Wiring: Whenever possible, use the screw terminals on a switch or outlet. If a switch only has backstab connections, it's often a sign of a lower-quality device. You can also pigtail wires to screw terminals for a more secure connection.
- Proper Wire Preparation: When making connections, ensure about 3/4 inch of insulation is stripped from the wire. For screw terminals, create a clean hook that wraps clockwise around the screw, ensuring the insulation butts up against the terminal, with no bare wire exposed beyond the screw head.
- Don't Overload Circuits: While usually not a cause of single-switch flickering, overloading an entire circuit can lead to broader electrical issues. Be mindful of how many high-draw appliances are on a single circuit.
- Address Issues Promptly: Don't ignore flickering lights. What starts as a minor annoyance can sometimes signify a deteriorating connection that could eventually fail completely or, in rare cases, generate heat.
When to Call a Professional
While most flickering light switch issues are DIY-friendly, there are specific situations where calling a licensed electrician is not just recommended, but essential for safety. If tightening connections at the switch and checking the fixture doesn't resolve the flickering, or if you observe any arcing, burning smells, scorch marks, or buzzing noises coming from the switch or electrical box, immediately turn off the power and call a professional. These are signs of a more severe electrical fault that could pose a fire hazard. Furthermore, if you're dealing with a multi-gang switch box, complex three-way or four-way switches, or if you feel uncomfortable at any point working with electricity, an electrician can diagnose and safely repair the issue. If multiple lights or appliances across different circuits are flickering, this could indicate a whole-house electrical problem, possibly at your main service panel or with the utility company's connection, which absolutely requires professional intervention. Never attempt to diagnose or repair main panel issues yourself. They have the specialized tools and experience to trace the root cause and ensure all work complies with electrical codes, protecting your home and family.
Related Articles
Keep troubleshooting with these hand-picked guides from FixlyGuide:
- The Single Most Common Reason Half Your Outlet Dies (and How to Fix It in 15 Minutes) — Before you call an electrician for a half-dead outlet, check this common culprit that's often a simple DIY fix.
- Why is Your Light Switch Hot? (The Hidden Danger Most Homeowners Miss) — A hot light switch isn't just uncomfortable; it's a critical warning sign of electrical issues that should never be ignored due to fire ris…
- Why Your Outlet Died (Even If the Breaker's On) — Discover the hidden reasons an electrical outlet stops working, even when the circuit breaker appears to be on, and learn simple diagnostic…
- Why Does Only One Room Have Flickering Lights? The Real Culprit — Flickering lights in a single room often point to a localized electrical issue, most commonly a loose connection within the circuit.
- Why is Your Light Switch Hot? The 3 Hidden Overload Risks Explanations — A hot light switch isn't just uncomfortable; it signals potential electrical problems like overloading, loose wiring, or a failing switch.
- The #1 Reason Your AC Blows Warm Air (And It's Not What You Think) — A dirty air filter is often the overlooked culprit behind an air conditioner blowing warm air, hindering its ability to cool your home effi…
Should you do this yourself?
Answer five quick questions before you start. Safety outranks savings every time.
Your experience with work like this
How high do you have to work?
Does the job involve any of these?
Will it need a permit?
Specialty tools
Free and instant. Educational guidance only — not a quote, inspection, or professional diagnosis.
What should this project cost?
Enter your project details for a realistic cost range before you call anyone.
Outlet and switch work usually $150–$400; panel upgrades commonly $1,800–$4,200.
- Regional adjustment
- National average
- Labor share (typical)
- ~$709
- Quotes to collect
- 3 written estimates
Educational estimate based on national averages — not a binding quote. Always confirm with written local estimates.
Fixly Project Decision Box
- DIY difficulty
- Professional Recommended
- Estimated time
- Diagnosis 1–2 hours
- Cost level
- Moderate
Main tools / materials
- Non-contact voltage tester
- Outlet tester
- Flashlight
When to stop and call a pro
- Burning smell, scorch marks, or a warm outlet or switch plate
- A breaker that trips again right after being reset
- Any work inside the service panel
- Aluminum wiring or cloth-insulated wiring
Need professional help?
Talk to a Licensed ElectricianFrequently asked questions
What causes a light switch to flicker?+
A flickering light switch is most commonly caused by loose wire connections at the switch terminals, within the electrical box, or at the light fixture itself. Over time, these connections can loosen, leading to intermittent electrical contact.
Is a flickering light switch dangerous?+
While often just an annoyance, persistent flickering from a loose connection can generate heat and, in rare cases, pose a fire risk. Any arcing, burning smell, or buzzing should prompt immediate power shutdown and a call to an electrician.
Can I replace a flickering light switch myself?+
Yes, for a standard single-pole switch, replacement is a moderate DIY task, as long as you prioritize safety by turning off power at the breaker and verifying with a voltage tester.
How do I know if the problem is the switch or the bulb?+
First, try replacing the bulb. If the flickering continues, it's likely an issue with the switch or the fixture’s wiring. A simple inspection and tightening of connections at the switch can often resolve it.
What if tightening connections doesn't stop the flickering?+
If tightening connections at the switch and fixture doesn't work, the switch itself may be faulty and need replacement. If the issue persists with a new switch, it may indicate a deeper electrical problem requiring a professional electrician.
Discussion
Loading comments…