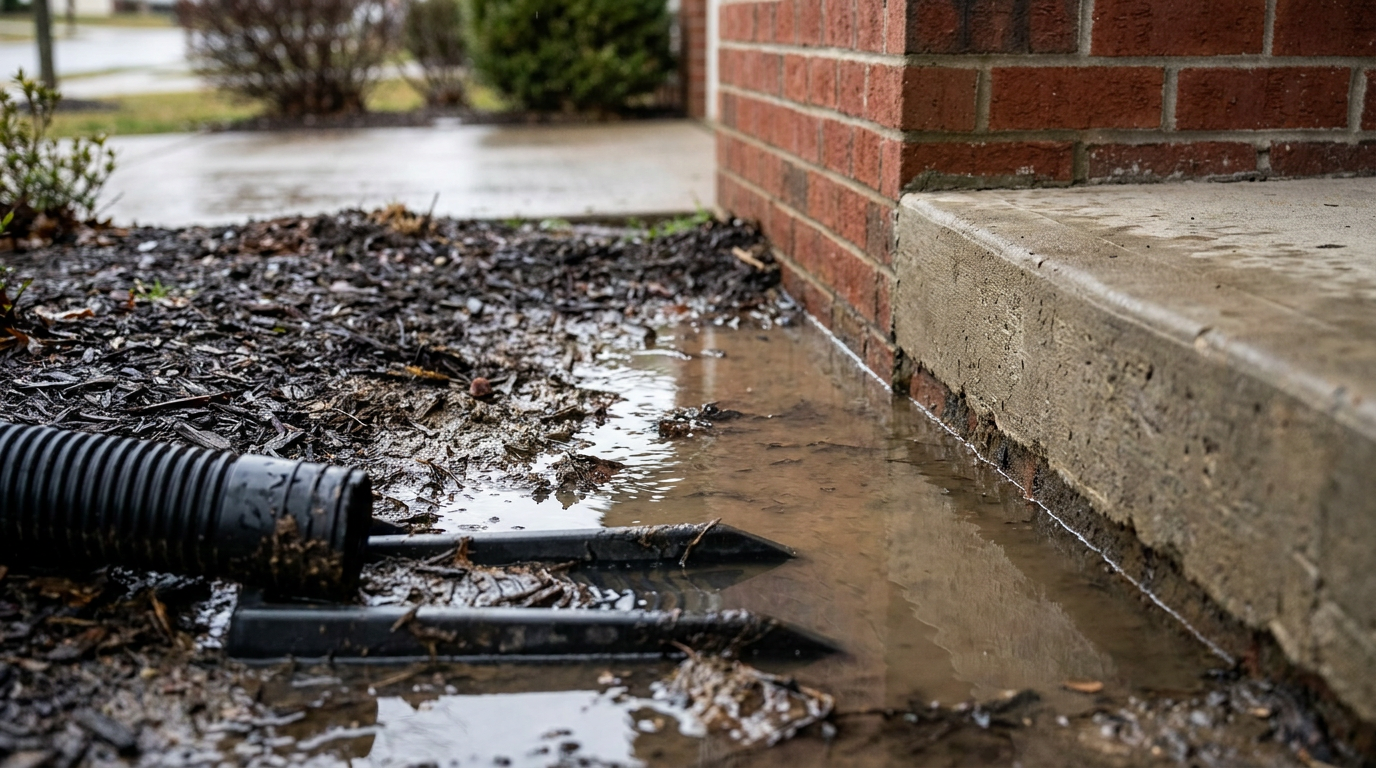
- Settled Backfill Soil — Soil backfilled against new foundation footings settles over the first 5 years, dropping the bed surface below surrounding lawn levels and creating an inward funnel.
- Runaway Downspouts — An inch of rain dropping on a 2,000-square-foot roof yields 1,250 gallons of water. When three downspouts drop that whole mess straight into a 3-foot-wide foundation garden, no soil on earth can absorb it fast enough.
- Mulch Layering ("Mulch Volcanos") — Homeowners piling fresh mulch on top of decomposed mulch year after year creates an artificial dam higher than the surrounding lawn that traps water directly against the house.
- Heavy Clay Hardpan — Dense, unamended subsoil with minute clay particles seals up when wet, preventing vertical water drainage and creating perched water tables around structural footings.
- Raised Edging Borders — Heavy concrete or stone border blocks installed without weep holes act like mini-retaining walls, locking surface sheet drainage inside the garden bed instead of letting it spill out into the lawn.
Landscaping · Drainage or grading problem
| Project category | Landscaping |
|---|---|
| Problem type | Drainage or grading problem |
| Trade required | Landscaping |
| Urgency | Soon — within weeks |
| Safety risk | Low safety risk |
| DIY suitability | Pro recommended |
| Cost category | Moderate cost |
| Typical timeline | Most yards 1–3 days |
| Contractor type | Landscaping contractor |
Repair option
Regrade, extend downspouts, and add a French drain where water collects.
Replacement option
Full drainage system with catch basins for chronic flooding.
Common causes
- Negative grade toward the house
- Compacted clay soil
- Downspouts discharging at the foundation
Relevant tools:project cost estimator
Published October 23, 2026Last updated October 23, 2026
Tools & materials you'll need
Affiliate links- Amazon4-inch perforated PVC pipe (SDR-35)20–30 ft · Smooth-wall rigid pipe with drilled holes
- AmazonWashed 3/4-inch crushed gravel or river stone0.5–1 cubic yard · For trench base and backfill
- Amazon4-ounce non-woven geotextile drainage fabric1 roll (3x50 ft) · Do not use woven weed barrier
- AmazonSolid 4-inch PVC pipe and fittings10–20 ft · For downspout extensions
- AmazonPop-up drainage emitter1
As an Amazon Associate FixlyGuide earns from qualifying purchases — at no extra cost to you. Prices and availability are accurate as of publication and subject to change.
Quick Answer
To fix water pooling around your home's foundation beds, clear out the dense organic muck and regrade the soil so it falls away from the house at a minimum downward slope of 1/4 inch per foot — or 6 inches over the first 10 feet. Reroute downspout discharge at least 6 feet beyond plant beds, break up hardpan or heavy clay with organic compost, and install a shallow gravel catch basin or perforated French drain pipe wrapped in 4-ounce non-woven geotextile fabric if the yard grade is trapping runoff.
The Problem
Water pooling in landscaping beds isn't just an ugly puddle killing your boxwoods. It's a direct threat to your home's structural integrity. During heavy downpours—common across North Texas flash storms and southern seasonal rains—flower beds right next to the foundation catch hundreds of gallons of roof runoff. When that soil stays saturated, hydrostatic pressure builds against grade beams and slab perimeters. In expansive soil regions, heavy clay swells like a sponge, pushing upward and sideways against concrete. Then it bakes dry in summer heat, shrinks back, and pulls away. That constant swell-shrink cycle cracks slabs, warps door frames, and invites subterranean termites right where moist mulch touches your sill plates or exterior brick weeping holes.
When standing water stays parked in landscape beds for longer than 24 hours after rain stops, you're dealing with an active grade, drainage, or soil compaction failure. The roots drown because saturated soil doesn't leave enough pore space for oxygen exchange, fungal pathogens like Phytophthora take over, and your foundation pays the bill.
How It Works
Water obeys gravity. That's the whole game. Around a residential foundation, the first 10 feet of soil ought to work like a shed plane, moving roof and surface water out toward municipal swales, alleyways, or street gutters.
When contractors backfill a new build, they usually pack the perimeter looser than undisturbed native ground. Over 3 to 10 years, that trench settles. Meanwhile, homeowners pile 2 to 3 inches of wood mulch into the beds year after year without clearing the old layer. That builds an inverted dam—a mulch berm—that ends up higher than the lawn and slopes right back toward the slab.
ROOF RUNOFF & SPLASH
         │
         ▼
[Exterior Wall] ── (Sill / Weep Hole)
         │
         ├── Negative Slope (Traps Water) ──┐
         │                                  ▼
[Foundation Slab]                    [Mulch Berm Dam] ──► Trapped Pond
         │                                  ▲
         └── Hydrostatic Pressure Area ─────┘
Rain falling from the roof eaves or dumping out of gutter downspouts hits this depression. Subsurface drainage depends on soil percolation rate. Sandy loam drains at roughly 1 to 2 inches per hour, but dense, high-plasticity clay soils drain at less than 0.05 inches per hour. When water arrives faster than the percolation rate, it fills every air void in the topsoil and collects in the low pocket against the concrete stem wall, saturating the backfill zone completely.
I pulled a water heater in Frisco last month that had exactly this same kind of soil problem around the back patio bed—looked harmless until you got the shovel in there and found soup. Same story, different house.
Step-by-Step Fix
Here is how I’d get rid of standing water in foundation beds and get positive drainage moving away from your walls.
-
Conduct a Bed Height and Slope Check — Measure the vertical clearance between the bottom edge of your siding or brick weep holes and the top of the landscape soil. You need a minimum of 4 inches (preferably 6 inches) of exposed foundation concrete. Pull a mason's line tight from the wall outward 10 feet into the lawn, place a line level on it, and measure the drop using a tape measure. You must establish at least a 6-inch drop over that 10-foot run (a 5% grade), or at absolute minimum 1/4 inch of fall per linear foot in tight spaces.
- Tools: Mason's string line, line level, wooden stakes, 25-foot tape measure.
- If clearance is under 4 inches: Don't pile more soil against the wall to fake the slope; you need to excavate soil out of the bed so you keep concrete exposed.
-
Strip Away Old Mulch and Degraded Organic Sludge — Shovel away the accumulated years of decomposed hardwood mulch down to actual mineral soil. Mulch mats get spongy, hold gallons of standing moisture against brickwork, and hide low spots in the underlying grade. Wheelbarrow the old material out to a compost pile or yard-waste bags.
- Safety: Wear heavy leather gloves and watch for fire ants or scorpions that nest under wet mulch layers in warm climates.
-
Map and Clear Underground Utilities — Call 811 before you thrust a trenching shovel or sharp spade into the bed. Cable, internet lines, natural gas feeds, and electrical conduits to exterior condenser units routinely run shallow through perimeter foundation plantings—sometimes just 4 to 8 inches deep.
- Safety: Never use an electric or gas-powered trencher within 24 inches of utility marks; hand-dig with a blunt-nosed shovel only.
-
Excavate a Positive Grade Slope — Using a flat transfer shovel and mattock, scrape down the mineral soil nearest the house wall. Establish a firm, continuous slope that falls smoothly away from the foundation perimeter out to the bed's outer border. Pack the carved surface using a hand tamper so newly exposed soil won't instantly sink under the first storm.
- Tools: Heavy flat shovel, digging mattock, 8x8-inch steel tamper.
- If this doesn't work: If your lawn sits noticeably higher than the bed edge and can't be scraped down, step-by-step grading alone won't bail you out; you must install a subsurface drainage trench (Steps 6–8).
-
Extend Gutter Downspouts Past the Planting Border — Never let downspouts terminate directly into foundation planting beds. Unclip the bottom elbow and connect a solid 4-inch smooth-wall PVC or rigid SDR-35 pipe. Run that solid line underground or along the bed edge to daylight into the lawn at least 6 to 10 feet away from the structure.
- Tools: 4-inch PVC elbow, thin-wall or SDR-35 pipe, PVC primer/cement, pop-up emitter.
- Pro Tip: Skip black corrugated pipe here; its ridges catch silt, crack under foot traffic, and invite tree root intrusion within three years.
-
Dig a Relief Trench for Trapped Pockets — If water pools in an isolated, low-lying pocket blocked by a walkway or patio, dig a 10-to-12-inch wide trench through the center of the problem zone. Slope the trench floor downward at a uniform rate of 1/8 to 1/4 inch per linear foot toward an open exit point in your yard or drainage swale.
- Depth: Dig 12 to 18 inches deep, making sure you stay below the root ball zone of existing foundation shrubs.
-
Install Geotextile Fabric and Base Aggregate — Line the excavated trench with 4-ounce non-woven needle-punched geotextile fabric. Leave enough fabric loose on the sides so it can wrap over the top later. Pour a 2-inch base layer of washed 3/4-inch crushed granite or river rock along the bottom.
- Material Note: Don't use cheap black plastic or woven weed barrier; woven plastic blinds quickly with fine clay particles and turns water-impermeable.
-
Lay Perforated Pipe with Holes Facing Down — Set a rigid 4-inch perforated PVC pipe directly on top of the rock base. Crucial rule: turn the dual rows of drilled weep holes down toward the bottom at the 4 o'clock and 8 o'clock positions. Water rises from the saturated trench bottom up into the pipe and flushes away via gravity.
- Check: Use a 2-foot torpedo level resting on the pipe crown to verify steady fall along the entire run toward the discharge point.
-
Backfill with Washed Stone and Wrap the Filter — Shovel washed 3/4-inch crushed gravel around and over the pipe until it sits 3 inches below ground level. Fold the protruding geotextile fabric wings over the gravel with an overlap of at least 8 inches. This sandwich keeps silt and clay out of your drainage gravel while still letting water move freely.
-
Cap the Surface and Re-dress the Bed — Fill the remaining 3 inches of the trench with coarse, sandy topsoil or porous decorative river stone. Dress the rest of the planting bed with no more than 2 inches of shredded bark mulch, keeping the mulch pulled back at least 6 inches from the structural wall.
Common Causes
- Settled Backfill Soil — Soil backfilled against new foundation footings settles over the first 5 years, dropping the bed surface below surrounding lawn levels and creating an inward funnel.
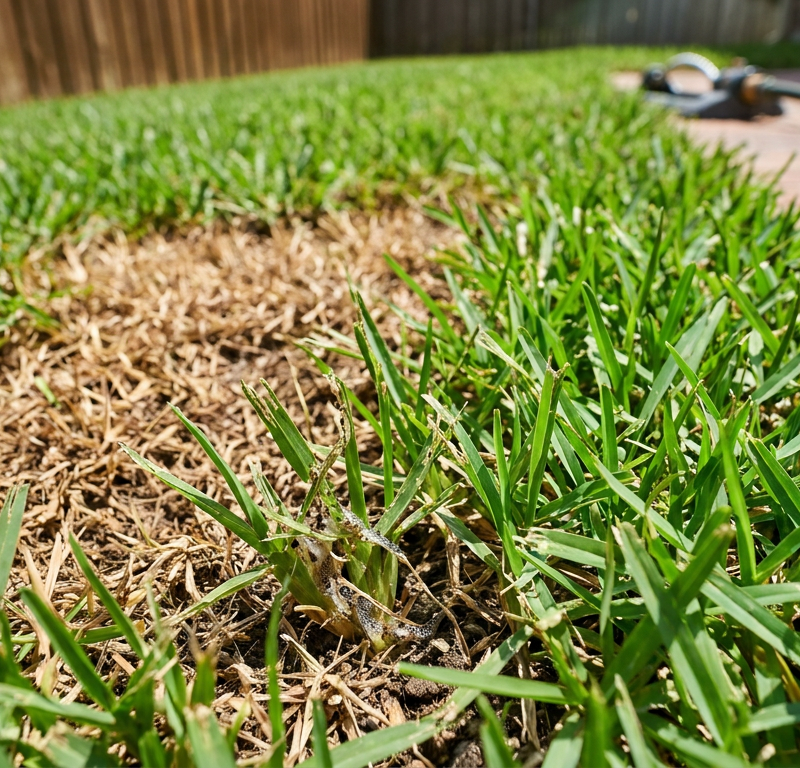
- Runaway Downspouts — An inch of rain dropping on a 2,000-square-foot roof yields 1,250 gallons of water. When three downspouts drop that whole mess straight into a 3-foot-wide foundation garden, no soil on earth can absorb it fast enough.
- Mulch Layering ("Mulch Volcanos") — Homeowners piling fresh mulch on top of decomposed mulch year after year creates an artificial dam higher than the surrounding lawn that traps water directly against the house.
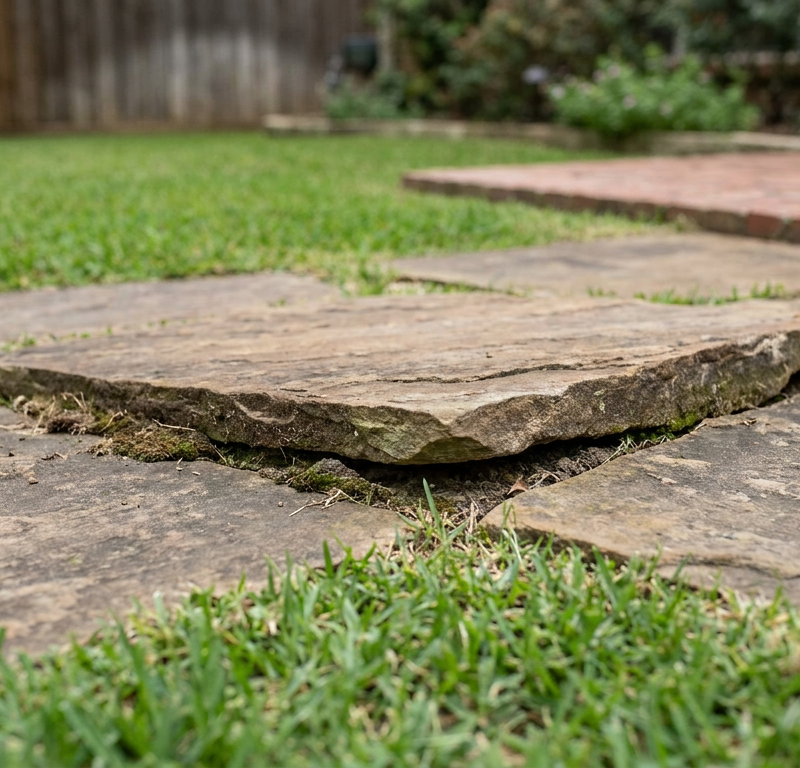
- Heavy Clay Hardpan — Dense, unamended subsoil with minute clay particles seals up when wet, preventing vertical water drainage and creating perched water tables around structural footings.
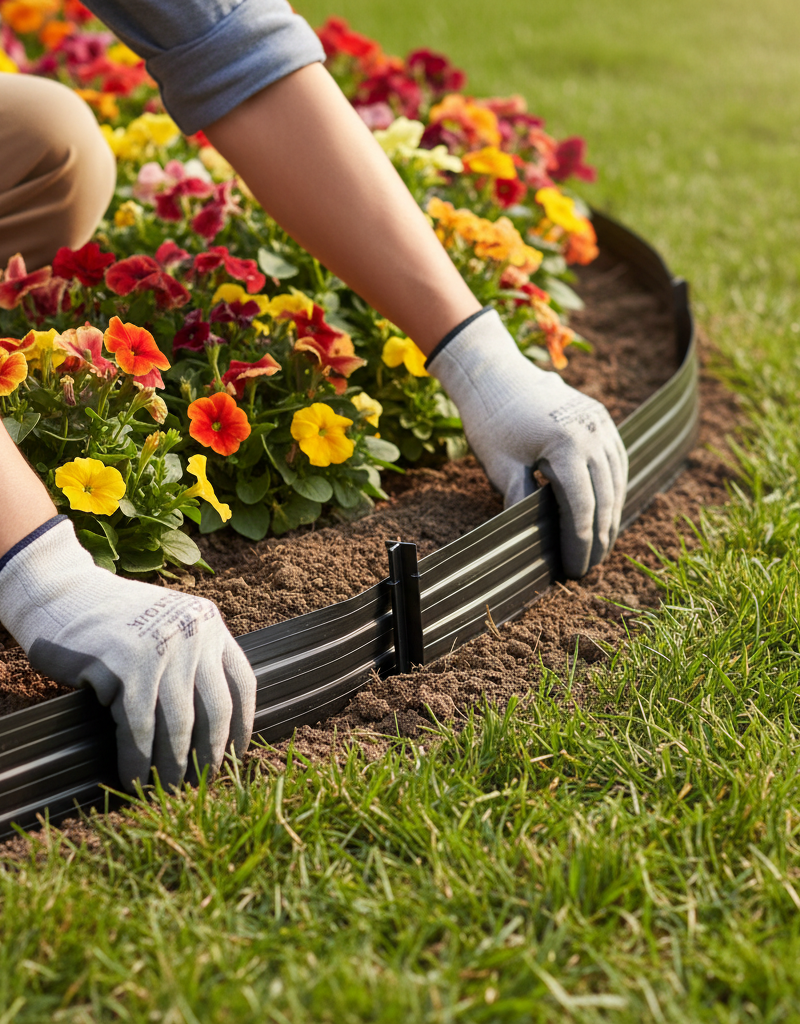
- Raised Edging Borders — Heavy concrete or stone border blocks installed without weep holes act like mini-retaining walls, locking surface sheet drainage inside the garden bed instead of letting it spill out into the lawn.
Common Mistakes
- Adding Soil Without Checking Foundation Reveal — When water pools, people reflexively dump bags of topsoil against the wall to "raise the grade." If you cover the brick ledge or leave less than 4 inches of exposed concrete stem wall, you give subterranean termites an open highway straight into your framing.
- Laying Perforated Pipe Holes Pointing Up — Putting the drill holes at 12 o'clock means water must fill the entire trench to the top before a single drop flows out the pipe. Always lay holes downward at 4 and 8 o'clock so water enters from underneath as the water table rises.
- Using Corrugated Plastic Drain Pipe — That flexible black coil pipe gets crushed by wheelbarrows, holds standing water in every internal groove, and clogs solid with sediment inside three seasons. Use rigid, smooth-interior PVC every single time.
- Trapping Water with Solid Landscape Borders — Stacking mortar-set retaining stones or pound-in edging along bed fronts without weep gaps traps storm runoff against your house. Always maintain an exit channel or notch for surface water to escape out to the turf.
- Wrapping the Pipe Instead of the Trench — Buying pipe pre-wrapped in a tight fabric "sock" often fails in clay soil because silt gums up directly on the plastic slits. Line the perimeter of the excavated dirt trench with wide geotextile fabric instead, encasing the gravel and pipe together.
Cost & Time Breakdown
| Task | DIY Cost | Pro Cost | Time |
|---|---|---|---|
| Bed Clearing & Grade Reshaping | $30–$60 (shovel, tamper rental) | $400–$800 | 4–6 hours |
| Downspout Extension Routing (2 lines) | $50–$90 (PVC pipe, fittings) | $350–$600 | 2–3 hours |
| 25-Foot Perforated Trench Drain | $180–$320 (gravel, pipe, fabric) | $1,200–$2,200 | 6–8 hours |
| Pop-up Catch Basin Installation | $45–$80 (box, adapter, pipe) | $250–$450 | 2–3 hours |
| Soil Decompaction & Compost Blend | $40–$100 (organic material) | $300–$500 | 3–4 hours |
Tips & Prevention
- Check Clearances Twice a Year — Walk the house perimeter every spring and fall to make sure you have at least 4 inches of exposed concrete below siding or weep holes.
- Perform the 24-Hour Post-Storm Test — Step outside exactly 24 hours after a soaking rainstorm. If water is still visible anywhere inside the bed boundaries, your exit flow is restricted and needs immediate clearing.
- Scrape Before You Refresh Mulch — Never add new wood chips over old mats; rake out the dried crust down to dirt before spreading a fresh 2-inch layer.
- Inspect Gutter Elbows for Clean Discharge — Clear out leaf plugs from downspout transition cleanouts every autumn so high-volume overflow doesn't spill straight over the gutter lip into the beds below.
- Test Soil Percolation Yearly — Dig a hole 12 inches wide and 12 inches deep in your planting bed, fill it with water, let it drain completely, then fill it again and track the drop. If the water level drops slower than 1 inch per hour, mix coarse sand and compost into your soil beds to loosen compaction.
When to Call a Professional
If you've corrected the surface grade, redirected all downspouts, and water still collects in your beds—or worse, your home shows indoor warning signs—the issue is beyond surface DIY work. Call a licensed foundation repair specialist or civil drainage contractor immediately if you see step-cracks in exterior brick mortar, drywall cracks radiating upward from interior door frames, or sticking windows. These indicate structural movement from moisture-induced soil upheaval.
You should also bring in an engineer if your property sits at the bottom of a steep regional hill where neighbors' runoff cascades onto your lot. Handling high-volume hydro-pressure without flooding adjoining private properties requires engineered swales, heavy-duty commercial catch basins, or a sump-pump discharge pit piped directly to city storm drains.
FAQ
How far should soil slope away from a house foundation?
The International Residential Code (IRC) calls for a minimum 6-inch drop in the first 10 feet away from your foundation (a 5% grade). If lot lines or physical obstructions prevent a full 10-foot run, aim for at least 1/4 inch of continuous drop per foot, and make sure that water exits cleanly into a designated drainage swale.
Can standing water in flower beds damage a concrete slab?
Yes. Heavy standing water causes localized soil saturation beneath the slab edge. In expansive soils like clay, the wet ground expands upward and lifts the concrete (heaving), then shrinks downward when it dries. This uneven pressure bends the slab, creates major structural cracks, and pushes exterior walls out of plumb.
Why does my landscape bed pool water even though it looks flat?
Flat ground is the enemy of drainage. Water won't move across soil without gravity. A bed that looks completely level to the eye typically contains slight micro-depressions that hold hundreds of gallons of water, especially if the underlying dirt is compacted native clay from original home construction.
Should I just put black plastic under my mulch to stop water?
Never use solid plastic under landscape mulch. Plastic traps moisture beneath it, suffocates earthworms, denies oxygen to plant roots, and encourages anaerobic rot. Over time, weed seeds blow in and root directly into the damp mulch decaying on top of the plastic, creating a tangled, muddy disaster.
How deep does a foundation French drain need to be?
For surface garden beds, a shallow French drain trench should be 12 to 18 inches deep and 10 to 12 inches wide. It needs to sit deep enough to catch groundwater below shrub root systems, but remain shallow enough to maintain gravity fall toward an open yard exit or pop-up emitter.
What type of pipe should I use for yard drainage around beds?
Use rigid, smooth-wall Schedule 40 or thin-wall SDR-35 PVC pipe with pre-drilled perforation holes. Avoid thin corrugated black tubing; it crushes easily, traps silt along the interior ribs, and is almost impossible to clear out with a drain snake or hydro-jetter when dirt washes in.
Will plants help absorb the standing water in my beds?
While water-loving plants like switchgrass, dogwoods, or hydrangeas consume plenty of water, they can't solve structural grading issues. Plants can't transpire water fast enough during a heavy rainstorm to prevent hydrostatic pressure buildup against your foundation walls. Correct the grade first, then pick plants that can live with the site.
Is it normal for water to pool in flower beds right after a heavy rain?
Temporary pooling during an extreme storm is normal, but all standing water should fully drain away within 24 hours after rainfall ceases. If water lingers past 24 hours, or if you step into the bed days later and sink into saturated mud, your drainage system has failed and needs correction.
Related Articles
Keep troubleshooting with these hand-picked guides from FixlyGuide:
- The 3 Hidden Water Sources Breeding Mosquitoes in Your Yard (And How to Eliminate Them) — Naturally control mosquitoes in your backyard by targeting and eliminating hidden standing water sources where they breed, using simple, ec…
- The #1 Secret to Edging Flower Beds That Last Years (and Resist Weeds) — Discover the crucial, often-skipped step that ensures your landscape edging stays put and keeps weeds out for years, transforming your flow…
- The #1 Mosquito Mistake Homeowners Make (and 4 Natural Ways to Fix It) — Discover the biggest mistake homeowners make in mosquito control and learn four effective, natural strategies to reclaim your backyard from…
- The #1 Mowing Mistake That Leaves Your Lawn Brown and Patchy — Discover the most common mowing mistake homeowners make that leads to unhealthy, patchy grass and how to fix it for a vibrant lawn.
- The #1 Pre-Emergent Mistake Wrecking Your Weed Control (And How to Fix It) — Applying pre-emergent at the wrong time is the most common mistake, leading to ineffective weed control and wasted effort for homeowners.
- The Secret Hairball Fix Plumbers Don't Want You to Know — Tired of standing in ankle-deep water? Most shower clogs are a gnarly mix of hair and soap scum, and you can clear them yourself without ha…
What should this project cost?
Enter your project details for a realistic cost range before you call anyone.
Minor crack sealing $800–$2,500; pier and beam stabilization $10,000–$30,000+.
- Regional adjustment
- National average
- Labor share (typical)
- ~$4,961
- Quotes to collect
- 3 written estimates
Educational estimate based on national averages — not a binding quote. Always confirm with written local estimates.
Fixly Project Decision Box
- DIY difficulty
- Moderate
- Estimated time
- 30 minutes – half a day
- Cost level
- Moderate
Main tools / materials
- Adjustable wrench
- Plunger or drain auger
- Bucket and towels
- Thread tape
When to stop and call a pro
- Water you cannot shut off at the fixture or main
- Sewage backing up into more than one fixture
- Water near electrical panels or outlets
- Gas water heater work beyond relighting a pilot
Need professional help?
Get a Licensed PlumberGet the print-ready PDF of this guide
A clean, ad-free, printable version you can keep on your phone or pin to the workshop wall. Free with a FixlyGuide account.
- Print-optimized layout
- Tools, materials & every step included
- Saved to your account
Frequently asked questions
How far should soil slope away from a house foundation?+
The International Residential Code (IRC) calls for a minimum 6-inch drop over the first 10 feet away from the foundation. If space is limited by property borders or walkways, you need at least 1/4 inch of continuous downward slope per linear foot out toward a lawn swale.
Can standing water in flower beds damage a concrete slab?+
Yes. Standing water saturates backfill soil, building hydrostatic pressure against basement walls and causing clay soil around slab foundations to swell. This uneven expansion cracks concrete slabs, shifts stem walls, and warps interior door jambs over time.
Why does my landscape bed pool water even though it looks flat?+
A bed that appears flat to the eye contains micro-depressions that catch storm runoff. Without a positive slope, gravity cannot pull water away, causing it to pool over heavy, impermeable subsoil or packed clay.
Should I just put black plastic under my mulch to stop water?+
No, never use solid black sheet plastic under mulch. Plastic suffocates plant root systems, prevents gas exchange in the soil, and traps stagnant water underneath, while still allowing weed seeds to germinate in the damp mulch on top.
How deep does a foundation French drain need to be?+
For foundation garden beds, a trench 12 to 18 inches deep and 10 to 12 inches wide is ideal. This depth captures water below the root line of common shrubs while allowing enough continuous downward slope to daylight the pipe downhill.
What type of pipe should I use for yard drainage around beds?+
Use rigid, smooth-interior PVC pipe (such as perforated SDR-35 or thin-wall sewer/drain pipe) rather than flexible corrugated tubing. Rigid pipe holds a consistent slope, resists crushing, and stays clean of trapped sediment.
Will plants help absorb the standing water in my beds?+
Plants help draw moisture out through transpiration, but they cannot keep up with thousands of gallons of roof runoff during a heavy storm. Relying on plants to fix pooling water leaves your foundation vulnerable to hydrostatic damage; grade correction must come first.
Is it normal for water to pool in flower beds right after a heavy rain?+
Water may pool temporarily during torrential downpours, but it should drain completely within 24 hours after the rain stops. Puddles that remain after 24 hours indicate compacted soil, poor grade, or improper downspout discharge that must be corrected.
Discussion
Loading comments…