- Plumbing or Electrical Access: Homeowners or professionals sometimes cut into drywall to access pipes, wiring, or the backside of fixtures for repairs, leaving behind a hole that needs proper patching.
- Previous Poor Repairs: Patching small holes incorrectly, or using insufficient materials for larger ones, can lead to patches that fail, crack, or fall out over time, leaving an even larger, more challenging hole.
- Moving Appliances or Fixtures: Removing a wall-mounted TV, a large mirror, or even a heavy picture frame can sometimes tear out a section of drywall, especially if the anchors were improperly installed or removed carelessly.
General remodeling · Renovation planning
| Project category | General remodeling |
|---|---|
| Problem type | Renovation planning |
| Trade required | General contracting |
| Urgency | Planned project |
| Safety risk | Low safety risk |
| DIY suitability | Pro recommended |
| Cost category | Major investment |
| Typical timeline | Design and permitting often 2–4 months before work starts |
| Contractor type | General contractor |
Repair option
Phase the work and fix the building envelope first.
Replacement option
Full renovation with permits, design, and a general contractor.
Common causes
- Space no longer fits how the household lives
- Resale preparation
- Deferred maintenance stacking up
Relevant tools:project cost estimatorcompare quoteshome improvement material prices
Published July 18, 2026Last updated August 17, 2026
Tools & materials you'll need
Affiliate linksAs an Amazon Associate FixlyGuide earns from qualifying purchases — at no extra cost to you. Prices and availability are accurate as of publication and subject to change.
Quick Answer
Patching a large drywall hole (anything over 6 inches in diameter) isn't as simple as slapping on some spackle. It requires cutting out the damaged area into a neat square, installing solid wood backing inside the wall, precisely cutting and fitting a new piece of drywall, and then taping and mudding strategically. The goal is to create a repair that is structurally sound, perfectly flush, and invisible once painted, avoiding common DIY errors that lead to sagging patches or visible seams.
The Problem
That gaping hole in your drywall, whether from an errant doorknob, a playful child, or a DIY mishap, isn't just an eyesore; it compromises the integrity of your wall and allows for air and sound transfer. Smaller holes can often be filled with mesh patches or spackle, but once a hole exceeds about 6 inches, a simple patch won't suffice. The sheer size of the opening means there's no solid material behind it for a patch to adhere to, leading to either a weak, sagging repair or one that can't be properly finished without an unsightly bulge. This is where many homeowners run into trouble, attempting quick fixes that inevitably fail, leaving them with an even bigger headache and a more prominent flaw.
How It Works
Think of your drywall as a skin stretched over a skeleton of wooden studs. When you have a large hole, a portion of that skin is missing, and there's nothing for a new piece to attach to around the perimeter of the hole. The solution is to create a new, localized skeleton or framing within the wall cavity. This is achieved by installing backer boards – typically scrap pieces of wood, like 1x3s or 1x4s – securely screwed to the inside of the existing drywall around the edges of your newly cut opening. These backer boards act as anchors, providing a solid surface to screw your new drywall patch into.
Once secured, the patch becomes an integral part of the wall. The drywall tape (either paper or fiberglass mesh) then bridges the seams between the new patch and the old drywall, strengthening the joint and preventing cracks. Layering joint compound (often called mud) over the tape fills the seams, creating a smooth transition. Multiple thin coats, sanded between applications, are crucial to feather the edges out seamlessly, making the repair virtually undetectable. The process relies on creating a strong mechanical bond for the patch and then meticulously blending it so it disappears into the surrounding surface.
Step-by-Step Fix
1. Prepare the Area – Cut a Clean Opening
— Begin by squaring off the damaged area. Use a utility knife or jab saw to cut the hole into a perfect square or rectangle, extending past any compromised drywall. Use a straightedge to ensure your cuts are precise. This creates clean edges for the patch and makes measuring much easier. Make sure to cut past any damaged or soft drywall, even if it means making the hole slightly larger.
- Safety First: Wear safety glasses and gloves. Be mindful of hidden electrical wires or plumbing pipes when cutting into the wall. If you're unsure, a stud finder with electrical scanning can help.
- If this doesn't work: If the hole is irregularly shaped and you're struggling to make a clean cut, try making it larger to reach solid, undamaged drywall that can be squared off.
2. Install Backer Boards – Create a Foundation
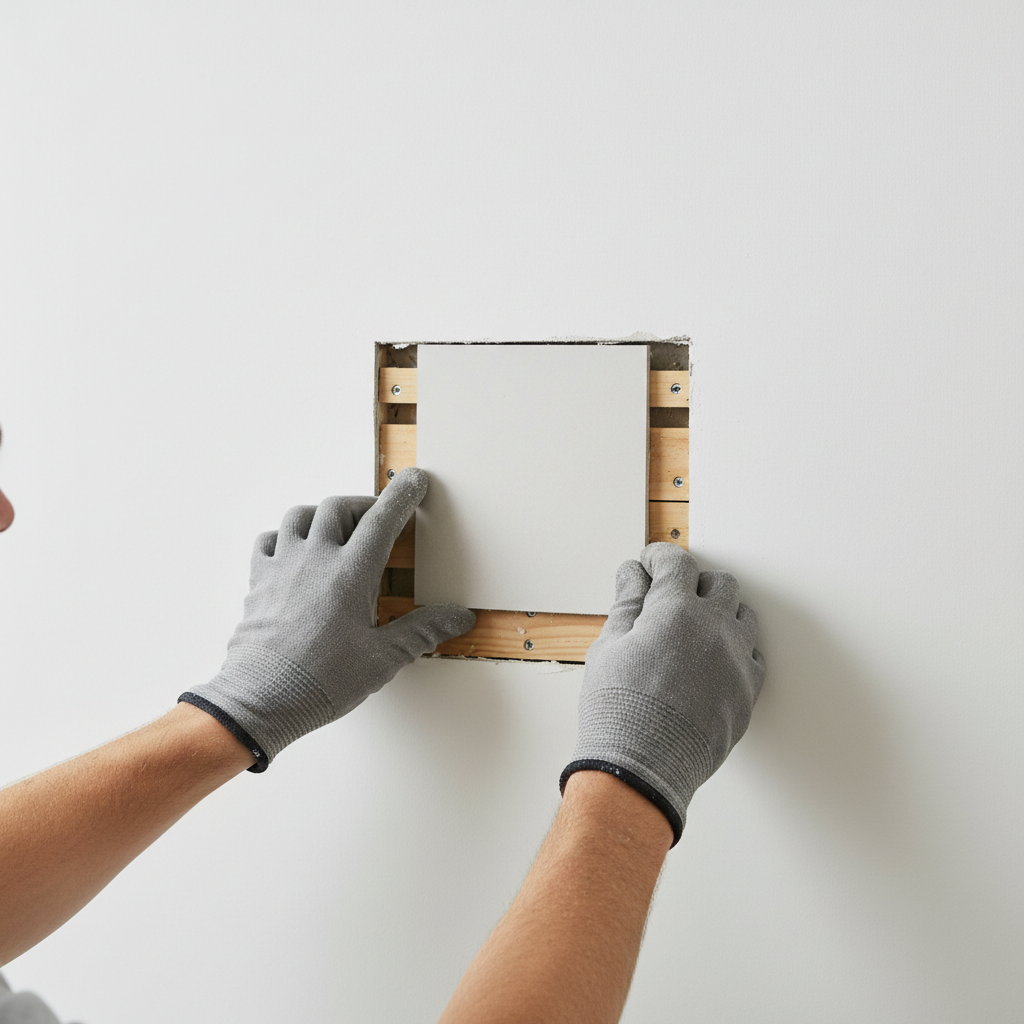
— Cut two pieces of 1x3 or 1x4 lumber that are roughly 6-8 inches longer than the width of your hole. Insert one piece into the wall cavity, centering it horizontally behind the top edge of your newly cut opening. Drive two drywall screws through the existing drywall and into the backer board, securing it firmly. Repeat this process for the bottom edge. For larger patches, consider adding vertical backer boards on the sides as well.
- Tools: Drill/driver, drywall screws (1-5/8 inch).
- Tip: If you're working alone, you can temporarily hold the backer board in place by driving a screw partially through the center of the wood, leaving enough hanging out to grip, then pull it tight against the back of the drywall as you secure the ends.
3. Measure and Cut the Patch – Precision is Key
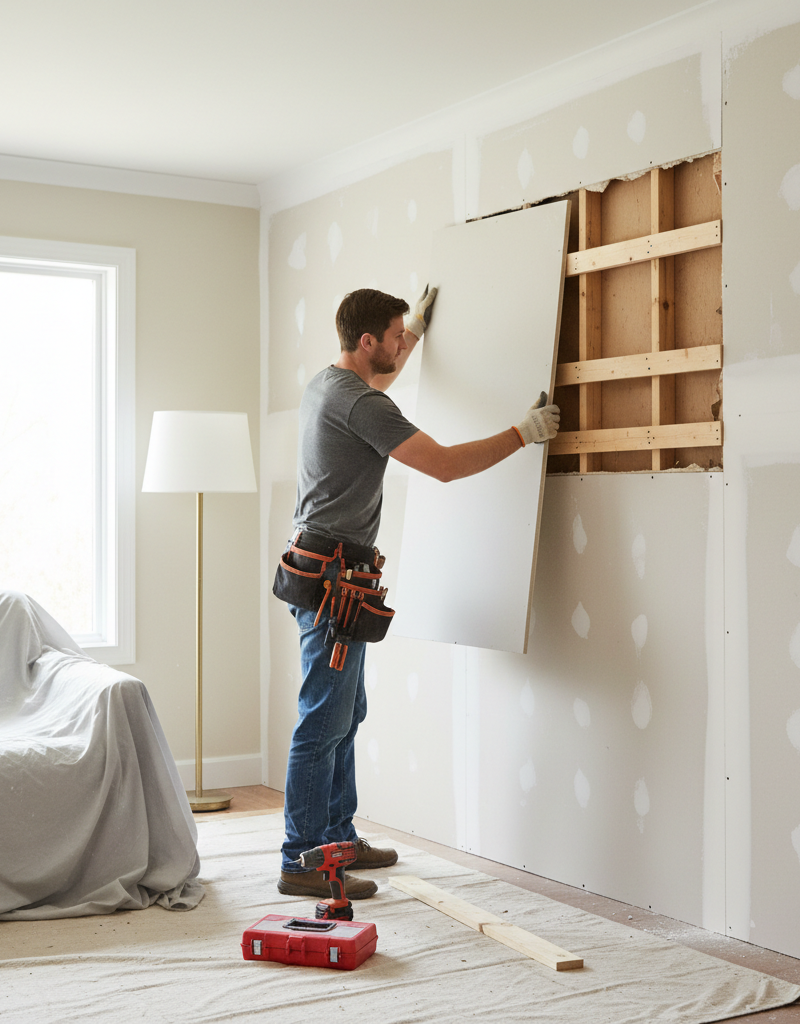
— Carefully measure the exact height and width of your newly cut opening. Transfer these measurements to a new piece of drywall. Use a utility knife and a straightedge to score the drywall sheet, then snap it along the score line. Cut through the paper backing on the other side. Test fit the patch; it should slide in snugly but without needing to be forced.
- Material: 1/2-inch or 5/8-inch drywall (match existing wall thickness).
- Check: Ensure the patch sits perfectly flush with the existing wall. If it protrudes, trim it slightly. If it's recessed, you may need a slightly larger patch or shims behind the backer boards.
4. Secure the Patch – Firm and Flat
— Once the patch fits perfectly, center it in the opening. Drive drywall screws (1-1/4 inch is usually sufficient) through the patch and into the backer boards. Space screws every 6-8 inches along all four edges of the patch. Ensure the screw heads are slightly recessed (dimpled) below the drywall surface, but do not break through the paper facing.
- Mistake to Avoid: Overtightening screws will tear the paper and weaken the hold. Underscrewing will leave visible bumps. Aim for a slight dimple.
5. Apply Joint Tape – Bridge the Gaps
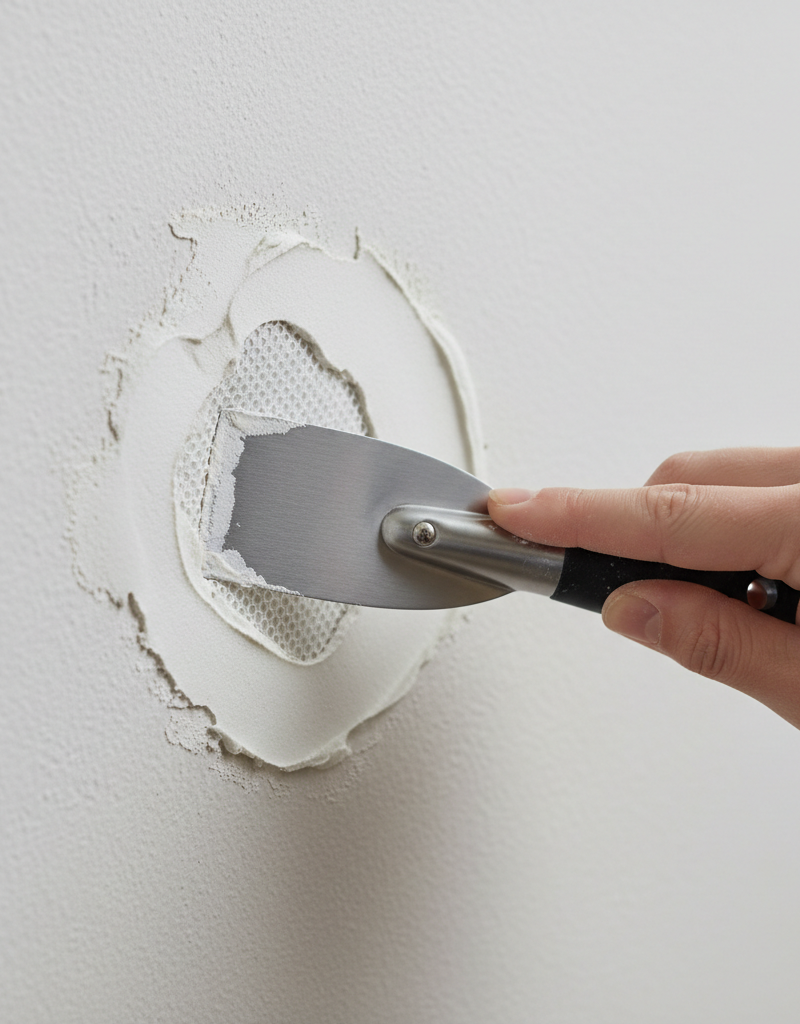
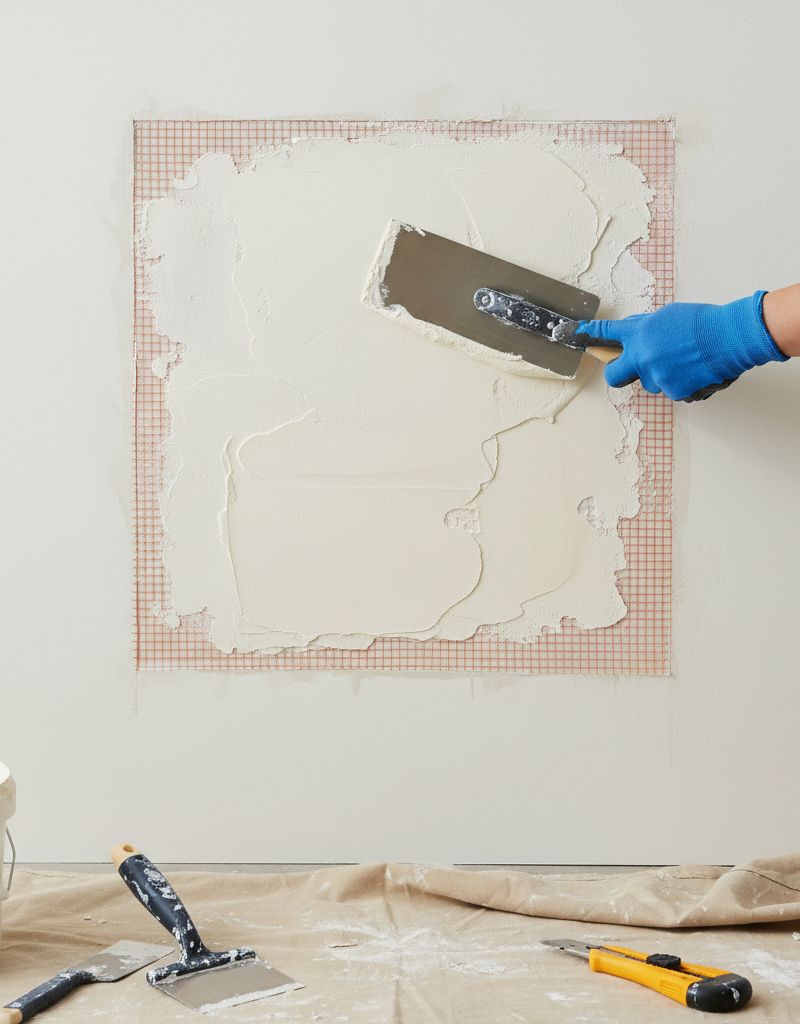
— Apply self-adhesive fiberglass mesh tape directly over all seams where the new patch meets the old drywall. Press it down firmly to ensure good adhesion. If using paper tape, apply a thin layer of all-purpose joint compound first, embed the paper tape into the wet mud, and then scrape off the excess.
- Choosing Tape: Fiberglass mesh tape is easier for beginners; paper tape offers a stronger joint but is trickier to bed smoothly.
6. First Coat of Joint Compound – Filling the Seams
— Using a 6-inch or 8-inch drywall knife, apply a thin, even layer of all-purpose joint compound over the taped seams. Feather the edges out about 4-6 inches onto the existing wall. The goal is to fill the tape and recess the screw heads, making the surface as flat as possible. Allow it to dry completely (4-6 hours or overnight).
- Tip: Mix the joint compound slightly with water if it's too thick, aiming for a consistency like thick mayonnaise. Avoid adding too much water, which weakens the mud.
7. Second Coat of Joint Compound – Broader and Smoother
— Once the first coat is dry, lightly sand any high spots or ridges with fine-grit sandpaper (150-220 grit). Wipe away dust. Apply a second, slightly wider coat of joint compound using a 10-inch or 12-inch drywall knife. Feather the edges even further out to minimize any visible ridge. Allow to dry completely.
- Sanding: Hand sanding is better for small areas; a sanding sponge works well. Avoid electric sanders unless you're experienced, as they can easily create depressions.
8. Final Coat and Sanding – The Invisible Blend
— Apply a very thin, wide final coat of topping compound (which is easier to sand) if desired, or use your all-purpose compound. Blend it as smoothly as possible, feathering the edges out even wider – up to 18-24 inches from the patch's center. Allow to dry. Then, lightly sand the entire patched area until it's perfectly smooth and blends seamlessly with the surrounding wall. Remove all dust with a damp cloth.
- Lighting: Use a work light held at an angle to highlight imperfections (shadows will reveal bumps and dips) before and after final sanding.
Common Causes
- Impact Damage: Perhaps the most frequent culprit, often from furniture being moved, doors swinging open too forcefully without a doorstop, or objects being dropped against the wall. Kids playing indoors can also lead to unintended wall modifications.
- Plumbing or Electrical Access: Homeowners or professionals sometimes cut into drywall to access pipes, wiring, or the backside of fixtures for repairs, leaving behind a hole that needs proper patching.
- Previous Poor Repairs: Patching small holes incorrectly, or using insufficient materials for larger ones, can lead to patches that fail, crack, or fall out over time, leaving an even larger, more challenging hole.
- Moving Appliances or Fixtures: Removing a wall-mounted TV, a large mirror, or even a heavy picture frame can sometimes tear out a section of drywall, especially if the anchors were improperly installed or removed carelessly.
Common Mistakes
- Not Using Backer Boards: This is the most common and critical mistake. Without solid backing, a large patch has nothing to screw into, leading to a weak, sagging repair that will crack or eventually fall out.
Always use wood backer boards for holes larger than 6 inches. - Applying Too Much Mud at Once: Piling on thick layers of joint compound makes it harder to dry, more prone to cracking, and creates a lumpy, uneven surface that is incredibly difficult to sand smooth.
Apply multiple thin, even coats, sanding lightly between each. - Failing to Feather Edges: Stopping your mud applications abruptly at the edge of the patch creates a visible hump or ridge.
Feather your joint compound out several inches beyond the patch on each coat to create a gradual, unnoticeable transition. - Improper Screw Depth: Screwing too deep rips the paper facing of the drywall, compromising its strength. Screwing too shallow leaves a bump that will be visible through paint.
Aim for screw heads to be slightly recessed (dimpled) below the surface without breaking the paper. - Insufficient Drying Time: Rushing to sand or apply the next coat before the previous one is fully dry leads to gumming up sandpaper, uneven application, and cracking.
Always allow each coat of joint compound to dry completely, which can take hours depending on humidity and thickness. - Skipping the Tape: While it might seem like just
more work, joint tape (especially fiberglass mesh) is essential for strengthening seams and preventing future cracks from forming where the new patch meets the old wall.Never skip taping the seams of a drywall patch.
Cost & Time Breakdown
| Task | DIY Cost | Pro Cost | Time |
|---|---|---|---|
| Materials (drywall, screws, mud, tape, sandpaper) | $20–$50 | Included | N/A |
| Cutting & Backing Installation | $0 | Included | 30–60 minutes |
| Patch Installation | $0 | Included | 15–30 minutes |
| Taping & First Mud Coat | $0 | Included | 30–45 minutes |
| Subsequent Mud Coats & Drying | $0 | Included | 4–8 hours (each) |
| Final Sanding & Prep | $0 | Included | 30–60 minutes |
| Total (DIY) | $20–$50 | $150–$300+ | ~8–12 hours |
Note: Pro costs can vary significantly based on location and the extent of finish work (e.g., matching textured walls).
Tips & Prevention
- Install Door Stops: Prevent future doorknob-induced holes by installing rubber-tipped door stops where doors might swing open too far and hit the wall.
- Furniture Pads: When moving heavy furniture, use furniture pads or sliders to prevent scrapes and gouges that could lead to larger damage.
- Picture Hanging Prep: Use appropriate drywall anchors for heavy wall hangings, and pre-drill pilot holes carefully to avoid accidental damage to the drywall sheet itself.
- Stud/Wire Finder: Before drilling or cutting into any wall, always use a reliable stud finder to locate studs, electrical wires, and plumbing pipes, even if you think you know what's behind the wall.
- Keep Drywall Scraps: If you have leftover drywall pieces from a previous project, save them! A small scrap of the same thickness will be invaluable for a patch job.
- Practice on Scrap: If you're new to drywall work, practice cutting, mudding, and taping on a small scrap piece of drywall before tackling your actual wall repair.
When to Call a Professional
While patching a large drywall hole is a common DIY task, there are specific situations where calling a licensed professional is advisable. If the hole exposes electrical wiring or plumbing pipes that appear damaged, or if you suspect there's water damage or mold growth inside the wall cavity, a professional can safely address these underlying issues. Similarly, if the hole is exceptionally large (e.g., spanning multiple studs), if it's in a ceiling, or if your walls have a complex texture (like knockdown or skip trowel) that you're unsure how to match, a skilled drywall contractor can ensure a seamless, high-quality repair. They also have specialized tools for dust collection sanding, ensuring a cleaner finish and healthier work environment. Don't hesitate to consult a pro if you feel the task is beyond your comfort level or if the damage seems extensive.
Related Articles
Keep troubleshooting with these hand-picked guides from FixlyGuide:
- The Invisible Drywall Hole Fix: 3 Secrets to a Seamless Patch — Patching a large drywall hole can be daunting, but with the right technique, you can achieve a seamless repair that disappears into your wa…
- The Giant Drywall Hole: 3 Hidden Mistakes That Make Fixing It Worse — Don’t just spackle over that huge drywall hole; learn the right way to repair it and avoid common mistakes that lead to an even bigger head…
- The 4-Inch Drywall Hole Fix: Why Most DIY Patches Fail (And How to Do It Right) — Don't let a small drywall hole become a recurring nightmare – discover the secret to a seamless, lasting repair that disappears into your w…
- The 4-Step Drywall Patch Secret That Makes Large Holes Vanish — Discover how to flawlessly repair a large hole in drywall using a simple, effective method that makes the damage disappear without a trace.
- The Secret to a Flawless Drywall Patch Is In the Paper — Frustrated by drywall patches that always show through? That telltale bump or sanding mark can ruin a perfect wall. Discover the 'Californi…
- That Drywall Hole Isn't Just Ugly, It's a Bat Signal — Learn the pro-approved method for patching drywall holes of any size. We cover the surprising science behind a lasting repair and common mi…
What should this project cost?
Enter your project details for a realistic cost range before you call anyone.
Cost depends heavily on which system turns out to be the source.
- Regional adjustment
- National average
- Labor share (typical)
- ~$1,620
- Quotes to collect
- 3 written estimates
Educational estimate based on national averages — not a binding quote. Always confirm with written local estimates.
Recommended for DIYers & woodworkers
Sponsored
The Top 20 Tools for Workshops of Any Budget
No stationary machines or power tools required — plus 3 fundamental tools that can't be bought at any price.
Get the free guide
Ted's Woodworking — The #1 Woodworking Resource
Detailed instructions, dimensioned drawings, materials & cutting lists, and 3D schematics for every skill level.
See the plansSponsored: links above are affiliate links. FixlyGuide may earn a commission on qualifying purchases — at no extra cost to you.
Frequently asked questions
How big of a hole in drywall can you patch without a new piece of drywall?+
Generally, holes larger than 4-6 inches in diameter require a new piece of drywall and backing for a durable and seamless repair. Smaller holes can sometimes be repaired with mesh patches and spackle, but a new drywall piece is almost always superior for larger damage.
What kind of wood do I use for drywall backing?+
You can use common scrap lumber like 1x3s or 1x4s. The key is that it's flat, sturdy, and long enough to span beyond the hole and be screwed into the existing drywall. Plywood scraps can also work.
How many coats of mud do I need for a drywall patch?+
Typically, you'll need at least three thin coats of joint compound. The first coat is to embed the tape and fill screw holes, the second to smooth and broaden the patch, and the third for a final, wide feathering to blend seamlessly. Light sanding is required between each fully dry coat.
Can I paint directly over new joint compound?+
No, you should never paint directly over new joint compound. Drywall mud is porous and will absorb paint unevenly, leading to a dull or blotchy appearance. Always prime the patched area with a quality drywall or all-purpose primer before painting to ensure a uniform finish.
How long does joint compound take to dry?+
Drying time varies greatly depending on the thickness of the application, humidity levels, and temperature. Thin coats can dry in 2-4 hours, while thicker coats or high humidity can extend drying time to 8-24 hours. Always ensure the mud is completely dry before sanding or applying the next coat.
Discussion
Loading comments…