- Turn on all faucets in your home. If only one or a few are affected, the problem is likely isolated. If none work, the issue could be with your main water line or a widespread freeze.
- Look for visible signs of a frozen pipe: frost on exposed pipes, a bulged section of pipe, or unusually cold areas on a pipe's surface.
- Pay close attention to pipes running along exterior walls, in unheated basements, crawl spaces, garages, or attics. These are the most common problematic areas.
Plumbing · Pipe damage
| Project category | Plumbing |
|---|---|
| Problem type | Pipe damage |
| Trade required | Plumbing |
| Urgency | Emergency — act now |
| Safety risk | High safety risk |
| DIY suitability | Licensed pro only |
| Cost category | High cost |
| Typical timeline | Emergency shutoff now; repipes commonly 2–5 days |
| Contractor type | Licensed plumber |
Repair option
Cut out and replace the damaged section with a coupling or new run.
Replacement option
Whole-home repipe when the material itself is the problem.
Common causes
- Freeze-thaw expansion in an uninsulated run
- Corrosion in aging galvanized or polybutylene
- Shifting foundation stressing a slab line
Relevant tools:emergency checklistcompare quotes
Published July 21, 2026Last updated August 17, 2026
Tools & materials you'll need
Affiliate linksAs an Amazon Associate FixlyGuide earns from qualifying purchases — at no extra cost to you. Prices and availability are accurate as of publication and subject to change.
Quick Answer
To safely thaw a frozen pipe, immediately turn off the main water supply if you suspect a burst. Locate the frozen section, usually in an unheated area like a crawl space, exterior wall, or basement. Apply gentle, consistent heat using a hairdryer, heat gun on its lowest setting, or towels soaked in hot water and wrapped around the pipe. Work from the faucet side of the blockage back towards the main water supply to allow melting ice to escape. Do NOT use open flames or high-heat methods, as this can cause the pipe to burst or lead to fire hazards. Once thawed, slowly turn the water back on and check for leaks.
The Problem
You wake up one cold morning, turn on the faucet, and nothing happens—or perhaps just a trickle. The dreaded frozen pipe. This isn't just an inconvenience; it's a serious home emergency. When water freezes, it expands. This expansion creates immense pressure within your pipes, potentially leading to cracks or even a catastrophic burst. A burst pipe can unleash hundreds of gallons of water an hour, causing extensive damage to your home's structure, finishes, and belongings, racking up thousands of dollars in repairs. The immediate problem is getting the water flowing again without causing further damage, and the underlying issue is understanding why the pipe froze in the first place to prevent future occurrences.
Frozen pipes typically occur in areas of your home that lack adequate insulation or heating. Common culprits include pipes running through unheated crawl spaces, basements, exterior walls, attics, or even under sinks in cabinets against exterior walls. Even a small draft or a sustained dip in temperature can be enough to turn flowing water into a solid block of ice, exerting up to 2,000 pounds per square inch (PSI) of pressure on your plumbing system. Recognizing the signs—no water, reduced flow, or visible frost on exposed pipes—and knowing how to react quickly and safely is crucial for minimizing damage and preventing a costly disaster.
How It Works
Water expands by about 9% when it freezes and turns into ice. This expansion is the fundamental physical principle behind why frozen pipes burst. As the temperature inside a pipe drops below 32°F (0°C), the water molecules begin to slow down and arrange themselves into a crystalline structure – ice. This crystalline structure takes up more space than liquid water. If the pipe is completely filled with water and the temperature continues to drop, the ice forms a plug. This plug creates two problems: first, it blocks the flow of water, leading to the symptom of no water from the faucet. Second, and more critically, as more water freezes, the expanding ice plug exerts immense pressure in both directions: back towards the main water supply and forward towards the faucet. However, the most critical pressure build-up usually occurs between the ice plug and the closed faucet, as this section of water has no escape. The pipe material—whether copper, PEX, or PVC—can only withstand so much internal pressure before it ruptures. Copper pipes, for example, can burst at internal pressures exceeding 2,500 PSI, far less than the potential pressure exerted by freezing water. The exact point of rupture is often at a joint, a weak spot, or a section of the pipe already stressed by installation or previous damage. The goal of thawing is to gently reintroduce heat, allowing the ice to melt and release this pressure, ideally before the pipe reaches its bursting point. The gradual melting allows the water to flow, reducing the pressure safely. Rapid, uneven heating, however, can exacerbate the problem by causing extreme temperature differentials within the pipe material, leading to thermal shock and immediate bursting.
Step-by-Step Fix
1. Identify the Problem — Confirm the pipe is frozen and locate the section.
- Turn on all faucets in your home. If only one or a few are affected, the problem is likely isolated. If none work, the issue could be with your main water line or a widespread freeze.
- Look for visible signs of a frozen pipe: frost on exposed pipes, a bulged section of pipe, or unusually cold areas on a pipe's surface.
- Pay close attention to pipes running along exterior walls, in unheated basements, crawl spaces, garages, or attics. These are the most common problematic areas.
2. Shut Off the Water Supply — Prevent flooding if the pipe has already burst or bursts during thawing.
- Locate your main water shut-off valve. This is usually in your basement, crawl space, near the water meter, or where the main water line enters your house.
- Turn the valve clockwise until it's completely closed. This is a critical safety step.
- If this doesn't work: If you can't find your main shut-off, try shutting off the water at the street by turning the valve on your water meter with a water meter key. Contact your utility company if you need assistance.
3. Open Faucets — Release pressure and allow water to flow as thawing occurs.
- Open the hot and cold water faucets that are connected to the frozen pipe. This provides an exit path for the melting ice and helps relieve pressure, preventing further damage.
- Leave them open while you thaw the pipe.
4. Apply Gentle Heat — Gradually melt the ice plug.
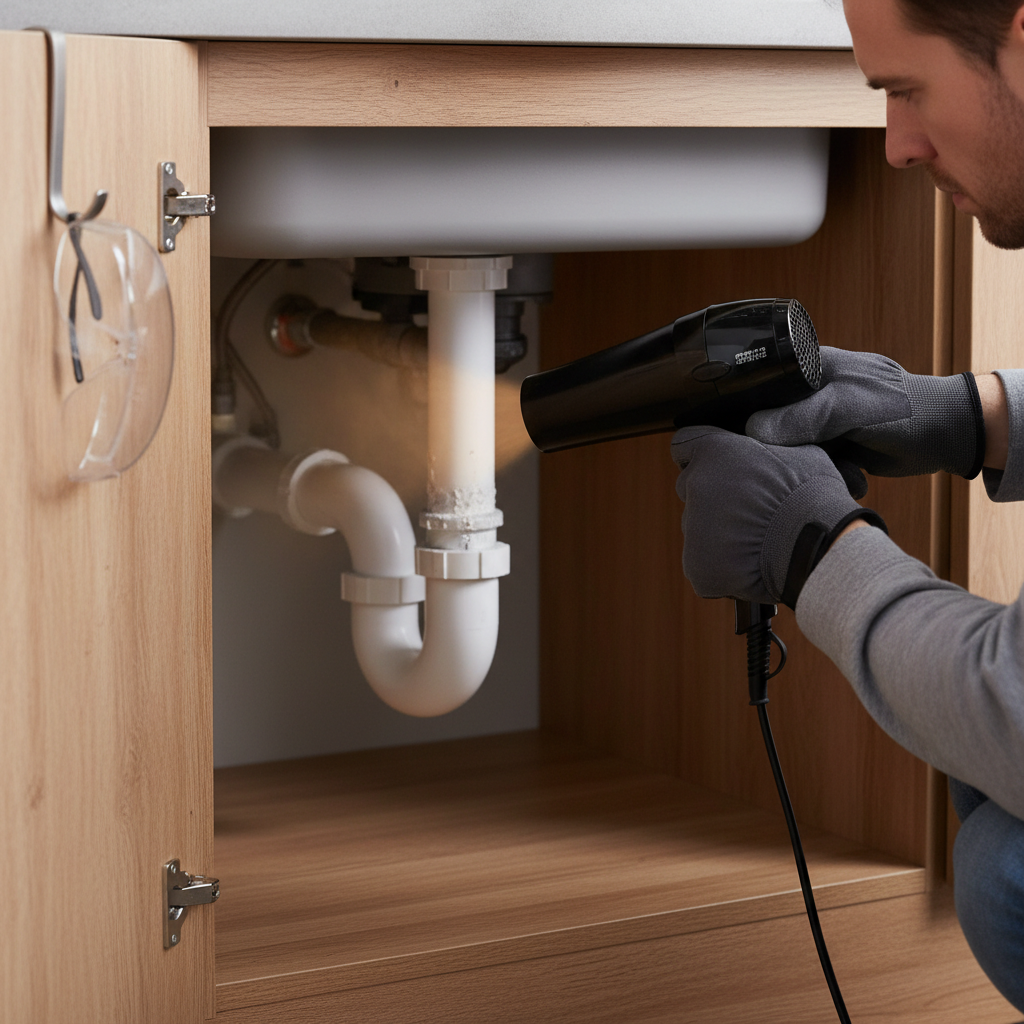
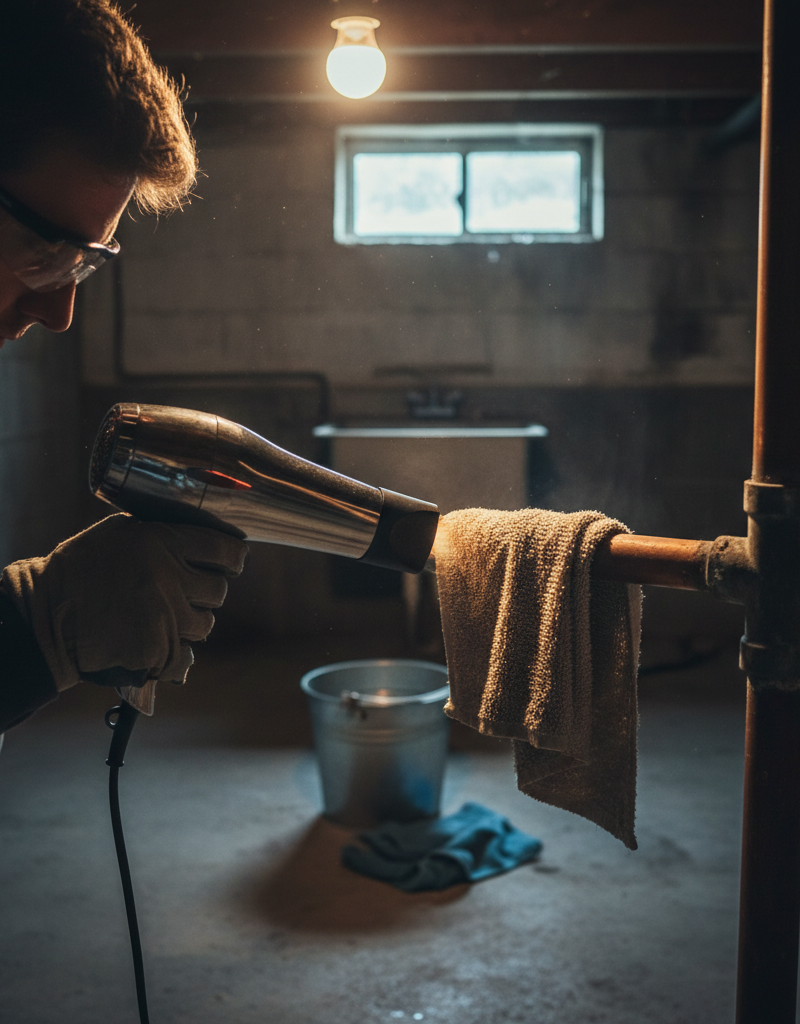
- Hair Dryer: This is often the safest and most effective method. Set it to a medium or high setting and move it back and forth along the frozen section of the pipe. Maintain a distance of several inches to avoid overheating.
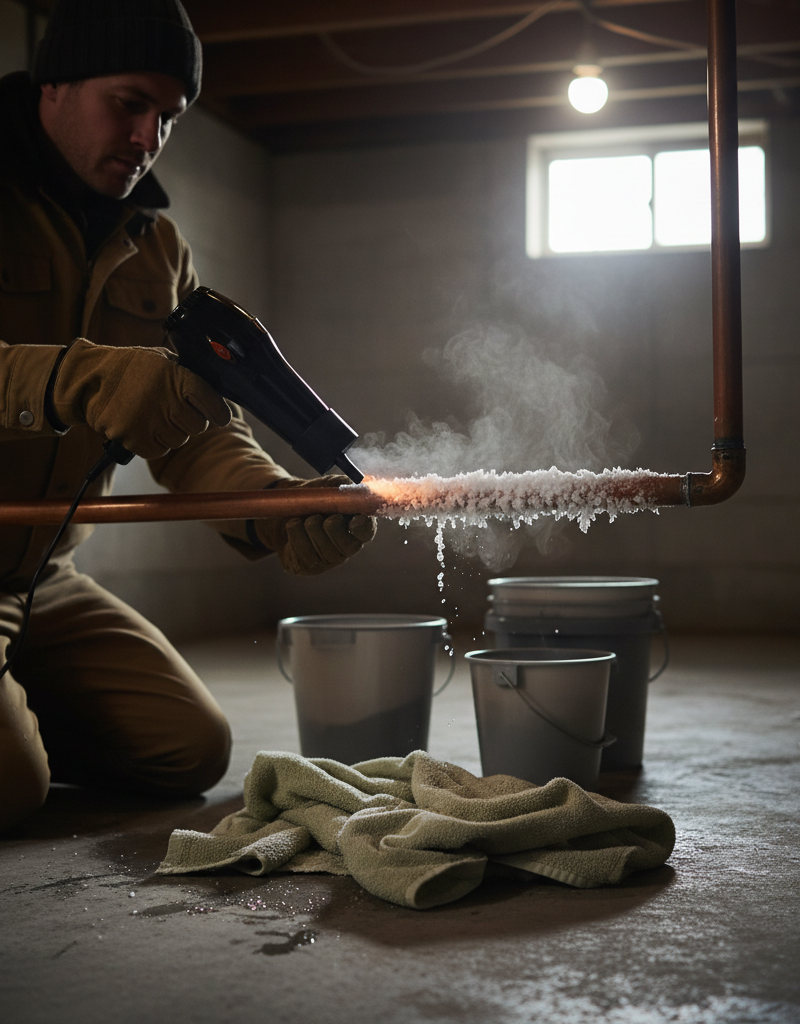
- Heat Gun (Low Setting): If you have a heat gun, use it carefully on its lowest heat setting. Keep it moving constantly to prevent spot overheating, which can damage the pipe or surrounding materials. Keep a fire extinguisher handy as a precaution.
- Hot Towels: Soak towels in hot water, wring them out, and wrap them around the frozen pipe. Replace them frequently with fresh hot towels as they cool. This is effective for easily accessible pipes and provides very gentle heat.
- Space Heater: For larger accessible areas like a crawl space, a small electric space heater can be placed at a safe distance from combustibles to warm the ambient air around the pipes. Do not leave it unattended.
- NEVER use an open flame device such as a propane torch, kerosene heater, or charcoal stove. This is a severe fire hazard and can cause the pipe to burst suddenly due to rapid, uneven expansion.
5. Work Progressively — Thaw from the faucet backward.
- Start applying heat at the end of the pipe closest to the open faucet. As the ice melts, water will begin to flow out of the faucet.
- Gradually work your way back along the pipe section towards the main water supply.
- This approach ensures that water can escape as it melts, preventing the buildup of pressure between the melting ice and the solid ice plug.
6. Monitor for Flow — Listen for water and observe the faucet.
- Keep applying heat until you hear the sound of water flowing through the pipe and a steady stream emerges from the open faucet.
- This indicates the blockage has been cleared.
7. Check for Leaks — Inspect the pipe thoroughly after thawing.
- Once water is flowing normally, close the open faucets.
- Slowly turn your main water supply back on.
- Carefully inspect the thawed pipe section and the surrounding area for any signs of leaks or cracks. Look for drips, wet spots, or bulging.
- If you find a leak: Immediately turn off the main water supply again and call a licensed plumber. Even a small crack will worsen under pressure.
8. Prevent Future Freezes — Take steps to insulate and protect your pipes.
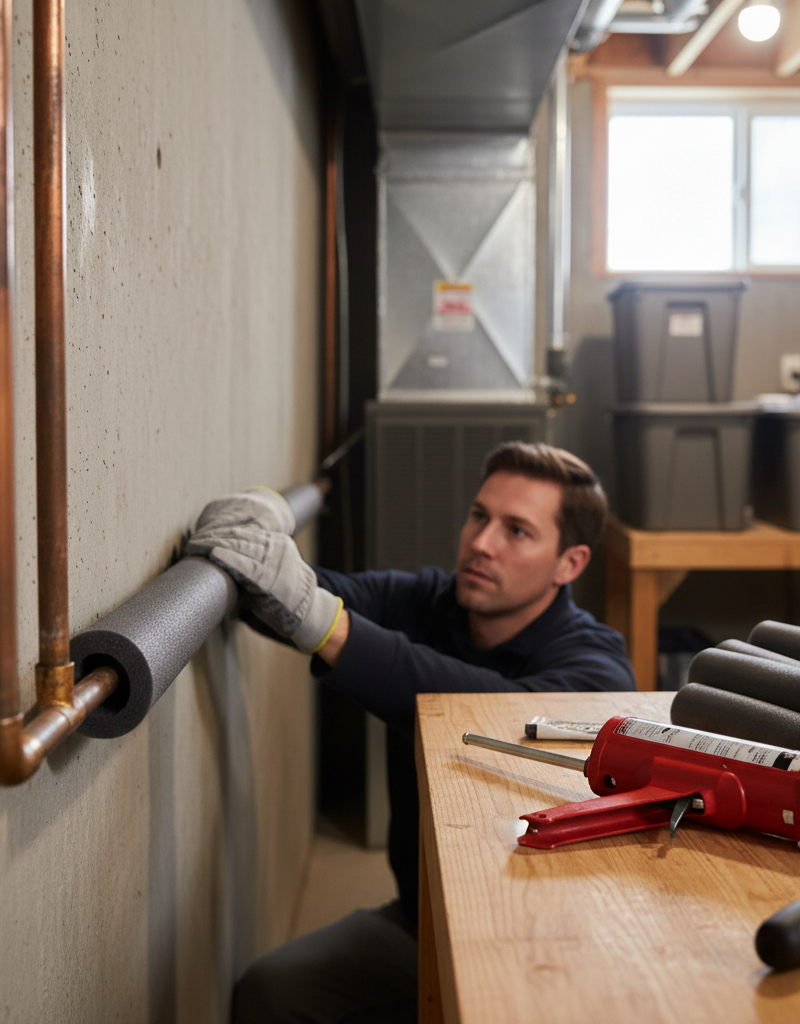
- Apply pipe insulation sleeves to exposed pipes in cold areas.
- Seal cracks and openings in your home's foundation and exterior walls.
- Consider adding insulation to unheated basements, crawl spaces, and attics.
- During extreme cold snaps, keep cabinet doors open under sinks on exterior walls to allow warmer air to circulate.
- Let a trickle of water run from strategic faucets during sustained freezing temperatures (only if absolutely necessary and as a last resort, as this wastes water).
Common Causes
- Poor Insulation: Pipes running through uninsulated or poorly insulated areas (crawl spaces, attics, garages, exterior walls, under sinks in cabinets against exterior walls) are highly susceptible to freezing when temperatures drop. Even slight drafts can contribute.
- Sudden Temperature Drops: A rapid and sustained drop in outside temperature, especially after a period of moderate cold, catches many homeowners off guard. Pipes that might be fine at 20°F ( -6°C) could freeze at 0°F ( -18°C) if exposed.
- Thermostat Set Too Low: If you go on vacation and set your thermostat too low (below 55°F or 13°C) to save energy, you risk allowing interior pipe temperatures to fall below freezing.
- Open Garage Doors/Windows: Leaving garage doors open for extended periods can expose pipes in adjacent walls or ceilings to freezing temperatures. Similarly, open windows, especially in basements or attics, allow frigid air to reach vulnerable plumbing.
- Lack of Water Flow: Pipes that are not regularly used (e.g., outdoor spigots, pipes to seldom-used guest bathrooms) are more prone to freezing because the water inside them is stagnant and cools down faster than flowing water.
Common Mistakes
- Using an Open Flame: Applying a propane torch or any open flame directly to a frozen pipe is incredibly dangerous. It can scorch surrounding materials, ignite insulation, and cause the pipe to burst explosively due to rapid, uneven heating, leading to severe burns or flooding.
- Ignoring the Main Water Shut-Off: Failing to turn off the main water supply before or during thawing is a huge mistake. If the pipe has already burst or ruptures during the thawing process, you'll have uncontrollable flooding that can cause extensive damage in minutes.
- Overlooking Secondary Freezes: Sometimes, homeowners thaw one section of a pipe only to find another section still frozen further down the line. Always open faucets on both hot and cold lines and allow them to run until both are flowing freely to ensure the entire system is clear.
- Thawing Too Fast or Unevenly: Applying intense, localized heat for extended periods to one small section can cause the water inside to expand too quickly. This 'superheating' can lead to thermal shock, causing the pipe material to crack or burst, even if the ice hasn't fully melted.
- Skipping the Leak Check: Assuming the pipe is fine after water starts flowing again is a gamble. A hairline crack might not be immediately obvious, but it will become a significant leak under full water pressure. Always inspect the thawed area thoroughly.
- Neglecting Prevention: After dealing with a frozen pipe, many homeowners neglect to address the underlying cause. Without proper insulation or sealing, the problem will likely recur with the next cold snap.
Cost & Time Breakdown
| Task | DIY cost | Pro cost | Time |
|---|---|---|---|
| Locating/Thawing Pipe | $0–$20 | $150–$400 | 30 min–2 hours |
| Minor Insulation/Draft Sealing | $20–$50 | N/A | 1–2 hours |
| Extensive Pipe Insulation | $50–$200 | $300–$800+ | 2–6 hours |
| Burst Pipe Repair (DIY parts) | $30–$100 | $500–$2,000+ | N/A (Pro Only) |
| Water Damage Cleanup | $100–$500+ | $1,000–$10,000+ | Days to Weeks |
Tips & Prevention
- Insulate Vulnerable Pipes: Use foam pipe insulation sleeves on any exposed pipes in unheated areas like basements, crawl spaces, attics, or even under sinks in exterior cabinets. Simple pipe wrap can save you thousands.
- Seal Air Leaks: Use caulk or weatherstripping to seal cracks and openings in your home's foundation and exterior walls, especially where pipes enter the house. Even small drafts can significantly lower pipe temperatures.
- Maintain Thermostat Settings: When away from home, never set your thermostat below 55°F (13°C). In extremely cold weather, consider keeping it at your normal temperature, even at night.
- Open Cabinet Doors: During severe cold snaps, open cabinet doors under sinks on exterior walls to allow warmer room air to circulate around the pipes.
- Outside Faucet Disconnect: Disconnect all garden hoses from outdoor spigots before the first freeze. Drain and shut off the water to exterior lines if you have separate shut-off valves.
- Trickle When Extreme: If temperatures are expected to be extremely low for an extended period, allow a small trickle of cold water to flow from one or two faucets, especially those on exterior walls. Moving water is less likely to freeze, but this wastes water and should be a last resort.
- Know Your Shut-Off Valve: Make sure everyone in your household knows where the main water shut-off valve is and how to operate it quickly.
When to Call a Professional
You should call a licensed plumber if you suspect a significant burst pipe, if you cannot locate the frozen section, or if your DIY thawing attempts are unsuccessful after a reasonable amount of time (e.g., 1-2 hours) with gentle heat. Immediately contact a professional if you turn the water back on and discover a leak, even a small drip. Attempting to repair a burst pipe yourself can lead to further damage, improper sealing, and continued costly leaks. Furthermore, if the frozen pipe is located within a wall, ceiling, or otherwise inaccessible area, a plumber has specialized equipment like thermal imaging cameras to locate the freeze and expertise to address it without unnecessary demolition. Never hesitate to call a professional for any gas line issues or if the problem involves your main sewer stack.
Related Articles
Keep troubleshooting with these hand-picked guides from FixlyGuide:
- The 90-Minute Hidden Danger of a Frozen Pipe (And the DIY Fix) — Thawing a frozen pipe quickly and safely is crucial to prevent bursting and extensive water damage to your home.
- The 3 Hidden Reasons Your Pipes Freeze (And How to Thaw Them Fast) — Discover the real culprits behind frozen pipes and learn a step-by-step method to safely thaw them, preventing costly damage.
- The 3 Hidden Reasons Your Pipes Freeze (and How to Thaw Them Fast) — Discover the real culprits behind frozen pipes and learn safe, effective methods to thaw them quickly, preventing costly damage to your hom…
- The 3 Hidden Reasons Your Pipe Froze (And How to Thaw It Fast) — Thawing a frozen pipe safely requires understanding the underlying causes and applying gentle, consistent heat to prevent further damage.
- The 3 Hidden Dangers of Frozen Pipes (And How to Thaw Them Safely) — Frozen pipes can burst, causing extensive water damage. Learn to safely thaw them and prevent costly repairs.
- The #1 Hidden Culprit Behind Your Whole-House Low Water Pressure (It's Not Your City!) — Discover the most common, often overlooked cause of low water pressure throughout your entire home and how to fix it yourself.
Should you do this yourself?
Answer five quick questions before you start. Safety outranks savings every time.
Your experience with work like this
How high do you have to work?
Does the job involve any of these?
Will it need a permit?
Specialty tools
Free and instant. Educational guidance only — not a quote, inspection, or professional diagnosis.
What should this project cost?
Enter your project details for a realistic cost range before you call anyone.
Common repairs run $150–$650; repipes and water-heater replacements reach $1,500–$4,500.
- Regional adjustment
- National average
- Labor share (typical)
- ~$754
- Quotes to collect
- 3 written estimates
Educational estimate based on national averages — not a binding quote. Always confirm with written local estimates.
Before you start
Check the difficulty, permits, and safety risk — then decide whether to call a pro.
- Estimate this projectGet a cost range for your scope and ZIP before you call anyone.Open
- Get local estimatesSend one request and compare written estimates from vetted pros.Open
Free, no signup required. Estimates are educational guidance, not a quote or an inspection.
Frequently asked questions
How do you tell if a pipe is frozen or burst?+
A frozen pipe will typically result in no water flow or a very weak trickle from a faucet. If the pipe has burst, you might see visible cracks or bulges, frost on the outside of the pipe, or, once it begins to thaw, active water leaking or spraying from a damaged section. The most definitive sign of a burst as it thaws is water actively leaking.
Can a frozen pipe thaw on its own?+
Yes, a frozen pipe can eventually thaw on its own if the ambient temperature increases above freezing. However, waiting for it to thaw naturally is risky because the pipe could burst at any point while it's frozen, causing significant water damage. It's always safer and quicker to actively thaw it.
How long does it take for a frozen pipe to thaw?+
The time it takes to thaw a frozen pipe depends on several factors: the length and accessibility of the frozen section, the size of the pipe, and the heat source used. With a hairdryer and consistent application, a small section might thaw in 30 minutes to an hour. Larger, less accessible sections can take several hours.
What temperature do pipes freeze at?+
Water freezes at 32°F (0°C). However, pipes don't instantly freeze as soon as the temperature drops below this point. It takes sustained freezing temperatures, often below 20°F (-6°C), for exposed pipes to freeze, especially if there's some water flow. Pipes in unheated areas are more vulnerable.
Is it safe to go to sleep with a frozen pipe?+
It is not safe to go to sleep with a known frozen pipe, especially if you haven't taken steps to thaw it or if you suspect it might burst. The pipe could burst during the night, leading to severe water damage while you're unaware. If you can't thaw it immediately, turn off your main water supply and call a professional.
Discussion
Loading comments…