
- Infrequent Cleaning: This is the big one. Most folks clean the lint trap but forget the vent duct. You’ve got to clean the whole run at least once a year, and more often if you dry a lot of towels, blankets, or pet bedding.
- Improper Vent Material: Those flimsy white vinyl or foil accordion hoses? Awful. The ridges grab lint, and they crush way too easy. Stick with rigid or semi-rigid metal ducting.
- Long or Kinked Vent Runs: The longer the run, the more lint gets a chance to settle out. Every bend slows airflow and gives lint a place to hang up. Short and straight wins.
- Exterior Vent Hood Obstructions: Sometimes the outside flap sticks shut, or birds build nests right at the exit. I’ve even seen folks paint over the louvers by accident and seal them shut. Keep that end open.
- Damaged or Disconnected Ductwork: Over time, ducts can pull apart at the joints, especially if they weren’t secured well. Then lint leaks into the wall cavity and airflow takes a hit.
Plumbing · Clog
| Project category | Plumbing |
|---|---|
| Problem type | Clog |
| Trade required | Plumbing |
| Urgency | Soon — within weeks |
| Safety risk | Low safety risk |
| DIY suitability | DIY friendly |
| Cost category | Low cost |
| Typical timeline | Same-day DIY attempt; pro visit within a day or two |
| Contractor type | Licensed plumber |
Repair option
Plunger, hand auger, or trap cleanout before chemicals.
Replacement option
Line replacement when clogs return in the same spot repeatedly.
Common causes
- Hair and soap buildup in the trap
- Grease cooling in the branch line
- Flushed wipes or foreign objects
Relevant tools:diy difficultydiy or hire a pro
Published August 2, 2026Last updated August 17, 2026
Tools & materials you'll need
Affiliate linksAs an Amazon Associate FixlyGuide earns from qualifying purchases — at no extra cost to you. Prices and availability are accurate as of publication and subject to change.
Quick Answer
I’ve seen some nasty dryer vents in my 25+ years in this trade, and let me tell you, a clogged vent is a fire waiting to happen. The quick answer to how to clean a dryer vent and prevent fires is pretty simple: you’ve got to clear lint out of the whole vent system, not just the lint trap in the dryer. That means getting into the ductwork itself, ideally once a year, and pulling out all that dry, fluffy junk that piles up. It’s dirty work. No way around that. But it could save your house, and that’s not me being dramatic.
The Problem
Alright, let’s talk about what’s really going on when that vent gets packed with lint. Every time your dryer runs, it’s pushing moist air out of the drum. That air carries tiny fibers—lint—from your clothes. Most of it gets caught in the lint screen, which you should clean after every load, if you’re doing it right. But some of those finer bits slip past the screen and head into the vent duct that carries hot, humid air outside. Over time, that lint stacks up, especially in bends and corners where airflow slows down.
Here’s where things get ugly. Your dryer heats air to temperatures often exceeding 135°F, sometimes up to 150°F or even 160°F for heavy loads. When that hot air can’t get out because of a lint blockage, the machine starts running hot. That lint in the duct—especially the stuff that’s been baked dry by all that heat—turns into kindling. One spark from a bad heating element, a loose connection, or even static electricity, and you’ve got ignition. Once it lights off, fire can race through the ductwork, into the wall, and then into the house. The National Fire Protection Association (NFPA) says dryers cause around 13,820 home fires every year, and most of those come down to lack of maintenance, plain and simple. I pulled a water heater in Frisco last month that sat right beside a dryer vent so loaded with lint it looked like someone packed it with gray felt. Same story. Same risk. It wasn’t a pretty sight.
How It Works
To really keep this from happening, you’ve gotta know how the system’s supposed to work. Your dryer isn’t just tumbling clothes around; it’s built to dry them fast and safely. Here’s the breakdown:
First, inside the dryer, there’s a heating element (electric models) or a gas burner (gas models) that heats the air. A blower wheel then pulls that heated air through the drum, across your wet clothes, and into the lint trap. That’s where most of the airborne lint is supposed to get caught. After that, the moist, lint-carrying air gets pushed by the blower wheel into the dryer vent duct. That duct is usually a 4-inch diameter pipe that runs from the back of the dryer, through a wall or floor, and out to an exterior vent hood on the outside of the house. The setup’s simple enough: hot, damp air goes in one end, gets pushed out the other. The whole game is unobstructed airflow.
When that airflow gets choked off by lint, a few things start going sideways. The dryer takes longer to dry clothes, which means it runs hotter and longer, burns more energy, and beats up the parts faster. The safety thermostats may trip over and over, and eventually they can fail. And that hot, damp air, instead of getting dumped outside, gets trapped, which can cause condensation in the vent. That moisture makes lint stick together—now you’ve got a bigger clog on your hands. The blower wheel works harder, the motor can overheat, and the whole mess gets worse. Clear vent, better drying, lower bills, less risk. Simple as that. A vent in good shape should have an airflow rate of at least 1,500 linear feet per minute to move lint and moisture out the way it should.
Step-by-Step Fix
Alright, let’s get after it. Cleaning a dryer vent isn’t rocket science, but it does take a little elbow grease and some patience. Figure about an hour, maybe two if the run’s long or has a bunch of bends. You’ll get dusty, so wear junk clothes.
-
Safety First — Unplug the Dryer — Start here every time. Go to your electrical panel and shut off the breaker for the dryer. If it’s a gas dryer, close the gas supply valve (it’s usually a yellow handle behind the dryer). You don’t want power or gas feeding that appliance while you’re working on it. No dice. I’ve seen enough close calls over the years to know this step isn’t optional.
-
Pull the Dryer Out — Make some room. Gently pull the dryer away from the wall. You need enough space to work comfortably behind it. Be careful not to strain or kink the utility lines—electrical cord, gas line, or water lines if it’s a steam dryer. If it’s tight, grab a helper. If the dryer won’t budge, check the leveling feet; sometimes they’re dug in harder than you’d think.
-
Disconnect the Vent Hose — Separate the pieces. This is usually a flexible foil or plastic hose. Clamps hold it to the dryer exhaust port and the wall vent. Loosen those with a screwdriver or nut driver, then carefully pull the hose free on both ends. Check the hose itself—if it’s crushed, ripped, or worn out, swap it now. Those flimsy foil vents are lint magnets and they crush easy. I always tell folks to step up to a semi-rigid aluminum duct if they can; better airflow, easier cleanup. While you’re there, vacuum the lint out of the dryer’s exhaust port too.
-
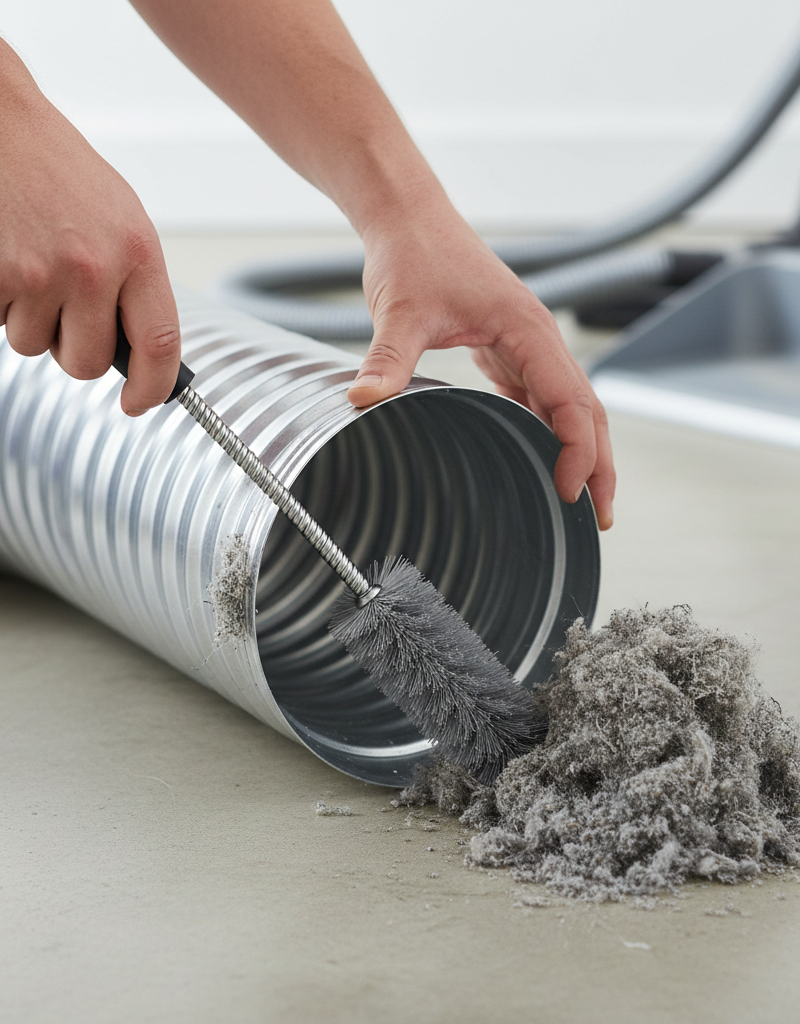
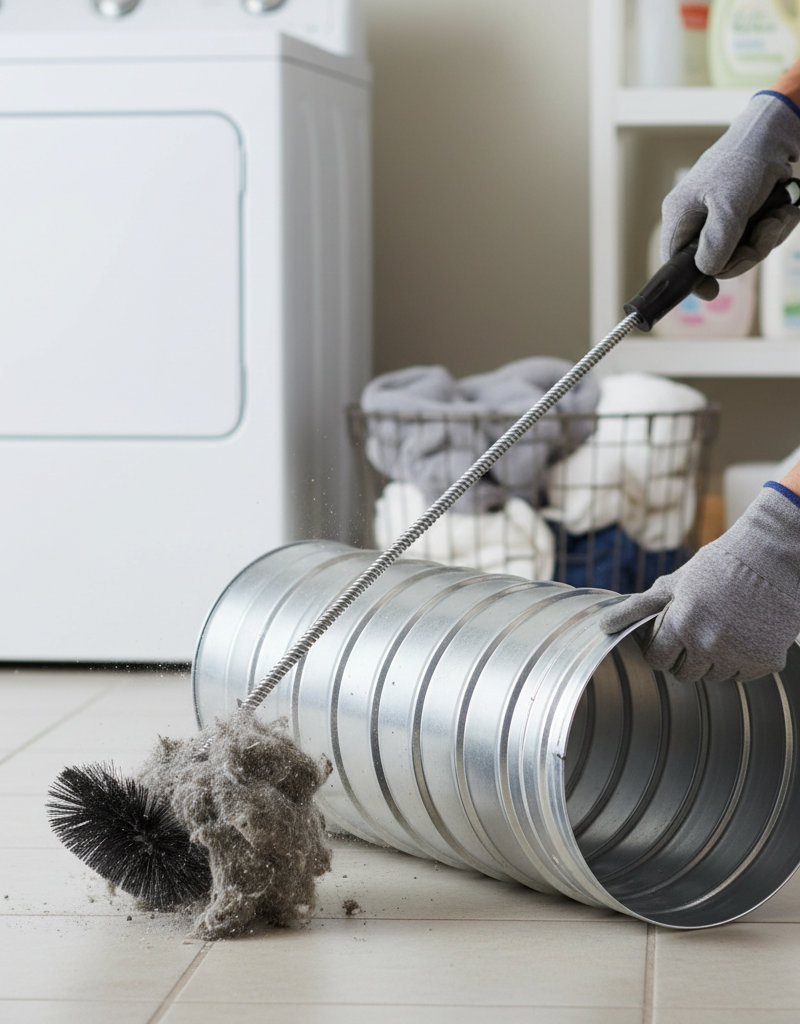
Clean the Flexible Vent Hose — Get the junk out. Take the disconnected hose outside if you can. Shake it hard. Then use a shop-vac to pull lint from both ends, or run a long flexible brush through it. If it’s really packed up and it’s the cheap foil type, sometimes it’s faster and safer to replace it. They’re only about $15–$25 at the hardware store. Get it clean, or get rid of it.
-
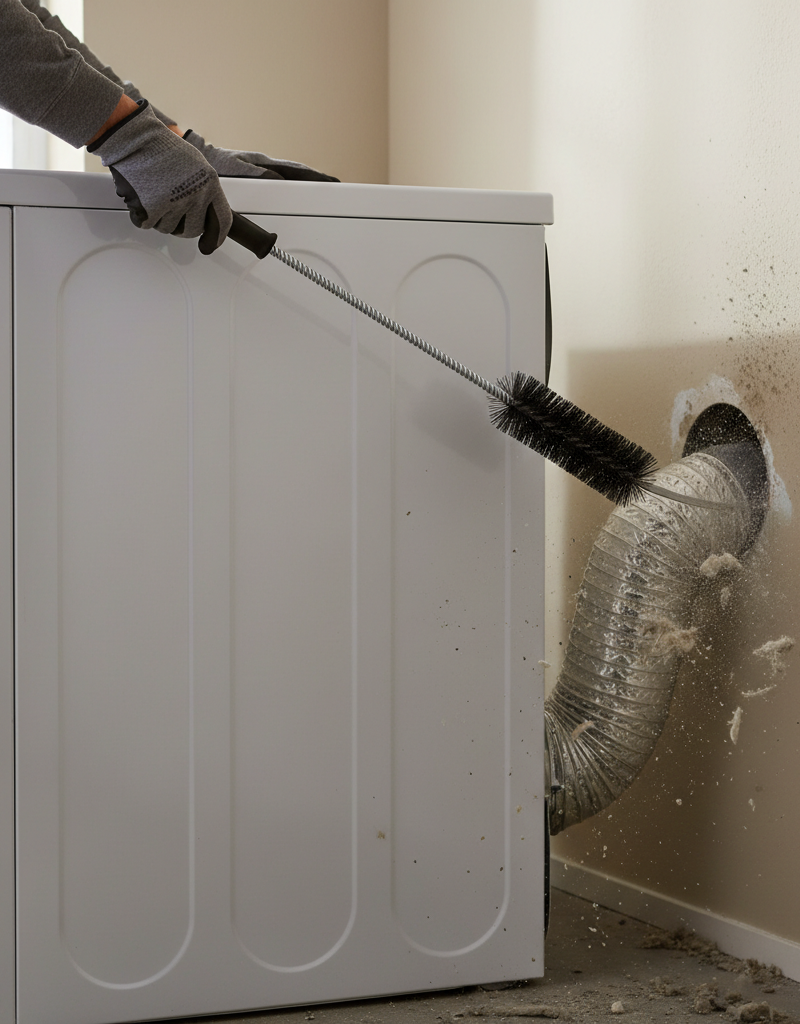
Clean the Wall Vent Duct (Inside) — This is the big one. You’ll want a dryer vent cleaning kit for this part. Usually it’s a set of flexible rods that screw together with a brush head on the end. Attach the brush to the first rod, feed it into the vent opening in the wall, and keep adding rods as you go. Rotate the brush clockwise while you push it through the ductwork. That loosens the lint. As you pull the brush back, use your shop-vac to catch the mess. Go slow. Don’t force it. You may have to run it through a few times before nothing else comes out. I remember one job in Mesa where the vent was so jammed I pulled out a lint ball that looked like a dead raccoon—just a ridiculous wad of gray fuzz. The homeowner about fell over.
-
Go Outside and Clean the Exterior Vent Hood — Don’t miss the exit. Head outside to where the dryer vent ends. That’s usually a plastic or metal hood with a flap or louvers. Clean out any lint built up there. Use a brush, your hand, or the shop-vac. Make sure the flap moves freely. Birds and little critters love those spots, especially if the flap’s busted or missing. If you find a nest, remove it carefully—wear gloves. If the vent hood’s damaged, replace it. A decent hood lets air out but keeps pests out too. Just don’t get a screen that’s so fine it turns into a lint catcher. Seen that more than once.
-
Reconnect Everything — Put it back together. Once you’re sure the ductwork is clear, reconnect the flexible vent hose to the wall vent and the dryer exhaust port. Tighten the clamps good and snug. Make sure the hose isn’t kinked or crushed when you slide the dryer back. Straight and smooth is the goal. Don’t rely on tape alone to hold the connections. The clamps are there for a reason.
-
Restore Power/Gas and Test — See if you nailed it. Plug the dryer back in or open the gas valve. Flip the breaker back on. Run the dryer on an air-fluff or low-heat cycle for about 10–15 minutes. Go outside and check the exterior vent hood. You should feel a strong, warm puff of air coming out. If it’s weak, or the dryer sounds like it’s working too hard, you probably missed a blockage or there’s another issue with the appliance itself. Give it a sniff too—you shouldn’t smell anything burning. If you do, shut it down right now.
Common Causes
Knowing why these clogs happen helps you stay ahead of ’em:
- Infrequent Cleaning: This is the big one. Most folks clean the lint trap but forget the vent duct. You’ve got to clean the whole run at least once a year, and more often if you dry a lot of towels, blankets, or pet bedding.
- Improper Vent Material: Those flimsy white vinyl or foil accordion hoses? Awful. The ridges grab lint, and they crush way too easy. Stick with rigid or semi-rigid metal ducting.
- Long or Kinked Vent Runs: The longer the run, the more lint gets a chance to settle out. Every bend slows airflow and gives lint a place to hang up. Short and straight wins.
- Exterior Vent Hood Obstructions: Sometimes the outside flap sticks shut, or birds build nests right at the exit. I’ve even seen folks paint over the louvers by accident and seal them shut. Keep that end open.
- Damaged or Disconnected Ductwork: Over time, ducts can pull apart at the joints, especially if they weren’t secured well. Then lint leaks into the wall cavity and airflow takes a hit.
Common Mistakes
I’ve seen just about every mistake in the book with dryer vents. Here’s what trips people up, and how to avoid it:
- Only Cleaning the Lint Trap: This one gets folks all the time. The lint trap catches some lint, but not all of it. The vent system still needs attention.
- Using the Wrong Tools: Don’t go jamming a coat hanger down there. You’ll compact the lint, can tear the duct, and still won’t get it clean. Get the right dryer vent cleaning kit.
- Ignoring a Dryer That’s Running Hot or Taking Too Long: Those are big warning signs. Your dryer’s telling you something’s wrong. Don’t just keep using it; check the vent first.
- Improperly Connecting the Ductwork: Duct tape instead of proper clamps, or loose gaps at the joints, can dump lint into your walls and choke airflow.
- Crushing the Flexible Hose: When you shove the dryer back against the wall, it’s easy to pinch the hose. That kills airflow fast and leads to clogs. Make sure there’s enough slack and nothing’s pinched.
- Neglecting the Exterior Vent: Out of sight, out of mind, right? Wrong. The outside hood can clog just as bad as the inside duct, and sometimes it turns into a nest site.
Cost & Time Breakdown
Here’s what you can expect cost-wise and time-wise if you do it yourself versus hiring a pro.
| Task | DIY Cost | Pro Cost | Time |
|---|---|---|---|
| Dryer Vent Cleaning Kit | $20–$50 | Included | N/A |
| Replacement Vent Hose (if needed) | $15–$25 | $30–$50 | 10–15 mins |
| Replacement Vent Hood (if needed) | $10–$30 | $40–$70 | 15–20 mins |
| Total (DIY) | $20–$105 | N/A | 1–2 hours |
| Total (Professional) | N/A | $100–$250 | 1–1.5 hours |
Tips & Prevention
Keeping that vent clear and your house safe is mostly about building a few good habits. Here’s what I tell my customers:
- Clean the Lint Trap Every Single Load: Dryer 101. Don’t skip it. It makes a huge difference in keeping lint out of the vent.
- Inspect and Clean the Vent Annually: Put it on the calendar, set a phone reminder, whatever works. Once a year, pull the dryer out and give the vent a real cleaning.
- Use Rigid or Semi-Rigid Metal Ducting: Forget the flimsy plastic or foil. Metal ducts have smoother walls, so lint doesn’t cling as bad, and they hold up better.
- Keep Vent Runs Short and Straight: If you can, set up the laundry area so the vent run stays short and the bends are limited. Every 90-degree bend adds the same drag as about 5-8 feet of straight ductwork.
- Check the Exterior Vent Regularly: Just take a quick look every few months to make sure the flap moves and nothing’s blocking it.
- Avoid Overloading Your Dryer: Stuffing it full restricts airflow in the drum, makes the machine work harder, and can push more lint into the vent.
- Don't Dry Clothes with Excessive Lint: New towels, blankets, and similar stuff shed like crazy. Use lower heat if you can, and check the lint trap and vent more often after drying those loads.
When to Call a Professional
Look, cleaning a dryer vent is something a lot of handy homeowners can handle. But there are times you should just call a pro and be done with it. If your vent run is really long, goes through multiple walls or floors, or has a bunch of tricky turns, it can be tough to get it truly clean with DIY tools. Same goes if you think the ductwork inside the walls is damaged and you can’t get to it. And if you’ve got a gas dryer and you’re not comfortable disconnecting and reconnecting the gas line, absolutely call a licensed HVAC technician or a dryer vent cleaning specialist. They’ve got the gear—strong vacuums, cameras, the whole bit—to reach the problem spots and inspect the system properly. Don’t mess around with gas lines or fire hazards. It’s just not worth the gamble.
Related Articles
Keep troubleshooting with these hand-picked guides from FixlyGuide:
- The #1 Dryer Fire Culprit Hiding in Your Laundry Room (And How to Evict It) — Regular dryer vent cleaning is crucial to prevent lint buildup, improve efficiency, and most importantly, safeguard your home from potentia…
- The Dryer Fire Hazard Hiding in Plain Sight (and How to Eliminate It in 30 Minutes) — Lint buildup in your dryer vent is a silent fire hazard. Learn how to clean it thoroughly and prevent a potential disaster with simple tool…
- The Dryer Vent Fire Trap: 3 Hidden Signs Your Home Is at Risk — Learn the critical signs your dryer vent is clogged and how to safely clean it to prevent a dangerous house fire.
- The $5 Part That Stops Your Dryer From Heating (And How to Replace It in 30 Min) — Discover the most common, inexpensive culprit behind a dryer not heating up and learn how to quickly diagnose and replace it yourself.
- The Secret Reason Your Thermostat Lies (and 5 Fixes That Actually Work) — If your thermostat isn't reaching its set temperature, understanding the underlying cause is key to a comfortable home and lower energy bil…
- The Silent Fire Hazard Lurking In Your Laundry Room — Don't let a clogged dryer vent become a silent fire starter. Learn why this common oversight is so dangerous, the clear warning signs to lo…
Your seasonal maintenance checklist
The small jobs that prevent the expensive repairs. Tick them off — progress saves on this device.
Free, no signup. Skip anything that requires roof access or working near live electrical.
What should this project cost?
Enter your project details for a realistic cost range before you call anyone.
Service calls and common repairs run $150–$900; full system replacement typically $6,000–$12,000.
- Regional adjustment
- National average
- Labor share (typical)
- ~$1,935
- Quotes to collect
- 3 written estimates
Educational estimate based on national averages — not a binding quote. Always confirm with written local estimates.
Before you start
Check the difficulty, permits, and safety risk — then decide whether to call a pro.
- Is this a safe DIY job?Check permits, tools, and risk before you start the steps below.Open
- Estimate this projectGet a cost range for your scope and ZIP before you call anyone.Open
- Get local estimatesSend one request and compare written estimates from vetted pros.Open
Free, no signup required. Estimates are educational guidance, not a quote or an inspection.
Get the print-ready PDF of this guide
A clean, ad-free, printable version you can keep on your phone or pin to the workshop wall. Free with a FixlyGuide account.
- Print-optimized layout
- Tools, materials & every step included
- Saved to your account
Frequently asked questions
How often should I clean my dryer vent?+
You should aim to clean your dryer vent system at least once a year. If you have a large family, frequently dry linty items like pet bedding or towels, or notice your dryer taking longer to dry clothes, you might need to clean it every six months.
What are the signs of a clogged dryer vent?+
Key signs include clothes taking much longer to dry, clothes feeling unusually hot after a cycle, a burning smell coming from the dryer, excessive lint accumulating around the lint trap or dryer door, and the exterior vent flap not opening when the dryer is running.
Can a dirty dryer vent cause a fire?+
Absolutely, yes. Lint is highly flammable, and when it builds up in the dryer vent, it can trap heat. This combination creates a significant fire hazard, and clogged dryer vents are a leading cause of residential fires.
What kind of dryer vent hose is best?+
The best type of dryer vent hose is rigid metal ductwork, or at least semi-rigid aluminum. Avoid the flimsy white vinyl or foil accordion-style hoses as they are prone to crushing, kinking, and trapping lint, which increases fire risk.
Is it safe to clean a dryer vent myself?+
Yes, for most standard dryer vent setups, cleaning it yourself with a proper vent cleaning kit is safe and effective. Just be sure to unplug the dryer (and turn off the gas if applicable) before you start. If your vent run is very long, complex, or you have a gas dryer and aren't comfortable with the connections, call a professional.
What tools do I need to clean a dryer vent?+
You'll primarily need a dryer vent cleaning kit, which typically includes flexible rods and a brush head. A shop-vac or powerful vacuum cleaner is also essential for sucking out the loosened lint.
How do I know if my dryer vent is completely clear?+
After cleaning, reconnect everything and run your dryer on an air-fluff cycle. Go outside and check the exterior vent hood; you should feel a strong, warm stream of air coming out. If the airflow is weak, there's likely still a blockage.
Can a clogged dryer vent increase my energy bill?+
Yes, definitely. When your dryer vent is clogged, your dryer has to work harder and run longer to dry clothes effectively. This extended operation consumes more electricity or gas, leading to higher utility bills.
Should I clean the lint trap inside the dryer too?+
Always, always, always clean the lint trap screen inside your dryer after every single load. This prevents the vast majority of lint from ever entering your vent duct in the first place, significantly reducing the risk of blockages and fires.
Discussion
Loading comments…