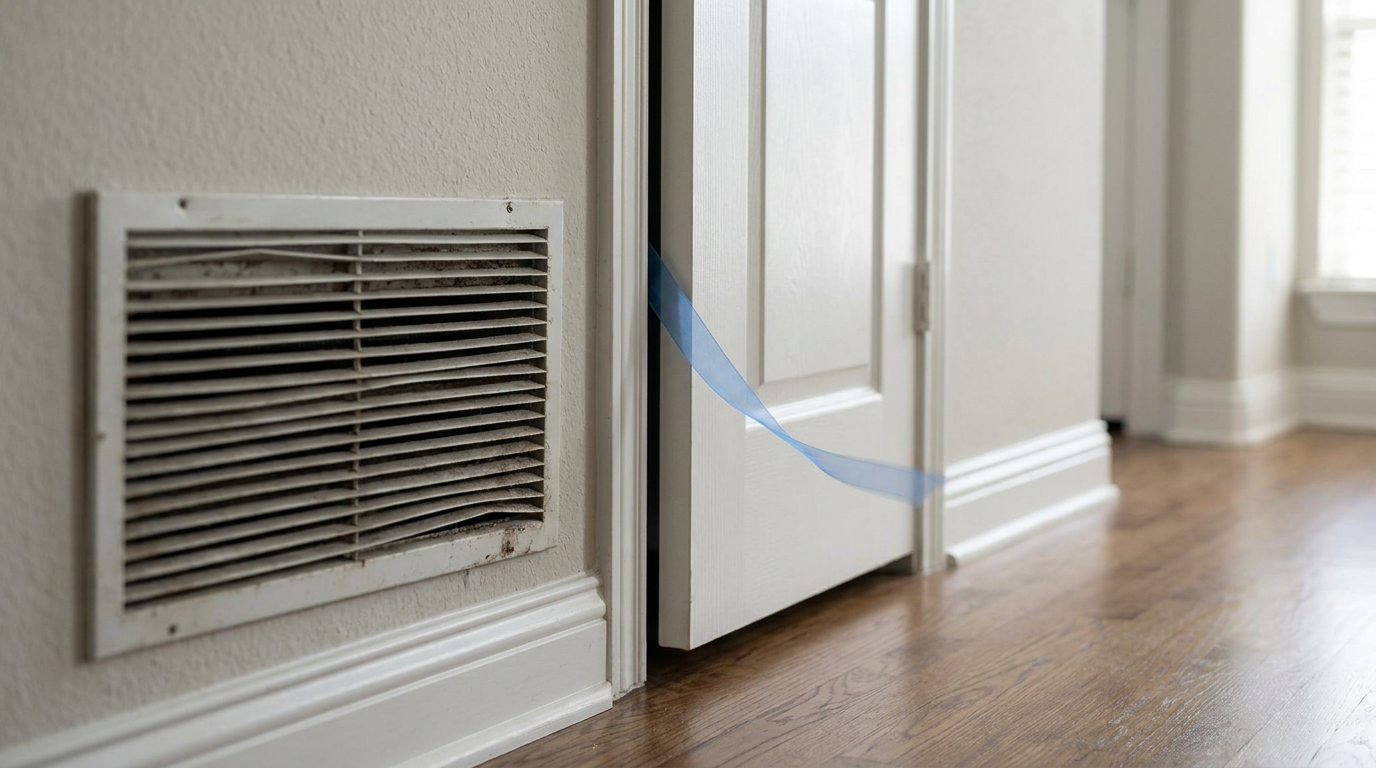
- Tools: Incense stick, lighter, or smoke pen.
- Safety: Don’t use open flames near gas lines or suspect appliance flues.
- If this doesn't work: Grab a handheld digital manometer and measure the pressure drop across doorways in Pascals.
HVAC · High energy usage
| Project category | HVAC |
|---|---|
| Problem type | High energy usage |
| Trade required | HVAC |
| Urgency | Planned project |
| Safety risk | Low safety risk |
| DIY suitability | DIY for experienced homeowners |
| Cost category | High cost |
| Typical timeline | Assessment within weeks; replacement planned off-season |
| Contractor type | Licensed HVAC technician |
Repair option
Duct sealing, insulation, and a tune-up before touching the equipment.
Replacement option
High-efficiency replacement sized by a load calculation, not a rule of thumb.
Common causes
- Aging, low-efficiency equipment
- Leaking ducts losing conditioned air
- Insufficient attic insulation
- Oversized system short-cycling
Relevant tools:project cost estimatorrepair or replace
Published October 25, 2026Last updated October 25, 2026
Tools & materials you'll need
Affiliate linksAs an Amazon Associate FixlyGuide earns from qualifying purchases — at no extra cost to you. Prices and availability are accurate as of publication and subject to change.
Quick Answer
To fix positive or negative house pressure, I’d start with the mechanical basics: swap out clogged 1-inch to 4-inch HVAC filters, clear any blocked fresh air intake screens outside, and seal leaky ductwork in the attic or crawlspace. Run exhaust fans only when you need ’em, crack a window during fireplace use, and make sure interior doors have at least a 3/4-inch undercut so conditioned air can get back to your central returns without fighting for its life.
The Problem
Your house breathes, whether you like it or not. When the air leaving your living space doesn’t match the air coming in, the whole shell ends up in a pressure fight.
Negative pressure turns the place into a vacuum. You’ll see doors slam shut by themselves, heavy exterior doors feel glued to the jamb, drafts whistle around switch plates, and—worst of all—water heater or furnace exhaust can get pulled backward down the chimney flue and into your living room. Positive pressure does the opposite: it pushes warm, humid indoor air out through tiny cracks in the drywall and sheathing. When that warm air hits a cold outer wall cavity in winter, it condenses on the framing, feeds hidden mold, and starts chewing up sill plates. If you’re smelling sewer gas, burnt exhaust, or a room that always feels stale while the utility bill keeps climbing, odds are your pressure envelope is out of whack.
How It Works
Think of your home like a sealed box with a couple air pumps running at the same time. Under ideal conditions, indoor pressure sits neutral or just a hair positive—roughly +1 to +3 Pascals compared to outside. That slight push helps keep outdoor dust and unconditioned air from sneaking in without forcing moisture into wall assemblies.
       [ Central HVAC Blower ]
         /                  \
        v                    v
  [Supply Ducts]       [Return Ducts]
   (Pushes air)         (Pulls air)
        |                    |
        +---- Living Room ---+
                  |
     [Exhaust Fans / Vent Hoods] ---> (Exits House)
Your HVAC blower moves between 350 and 400 CFM (cubic feet per minute) of air per ton of cooling capacity. A typical 3-ton system circulates around 1,200 CFM. If your supply ducts leak into an unconditioned attic, the system can dump 200 to 300 CFM of pressurized air into the sky. Then the house has to make that air up somehow, so it starts sucking unconditioned air through window seals, can lights, and even the dirt around the foundation. Been there. I pulled a duct run apart in Frisco last month that was leaking so bad the homeowner thought the attic fan was on—nope, just a split flex line dumping cooled air where it had no business being.
On the flip side, if a bedroom door stays shut with a supply vent blasting 150 CFM and no real return air path, that bedroom becomes a high-pressure pocket. Meanwhile, the hallway with the main return grille drops into negative pressure. Stack a 400 CFM kitchen range hood and two 80 CFM bathroom fans running at dinner time, and now you’ve evacuated 560 CFM with no makeup air path to replace it. That thing’s toast unless you balance it out.
Step-by-Step Fix
Here’s how I’d track down, diagnose, and fix house pressure problems with regular tools and a little mechanical common sense.
-
Perform the Door-Swing and Lighter Test — Shut the windows and exterior doors, kick on the HVAC blower, and leave interior bedroom doors cracked about 1 inch. Watch the door. If it pulls shut or shoves open on its own, that room’s got a serious pressure difference. Then hold a lit lighter or incense stick near exterior door frames and outlets on outside walls; smoke getting yanked hard inward points to negative whole-house pressure, while smoke pushed away tells you the house is positive.
- Tools: Incense stick, lighter, or smoke pen.
- Safety: Don’t use open flames near gas lines or suspect appliance flues.
- If this doesn't work: Grab a handheld digital manometer and measure the pressure drop across doorways in Pascals.
-
Inspect and Swap Your HVAC Return Air Filter — A clogged, choked-up return filter starves the air handler’s return plenum, which drives negative pressure in utility closets and forces ugly pressure swings downstream. Pull the pleated filter and hold it up to a bright light. If light can’t get through, or if it’s older than 90 days, toss it.
- Replace with a MERV 8 to MERV 11 filter rated for your system’s static pressure capacity.
- Avoid restrictive MERV 13+ filters in older duct systems unless your blower motor is specifically set up for high static loads (above 0.5 inches of water column).
-
Check Interior Door Undercuts for Air Relief — Close the bedroom doors while the AC or heat is running. If you feel a strong whistle of air under the door, the gap’s too tight for the room air to make it back to the central hallway grille.
- Measure the gap between the bottom of the door slab and the finished floor.
- You need a minimum clearance of 3/4 inch (1 inch is better over thick carpet).
- If the gap is under 1/2 inch, pull the hinges, set the door on sawhorses, and trim the bottom edge with a circular saw and a 60-tooth fine-finish blade.
-
Install Doorway Jump Ducts or Transfer Grilles — For rooms that still stay pressurized even with an undercut door, give that air a dedicated bypass to the hallway.
- Cut a 12x6-inch opening through the drywall above the door frame on both the room side and hallway side.
- Install a baffled, sound-damped transfer grille sleeve between the studs so air can move while sound stays blocked.
- Or install an R-6 insulated flexible "jump duct" in the attic from a ceiling collar in the bedroom to a matching ceiling collar in the hallway.
-
Inspect the Outside Fresh Air Intake Screen — A lot of modern homes have a 6-inch or 8-inch fresh air intake duct running from the soffit or exterior wall into the HVAC return plenum. Head outside and find that hood.
- Clear spider webs, bird nests, lint, and packed pollen off the 1/4-inch wire mesh screen.
- A plugged intake screen cuts off intentional makeup air, and that’ll drag your living space into negative pressure any time bathroom fans or the dryer are running.
-
Calibrate Exhaust Ventilation Habits — High-output exhaust gear can overpower the house in a few minutes.
- Keep kitchen range hood run times limited to active cooking, especially if your hood pulls 400 CFM or higher.
- Put bathroom exhaust fans on 20-minute countdown push-button timers so they don’t run all day while you’re at work.
- Make sure clothes dryer exhaust flues swing freely outside and don’t stay stuck open, or wind can throw the whole balance off.
-
Check Attic and Crawlspace Duct Runs for Major Disconnections — Crawl into the attic or crawlspace while the HVAC blower is running. Run your bare hand along duct joints, plenum seams, and flex duct collars.
- If you feel cold or hot air blowing on your face in the attic, your supply duct is broken, pressurizing the attic while putting the house into heavy negative pressure.
- If you feel suction tugging at your fingers along the return plenum, the system is pulling hot, dirty attic air straight into the house’s breathing supply.
- If you find a leak, clean the sheet metal with a rag and seal it right away with paint-on mastic paste and fiberglass mesh tape.
-
Adjust Supply Register Dampers — Walk through the house and look at the register grilles. Homeowners shut vents in unused rooms all the time, thinking it saves money. It doesn’t.
- Closing supply registers ramps up static duct pressure, increases leakage, and creates room-by-room pressure spikes.
- Reopen all closed branch registers at least 75% to get the air distribution back in line.
-
Verify Atmospheric Combustion Backdrafting — If your house tested negative in Step 1, you need to confirm that your naturally drafting gas water heater or gas furnace is venting the way it should.
- Turn on your kitchen vent hood and bathroom exhaust fans to mimic worst-case negative pressure.
- Run the hot water tap until the water heater burner lights.
- Hold a smoke pencil or extinguished match 1 inch away from the lip of the draft hood (the bell-shaped metal collar on top of the tank).
- The smoke has to get pulled smoothly up into the chimney flue within 60 seconds. If smoke spills into the room, your house is dangerously backdrafting carbon monoxide. Shut off the exhaust fans immediately and call a certified technician.
Common Causes
- Supply Duct Leaks in Unconditioned Spaces: When supply ducts tear or come apart in an attic or crawlspace, the HVAC unit dumps conditioned air outside. That pulls the living area into constant negative pressure and drags outdoor air in through every crack.
- Return Duct Leaks in the Attic: A disconnected return line pulls scorching 130°F attic air or moldy crawlspace air into the ductwork. The system then shoves too much volume into the house, creating severe positive pressure that forces indoor humidity deep into exterior wall insulation.
- Oversized Kitchen Vent Hoods Without Makeup Air: Modern commercial-style range hoods move 600 to 1,200 CFM. Run one in a tight house without a motorized makeup air damper and you’ll create an instant vacuum that backdrafts chimneys and water heaters.
- Closed Bedroom Doors Without Return Paths: Central air systems push air into bedrooms through supply vents. If the doors are shut and there aren’t transfer grilles or decent undercuts, the bedroom pressurizes while the hallway goes negative.
- Unbalanced Energy Recovery Ventilators (ERVs) or HRVs: If the fresh air intake filters on an ERV or HRV are filthy while the exhaust core stays clean, the unit will exhaust more air than it delivers, pulling the house into negative pressure.
Common Mistakes
- Closing Supply Registers in Unused Rooms: Folks think shutting vents trims the power bill. Usually, it just spikes duct pressure, drives up blower amperage, blows out seams, and throws the room pressures all over the place. Leave the supply grilles open.
- Relying on Duct Tape for Duct Repairs: Standard cloth-backed duct tape breaks down and gets brittle within 12 to 24 months in attic heat. Use only UL 181-rated foil tape or water-based mastic sealant with fiberglass mesh tape.
- Installing High-MERV Filters on Standard Blowers: Tossing a 1-inch MERV 13 or MERV 14 filter into an older HVAC cabinet can strangle airflow, cut air volume across the heat exchanger, and throw the system pressure off. Stick with MERV 8 unless an HVAC pro checks your static pressure budget.
- Ignoring the Kitchen Range Hood Makeup Air Code: Installing a range hood rated over 400 CFM without an interlocked motorized makeup air damper violates IRC Section M1503.6. It can create dangerous backdrafting in homes with standard gas water heaters.
- Sealing Windows While Ignoring Chimney Flues: Weatherstripping every door and window while leaving a drafty open fireplace damper can actually make backdrafting worse, pulling fireplace soot and cold drafts straight across the living room floor.
Cost & Time Breakdown
| Task | DIY Cost | Pro Cost | Time |
|---|---|---|---|
| Replace HVAC Filter & Clean Screen | $15–$35 | $90–$150 | 15–20 minutes |
| Trim Interior Door Undercuts (per door) | $0–$10 | $75–$125 | 30–45 minutes |
| Install Wall Transfer Grille | $30–$50 | $150–$250 | 45–60 minutes |
| Seal Leaking Duct Joints (Mastic & Mesh) | $25–$45 | $350–$800 | 2–4 hours |
| Install Attic Jump Duct (per room) | $60–$90 | $250–$450 | 1–2 hours |
| Motorized Range Hood Makeup Air System | $400–$700 | $1,200–$2,000 | 4–6 hours |
Tips & Prevention
- Monitor Static Pressure Annually: Have an HVAC tech take magnehelic gauge readings during the yearly tune-up. Total external static pressure shouldn’t exceed the rating on the air handler’s data plate (typically 0.50 inches of water column).
- Inspect Fresh Air Hoods Seasonally: Check the outside intake hoods every spring and autumn. Wash out bird screens, make sure rodent screens are intact, and vacuum away leaf debris.
- Upgrade to Low-Resistance High-Capacity Filters: Swap narrow 1-inch filter tracks for a 4-inch or 5-inch media filter cabinet. Deeper media gives you way more surface area, dropping airflow resistance by up to 50% while still catching finer dust.
- Keep Bedroom Doors Ajar When Practical: If your house doesn’t have dedicated return ducts in every room, keep interior doors propped open a few inches whenever you can so pressure stays more even across the floor plan.
- Install Low-Level Carbon Monoxide Detectors: Standard store-bought CO alarms don’t sound until levels hit 70 PPM. Install a low-level digital monitor that alerts you at 10 to 15 PPM so you catch combustion backdrafting before it turns into an emergency.
When to Call a Professional
If you notice exhaust fumes, soot marks around your water heater draft hood, or headaches when the kitchen fans run, stop tinkering and call a licensed HVAC contractor right away. Air balancing is exact work. Good techs use digital micro-manometers, capture hoods (flow hoods), and duct-blaster equipment to measure airflow down to individual CFM levels. If your ductwork needs major re-sizing, if the return plenums are undersized inside finished walls, or if you need an interlocked, motorized makeup air system wired into a high-CFM range hood, that’s not weekend-fix territory. It takes certified trade skills and local code compliance. Don’t gamble with combustion safety or hidden moisture damage.
Related Articles
Keep troubleshooting with these hand-picked guides from FixlyGuide:
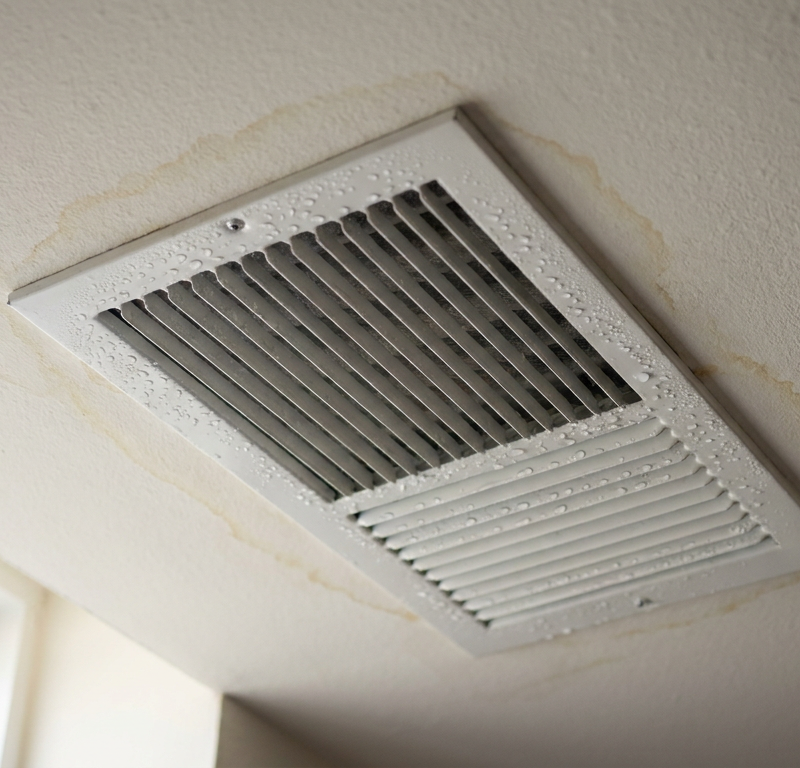
- Sweating AC Vents? 6 Causes and the Step-by-Step Fix for Dripping Grilles — Stop sweating HVAC vents and dripping ceiling registers by sealing boot air leaks with mastic, controlling indoor humidity, and restoring p…
- That August Chill: Why Your AC Freezes Up & How to Fix It — Is your air conditioner a block of ice in the middle of a heatwave? It seems counterintuitive, but an AC that freezes up is a common August…
- Why Your AC Is Blowing Warm Air (When It Was Fine Last Year) — Discover the surprising reasons your air conditioner might be blowing warm air even after a smooth season, and how you can troubleshoot and…
- The Mystery of the Vanishing Air: Why Your HVAC Stops Blowing After 10 Minutes — Discover the hidden culprits behind your HVAC system stopping short after just 10 minutes of operation and learn how to fix them yourself.
- The Shocking Truth: Your AC Freezing Outside Isn't What You Think — When your outdoor AC unit turns into an ice sculpture, it's a sure sign of air circulation problems, often caused by easily overlooked issu…
- The Hard Water Secret: Why Your Shower Head Sprays Sideways (and the 10-Minute Fix) — Hard water mineral buildup can reduce shower head pressure and cause erratic spray patterns. Learn how to restore flow and direction in und…
Should you do this yourself?
Answer five quick questions before you start. Safety outranks savings every time.
Your experience with work like this
How high do you have to work?
Does the job involve any of these?
Will it need a permit?
Specialty tools
Free and instant. Educational guidance only — not a quote, inspection, or professional diagnosis.
Estimate your own project cost
National averages are a starting point. Enter your details for a range that fits your house.
HVAC replacement cost
- Equipment$2,200 – $3,800
- Installation labor$1,200 – $2,500
Always insist on a Manual J load calculation — sq-ft sizing is only a rough check. Federal heat-pump rebates may reduce cost significantly.
Educational estimate only — always confirm with written local bids.
What should this project cost?
Enter your project details for a realistic cost range before you call anyone.
Service calls and common repairs run $150–$900; full system replacement typically $6,000–$12,000.
- Regional adjustment
- National average
- Labor share (typical)
- ~$1,935
- Quotes to collect
- 3 written estimates
Educational estimate based on national averages — not a binding quote. Always confirm with written local estimates.
Fixly Project Decision Box
- DIY difficulty
- Advanced
- Estimated time
- Homeowner checks 20–30 minutes
- Cost level
- Moderate
Main tools / materials
- Clean air filter
- Garden hose for condenser coils
- Shop vac for the condensate line
When to stop and call a pro
- Burning smell, smoke, or a tripping breaker
- Refrigerant lines iced over or hissing
- Any work inside the sealed refrigerant circuit (EPA-licensed only)
- Gas smell near a furnace — leave and call the utility
Need professional help?
Find an HVAC Pro Near YouGet the print-ready PDF of this guide
A clean, ad-free, printable version you can keep on your phone or pin to the workshop wall. Free with a FixlyGuide account.
- Print-optimized layout
- Tools, materials & every step included
- Saved to your account
Frequently asked questions
How do I know if my house has negative air pressure?},{answer:+
Negative pressure creates a vacuum effect. Look for interior doors that creep or slam shut on their own, heavy exterior doors that resist opening, whistling around window seals or electrical outlets, and exhaust odors or chimney smoke being pulled backward into your living area.
Discussion
Loading comments…