- Check Your Air Filter — The low-hanging fruit
- Tools: New air filter (correct size and MERV rating)
- Tip: Write the date on the new filter. Change it every 1-3 months, more often if you’ve got pets or allergies.
HVAC · High energy usage
| Project category | HVAC |
|---|---|
| Problem type | High energy usage |
| Trade required | HVAC |
| Urgency | Planned project |
| Safety risk | Low safety risk |
| DIY suitability | DIY for experienced homeowners |
| Cost category | High cost |
| Typical timeline | Assessment within weeks; replacement planned off-season |
| Contractor type | Licensed HVAC technician |
Repair option
Duct sealing, insulation, and a tune-up before touching the equipment.
Replacement option
High-efficiency replacement sized by a load calculation, not a rule of thumb.
Common causes
- Aging, low-efficiency equipment
- Leaking ducts losing conditioned air
- Insufficient attic insulation
- Oversized system short-cycling
Relevant tools:project cost estimatorrepair or replace
Published August 24, 2026Last updated August 24, 2026
Tools & materials you'll need
Affiliate linksAs an Amazon Associate FixlyGuide earns from qualifying purchases — at no extra cost to you. Prices and availability are accurate as of publication and subject to change.
Quick Answer
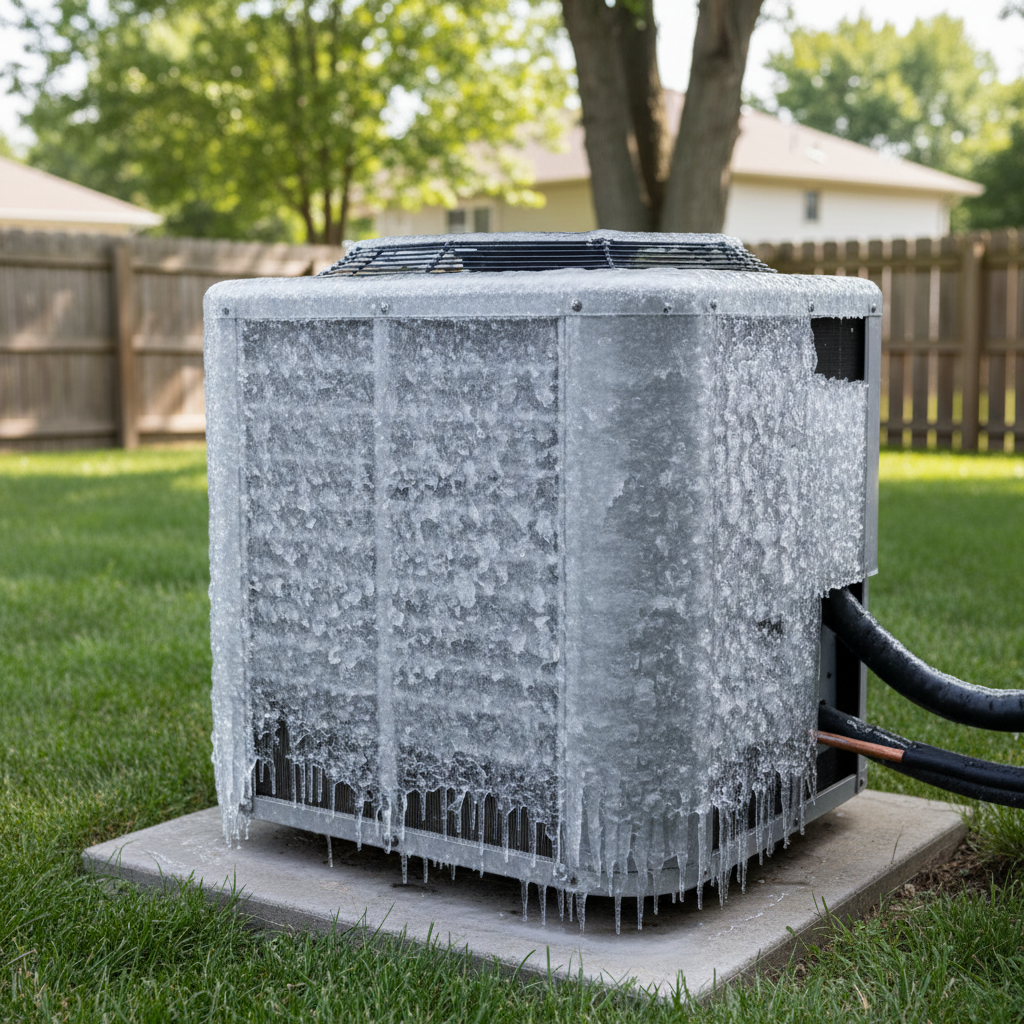
Your AC freezing up outside? Don’t panic, but don’t shrug it off either. That ice isn’t some harmless winter scene — it’s your unit waving a big red flag that something’s wrong with airflow or refrigerant flow. Nine times out of ten, I’m looking at a choked filter, dirty coils, or low refrigerant because there’s a leak somewhere. Catch it early and you’ll save yourself a pile of hassle and a whole lot of money.
The Problem
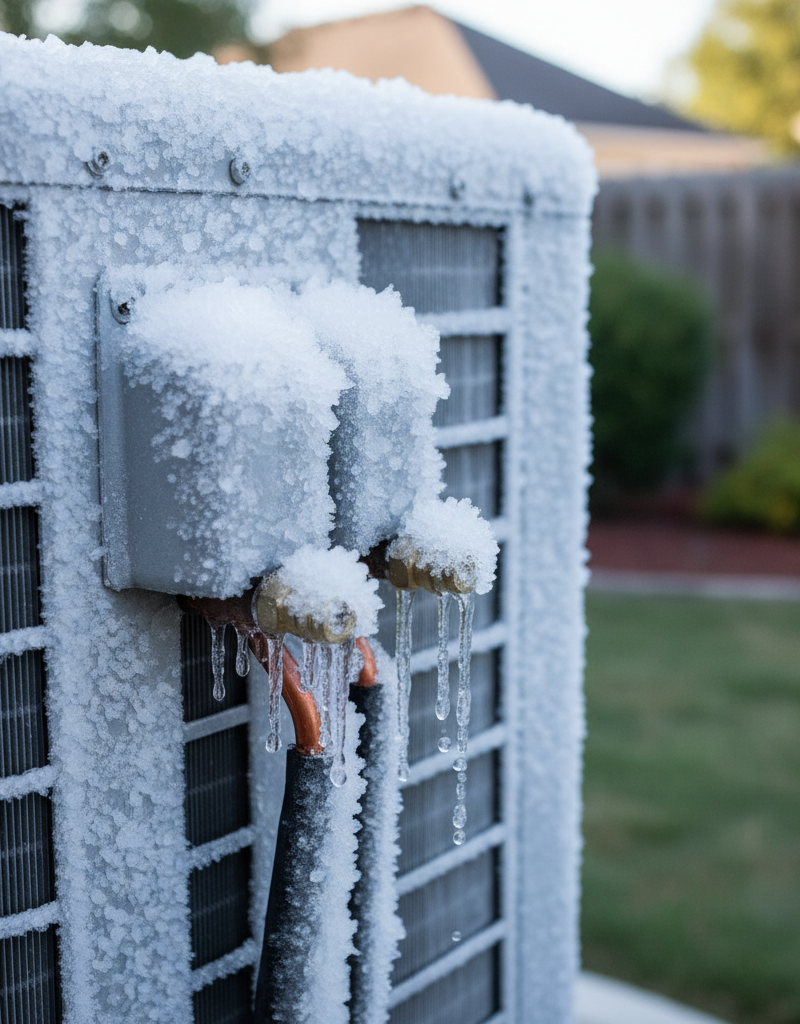
I’ve seen this one a hundred times: a homeowner calls and says, “My AC’s not cooling, and the outdoor unit’s covered in ice!” Yep, classic. That ice isn’t normal, not one bit. When your outdoor condenser unit, or even the indoor evaporator coil, starts looking like a glacier, the system’s telling you it can’t move heat the way it should. It’s supposed to pull heat out of your house and dump it outside. Simple enough. But once it freezes, that whole heat transfer job goes sideways. You get warm air inside, higher electric bills, and if you keep running it, you can turn a fixable problem into a pricey mess — sometimes even a full replacement. That thing’s screaming for attention.
How It Works
Alright, brass tacks. Your AC is basically a heat-moving machine. It’s got two main coils: one inside (the evaporator) and one outside (the condenser). Refrigerant — that special chemical blend — moves between them. Inside, it soaks up heat from your home’s air and changes from a liquid into a gas. For that to work right, it needs strong airflow across the indoor coil.
Then that hot gas gets pumped outside to the condenser coil. There, the outdoor fan blows air across the coil and dumps the heat outside. As the refrigerant releases that heat, it condenses back into a liquid and starts the cycle over again. That outdoor fan has to move a lot of air — often thousands of cubic feet per minute — or the heat can’t get out fast enough. If airflow gets restricted, or if refrigerant pressure drops because of a leak, the coil temperature can fall below 32°F, which is the freezing point of water. Once that happens, moisture on the coil turns to ice. Then the ice acts like insulation, and now you’ve got even worse airflow and even less heat transfer. Ugly loop. I pulled a water heater in Frisco last month where the homeowner ignored a similar “it’s just a little ice” situation on their AC — by the time I got there, the compressor was cooked. No dice.
Step-by-Step Fix
First things first: safety. You’re dealing with electricity and moving parts. Kill the power. Don’t get cute with that.
-
De-ice the Unit — Give it a thaw As soon as you spot ice, shut the AC off at the thermostat. If your system has a “Fan Only” setting, use that. If not, cut power at the breaker. You’ve got to let all that ice melt completely, and that can take anywhere from 2 to 24 hours depending on how much ice built up and what the weather’s doing outside. You can gently hose the outdoor coil down with a garden hose — never a pressure washer — to speed things along, but only if the power is OFF. I once had a guy in Maple Grove try to chip ice off with a screwdriver. Bad move. He cracked the coil and turned a small job into a much bigger repair.
-
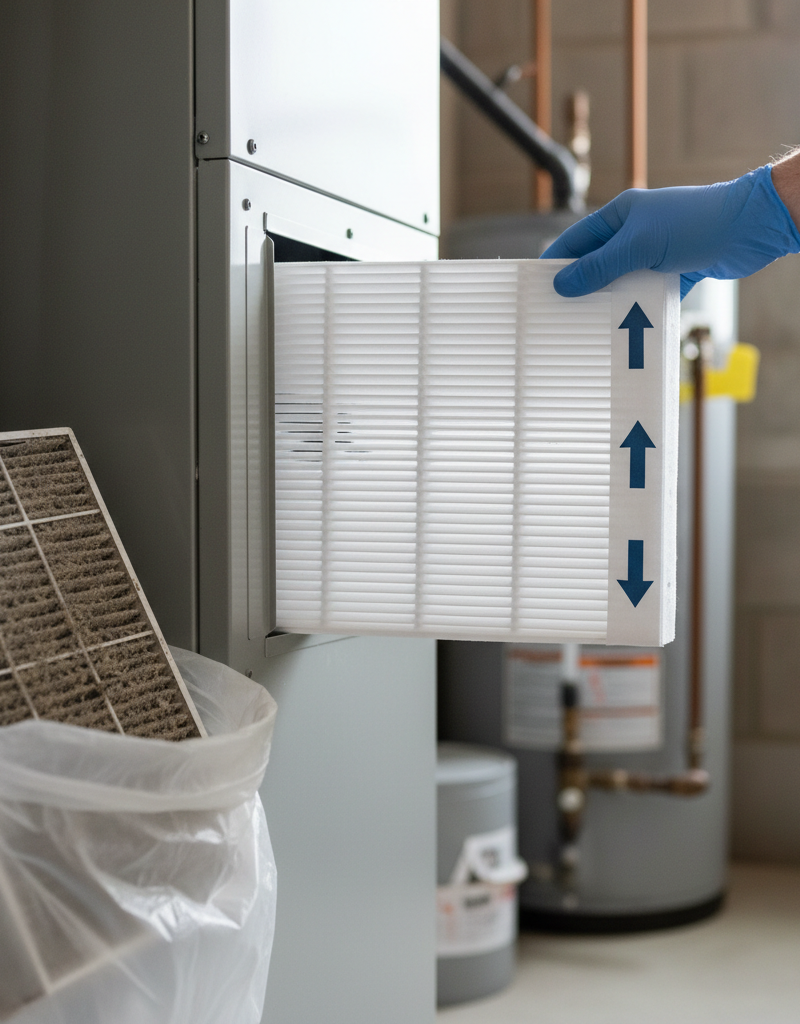
Check Your Air Filter — The low-hanging fruit Go inside and find the air filter. It’s usually in the return vent or inside the furnace or air handler. Pull it out and hold it up to a light. Can’t see through it? Then it’s clogged. A dirty filter strangles airflow to the indoor coil, and that’ll freeze a system faster than folks think. This is probably the most common culprit, and it’s one of the easiest fixes. Swap it with a clean one — check your owner’s manual for the right size, but most residential units use filters around 16x20x1 or 20x25x1 inches.
- Tools: New air filter (correct size and MERV rating)
- Tip: Write the date on the new filter. Change it every 1-3 months, more often if you’ve got pets or allergies.
-
Inspect Return and Supply Vents — Free up the breeze Walk through the house and make sure your return grilles and supply vents are open and not blocked by furniture, drapes, rugs, or a pile of junk somebody shoved in front of them. Your system has to pull air in and push air out freely. Even one half-closed vent can throw off static pressure and airflow, and that’s enough to cause trouble.
-
Clean Outdoor Condenser Coils — Brush off the grunge Once the ice is fully melted and the power is still off, take a look at the outdoor unit. Is it plastered with leaves, grass clippings, or cottonwood fluff? That mess insulates the coil and chokes airflow. Use a stiff brush or a coil fin comb to gently clean the fins. You can also spray the coils carefully from the inside out with a garden hose to flush debris away. Don’t mash the fins down.
- Tools: Stiff brush, garden hose, coil fin comb (optional)
- Safety: Wear gloves so you don’t get sliced up by sharp fins.
-
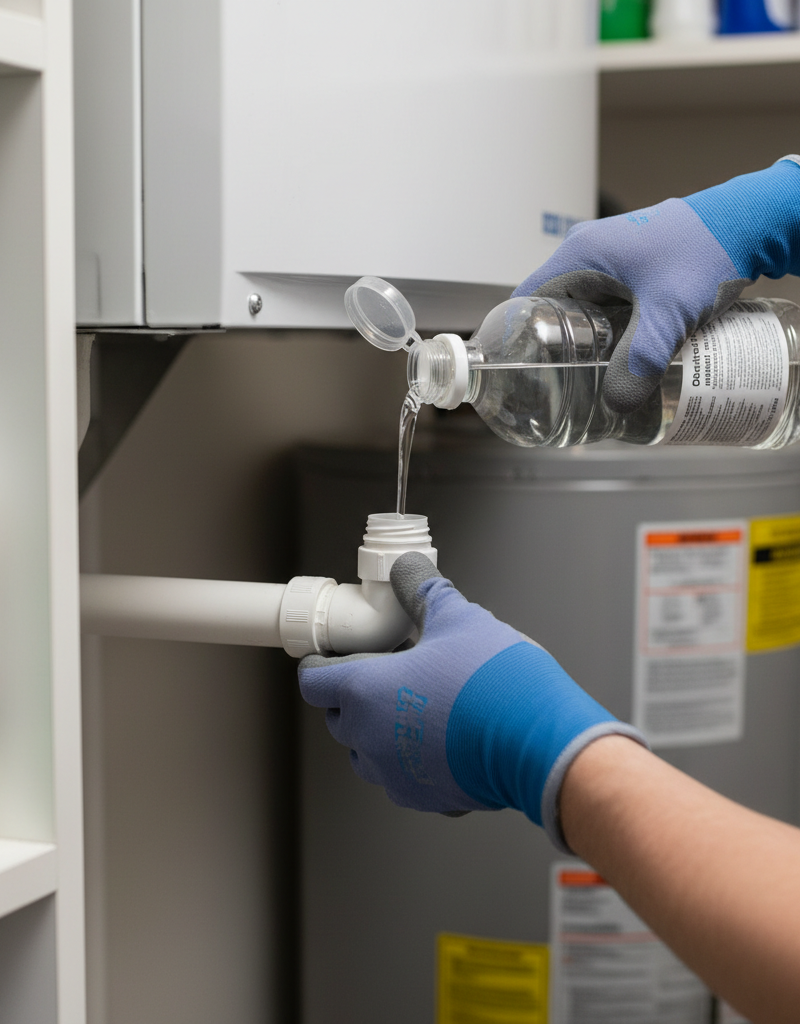
Check the Condensate Drain Line — Prevent water woes Your indoor evaporator coil makes condensation, and that water drains out through a PVC line, usually into a basement drain or outside. If that line gets clogged with algae or sludge, water can back up, freeze on the indoor coil, and eventually mess with the outdoor unit’s operation or trip a safety switch. Pour a cup of distilled vinegar down the access port of the drain line to knock out minor clogs. If it keeps coming back, you may need a shop vac to suck out the blockage.
-
Look for Refrigerant Leaks (Visual) — Spot the oily stains With the unit still off and cleaned up, inspect the refrigerant lines and outdoor coil. Look for oily residue. When refrigerant leaks, it often carries a bit of compressor oil with it, and that leaves a telltale stain. If you see that, you’ve probably found your problem, and that’s pro territory. Don’t try to top it off yourself — it’s illegal and it can damage the system.
-
Inspect Blower Motor (Indoor Unit) — Is the fan spinning strong? If your AC still freezes after you’ve handled the filters and coils, the indoor blower motor may be the culprit. That motor pushes air across the evaporator coil. If it’s weak, dirty, or failing, airflow drops and the coil starts icing up. You’ll usually hear it — maybe a squeal, maybe just a weak little draft from the vents. This takes electrical know-how; if you’re not comfortable, call a pro. If you are, shut the power off and check whether the fan blade is clean and spins freely. Sometimes the motor capacitor goes bad, and that’s a pretty cheap fix for a pro.
Common Causes
- Dirty Air Filter: This is the big one. A clogged filter cuts airflow over the indoor coil so hard that temperatures drop and ice forms. It’s like trying to breathe through a pillow.
- Low Refrigerant (Leak): If the system’s low on refrigerant, pressure drops and the evaporator coil gets way too cold. That’s always because of a leak, not because refrigerant “gets used up” like gas in a car.
- Blocked Condenser Coils (Outdoor Unit): Leaves, dirt, grass clippings, and other junk build up on the outdoor coils and stop proper heat exchange and airflow. Then the unit struggles, and freezing can follow.
- Obstructed Vents/Ductwork: Closed or blocked supply registers and return grilles mess with overall system airflow and create pressure problems that can lead to freezing.
- Malfunctioning Blower Motor/Fan: A weak or failing indoor blower motor can’t move enough air across the evaporator coil, so it gets too cold and freezes. Same story with a struggling outdoor fan motor.
- Dirty Evaporator Coil (Indoor Unit): Over time, the indoor coil can get caked with dirt and grime even if the filter looks fine. That cuts heat absorption and airflow.
Common Mistakes
- Ignoring the Ice: A lot of homeowners just let the unit run and hope it sorts itself out. It won’t. Running it while frozen can hammer the compressor and turn a small issue into a several-thousand-dollar headache.
- Adding Refrigerant Yourself: Refrigerant isn’t something you just top off. If you’re low, there’s a leak. Adding more without finding and fixing that leak is a temporary, illegal, and potentially dangerous patch that hides the real issue.
- Using a Pressure Washer on Coils: Those fins are delicate. A pressure washer can bend or flatten them in a hurry, which only makes airflow worse. A gentle garden hose is all you need.
- Neglecting Filter Changes: I can’t say this enough. A dirty filter is the #1 cause of poor AC performance and freezing. Swapping it every 1-3 months costs pennies compared to repair bills.
- Skipping Annual Maintenance: A pro tune-up can catch low refrigerant, dirty coils, and failing parts before they turn into a full freeze-up.
Cost & Time Breakdown
| Task | DIY cost | Pro cost | Time |
|---|---|---|---|
| De-ice unit | $0 | $0 (if self-done) | 2-24 hours |
| Replace air filter | $10-$40 | $10-$40 | 5 minutes |
| Clean outdoor coils | $0-$10 | $75-$150 | 30-60 minutes |
| Clean condensate drain | $0-$5 | $100-$250 | 15-30 minutes |
| Blower motor capacitor repl. | $15-$50 | $150-$350 | 30-60 minutes |
| Refrigerant leak detection/fix | N/A (pro only) | $400-$1500+ | 2-4 hours |
Tips & Prevention
- Regular Filter Changes: Seriously, mark your calendar. Write it on the filter. Change that bad boy every 30-90 days, or monthly if you’ve got pets or allergies. Cheapest insurance you’ll buy.
- Annual Professional Tune-Up: Book one every spring. A pro will clean the coils, check refrigerant levels, test electrical parts, and make sure the system’s running right. This usually runs around $75-$150 and can save you a world of grief.
- Keep Outdoor Unit Clear: Leave at least 2 feet of clearance around the condenser. Trim shrubs, rake leaves, and keep debris away all year. And don’t let snow bury it if you’re in a cold climate.
- Check Vents Monthly: Take a quick lap through the house and make sure supply and return vents are open and not blocked. Small habit, big payoff.
- Monitor for Warning Signs: Listen for weird noises, watch for weaker cooling, and keep an eye on your electric bill. Catching trouble early is the name of the game.
- Don't Oversize Your System: An AC that’s too big for the house cycles on and off too fast, which can lead to humidity problems and freezing. It’s gotta be sized right.
When to Call a Professional
You’ve done the basics — filters are clean, coils are cleared off, vents are open, and the ice has melted. But if the AC freezes up again, or if you suspect a refrigerant leak (those oily stains are a giveaway), it’s time to call a licensed HVAC technician. Refrigerant work is dangerous, illegal without proper certification, and it takes special tools to do safely. And if the blower motor is failing, the indoor coil is filthy, or the ductwork’s a mess, a pro’s got the gear and the know-how to sort it out the right way. Don’t fool around with electrical parts you don’t understand, especially the compressor. I tell my clients this all the time: if it’s more than changing a filter or washing off some leaves, don’t gamble with your equipment or your safety. Call in the cavalry. Your AC is a big investment, and you don’t want to turn a $300 repair into a $3000 replacement because you tried to play technician.
Related Articles
Keep troubleshooting with these hand-picked guides from FixlyGuide:
- The Hidden Reason Your AC Freezes — And Why Most Homeowners Get It Wrong — Your AC freezing isn't always due to low refrigerant; a clogged filter or dirty coil could be the surprising culprit.
- The Hidden Reason Your AC Freezes — And Why Most Homeowners Get It Wrong — Discover the surprising truth behind why your outdoor AC unit is freezing and learn the most common mistake homeowners make when trying to…
- The Hidden Reason Your AC Freezes — And Why Most Homeowners Get It Wrong — Discover the surprising truth behind why your outdoor AC unit freezes and how to fix it with simple steps.
- The Hidden Reason Your AC Freezes — And Why Most Homeowners Get It Wrong — Your outdoor AC unit freezing solid is a common, frustrating problem often caused by airflow issues or low refrigerant, leading to system i…
- The #1 Reason Your AC Freezes Solid (It's Not What You Think) — A frozen AC unit often points to poor airflow, which can be a simple fix if you know where to look.
- Why Your Toilet Clogs Every Few Days (And the #1 Mistake Homeowners Make) — A toilet that clogs frequently is a frustrating problem, often caused by easily overlooked issues like trapway obstructions or ventilation…
Should you do this yourself?
Answer five quick questions before you start. Safety outranks savings every time.
Your experience with work like this
How high do you have to work?
Does the job involve any of these?
Will it need a permit?
Specialty tools
Free and instant. Educational guidance only — not a quote, inspection, or professional diagnosis.
Estimate your own project cost
National averages are a starting point. Enter your details for a range that fits your house.
HVAC replacement cost
- Equipment$2,200 – $3,800
- Installation labor$1,200 – $2,500
Always insist on a Manual J load calculation — sq-ft sizing is only a rough check. Federal heat-pump rebates may reduce cost significantly.
Educational estimate only — always confirm with written local bids.
What should this project cost?
Enter your project details for a realistic cost range before you call anyone.
Service calls and common repairs run $150–$900; full system replacement typically $6,000–$12,000.
- Regional adjustment
- National average
- Labor share (typical)
- ~$1,935
- Quotes to collect
- 3 written estimates
Educational estimate based on national averages — not a binding quote. Always confirm with written local estimates.
Fixly Project Decision Box
- DIY difficulty
- Advanced
- Estimated time
- Homeowner checks 20–30 minutes
- Cost level
- Moderate
Main tools / materials
- Clean air filter
- Garden hose for condenser coils
- Shop vac for the condensate line
When to stop and call a pro
- Burning smell, smoke, or a tripping breaker
- Refrigerant lines iced over or hissing
- Any work inside the sealed refrigerant circuit (EPA-licensed only)
- Gas smell near a furnace — leave and call the utility
Need professional help?
Find an HVAC Pro Near YouBefore you start
Check the difficulty, permits, and safety risk — then decide whether to call a pro.
Free, no signup required. Estimates are educational guidance, not a quote or an inspection.
Get the print-ready PDF of this guide
A clean, ad-free, printable version you can keep on your phone or pin to the workshop wall. Free with a FixlyGuide account.
- Print-optimized layout
- Tools, materials & every step included
- Saved to your account
Frequently asked questions
How long does it take for AC to de-ice?+
It can take anywhere from 2 to 24 hours for your AC unit to completely de-ice after being turned off, depending on the amount of ice buildup and the ambient outdoor temperature. You can gently hose down the outdoor coil with a garden hose to speed up the process, but ensure the power is OFF first.
Can a dirty air filter cause AC to freeze?+
Absolutely, a dirty air filter is one of the most common culprits. A clogged filter severely restricts the airflow over your indoor evaporator coil, causing the refrigerant inside to get too cold and leading to ice formation on the coil. This blockage impacts the entire system.
What are the signs of low refrigerant?+
Common signs of low refrigerant include reduced cooling performance (your house isn't getting as cool), a hissing or bubbling sound from the refrigerant lines, and ice forming on the evaporator coil or the outdoor unit. You might also notice higher energy bills as the system struggles.
Is it bad to run AC when it's frozen?+
Yes, it's very bad to run your AC unit when it's frozen. Continuing to operate a frozen system puts immense strain on the compressor, which is the heart of your AC. This can lead to severe and expensive damage, potentially requiring a full compressor replacement or even a new unit.
How often should I clean my outdoor AC unit?+
You should aim to clean your outdoor condenser unit at least once a year, ideally in the spring before you start using your AC regularly. Keep the area around the unit clear of debris throughout the year, maintaining at least 2 feet of clearance.
Can I add refrigerant to my AC myself?+
No, you should never attempt to add refrigerant to your AC unit yourself. Refrigerant handling requires specialized tools and EPA certification. If your system is low on refrigerant, it means there's a leak that needs to be found and repaired by a licensed HVAC technician, not just topped off.
What's the normal operating temperature for AC coils?+
While refrigerant temperatures vary, the evaporator coil (indoor) typically operates around 40-45°F, and the condenser coil (outdoor) will be significantly warmer, dissipating heat. If the evaporator coil drops below 32°F, ice will begin to form.
How often should I change my AC filter?+
For most homeowners, changing your AC filter every 1 to 3 months is a good general guideline. If you have pets, allergies, or live in a dusty environment, you should consider changing it monthly to maintain optimal airflow and system efficiency.
Discussion
Loading comments…