- The 1 Reason Your AC Blows Warm Air (And It's Not What You Think) — Discover the most common and often overlooked reason your AC might be blowing warm air, and how a simple capacitor fix can restore cool air.
- The 1 Reason Your AC Blows Warm Air (And It's Not What You Think) — Before you panic, a surprisingly simple issue often causes your AC to blow warm air, leading to discomfort and higher energy bills.
- The 1 Reason Your AC Blows Warm Air (And It's Not What You Think) — A dirty air filter is often the overlooked culprit behind an air conditioner blowing warm air, hindering its ability to cool your home effi…
- The $0 Trick to Get Your AC Condenser Fan Spinning Again (Before Calling a Pro) — Before you spend money on a technician, a simple, often overlooked check can get your AC condenser fan spinning and cool air flowing.
- The Secret Reason Your AC Isn't Drying Your Air (And What to Check First) — Your AC should cool and dehumidify, but if your house feels muggy, there's a specific, often overlooked culprit preventing it from doing it…
HVAC · High energy usage
| Project category | HVAC |
|---|---|
| Problem type | High energy usage |
| Trade required | HVAC |
| Urgency | Planned project |
| Safety risk | Low safety risk |
| DIY suitability | DIY for experienced homeowners |
| Cost category | High cost |
| Typical timeline | Assessment within weeks; replacement planned off-season |
| Contractor type | Licensed HVAC technician |
Repair option
Duct sealing, insulation, and a tune-up before touching the equipment.
Replacement option
High-efficiency replacement sized by a load calculation, not a rule of thumb.
Common causes
- Aging, low-efficiency equipment
- Leaking ducts losing conditioned air
- Insufficient attic insulation
- Oversized system short-cycling
Relevant tools:project cost estimatorrepair or replace
Published July 28, 2026Last updated August 17, 2026
Tools & materials you'll need
Affiliate linksAs an Amazon Associate FixlyGuide earns from qualifying purchases — at no extra cost to you. Prices and availability are accurate as of publication and subject to change.
Quick Answer
If your AC’s blowing warm air and the indoor fan’s running, I wouldn’t jump straight to low refrigerant. Nine times out of ten, the culprit is a bad capacitor in the outdoor condenser. That little canister is basically the starter for your compressor and outside fan. If it quits, those parts won’t start, and all you’ll get inside is warm air moving around the house. It’s usually a pretty cheap fix and not a crazy hard one for a DIYer — but you’ve still got to respect the stored charge. That stuff’ll bite you if you get sloppy.
The Problem
You turn the thermostat down, the indoor unit kicks on, air’s coming out of the vents... but it isn’t cold. Sometimes it feels worse than the air outside. Then you go out back and the big fan on the condenser isn’t spinning, or you hear a hum and nothing else happens. That’s classic bad-capacitor behavior. I see it a lot here in Des Moines, especially on older systems that’ve taken a few brutal Iowa summers on the chin.
And no, it’s not just an annoyance. If you let it ride, it can wreck the whole system. When that capacitor goes south, the compressor and outdoor fan motor don’t get the jump they need to start up. The compressor may try to kick on, sit there buzzing, then trip a breaker or cook itself. Run an AC too long with a bad capacitor and you can wipe out the compressor — and now that $20 part has turned into a multi-thousand-dollar problem. I had a homeowner in Johnston try to baby one along for a week, and by the time I got there, the compressor was toast. That summer cost them nearly $3,500.
How It Works
Here’s what’s happening out in that condenser cabinet. You’ve basically got three main players: the compressor, the condenser fan motor, and the capacitor. The compressor is the heart of the system; it’s the pump that squeezes the refrigerant and sends it through the coils. The condenser fan motor pulls air across those hot coils so the system can dump heat outside. Both motors need a hard electrical shove to get moving from a dead stop. That’s where the capacitor earns its keep.
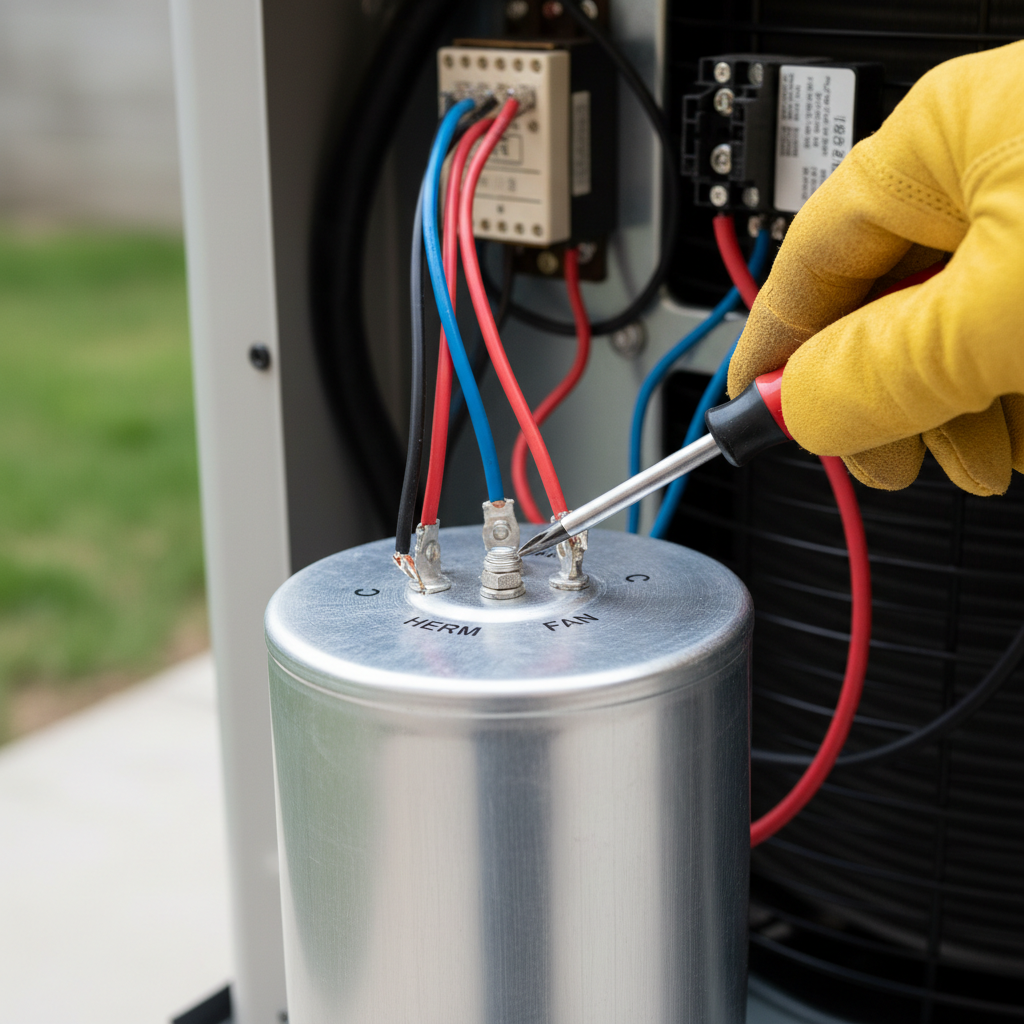
Think of a capacitor like a tiny burst tank for electricity. It stores a charge and dumps it all at once to give those motors the kick they need to start. Without that boost, the motors can’t break free from inertia. They just hum, draw way too much current, and start heating up fast. Most residential units use a dual-run capacitor, so one part handles both the compressor, through the HERM terminal, and the fan motor, through the FAN terminal. There’s also a common connection, the C terminal, for incoming power. Simple part. Big job.
Heat, voltage spikes, and plain old age wear these things out over time. They bulge. They leak. Sometimes they just get weak and won’t hold a charge anymore. Then your AC quits cooling even though the inside parts still sound like they’re running. Once you understand that little power boost function, troubleshooting gets a whole lot easier.
Step-by-Step Fix
This one’s DIY-friendly, but it deals with high voltage. ALWAYS shut the power off first, and act like every wire is live until you’ve proven otherwise. I’ve been shocked twice in my career because I got careless for just a second. Don’t do that dance.
-
Safety First – Kill the Power — Find the outdoor disconnect switch and pull it. You’ll usually see a gray box mounted near the condenser. Open it and pull out the disconnect block with the fuses — it often looks like a chunky plug. If there’s no disconnect, head to your main panel and flip off the breaker labeled for the AC. Then make sure the thermostat inside is set to OFF too. This isn’t a maybe. You’re dealing with 240 volts, and that’ll ruin your day in a hurry.
-
Access the Capacitor — Remove the service panel on the outdoor unit. Most of the time, there’s a small sheet metal panel on the side of the condenser held on with a few 1/4-inch or 5/16-inch hex-head screws. Use a nut driver or socket wrench and take them out carefully. Put the screws and panel somewhere safe so they don’t walk off on you.
-
Locate the Capacitor — Identify the often-cylindrical component. Once you’re in there, you’ll see the contactor, maybe a fan relay, and usually one or two silver cylinders. Those are the capacitors. The main run capacitor is usually the bigger one, something like 2-3 inches in diameter and 4-6 inches tall, with three terminals on top:
HERM,FAN, andC. -
Discharge the Capacitor Safely — This is crucial for preventing a shock. Even with the power off, that capacitor can still hold a nasty charge. Use a screwdriver with an insulated handle. Touch the metal shaft to the
HERMandCterminals at the same time. You might hear a pop or see a little spark — that’s the charge letting go. Do it again fromFANtoC. For good measure, hitHERMtoFANtoo. Do not use your fingers! -
Note Wiring and Disconnect — Take a photo, then carefully remove wires. Before you pull a single wire, snap a clear picture with your phone. That photo’s your road map. Then use needle-nose pliers or insulated terminal pullers and pull each wire straight off the terminal. Don’t yank on the wire itself. Make note of which color wire was on
HERM,FAN, andC. Sometimes they’re labeled clean as day; sometimes you’ve got to lean on the photo and wire colors to sort it out. -
Read the Old Capacitor's Specs — Find the MFD and voltage ratings. On the side of the old capacitor, you’ll see ratings like
Related Articles
Keep troubleshooting with these hand-picked guides from FixlyGuide:
- The #1 Reason Your AC Blows Warm Air (And It's Not What You Think) — Discover the most common and often overlooked reason your AC might be blowing warm air, and how a simple capacitor fix can restore cool air.
- The #1 Reason Your AC Blows Warm Air (And It's Not What You Think) — Before you panic, a surprisingly simple issue often causes your AC to blow warm air, leading to discomfort and higher energy bills.
- The #1 Reason Your AC Blows Warm Air (And It's Not What You Think) — A dirty air filter is often the overlooked culprit behind an air conditioner blowing warm air, hindering its ability to cool your home effi…
- The $0 Trick to Get Your AC Condenser Fan Spinning Again (Before Calling a Pro) — Before you spend money on a technician, a simple, often overlooked check can get your AC condenser fan spinning and cool air flowing.
- The Secret Reason Your AC Isn't Drying Your Air (And What to Check First) — Your AC should cool and dehumidify, but if your house feels muggy, there's a specific, often overlooked culprit preventing it from doing it…
- The Hidden Reason Your AC Isn't Cooling (And Why Most Homeowners Get It Wrong) — Is your central AC blowing warm air or struggling to cool your home? The culprit is often a silent but serious issue many homeowners overlo…
Should you do this yourself?
Answer five quick questions before you start. Safety outranks savings every time.
Your experience with work like this
How high do you have to work?
Does the job involve any of these?
Will it need a permit?
Specialty tools
Free and instant. Educational guidance only — not a quote, inspection, or professional diagnosis.
Estimate your own project cost
National averages are a starting point. Enter your details for a range that fits your house.
HVAC replacement cost
- Equipment$2,200 – $3,800
- Installation labor$1,200 – $2,500
Always insist on a Manual J load calculation — sq-ft sizing is only a rough check. Federal heat-pump rebates may reduce cost significantly.
Educational estimate only — always confirm with written local bids.
What should this project cost?
Enter your project details for a realistic cost range before you call anyone.
Service calls and common repairs run $150–$900; full system replacement typically $6,000–$12,000.
- Regional adjustment
- National average
- Labor share (typical)
- ~$1,935
- Quotes to collect
- 3 written estimates
Educational estimate based on national averages — not a binding quote. Always confirm with written local estimates.
Fixly Project Decision Box
- DIY difficulty
- Advanced
- Estimated time
- Homeowner checks 20–30 minutes
- Cost level
- Moderate
Main tools / materials
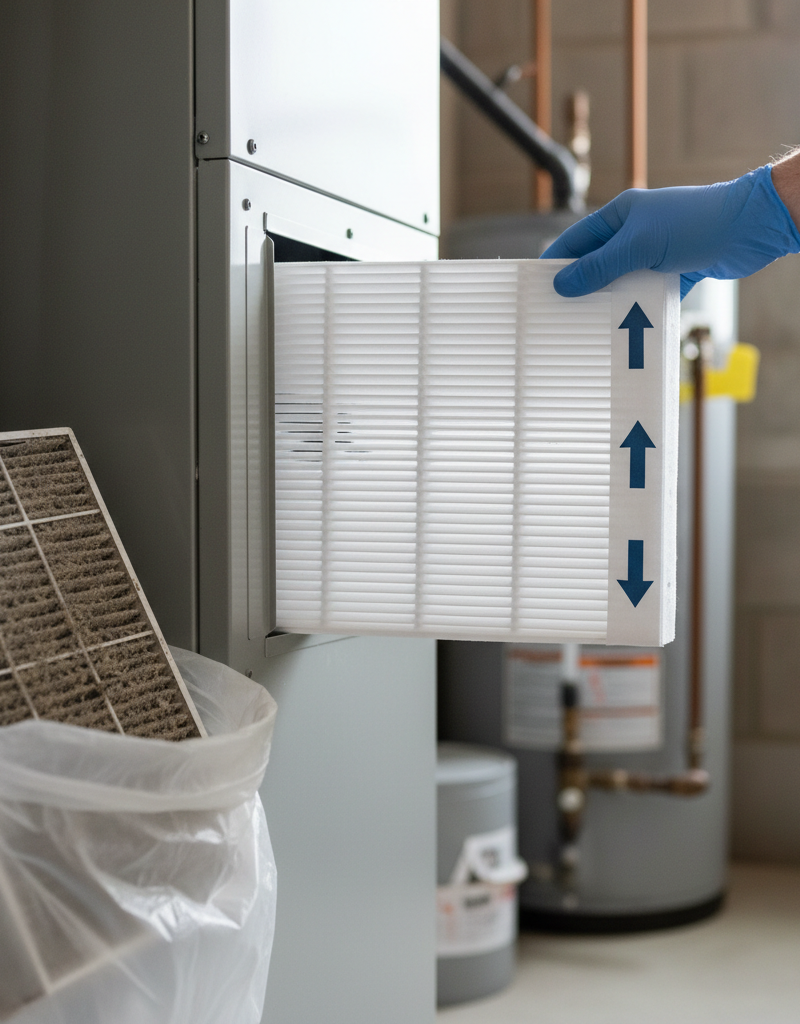
- Clean air filter
- Garden hose for condenser coils
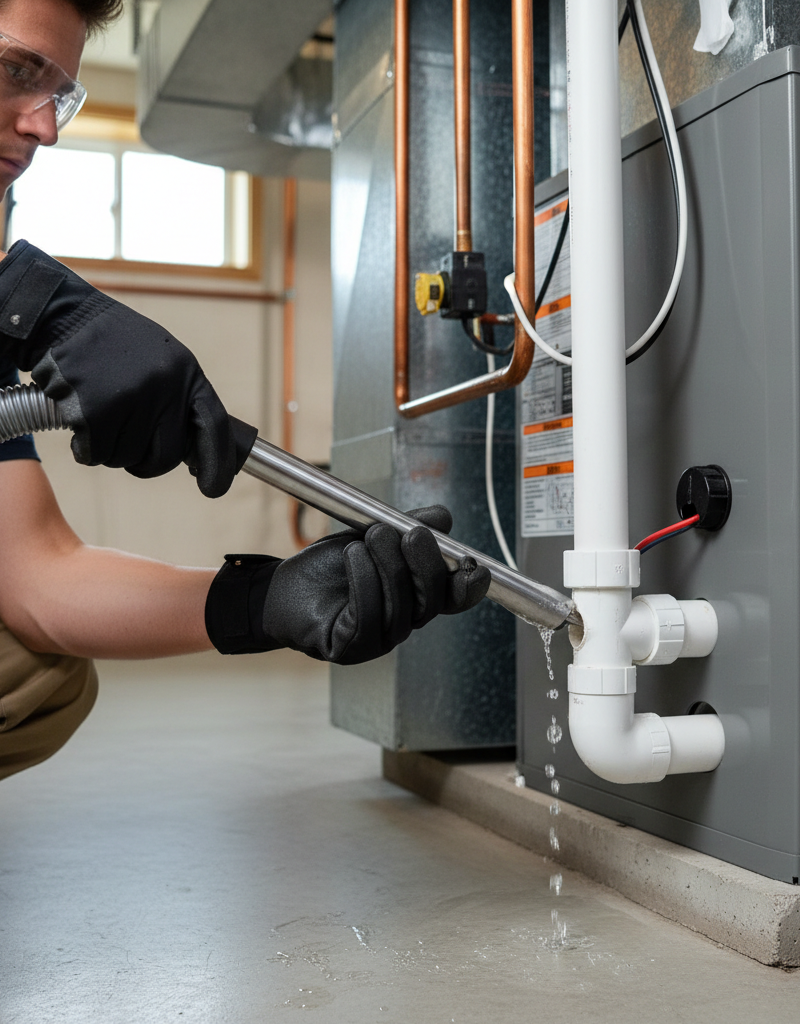
- Shop vac for the condensate line
When to stop and call a pro
- Burning smell, smoke, or a tripping breaker
- Refrigerant lines iced over or hissing
- Any work inside the sealed refrigerant circuit (EPA-licensed only)
- Gas smell near a furnace — leave and call the utility
Need professional help?
Find an HVAC Pro Near YouBefore you start
Check the difficulty, permits, and safety risk — then decide whether to call a pro.
Free, no signup required. Estimates are educational guidance, not a quote or an inspection.
Get the print-ready PDF of this guide
A clean, ad-free, printable version you can keep on your phone or pin to the workshop wall. Free with a FixlyGuide account.
- Print-optimized layout
- Tools, materials & every step included
- Saved to your account
Frequently asked questions
How do I know if my AC capacitor is bad?+
The most common signs are your outdoor unit's fan or compressor not starting, even though the indoor unit is running, or a loud humming noise from the outdoor unit. Sometimes, the capacitor itself will look bulged or have fluid leaking from the top.
Can I replace an AC capacitor myself?+
Yes, if you're comfortable with basic electrical work and always follow safety procedures to disconnect power and discharge the capacitor. It's a relatively straightforward repair that can save you a service call fee.
What tools do I need to replace an AC capacitor?+
You'll need a screwdriver (insulated handle preferred), needle-nose pliers, a nut driver or socket wrench for the access panel, and potentially a multimeter with a capacitance setting to test the old part.
Is it dangerous to replace an AC capacitor?+
It can be, as capacitors store a lethal electrical charge even after the power is off. Always ensure the power is disconnected at the breaker and, critically, discharge the capacitor using an insulated-handle screwdriver before touching any terminals. Wear electrical safety gloves if you have them.
How long does an AC capacitor usually last?+
AC capacitors typically last between 5-10 years, though some can fail sooner due to heat, voltage spikes, or manufacturing defects. It's a common failure point in an older AC system.
What does a capacitor do in an AC unit?+
A capacitor acts like a temporary battery, storing an electrical charge and releasing it instantly to give the compressor and fan motors the powerful surge they need to start spinning from a standstill. Without it, these motors just hum.
Can a bad capacitor damage other AC components?+
Yes, if the capacitor is faulty and the compressor or fan motor repeatedly try to start without success, they can overheat and eventually burn out. This can turn a cheap capacitor replacement into a very expensive compressor or outdoor unit replacement.
Where can I buy a new AC capacitor?+
You can find replacement capacitors at local HVAC supply stores, some larger hardware stores (like Lowe's or Home Depot), or online retailers. Make sure to match the MFD and voltage ratings exactly to your old capacitor.
My AC is still blowing warm air after replacing the capacitor. What now?+
If replacing the capacitor didn't fix it, the problem is likely more serious. It could be low refrigerant, a bad contactor, a failed fan motor, a refrigerant leak, or a faulty compressor. At this point, I'd strongly recommend calling a licensed HVAC professional for a diagnostic.
Why didn't my new capacitor fix the problem?+
There are a few reasons a new capacitor might not resolve the *warm air* issue. First, ensure you installed the correct MFD and voltage. If it's correct, the issue might lie elsewhere: a seized fan motor, a fried compressor, or a serious refrigerant leak. Sometimes, a contactor can also fail, preventing power from reaching the capacitor and motors. This is when the job moves from a simple swap to needing a pro's diagnostic tools and expertise.
Discussion
Loading comments…