- Smoking Indoors: Smoke leaves behind sticky residue and fine particles that coat a filter fast. It cuts efficiency and can leave that stale smell hanging around.
- High Occupancy: More people means more dust, more skin flakes, more foot traffic, more everything. A house with five kids is gonna generate a lot more filter-clogging junk than a one-person apartment.
- Infrequent Cleaning: If you’re not dusting, vacuuming, and keeping up with the basics, more debris ends up in the system. Simple as that.
HVAC · High energy usage
| Project category | HVAC |
|---|---|
| Problem type | High energy usage |
| Trade required | HVAC |
| Urgency | Planned project |
| Safety risk | Low safety risk |
| DIY suitability | DIY for experienced homeowners |
| Cost category | High cost |
| Typical timeline | Assessment within weeks; replacement planned off-season |
| Contractor type | Licensed HVAC technician |
Repair option
Duct sealing, insulation, and a tune-up before touching the equipment.
Replacement option
High-efficiency replacement sized by a load calculation, not a rule of thumb.
Common causes
- Aging, low-efficiency equipment
- Leaking ducts losing conditioned air
- Insufficient attic insulation
- Oversized system short-cycling
Relevant tools:project cost estimatorrepair or replace
Published August 19, 2026Last updated August 19, 2026
Tools & materials you'll need
Affiliate linksAs an Amazon Associate FixlyGuide earns from qualifying purchases — at no extra cost to you. Prices and availability are accurate as of publication and subject to change.
Quick Answer
Most homeowners ought to swap out their HVAC filter every 30 to 90 days. But that’s just the baseline. If you’ve got pets shedding all over the place, someone in the house has allergies, or there’s a remodel kicking up dust nearby, you’ll probably be changing it a lot sooner. A clogged filter chokes off airflow, plain and simple, and then your system starts working overtime and your bills climb. Small job. Big payoff. Better comfort, less wear, and fewer headaches.
The Problem
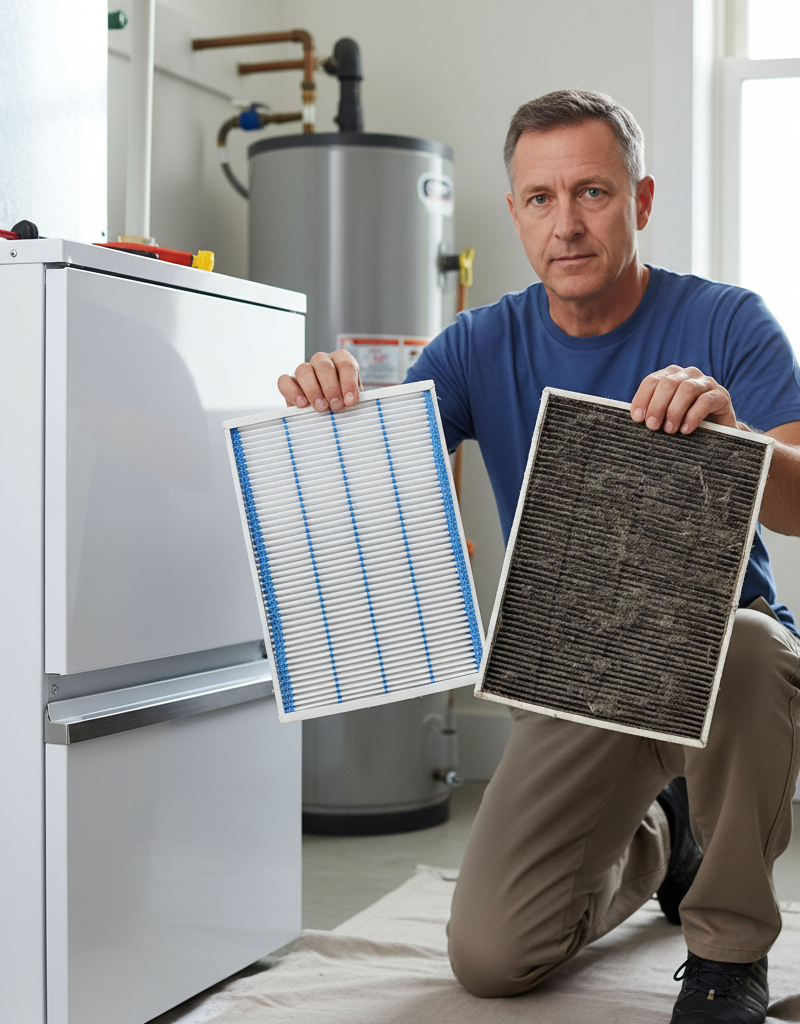
I can’t tell you how many times I’ve walked into a house where the homeowner’s complaining about high energy bills, lousy airflow, or the AC just not keeping up. My first question? “When’s the last time you checked that air filter?” Nine times out of ten, I get a blank stare or some version of “uhh, a few months ago?” Then I pull the filter out and, no kidding, it’s packed solid with dust, pet hair, and whatever else the house has been chewing on. That thing’s toast.
Your HVAC system’s the lungs of the house, and that filter is the mask. If it’s plugged up, the system can’t breathe, and neither can you — not efficiently anyway. It’s one of those tiny chores that ends up costing folks a fortune in electricity and, if you keep ignoring it, can lead to bigger repairs down the road. I pulled a blower motor job in Frisco last month that started with nothing more than a neglected filter. Trust me, you don’t want to be replacing a compressor because you skipped a $15 filter.
How It Works
Alright, here’s how this air filtration setup actually works. Your heating and cooling system, whether it’s a furnace, air conditioner, or heat pump, uses a fan to pull air from your home through a return duct. Before that air hits the fan, gets conditioned, and gets shoved back out into your rooms, it passes through that little filter.
That filter’s job is dead simple: trap the junk you don’t want in your air. Dust, pollen, pet dander, mold spores, all that crud. The filter’s ability to catch those particles is measured by its MERV rating (Minimum Efficiency Reporting Value). Higher MERV means a finer filter, which catches smaller particles. In most homes, you’ll see MERV ratings from 5 to 13. A MERV 8 filter is a solid all-around choice — decent filtration, still lets air move like it should. Go too high, like a MERV 16, and you can strangle airflow on older systems and maybe damage them. I’ve seen that movie before. Always check the system manual for the recommended MERV range.
As air moves through, particles get caught in the filter fibers. Bit by bit, that buildup starts blocking the open spaces in the filter. Now you’ve got resistance. Air can’t move as easily. Think about trying to breathe through a thick scarf — that’s what your HVAC system feels like with a dirty filter. The fan has to work harder to pull the same amount of air, which means more electricity. And when airflow drops too much, your coils can freeze in the summer or your furnace can overheat in the winter. One dirty filter can snowball into a bunch of problems fast.
Step-by-Step Fix
Changing an HVAC filter isn’t rocket science, but there is a right way to do it. Follow these steps and you’ll save yourself some money and a few headaches.
-
Turn Off the Power — Don’t skip this.
- Before you touch anything, go to your thermostat and shut the system off. Better yet, hit the breaker for the furnace or air handler. You don’t want that fan kicking on while your hands are in the cabinet. Bad timing. Bad idea.
-
Locate the Filter Slot — It’s usually not hard to find.
- Your filter will be in one of two places: in a dedicated slot on the return air duct, usually near the indoor unit, or right inside the return vent in a wall or ceiling. Look for a rectangular slot or a grille that opens up. Sometimes there’s an arrow stamped on the housing showing airflow direction.
-
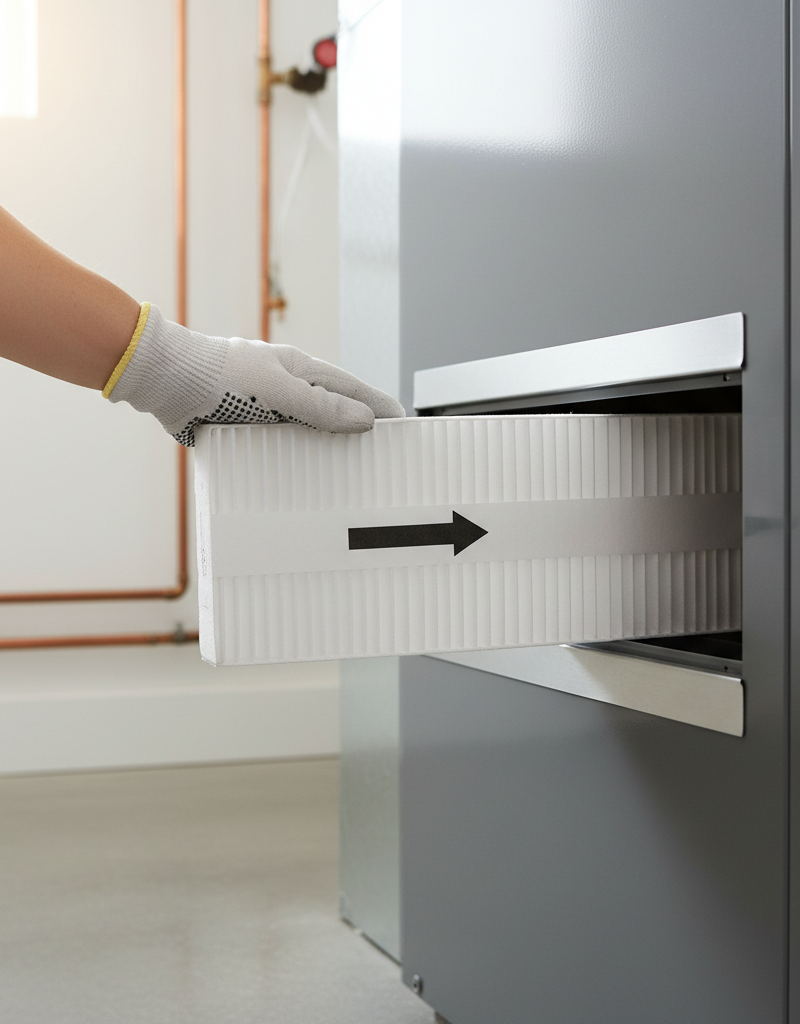
Note the Airflow Direction — Don’t put it in backward.
- Every filter has an arrow on the frame. That arrow tells you which way the air moves. Pull the old one out, take a quick look, maybe snap a phone pic if you’re not sure. The new one goes in the same way, arrow pointing toward the furnace or air handler.
-
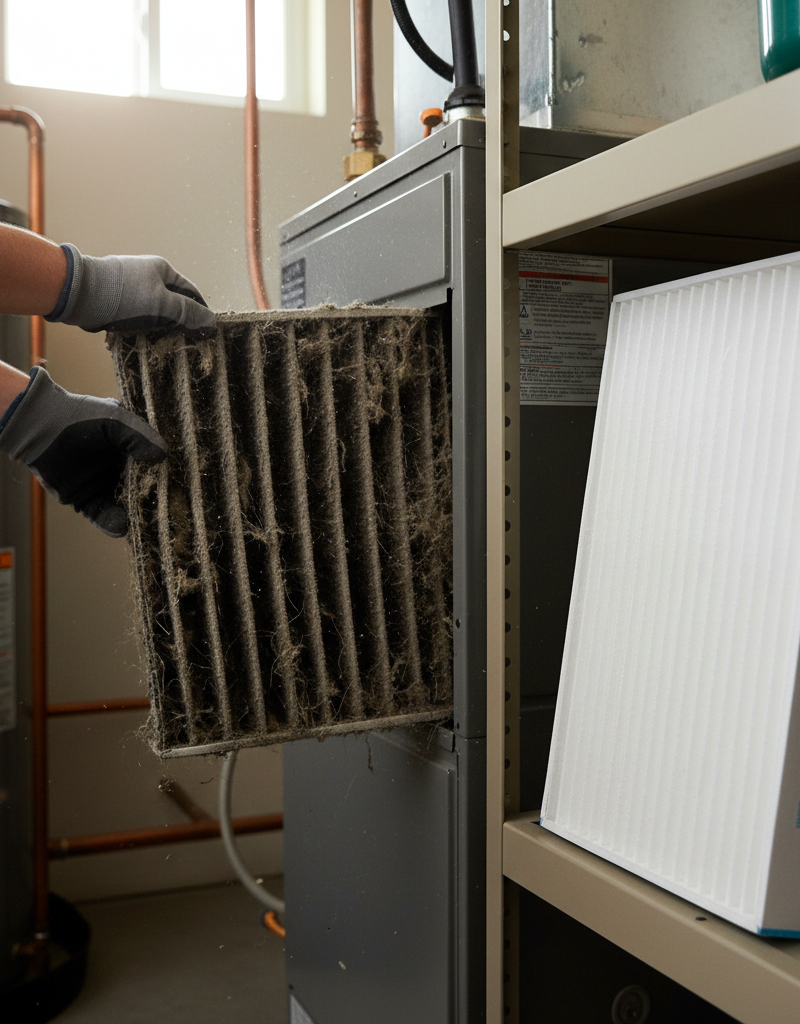
Remove the Old Filter — Pull it out carefully.
- Slide the old filter out once you’ve found the slot. It might be filthy, so have a trash bag ready and drop it straight in. Take a second and look at all the junk it caught — that’s the stuff that wasn’t floating around in your house anymore.
-
Clean the Filter Area (Optional but Recommended) — Quick wipe, big help.
- While the filter’s out, use a damp cloth or a vacuum with a brush attachment to clean around the housing. Dust and bits collect there, and some of it can get sucked right into the system if you leave it alone. Takes maybe 30 seconds. Worth it.
-
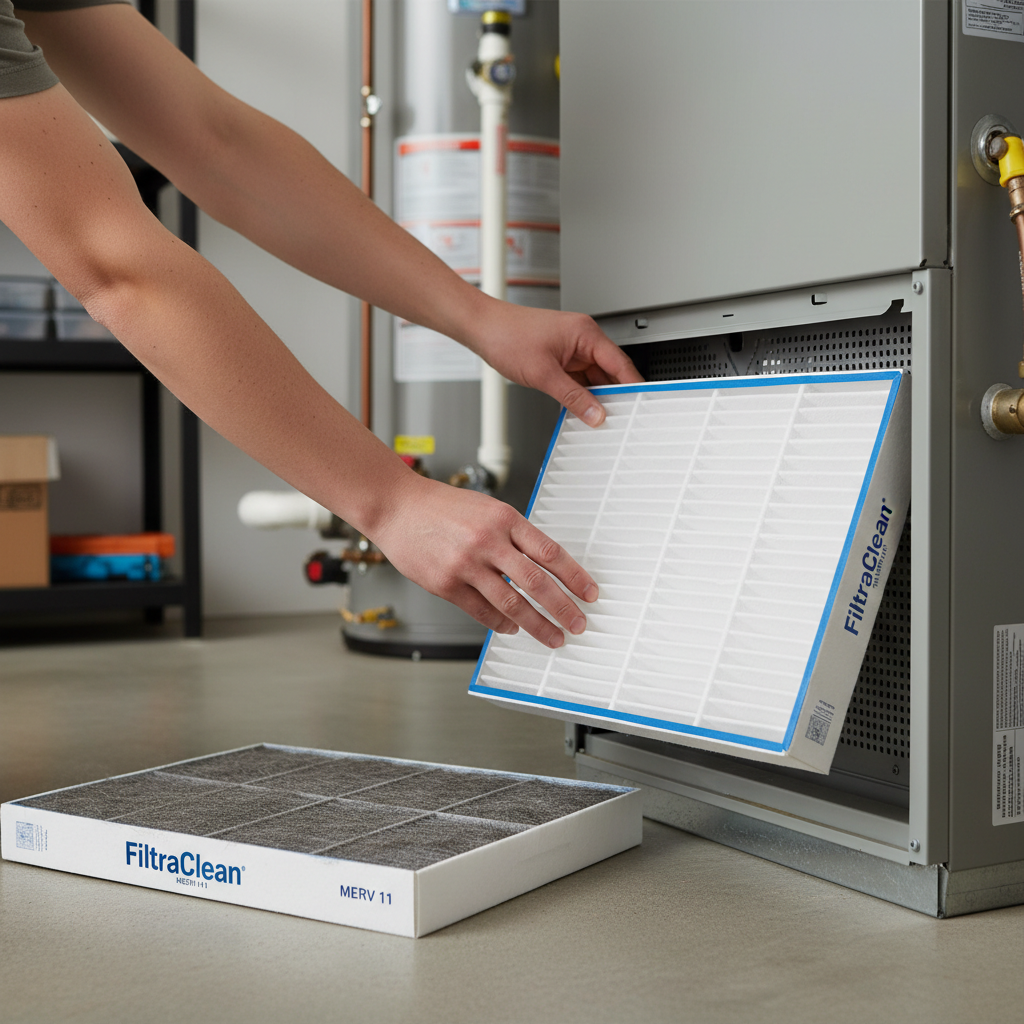
Insert the New Filter — Watch that arrow.
- Unwrap the new filter and check the size. It should match the old one exactly. Most residential filters are 1-inch thick, but some systems use 2-inch or 4-inch filters. Make sure the airflow arrow points the right way — toward the furnace or air handler — and slide it into the slot until it seats fully. No gaps. No wobble.
-
Restore Power — Bring it back online.
- Close the filter slot or grille if it has one. Head back to the breaker and flip it on. Then reset your thermostat to whatever you want — Heat, Cool, or Auto — and set the temperature. Listen for the fan and feel the vents. You should be good to go.
-
Set a Reminder — So you’re not guessing later.
- This one matters. Mark the calendar, set a recurring phone reminder, or write the install date on the filter frame with a marker. I tell my clients in Milford to just set a reminder every 60 days. Makes life easier. No thinking required.
Common Causes
What makes a filter clog up faster? Usually it’s pretty easy to figure out once you look around the house. Here’s the usual lineup:
- Pets, Especially Shedders: Dogs and cats, bless ’em, send out a ton of hair and dander. That stuff goes airborne and heads straight for the filter. Got a Golden Retriever or a Maine Coon? You’ll be changing filters more often than the guy next door with a goldfish.
- Allergies or Respiratory Issues: If someone in the house has bad allergies or asthma, you’re probably running a higher MERV filter to clean the air up. That’s great for breathing, but it also means the filter loads up faster. Trade-off, plain and simple.
- Construction or Renovation: Dust is brutal. DIY project in your own place, or new construction down the street — those fine particles find their way into your HVAC before you know it. I remember a kitchen remodel in Westborough a few years back; the homeowner was swapping filters weekly because the drywall dust was unreal.
- Smoking Indoors: Smoke leaves behind sticky residue and fine particles that coat a filter fast. It cuts efficiency and can leave that stale smell hanging around.
- High Occupancy: More people means more dust, more skin flakes, more foot traffic, more everything. A house with five kids is gonna generate a lot more filter-clogging junk than a one-person apartment.
- Infrequent Cleaning: If you’re not dusting, vacuuming, and keeping up with the basics, more debris ends up in the system. Simple as that.
Common Mistakes
I’ve seen some real head-scratchers with HVAC filters. Here are the screw-ups homeowners make most often, and how to dodge ’em:
- Ignoring the Filter Entirely: This is the big one. Some folks forget it exists until the system starts acting up or the electric bill goes sideways. Set the reminder. Seriously. It’s one of the easiest maintenance jobs you’ve got.
- Putting the Filter in Backwards: That airflow arrow matters. Put it in wrong and the filter won’t do its job right — and yeah, it can add strain too. Always check the arrow before you slide it in.
- Using the Wrong Size Filter: Too small and you get gaps where air and dust can bypass the filter. Too big and it won’t fit. Use the exact size the unit calls for. The dimensions are printed on the old frame.
- Choosing Too High a MERV Rating: Higher sounds better, but filters rated 14+ are often too restrictive for standard residential systems. They can cut airflow, make the unit work harder, and even hurt the fan motor or coils. Stick with what the manual says, usually MERV 8-11 for most homes.
- Trying to Clean a Disposable Filter: Most home filters are meant to be tossed and replaced. Vacuuming or washing them just beats up the filter media and makes them lousy at catching dust. They’re cheap enough to replace.
- Not Checking During Extreme Weather: When the system’s running nonstop — brutal summer heat or deep winter cold — the filter clogs faster. Don’t wait for your usual schedule. Check it more often when the equipment’s working hard.
Cost & Time Breakdown
Let’s talk brass tacks about what this little job costs in time and money.
| Task | DIY Cost | Pro Cost | Time |
|---|---|---|---|
| Filter Replacement | $10 – $30 per filter | $75 – $150 (as part of a service call) | 5 – 10 minutes |
| Annual DIY Filters (4x) | $40 – $120 | N/A | ~30 minutes |
| Annual Pro HVAC Tune-up | N/A | $150 – $300 (includes filter check/replacement) | 1 hour |
| Reduced Energy Bills | Save 5-15% | Save 5-15% | Ongoing |
| System Lifespan Extension | Potentially years | Potentially years | N/A |
As you can see, the DIY cost is pretty small, and the time it takes is nothing to brag about. You’ll spend way more over time in higher energy bills if you keep running a dirty filter than you ever would just replacing it on schedule.
Tips & Prevention
Want to keep your HVAC running smooth and your air cleaner? Here are a few habits I’ve picked up over the years:
- Check Monthly, Change as Needed: Even if the box says “90-day,” pull the filter and look at it every month. Hold it up to a light — if you can’t see through it, it’s time. Better to catch it early than wait for the system to complain.
- Buy Filters in Bulk: If you know your size, grab a 4-pack or 6-pack online or at the local home store. Usually cheaper per filter, and you won’t be caught flat-footed later. Handy little trick.
- Consider a Higher MERV (Carefully!): If allergies are a real issue, try stepping up to a MERV 11 filter, if your system can handle it, instead of jumping straight to the highest number on the shelf. Watch airflow and energy use as you go.
- Keep Your Home Clean: Vacuum often with a HEPA filter, dust surfaces, mop floors. Less mess in the house means less mess in the filter. Simple math.
- Seal Leaky Ducts: Leaky ductwork can suck unfiltered air from attics, crawlspaces, and wall cavities right into the system. Seal those leaks with mastic or foil tape and your filter won’t have to work as hard. [Here
Related Articles
Keep troubleshooting with these hand-picked guides from FixlyGuide:
- The #1 HVAC Mistake Costing You Money (And 3 Ways to Fix It) — Your HVAC filter is vital for air quality and system efficiency. Learn how often to change it to avoid costly repairs and high energy bills.
- The #1 Mistake Homeowners Make With HVAC Filters (And How Often to Really Change Them) — Discover the crucial mistake most homeowners make with HVAC filters and the specific schedule you should follow to avoid costly HVAC issues…
- The #1 HVAC Mistake Costing You Money (And 3 Ways to Fix It) — Discover the crucial reasons why your HVAC filter needs regular changing and how this simple task can save you money and improve your home'…
- The #1 HVAC Mistake Costing You Hundreds (And How Often to Really Change Your Filter) — Discover the crucial mistake most homeowners make with HVAC filters, leading to higher energy bills, poor air quality, and system damage. L…
- The Hidden Reason Your Furnace Short Cycles (and the $15 Fix) — Furnace short cycling can drive up energy bills and wear out your system prematurely; often, a simple fix like a dirty filter or miscalibra…
- The Giant Drywall Hole: 3 Hidden Mistakes That Make Fixing It Worse — Don’t just spackle over that huge drywall hole; learn the right way to repair it and avoid common mistakes that lead to an even bigger head…
Repair or replace your HVAC system?
Plug in four numbers and see which choice holds up financially.
Free and instant. Educational guidance only — not a quote, inspection, or professional diagnosis.
Estimate your own project cost
National averages are a starting point. Enter your details for a range that fits your house.
HVAC replacement cost
- Equipment$2,200 – $3,800
- Installation labor$1,200 – $2,500
Always insist on a Manual J load calculation — sq-ft sizing is only a rough check. Federal heat-pump rebates may reduce cost significantly.
Educational estimate only — always confirm with written local bids.
What should this project cost?
Enter your project details for a realistic cost range before you call anyone.
Service calls and common repairs run $150–$900; full system replacement typically $6,000–$12,000.
- Regional adjustment
- National average
- Labor share (typical)
- ~$1,935
- Quotes to collect
- 3 written estimates
Educational estimate based on national averages — not a binding quote. Always confirm with written local estimates.
Fixly Project Decision Box
- DIY difficulty
- Advanced
- Estimated time
- Homeowner checks 20–30 minutes
- Cost level
- Moderate
Main tools / materials
- Clean air filter
- Garden hose for condenser coils
- Shop vac for the condensate line
When to stop and call a pro
- Burning smell, smoke, or a tripping breaker
- Refrigerant lines iced over or hissing
- Any work inside the sealed refrigerant circuit (EPA-licensed only)
- Gas smell near a furnace — leave and call the utility
Need professional help?
Find an HVAC Pro Near YouRepair or replace?
Run the age, cost ratio, and repair history through the calculator before you commit.
Free, no signup required. Estimates are educational guidance, not a quote or an inspection.
Get the print-ready PDF of this guide
A clean, ad-free, printable version you can keep on your phone or pin to the workshop wall. Free with a FixlyGuide account.
- Print-optimized layout
- Tools, materials & every step included
- Saved to your account
Frequently asked questions
How often should I change my HVAC filter?+
For most homes, every 30-90 days is a good rule of thumb. However, if you have pets, allergies, or a lot of dust, you might need to change it monthly. During periods of heavy system use, like peak summer or winter, check it more frequently.
What happens if I don't change my HVAC filter?+
Ignoring your filter leads to restricted airflow, making your HVAC system work harder and consume more energy. This increases your utility bills and can cause damage to components like the fan motor or evaporator coils, potentially leading to costly repairs or premature system failure.
What MERV rating should I use for my HVAC filter?+
For most residential systems, a MERV rating of 8 to 11 offers a good balance between air filtration and airflow. Check your HVAC system's manual for specific recommendations. Going too high (e.g., MERV 14+) can restrict airflow too much, straining your system.
Can I clean and reuse my HVAC filter?+
Most standard residential HVAC filters are designed to be disposable and should not be cleaned. Attempting to wash or vacuum a disposable filter can damage the filter media, making it ineffective at trapping particles. Always replace disposable filters with new ones.
How do I know what size HVAC filter to buy?+
The dimensions of your filter are usually printed on the cardboard frame of the old filter. It will typically be three numbers (e.g., 20x25x1). Always match these exact dimensions to ensure a snug fit that prevents air from bypassing the filter.
Will a dirty filter affect my indoor air quality?+
Absolutely. A dirty, clogged filter can no longer effectively capture airborne particles like dust, pollen, pet dander, and mold spores. This means these contaminants will continue to circulate throughout your home, negatively impacting your indoor air quality and potentially worsening allergy symptoms.
Why does my HVAC filter get dirty so fast?+
Several factors can accelerate filter clogging, including owning pets that shed, ongoing construction or renovation (either inside your home or nearby), a high number of occupants in the house, or simply not regularly cleaning your home. High system usage during extreme weather also contributes.
Where is the HVAC filter located?+
Your HVAC filter is typically located in one of two places: either in a dedicated slot on the return air duct, usually near your indoor furnace or air handler unit, or directly behind a large return air grille in a wall or ceiling. Look for an arrow on the filter housing indicating airflow direction.
Discussion
Loading comments…