- Perform the Sniff Isolation Test — Turn the thermostat fan switch from "AUTO" to "ON" while leaving heating and cooling off, then switch on the AC, and finally test the heat.
- If the smell only shows up when the blower first starts in cooling mode, the evaporator coil or drain pan is your main suspect.
- If the odor smells like rotten eggs or dead animals no matter what mode the system’s in, stop and check for gas leaks or pest intrusion instead of blaming coil algae.
- Safety note: If you catch that faint sulfur-y rotten-egg scent of natural gas, get out of the house and call the gas utility from outside.
Plumbing · Clog
| Project category | Plumbing |
|---|---|
| Problem type | Clog |
| Trade required | Plumbing |
| Urgency | Soon — within weeks |
| Safety risk | Low safety risk |
| DIY suitability | DIY friendly |
| Cost category | Low cost |
| Typical timeline | Same-day DIY attempt; pro visit within a day or two |
| Contractor type | Licensed plumber |
Repair option
Plunger, hand auger, or trap cleanout before chemicals.
Replacement option
Line replacement when clogs return in the same spot repeatedly.
Common causes
- Hair and soap buildup in the trap
- Grease cooling in the branch line
- Flushed wipes or foreign objects
Relevant tools:diy difficultydiy or hire a pro
Published November 3, 2026Last updated November 3, 2026
Tools & materials you'll need
Affiliate linksAs an Amazon Associate FixlyGuide earns from qualifying purchases — at no extra cost to you. Prices and availability are accurate as of publication and subject to change.
Quick Answer
If your house smells musty, stale, or moldy every time the heating or air conditioning turns on, contaminated evaporator coils, a clogged condensate drain line, standing water in the drain pan, or disconnected attic ductwork pulling in unconditioned crawlspace or attic air are usually the culprits. I’d start by clearing your 3/4-inch PVC condensate line with distilled white vinegar and taking a hard look at the evaporator coil inside the indoor air handler. If you see active black mold colonies, rotting fiberglass duct board, or you catch an acrid electrical or sewer smell, shut the HVAC breaker off right then and call a certified pro.
The Problem
Nothing kills a house’s comfort faster than a blast of sour, damp gym-sock odor pouring out of the supply grilles every time the blower kicks on. In the trade, we call it "Dirty Sock Syndrome," but it isn’t always just a little microbial growth on the heat pump’s aluminum fins.
I’ve seen this show up all over places with brutal summers and wild humidity swings — North Texas, the Gulf Coast, the humid Southeast. Once your air delivery system starts growing bacterial biofilms, holding stagnant water, or breathing through torn return plenums, it sends spores, volatile organic compounds (VOCs), and ultra-fine dust straight into the living room and bedrooms. No thanks.
Ignoring the stink doesn’t just make the place unpleasant when guests come by. It can turn into chronic sinus headaches, worse asthma, drywall damage from overflowing pans, and ruined ductwork that’ll cost you real money to replace. The job is figuring out whether you’ve got a simple maintenance hiccup — like a plugged trap — or a deeper contamination problem that needs EPA-registered biocides and mechanical remediation.
How It Works
Your central HVAC system is basically the lungs of the house, moving roughly 400 cubic feet per minute (CFM) of air per ton of cooling capacity. In cooling mode, warm, humid indoor air gets pulled through return grilles, goes through the pleated air filter, and hits the evaporator coil. That coil runs cold — usually between 40°F and 48°F.
When that warm air touches the cold aluminum fins, moisture condenses out of the air stream and turns from vapor into liquid water drops. Those drops run down the coil face. Under normal conditions, gravity sends that condensation into an internal sloped composite or galvanized drain pan, then into a 3/4-inch PVC condensate line, and it drains safely outside or into an indoor plumbing standpipe.
The trouble starts when airflow slows down, drainage quits, or the thermal barriers fail. Dust that sneaks past a bad-fitting filter settles right onto wet coil fins. That dust carries dead skin cells, pet dander, and fungal spores. Mix that with constant moisture and total darkness inside the air handler cabinet, and you’ve got a microbial greenhouse. Ugly little setup.
And if your return ductwork runs through an unconditioned 140°F attic or a damp crawlspace and starts leaking at the seams, the negative pressure inside the return trunk sucks foul, dusty, or dead-rodent air straight into the supply stream, bypassing the filter altogether. That thing’s toast until you find the leak.
Step-by-Step Fix
Before you assume the worst, run through this diagnostic and cleaning sequence to figure out where the smell’s coming from and knock out the usual household culprits.
-
Perform the Sniff Isolation Test — Turn the thermostat fan switch from "AUTO" to "ON" while leaving heating and cooling off, then switch on the AC, and finally test the heat.
- If the smell only shows up when the blower first starts in cooling mode, the evaporator coil or drain pan is your main suspect.
- If the odor smells like rotten eggs or dead animals no matter what mode the system’s in, stop and check for gas leaks or pest intrusion instead of blaming coil algae.
- Safety note: If you catch that faint sulfur-y rotten-egg scent of natural gas, get out of the house and call the gas utility from outside.
-
Kill High-Voltage Power at the Disconnect — Flip the dedicated HVAC breaker in the main panel and pull the disconnect block near the indoor air handler.
- Tools needed: Digital multimeter or non-contact voltage tester.
- Make sure the blower and control boards are fully dead before you take off any cabinet panels. Don’t reach into a live air handler where 120V/240V circuits or a sharp-spinning blower wheel can bite you.
-
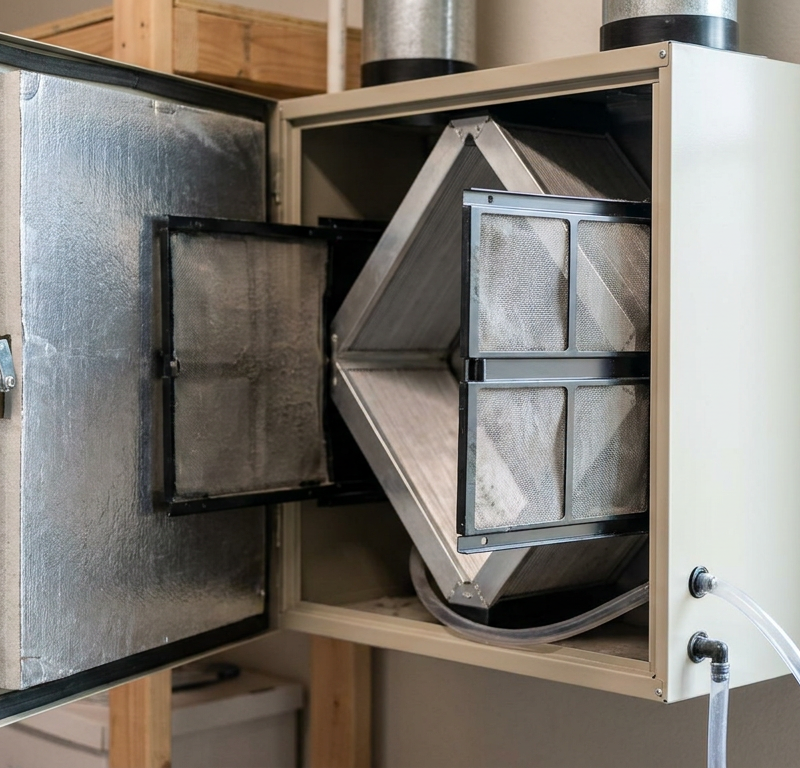
Inspect and Replace the Air Filter — Slide out your return filter and check the media under bright light for damp spots, black speckling, or perimeter bypass gaps.
- If the filter’s bent, damp, or smells sour by itself, toss it.
- Put in a fresh pleated filter with a MERV rating between 8 and 11. Skip restrictive MERV 13+ filters unless your duct system was built for that higher static pressure drop (usually exceeding 0.5 inches of water column).
-
Access the Indoor Evaporator Coil Cabinet — Unscrew the upper or lower coil access panel on your air handler or furnace cabinet using a 1/4-inch or 5/16-inch nut driver.
- Watch those foil-faced insulation blankets; slice cleanly along aluminum tape seams with a utility knife instead of ripping the duct wrap.
- Set panels aside where screws won’t drop into floor vents or disappear into attic floor insulation. Been there, done that, didn’t enjoy fishing screws out of blown-in insulation.
-
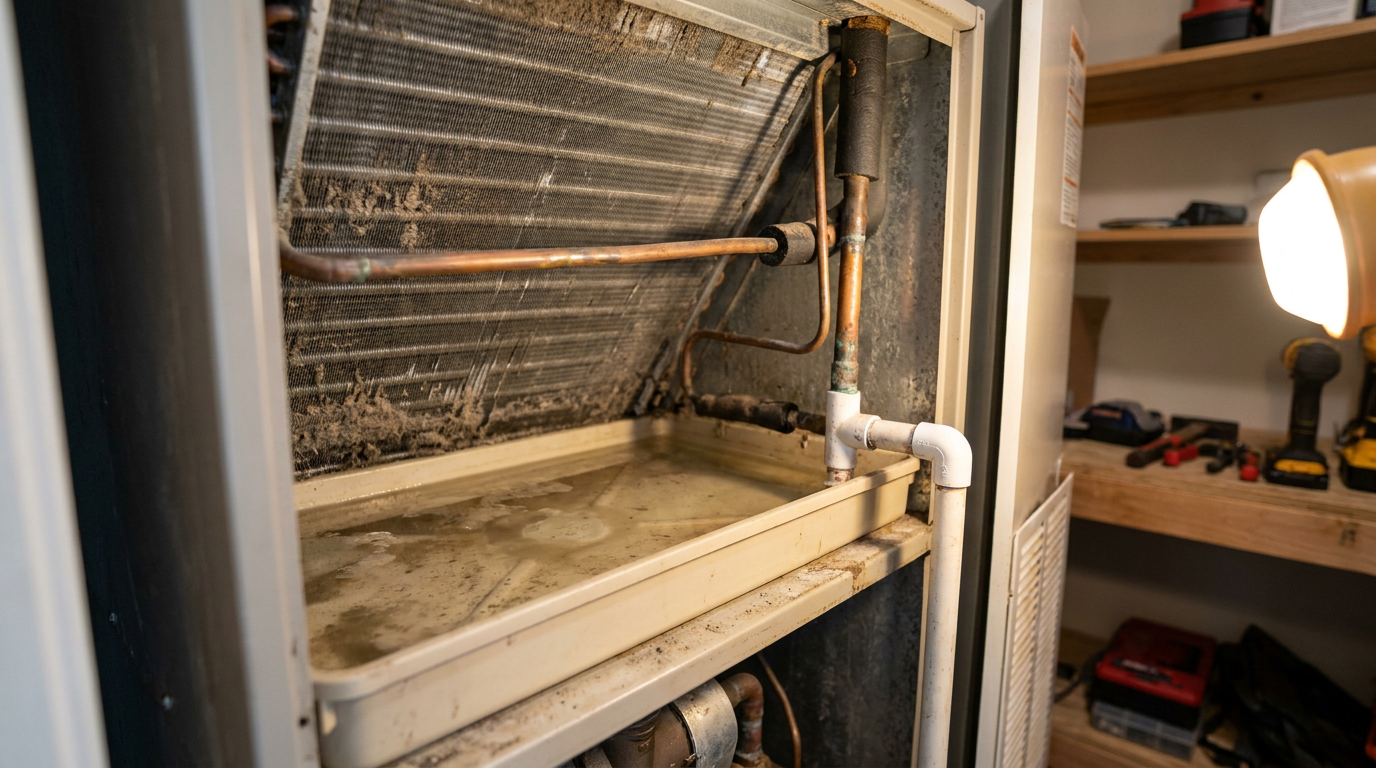
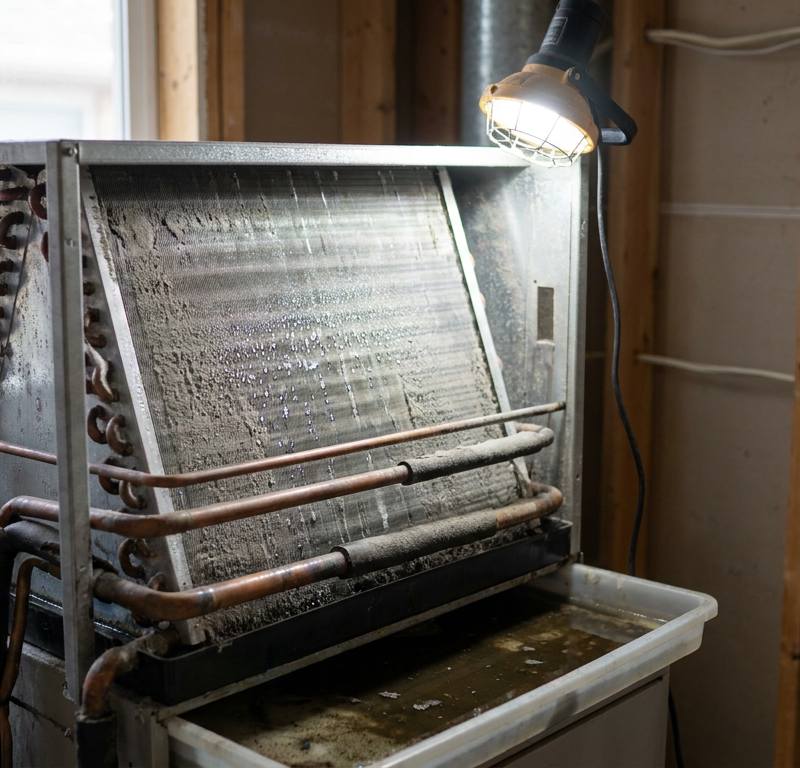
Examine the Coil Fins and Primary Drain Pan — Shine a high-lumen flashlight between the aluminum "A-frame" slabs to inspect the condition of the metal and composite pan.
- Look for slick, jelly-like slime, white crusty mineral scale, or gray velvety mold hanging on the fin edges.
- Look into the primary pan beneath the coil: if more than 1/4 inch of standing water sits stagnant at the drain outlet, your slope is wrong or the drain line’s clogged.
-
Flush the 3/4-Inch Condensate Drain Line — Find the open vertical T-fitting or cleanout cap on the PVC drain pipe directly outside the air handler cabinet.
- Tools needed: 2 cups of distilled white vinegar, small funnel, wet/dry shop vacuum.
- Pour 2 cups of regular white vinegar down the cleanout port to break up algae mats and bacterial slime.
- Branch action: If liquid backs up and overflows out of the T-fitting, put your shop vac hose on the outdoor drain exit line (usually near your exterior condenser unit), wrap your hand or a rag around the connection to make a seal, and vacuum the line for 3 minutes to suck out sludge plugs.
-
Clean the Coil with No-Rinse Foaming Cleaner — Coat the supply-air and return-air faces of the aluminum evaporator fins thoroughly using a can of self-rinsing, alkaline coil cleaner.
- Materials needed: EPA-registered, no-rinse evaporator coil cleaning spray.
- Spray the foam evenly from bottom to top, holding the nozzle roughly 6 inches away so the expanding foam gets deep into the coil matrix.
- Let the chemical break down biological films for 15 to 20 minutes; when the AC runs later, natural condensation will wash the foam and dissolved debris straight down the drain.
-
Sanitize the Drain Pan with Condensate Tablets — Drop two slow-dissolving quaternary ammonium condensate pan tablets into the far corner of the primary pan, away from the drain hole.
- These tablets release an antimicrobial agent over 60 to 90 days that helps keep gelatinous "zooglea" slime and algae plugs from coming back.
- Don’t set tablets right over the drain outlet opening where a loose tablet could physically block water flow.
-
Seal Cabinet Seams and Reseal Foil Tape — Reinstall the access sheet metal panel, tighten all hex-head screws firmly, and seal every perimeter seam.
- Materials needed: UL 181A-P listed aluminum foil tape (not generic gray vinyl duct tape).
- Rub the tape down hard with a plastic squeegee or the heel of your hand to wake up the acrylic adhesive over all cut insulation seams and screw lines. Air leaks at the cabinet pull unconditioned attic air straight into the supply plenum.
-
Re-energize System and Test Air Delivery — Restore electrical power at the breaker panel and indoor disconnect, drop your thermostat cooling setpoint 3°F below room temperature, and let the system run for 45 minutes.
- Check outside to make sure clean water drips steadily out of the PVC condensate pipe.
- Put your nose near the nearest supply grille: the damp, musty stench should be gone, replaced by neutral air.
Common Causes
Knowing what kicks off bad air quality helps you keep it from coming back next season:
- Biofilm on Evaporator Fins (Dirty Sock Syndrome): Tiny dust slips past low-efficiency fiberglass filters and bonds to damp aluminum coil fins during cooling cycles. When heat cycles kick on or the system sits idle, bacteria and mold feed on that dust layer and release volatile sulfur and nitrogen compounds into the supply airstream.
- Clogged or Improperly Trapped Condensate Lines: A dry, missing, or blocked P-trap on a draw-through air handler pulls sewer gas or stagnant, moldy water back into the blower chamber because of negative air pressure inside the cabinet.
- Attic or Crawlspace Duct Breaches: Disconnected flex duct collars, dried-out mastic seams, or rodent tears pull humid, insulation-filled air — sometimes with rodent urine and droppings — straight into the duct system.
- Oversized AC Equipment (Short-Cycling): A system that’s too big for the square footage drops indoor temperature fast in 7 to 10 minutes without running long enough to pull moisture out of the air. Relative indoor humidity stays above 60%, and that’s prime territory for indoor dust mites and mold.
- Internal Fiberglass Insulation Delamination: Older air handlers use porous fiberglass insulation glued to the inside of the metal sheet cabinet. Once that porous insulation gets wet from a splashing coil or clogged pan, it drinks moisture like a sponge and turns into a permanent mold colony that can’t be wiped clean.
Common Mistakes
- Dumping Straight Chlorine Bleach into the Condensate Line: Bleach eats plastic drain pans, corrodes aluminum coils through harsh chlorine fumes, and breaks down the glue in PVC joints. Stick to distilled white vinegar or purpose-built condensate line drain cleaners.
- Using High-Pressure Water or Wire Brushes on Coils: Evaporator fins are paper-thin aluminum (measuring just 0.005 to 0.008 inches thick). Hit them with a pressure washer or scrub with a stiff metal brush and you’ll crush the fins flat, choke off airflow, and freeze the coil.
- Masking Odors with Scented Air Fresheners or Duct Sprays: Spraying perfume, aerosol disinfectants, or ozone generators into return grilles doesn’t kill deep-seated mold. It just coats the ductwork in sticky chemical residue, irritates people’s lungs, and leaves the moisture problem right where it was.
- Installing Ultra-Dense 1-Inch MERV 13 Filters Without Checking Static Pressure: Homeowners smelling bad air often rush out and buy the highest-rated filtration media they can find. If your system wasn’t sized for a thick, restrictive filter, the blower motor suffocates, airflow drops below 350 CFM per ton, the coil turns into an ice block, and when it melts, it floods the drain pan.
- Leaving the Thermostat Fan Setting on "ON" Instead of "AUTO": When the cooling cycle shuts off, the coil’s still covered in water droplets. Running the blower continuously blows that lingering liquid water back into the home before it can drain away, driving indoor humidity back up 10% to 15% within minutes.
Cost & Time Breakdown
| Task | DIY Cost | Pro Cost | Time |
|---|---|---|---|
| Condensate Line Flush & Vacuum | $5–$15 | $125–$250 | 30–45 mins |
| In-Place Evaporator Coil Foaming Clean | $20–$40 | $200–$450 | 1–2 hours |
| Blower Wheel Removal & Deep Cleaning | Not recommended | $300–$600 | 2–3 hours |
| Attic Duct Leak Sealing (Mastic & Tape) | $35–$75 | $400–$1,200 | 3–5 hours |
| Deep Antimicrobial Whole-System Remediation | N/A | $800–$2,000 | 4–6 hours |
| Complete Evaporator Coil Pull and Acid Dip | N/A | $700–$1,400 | 3–5 hours |
Tips & Prevention
- Flush Your Condensate Line Monthly During Cooling Season: Pour 8 to 12 ounces of straight distilled white vinegar down the primary T-pipe cleanout every 30 days between April and October.
- Verify Drain Pan Slope with a Level: The primary pan inside the air handler should have a slight, intentional pitch of at least 1/8 inch per foot toward the drain outlet so water doesn’t sit there dead still.
- Maintain Relative Indoor Humidity Below 50%: Keep an eye on digital hygrometers throughout your home. If indoor relative humidity sits consistently above 55% during summer, think about a whole-home dehumidifier or dialing in your variable-speed blower settings.
- Upgrade to a 4-Inch Media Filter Cabinet: If your unit currently uses flimsy 1-inch filter tracks, have an HVAC tech install a 4-inch or 5-inch deep media cabinet. Those deep pleated filters give you a lot more dust-holding surface area with minimal static pressure drop, which keeps coils cleaner for 6 to 12 months between changes.
- Schedule Annual Pre-Summer Maintenance: Have an EPA-certified technician measure temperature split across the coil (which should sit between 16°F and 21°F) and check static pressure across the air handler before the hot season hits.
When to Call a Professional
Some air quality problems just don’t belong in the DIY pile. If you open your air handler access panel and find thick, fuzzy black mold covering the internal porous insulation lining, that material can’t be safely sanitized in place; the cabinet has to be stripped, treated with EPA-registered fungicides, and relined with closed-cell elastomeric foam by a licensed remediation pro.
And if your evaporator coil is packed inside a cased A-coil box without access space, cleaning it right means recovering the R-410A or R-32 refrigerant, desoldering copper suction and liquid lines with an oxy-acetylene torch, pulling the whole coil out of the house for a pressure wash, and pulling a deep vacuum below 500 microns when it goes back together. Handling pressurized refrigerant without an EPA Section 608 certification is illegal under federal law.
If you smell hot electrical ozone, plastic burning, or persistent rotten eggs, don’t fool around with tools — shut system power off at the breaker panel immediately and call a professional contractor.
Related Articles
Keep troubleshooting with these hand-picked guides from FixlyGuide:
- AC Smells Like Dirty Socks? 5 Causes and the Step-by-Step Fix — Stop the sour, musty locker-room stench coming from your AC vents. Here is how to clean your evaporator coil, flush the pan, and end season…
- Sweating AC Vents? 6 Causes and the Step-by-Step Fix for Dripping Grilles — Stop sweating HVAC vents and dripping ceiling registers by sealing boot air leaks with mastic, controlling indoor humidity, and restoring p…
- Bathroom fan smell? 3 hidden culprits for mold & moisture — A musty smell from your bathroom fan often signals trapped moisture and mold growth in the fan housing or ductwork, a fixable issue that ha…
- That 'Energy-Saving' HVAC Trick Is Costing You Money — You've heard the advice: close HVAC vents in unused rooms to save on heating and cooling. But this common practice is a myth. It actually h…
- The Mystery of the Vanishing Air: Why Your HVAC Stops Blowing After 10 Minutes — Discover the hidden culprits behind your HVAC system stopping short after just 10 minutes of operation and learn how to fix them yourself.
- Dishwasher Backing Up into Sink? 5 Causes and the Step-by-Step Fix — Is dirty water backing up into your sink when the dishwasher runs? Learn how to clear clogged disposal inlets, fix hose routing, and stop b…
Should you do this yourself?
Answer five quick questions before you start. Safety outranks savings every time.
Your experience with work like this
How high do you have to work?
Does the job involve any of these?
Will it need a permit?
Specialty tools
Free and instant. Educational guidance only — not a quote, inspection, or professional diagnosis.
Estimate your own project cost
National averages are a starting point. Enter your details for a range that fits your house.
HVAC replacement cost
- Equipment$2,200 – $3,800
- Installation labor$1,200 – $2,500
Always insist on a Manual J load calculation — sq-ft sizing is only a rough check. Federal heat-pump rebates may reduce cost significantly.
Educational estimate only — always confirm with written local bids.
What should this project cost?
Enter your project details for a realistic cost range before you call anyone.
Service calls and common repairs run $150–$900; full system replacement typically $6,000–$12,000.
- Regional adjustment
- National average
- Labor share (typical)
- ~$1,935
- Quotes to collect
- 3 written estimates
Educational estimate based on national averages — not a binding quote. Always confirm with written local estimates.
Fixly Project Decision Box
- DIY difficulty
- Advanced
- Estimated time
- Homeowner checks 20–30 minutes
- Cost level
- Moderate
Main tools / materials
- Clean air filter
- Garden hose for condenser coils
- Shop vac for the condensate line
When to stop and call a pro
- Burning smell, smoke, or a tripping breaker
- Refrigerant lines iced over or hissing
- Any work inside the sealed refrigerant circuit (EPA-licensed only)
- Gas smell near a furnace — leave and call the utility
Need professional help?
Find an HVAC Pro Near YouGet the print-ready PDF of this guide
A clean, ad-free, printable version you can keep on your phone or pin to the workshop wall. Free with a FixlyGuide account.
- Print-optimized layout
- Tools, materials & every step included
- Saved to your account
Frequently asked questions
What is Dirty Sock Syndrome in an HVAC system?+
Dirty Sock Syndrome is the industry term for a foul, sour, or mildew smell emanating from your air conditioner or heat pump upon startup. It is caused by bacteria and fungal micro-colonies growing on the dust and moisture trapped across your indoor evaporator coil fins.
Is it safe to pour vinegar into my AC condensate drain?+
Yes, regular 5% acidity distilled white vinegar is the preferred DIY cleaner. Its mild acetic acid kills algae and dissolves mineral crust without releasing toxic fumes into your home or eroding the plastic drain pan and PVC fittings.
Can I use bleach to clean my AC drain pan and line?+
No. Chlorine bleach can react aggressively with internal components, produce harmful airborne chlorine gas inside your living spaces, destroy PVC joint glue, and crack plastic drain pans. Stick to distilled white vinegar or EPA-approved pan treatments.
How often should I change my AC air filter to prevent musty smells?+
Change basic 1-inch pleated filters every 30 to 60 days, especially if you have pets or live in dusty environments. Thicker 4-inch to 5-inch media filters last anywhere from 6 to 12 months before requiring replacement.
Is standing water in my HVAC drain pan normal?+
A slight 1/8-inch film of water right near the drain hole while the AC is actively running can be normal. However, standing water deeper than 1/4 inch or water that stays in the pan hours after the cycle ends means you have a clogged drain line or improper pan slope.
How much does a professional HVAC coil cleaning cost?+
A professional evaporator coil cleaning typically runs between $200 and $450 for an in-place foam wash. If the coil is packed with stubborn grime and must be completely removed, evacuated of refrigerant, and pressure-washed, costs range from $700 to $1,400.
Does running my HVAC fan on ON help clear musty air?+
No, running your fan continuously keeps the evaporator coil from draining fully. When the cooling compressor stops, the blower blows the moisture left on the coil right back into the supply air, driving humidity levels up and encouraging mold growth. Keep your thermostat set to AUTO.
Will installing a UV germicidal light eliminate vent odors?+
UV (ultraviolet-C) germicidal lamps installed above the indoor evaporator coil can prevent biological growth on wet metal surfaces. However, they only treat what the light directly hits; they will not fix poor duct sealing, dirty filters, or clogged drain lines on their own.
Discussion
Loading comments…