- Verify Dimmer Compatibility — The most common culprit
- Tools: Flathead screwdriver, Phillips head screwdriver, voltage tester.
- Safety: Turn off power at the breaker before touching any wires. Verify with a non-contact voltage tester.
- If this doesn't work: The flickering might be less about the dimmer and more about the power supply or connections.
General remodeling · Renovation planning
| Project category | General remodeling |
|---|---|
| Problem type | Renovation planning |
| Trade required | General contracting |
| Urgency | Planned project |
| Safety risk | Low safety risk |
| DIY suitability | Pro recommended |
| Cost category | Major investment |
| Typical timeline | Design and permitting often 2–4 months before work starts |
| Contractor type | General contractor |
Repair option
Phase the work and fix the building envelope first.
Replacement option
Full renovation with permits, design, and a general contractor.
Common causes
- Space no longer fits how the household lives
- Resale preparation
- Deferred maintenance stacking up
Relevant tools:project cost estimatorcompare quoteshome improvement material prices
Published September 9, 2026Last updated September 9, 2026
Tools & materials you'll need
Affiliate linksAs an Amazon Associate FixlyGuide earns from qualifying purchases — at no extra cost to you. Prices and availability are accurate as of publication and subject to change.
Quick Answer
I hear this one all the time: a homeowner finally gets that sleek, modern under-cabinet lighting installed, maybe some nice LED strips or pucks, only to have them flicker like a haunted house on a Saturday night. Drives ya nuts, right? Most times, it ain't the lights themselves that are bad, but something upstream — usually an old dimmer switch that wasn't built for low-wattage LEDs, or sometimes a tired power supply. Don't pull your hair out; it's usually a pretty straightforward fix, and most of the time you're talking about swapping a switch or tightening up a connection. It rarely costs an arm and a leg.
The Problem
You've just upgraded your kitchen, or maybe just added some snazzy under-cabinet lighting, and it's doing the disco dance. Flickering, dimming, sometimes even going completely dark for a second then popping back on. It's frustrating, ruins the ambiance, and frankly, makes your brand-new kitchen feel cheap. I've seen homeowners rip out entire runs of expensive LED strips, convinced they bought junk, when the real issue was a simple piece they missed. This isn't just annoying; it can shorten the life of your lights and even pose a minor fire risk if connections are truly loose and arcing.
How It Works
Alright, let's break down how this under-cabinet magic happens. Most modern under-cabinet lighting, especially the slim, energy-efficient stuff, uses Light Emitting Diodes (LEDs). Unlike old incandescent bulbs that just burn a filament, LEDs need a specific type of power. They typically run on low-voltage DC (Direct Current), usually 12V or 24V. Your house, however, runs on 120V AC (Alternating Current). So, there's a middleman involved: a "driver" or "transformer." This little box takes your house's 120V AC and converts it to the low-voltage DC that your LEDs need. Think of it like a translator for electricity.
Now, if you've got a dimmer switch in the mix, things get a little more complicated. Older dimmer switches, designed for incandescent or halogen bulbs, work by "chopping" the AC waveform. Incandescent bulbs, being basically resistors, don't care much about these chops; their filament just heats up and glows. LEDs, on the other hand, have tiny electronic circuits. When an old dimmer chops the waveform, it creates rapid on-off cycles that the LED driver tries to interpret, often leading to inconsistent power delivery, which we see as flickering. Modern LED-compatible dimmers use different technology, sometimes called "reverse phase" or "trailing edge" dimming, which is much smoother for LED drivers. Without the right dimmer, your LEDs are basically having a seizure trying to deal with the power input.
Beyond dimmers, the power supply (that driver box) needs to be correctly sized for your lights. If you have, say, 30 watts of LED strips, and your driver is only rated for 20 watts, it's going to be overloaded. It'll struggle, heat up, and often flicker or even shut down to protect itself. Then there are the connections: every splice, every wire nut, every plug-in connector is a potential point of failure. A loose connection acts like a tiny, intermittent switch, causing power interruptions and, you guessed it, flickering. Proper voltage drop over long runs can also be an issue, especially with 12V systems – the further the light is from the driver, the less voltage it receives, sometimes leading to dimming or flickering at the end of the run. I pulled a water heater in Frisco last month that had exactly this kind of intermittent nonsense from a loose splice, and the symptoms were just as maddening.
Step-by-Step Fix
Before you start, flip the breaker. Always. I've seen too many guys get zapped because they thought they could "just be careful." Don't be that guy.
-
Check the Breaker First — No, really, check it Sometimes, especially after other work, a breaker can be "tripped" but not fully thrown. It might look fine but is actually in an intermediate state, causing intermittent power. Go to your electrical panel, locate the breaker for your kitchen lights, and firmly flip it OFF, then ON. This resets it completely. Takes literally 10 seconds. If that doesn't do it, move on.
-
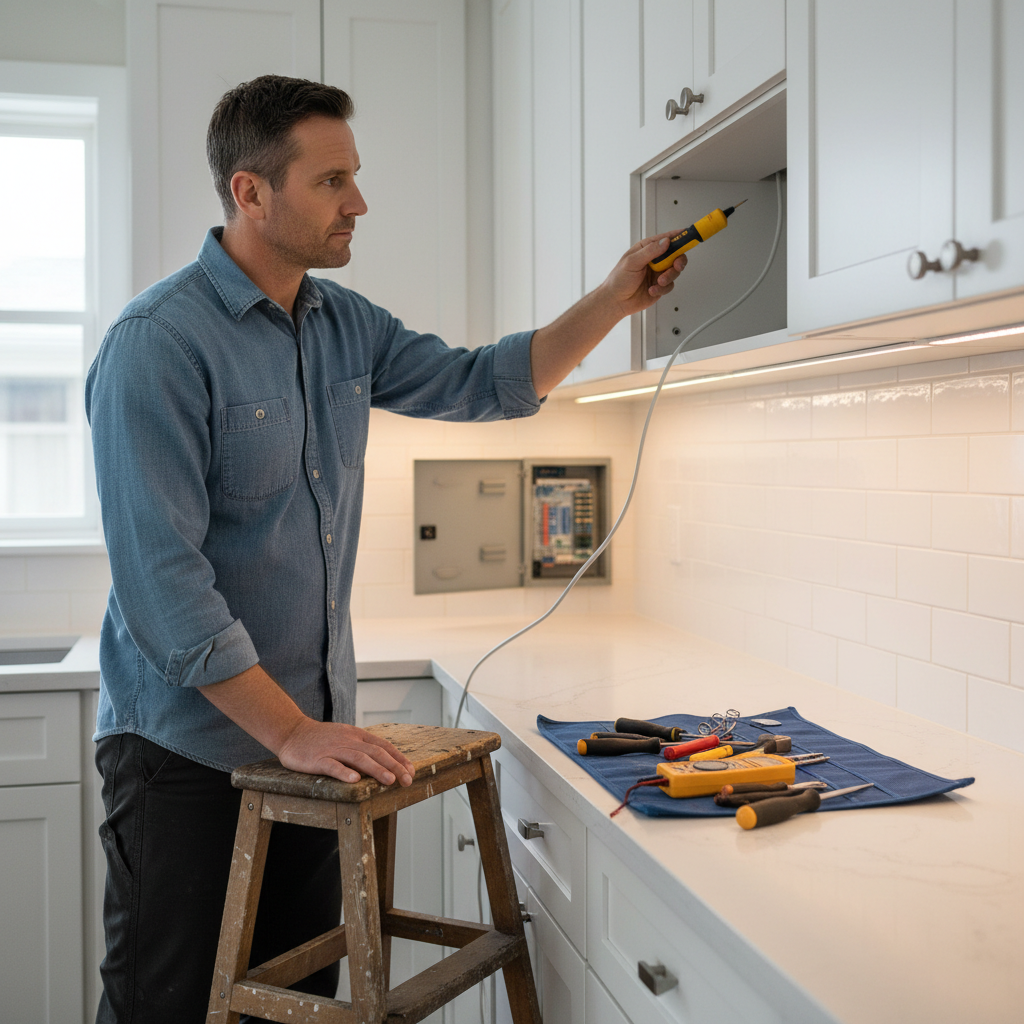
Verify Dimmer Compatibility — The most common culprit If you have a dimmer, this is usually where the trouble starts. Many older dimmers aren't designed for the low wattage and specific power needs of LED lights. You'll need an LED-compatible dimmer switch. You can usually tell if it's an old one by checking the brand and model number on the switch itself once you pull it out of the wall. Look for "LED compatible" or "for use with LED loads" on the new switch's packaging. An incandescent dimmer can flicker, hum, or cause early LED failure. I tell homeowners, if you're upgrading to LEDs, upgrade the dimmer too. It's just good practice.
- Tools: Flathead screwdriver, Phillips head screwdriver, voltage tester.
- Safety: Turn off power at the breaker before touching any wires. Verify with a non-contact voltage tester.
- If this doesn't work: The flickering might be less about the dimmer and more about the power supply or connections.
-
Inspect All Connections — Tight is right Loose connections are a huge source of intermittent power. Gently pull on each wire at the power driver, at any splice points, and where the lights connect to each other. Check wire nuts to ensure they're snug. If you have plug-in connectors, make sure they're fully seated. Corrosion can also be an issue, especially in older installations or damp environments. If you find any loose connections, untwist the wire nuts, twist the wires together firmly (clockwise!), then re-apply the wire nut until it's super snug. For plug-in connectors, clean the contacts with a bit of electrical contact cleaner if you suspect corrosion.
- Tools: Screwdrivers, wire strippers (if re-doing wire nuts), electrical tape.
- Tip: If you have push-in connectors, ensure the wires are fully inserted and haven't pulled out slightly.
-
Test the Power Driver/Transformer — Is it undersized or failing? The driver is that box converting AC to DC. If it's undersized for the total wattage of your lights, it'll struggle. Add up the total wattage of all your LED strips or pucks. Make sure your driver's wattage rating is at least 20% higher than the total load. For example, if you have 40 watts of lights, you need at least a 48-watt driver. If you're using a cheap, no-name driver, it might just be failing. You can test the DC output with a multimeter if you're comfortable. It should be consistently at 12V or 24V, depending on your system. Fluctuations here mean a bad driver. In my experience, a lot of the cheaper drivers just can't handle sustained loads.
- Tools: Multimeter (optional, but very helpful), wire strippers, new compatible power driver (if needed).
- If you replace: Ensure the new driver has the correct voltage (12V or 24V) for your lights.
-
Check for Voltage Drop — Long runs hate 12V If your under-cabinet lighting runs a long distance, say, over 10 feet, and particularly if it's a 12V system, you might be experiencing voltage drop. This means the lights furthest from the driver get less voltage, which can cause them to dim or flicker. You can confirm this with a multimeter by checking the voltage at the start and end of the run. If there's a significant drop (more than about 5-10%), you might need to: (a) upgrade to 24V lighting if possible, (b) use thicker gauge wire for longer runs, or (c) add another power driver in the middle of a very long run. Using 14 or 16-gauge wire instead of 18 or 20-gauge can make a big difference over distance.
- Tools: Multimeter, wire strippers, possibly heavier gauge wire.
-
Examine the LED Fixtures Themselves — Rarely the main issue, but worth a look While less common, individual LED pucks or strips can fail. If only one section is flickering, try temporarily swapping it with a section that's working correctly (if possible and easy to disconnect). This helps isolate if it's the fixture or the wiring to that specific fixture. Also, check for any visible damage to the LED strip or pucks — bends, nicks, or scorch marks. If you find a bad fixture, replacement is the only option here.
- Tools: None specific, just your eyes.
Common Causes
- Incompatible Dimmer Switch: This is the big one. Old dimmers designed for incandescent bulbs don't play nice with modern LEDs. They "chop" the power in a way that causes LEDs to flicker or hum. Always use an LED-rated dimmer.
- Loose Electrical Connections: Every point where wires meet — at the dimmer, the power driver, and between light segments — is a potential flicker factory if not secured properly. Over time, connections can loosen.
- Undersized or Failing Power Driver/Transformer: If the power supply isn't rated for the total wattage of your lights, it'll struggle to provide consistent power, leading to flickering, dimming, or even premature failure. Cheap drivers are notorious for this.
- Voltage Drop: Long runs of low-voltage (12V) wiring can lose voltage over distance, causing lights at the end of the line to dim or flicker. This is less common with 24V systems but still possible on very long runs.
- Power Fluctuations from the Grid: Less common indoors, but sometimes fluctuations in your home's main electrical supply can cause issues, though this would typically affect more than just your under-cabinet lights. It's usually an external issue, like a utility problem.
Common Mistakes
- Ignoring Dimmer Compatibility: Thinking any old dimmer will work with new LEDs is a rookie mistake. It almost never does, and it's the number one cause of flickering. Always read the packaging!
- Overloading the Power Driver: People often add more lights than their power supply can handle. If your driver says "Max 60W" and you've got 70W of lights hooked up, you're asking for trouble.
- Skipping the Voltage Tester: Thinking the breaker is off because the switch is off. Nope. Always test the wires before you touch them. You're dealing with household current here, it's not a toy.
- Using Too Thin Wire for Long Runs: For 12V systems, using thin gauge wire (like 22 AWG) over a 15-foot run will absolutely lead to noticeable voltage drop and flickering at the end of the line. Use heavier gauge, like 16 AWG, for longer distances.
- Not Tightening Connections Enough: Thinking a quick twist of a wire nut is sufficient. Connections need to be rock solid. Give them a good tug to ensure they're secure. I've seen plenty of fires start from loose connections.
- Buying the Cheapest Components: While tempting, going for the absolute cheapest LED strips or power drivers often means inferior internal components that are more prone to flickering and failure. Spend a few extra bucks for quality.
Cost & Time Breakdown
| Task | DIY Cost | Pro Cost | Time |
|---|---|---|---|
| Diagnose (DIY) | $0 | $75–$150 (trip fee) | 15–30 min |
| Replace Dimmer Switch | $20–$50 | $150–$300 | 20–45 min |
| Tighten Connections | $0 (existing) | Included in service | 10–20 min |
| Replace Power Driver | $30–$70 | $150–$350 | 30–60 min |
| Upgrade Wiring (minor) | $10–$20 | $100–$250 | 30–60 min |
| Replace Faulty LED Strip/Puck | $15–$60 (per ft/unit) | Included in service | 10–30 min |
Tips & Prevention
- Match Components: Always pair LED lights with an LED-compatible dimmer. This is non-negotiable for reliable performance.
- Oversize Your Driver: Choose a power driver with at least 20% more wattage capacity than the total load of your LED lights. This provides a buffer and extends the driver's life.
- Secure Connections: Double-check all wire connections during installation. Give wire nuts a firm twist and a gentle tug test. Loose connections are the enemy of consistent power.
- Consider 24V Systems for Long Runs: If you have long stretches of under-cabinet lighting, a 24V system will experience less voltage drop than a 12V system, leading to more consistent brightness.
- Buy Quality: Invest in reputable brands for both your LED lights and power drivers. Cheap components often mean headaches down the road.
- Regular Visual Inspection: Every now and then, take a quick peek under your cabinets. Look for any signs of loose wires, discolored components, or unusual sounds coming from the driver. Catching small issues early can prevent bigger ones. I usually tell clients to give it a once-over when they're cleaning the kitchen, just a quick glance. Saves a call to me later.
When to Call a Professional
Look, I'm all for DIY, but there are times when you just need to call in a pro. If you've gone through all these steps and your under-cabinet lights are still doing the funky chicken, or if you're uncomfortable working with household electrical wiring, it's time to step back. If you open up a junction box and find charred wires, or if you're unsure about which breaker controls what, stop immediately. Any issues involving the main household wiring, beyond just swapping a switch, really need a licensed electrician. Don't mess around with 120V; it bites hard. If you've got a complex multi-zone setup or you suspect the problem is further upstream in your home's electrical panel, get an expert on the line. Better safe than sorry, plain and simple.
Related Articles
Keep troubleshooting with these hand-picked guides from FixlyGuide:
- The Grimy Secret Under Your Bathroom Sink: Why Your Faucet Is Slow — A slow-flowing bathroom faucet is often more than just an annoyance; it's a clear sign of mineral buildup or internal damage that's surpris…
- That Heavy Mirror? It Needs More Than Just a Nail — Stop guessing with drywall anchors; the physics of shear force and toggle bolt ratings are the secret to keeping your heavy mirror securely…
- Your New Faucet Leaks at the Base? The 50-Cent O-Ring Fix — That brand new kitchen faucet shouldn't be dripping at the base; here's the surprisingly common reason why it's happening and the specific…
- Why Your Cabinet Doors Aren't Square (And How to Fix That Gap) — Frustrated by cabinet doors that won't close flush or hang crooked? I'll show you how to diagnose and fix those annoying gaps, hinges, and…
- That Falling Closet Rod? It’s The Tiny Anchor You’re Using. — Your closet rod keeps collapsing because the standard plastic anchors can't grip drywall; the fix is to anchor it properly to a wall stud o…
- The Real Reason Your Smoke Alarm Chirps Every 30 Seconds (It's Not Always the Battery) — Don't just swap batteries; a smoke detector chirping every 30 seconds can signal various issues, from dust to improper installation, demand…
What should this project cost?
Enter your project details for a realistic cost range before you call anyone.
Cosmetic refreshes start near $5,000; full remodels commonly $25,000–$45,000.
- Regional adjustment
- National average
- Labor share (typical)
- ~$8,550
- Quotes to collect
- 3 written estimates
Educational estimate based on national averages — not a binding quote. Always confirm with written local estimates.
Fixly Project Decision Box
- DIY difficulty
- Professional Recommended
- Estimated time
- Diagnosis 1–2 hours
- Cost level
- Moderate
Main tools / materials
- Non-contact voltage tester
- Outlet tester
- Flashlight
When to stop and call a pro
- Burning smell, scorch marks, or a warm outlet or switch plate
- A breaker that trips again right after being reset
- Any work inside the service panel
- Aluminum wiring or cloth-insulated wiring
Need professional help?
Talk to a Licensed ElectricianGet the print-ready PDF of this guide
A clean, ad-free, printable version you can keep on your phone or pin to the workshop wall. Free with a FixlyGuide account.
- Print-optimized layout
- Tools, materials & every step included
- Saved to your account
Recommended for DIYers & woodworkers
Sponsored
The Top 20 Tools for Workshops of Any Budget
No stationary machines or power tools required — plus 3 fundamental tools that can't be bought at any price.
Get the free guide
Ted's Woodworking — The #1 Woodworking Resource
Detailed instructions, dimensioned drawings, materials & cutting lists, and 3D schematics for every skill level.
See the plansSponsored: links above are affiliate links. FixlyGuide may earn a commission on qualifying purchases — at no extra cost to you.
Frequently asked questions
Why do my new under-cabinet LED lights flicker?+
Most often, flickering is due to an incompatible dimmer switch not designed for low-wattage LEDs. Other common causes include loose connections, an undersized or failing power driver, or voltage drop over long wire runs.
Can an old dimmer switch cause LED lights to flicker?+
Absolutely, yes. Older dimmers designed for incandescent bulbs operate differently than what modern LEDs require. This mismatch is a primary reason for flickering, humming, or even complete failure of your LED lights.
How do I know if my power driver (transformer) is the problem?+
If your lights flicker or dim despite having a compatible dimmer and tight connections, check the driver's wattage rating against your total LED load. If it's undersized or feels hot, it might be failing. A multimeter can confirm unstable voltage output.
Is it safe to fix flickering lights myself?+
For simple tasks like swapping a dimmer or tightening accessible connections, it's generally safe if you turn off the power at the breaker first and verify with a voltage tester. For complex wiring or if you're unsure, always call a licensed electrician.
What's the difference between 12V and 24V under-cabinet lighting?+
The main difference is voltage. 24V systems are more efficient for longer runs, experiencing less voltage drop than 12V systems. This means more consistent brightness across extended lengths of lighting.
How much does it cost to replace an LED dimmer switch?+
An LED-compatible dimmer switch typically costs between $20 and $50. If you do it yourself, that's your main expense. Hiring a pro adds labor costs, usually $150-$300 total.
Can too many LED lights on one circuit cause flickering?+
Not directly on the main household circuit for under-cabinet lights, but too many lights can overload the *low-voltage power driver*. Ensure your driver's wattage capacity exceeds the total wattage of all connected LED lights by at least 20% to prevent issues.
Should I replace all my flickering under-cabinet lights?+
Not usually. Start by troubleshooting the power source: dimmer, connections, and power driver. Individual light failures are less common. Only replace a light strip or puck if you've isolated it as the specific faulty component after checking everything else.
What kind of wire should I use for under-cabinet LEDs?+
For 12V systems, use 16 or 18-gauge wire for runs up to 10-15 feet to prevent voltage drop. For 24V systems, you can often use thinner wire (like 18-20 gauge) over similar distances, but always check the manufacturer's recommendations.


Discussion
Loading comments…