Tools & materials you'll need
Affiliate links- AmazonAdjustable Wrench
- AmazonScrewdriver Set
- AmazonHeadlamp or FlashlightFor inspecting dark areas of the unit
- AmazonGlovesFor handling unit in cold weather and minor debris
- AmazonGarden Hose (with warm water)For gently helping to defrost an iced-up unit
- AmazonPlastic ScraperFor very gently removing loose ice, avoid metal
- AmazonMultimeterOnly if comfortable with electrical diagnostics and safety
- AmazonNew Air FilterMatching size and MERV rating for your indoor unit
As an Amazon Associate FixlyGuide earns from qualifying purchases — at no extra cost to you. Prices and availability are accurate as of publication and subject to change.
Quick Answer
When frigid temperatures hit and your heat pump fails to keep your home warm, the problem often boils down to two main areas: issues with the defrost cycle or a lack of auxiliary heat engagement. Your heat pump is designed to extract heat from outdoor air, even when it's cold, but below a certain temperature (usually 35-40°F), it relies on supplemental electric or gas 'auxiliary' heat. If the outdoor unit is encased in ice, or if your thermostat isn't correctly calling for auxiliary heat, you'll be left in the cold. A common homeowner mistake is assuming the heat pump is broken when a simple adjustment or diagnostic check is all that's needed.
The Problem
Heat pumps are marvels of energy efficiency, but their performance can drop significantly as outdoor temperatures plummet. Unlike a furnace that generates heat, a heat pump moves heat. In heating mode, it absorbs heat from the outside air and transfers it indoors. However, when the outside air temperature drops below approximately 35-40°F (the exact temperature varies by model and efficiency rating), there's less heat available to extract. At these lower temperatures, the outdoor coil can also accumulate ice as moisture in the air freezes. To combat this, heat pumps enter a 'defrost cycle' to melt the ice, and simultaneously engage auxiliary (or 'emergency') heat to prevent your home from getting cold during defrost. If either the defrost cycle isn't working correctly or the auxiliary heat isn't kicking in, your home will feel increasingly chilly, leading to frustration and discomfort.
How It Works
Understanding how your heat pump heats and defrosts is crucial to troubleshooting. A heat pump operates on a refrigeration cycle, much like an air conditioner, but it can reverse the flow of refrigerant. In winter, a reversing valve changes the refrigerant's direction, making the outdoor coil act as an evaporator (absorbing heat) and the indoor coil as a condenser (releasing heat). The refrigerant, now a low-pressure, low-temperature gas, absorbs heat from the cold outdoor air, then gets compressed into a high-pressure, high-temperature gas. This hot gas flows to the indoor coil, transfers its heat to your home's air, and then the cycle repeats.
When outdoor temperatures drop close to or below freezing, the moisture in the air can condense and freeze onto the outdoor coil, reducing its ability to absorb heat effectively. To prevent this, your heat pump's control board initiates a defrost cycle. During defrost, the reversing valve temporarily switches the refrigerant flow back to the cooling cycle, making the outdoor coil hot enough to melt the ice. Electric resistance auxiliary heaters (like giant toaster coils) or a fossil fuel furnace (in dual-fuel systems) simultaneously activate to temper the cold air that would otherwise be blown into your home during defrost, ensuring your indoor comfort isn't compromised. Once the outdoor coil is clear of ice, the system switches back to normal heating mode. If auxiliary heat doesn't engage during defrost, or if it fails to activate when the outdoor ambient temperature is too low for the heat pump to be efficient independently, your heat pump will 'struggle' and you'll experience cold indoor temperatures.
Step-by-Step Fix
Safety Note: Always turn off power to your heat pump system (both indoor and outdoor units) at the main electrical panel before performing any inspections or maintenance beyond thermostat adjustments. High voltage can be deadly. If you are uncomfortable with any step, call a qualified HVAC technician.
1. Check Your Thermostat Settings First — The simplest oversight
— Many heating issues are caused by incorrect thermostat settings. Ensure your thermostat is set to 'Heat' mode, not 'Auto' or 'Cool'. Verify the temperature setting is several degrees above your current room temperature. Look for an 'Emergency Heat' or 'Aux Heat' setting. If it's accidentally engaged, your heat pump might be locked out, and the auxiliary heat struggle to keep up. Conversely, if your thermostat has an 'Auxiliary Heat Lockout' setting, ensure it's not set too high, preventing auxiliary heat from coming on when needed.
- If this doesn't work: Consider replacing old mercury or non-programmable thermostats with a modern, programmable or smart thermostat. They offer better control and diagnostics.
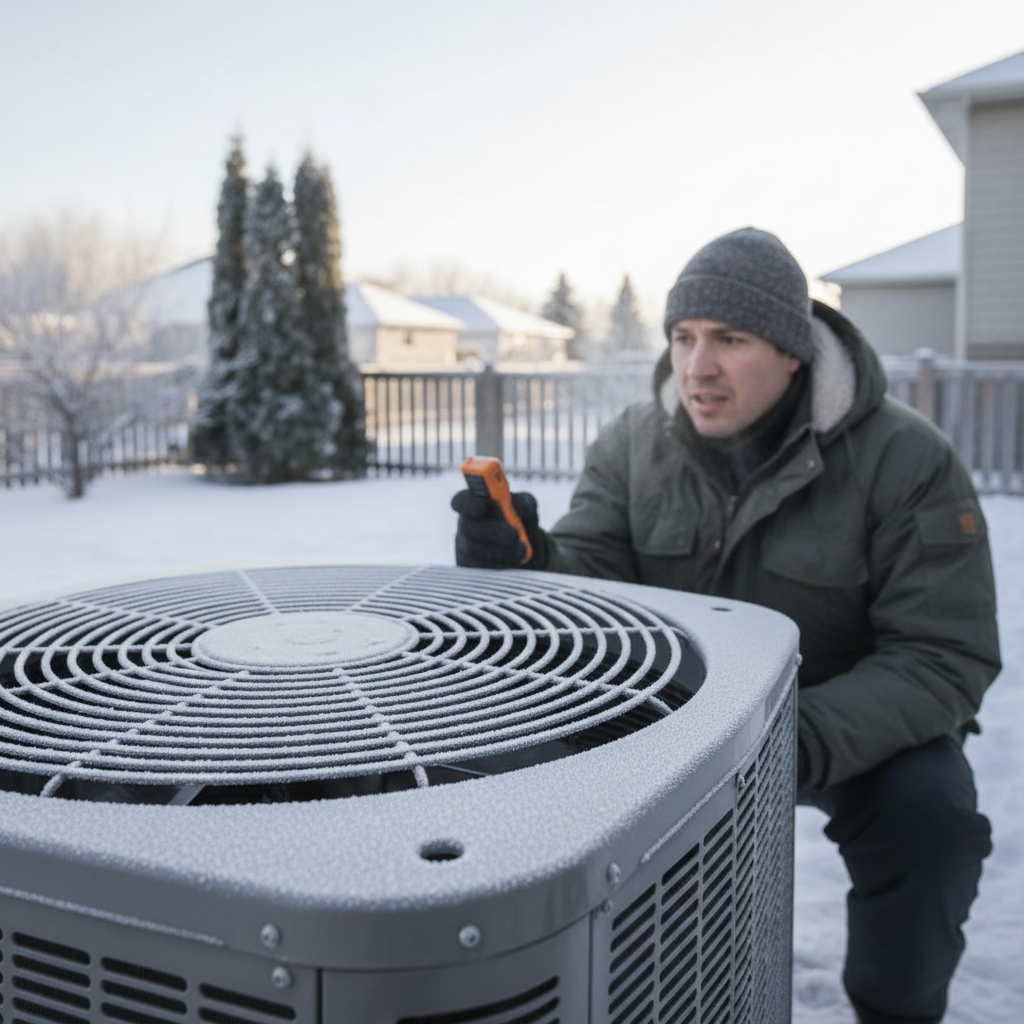
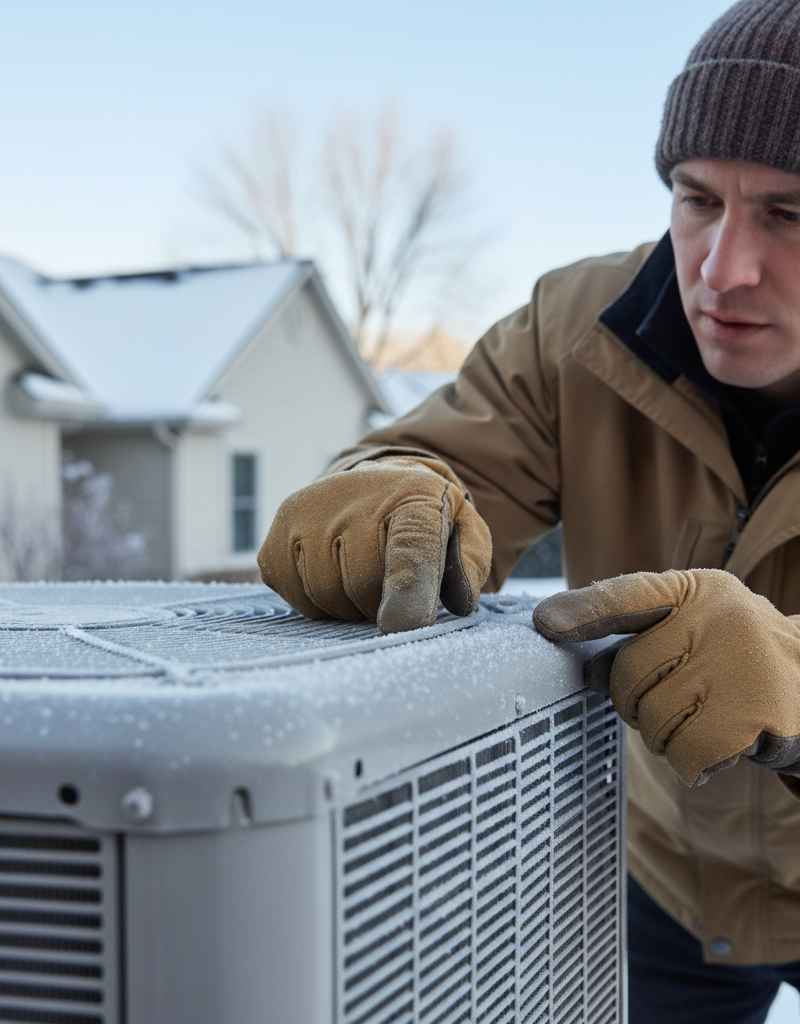
2. Inspect the Outdoor Unit for Ice Buildup — A visible culprit
— Go outside and carefully observe your heat pump's outdoor unit. Is it covered in a thick layer of ice, particularly on the coils and fan blades? A light layer of frost is normal in cold weather and should clear during a defrost cycle. However, significant ice buildup (more than 1/4 inch thick) indicates a problem with the defrost system or restricted airflow. This can prevent the heat pump from extracting heat effectively.
- Tools: Gloves, warm water, plastic scraper (optional).
- Safety: Do NOT use anything sharp like an ice pick or metal scraper, as you can easily damage the delicate fins and refrigerant lines within the coil. Turn off power before attempting to remove ice. Never spray hot water on the unit while it's running.
- If you see significant ice: Turn off the heat pump at the thermostat and at your electrical panel. Allow the unit to defrost naturally, which can take several hours depending on outdoor temperatures. You can gently assist the defrost by pouring lukewarm water over the coils (never hot water, as it can cause thermal shock to components). Once defrosted, restart the system. If it ices up again quickly, a deeper problem exists.
3. Clear Airflow Obstructions Around the Outdoor Unit — Easy restrictions
— Ensure there's at least two feet of clear space around all sides and above your outdoor unit. Shrubs, leaf piles, snow drifts, or even outdoor furniture can restrict airflow, making the heat pump work harder and more prone to icing. A restricted unit cannot transfer heat efficiently.
- Tools: Rake, shovel, pruning shears.
- Ongoing Maintenance: Trim vegetation yearly. Clear snow away from the unit regularly during winter.
4. Check the Defrost Sensor and Board — Requires basic electrical knowledge
— The defrost cycle is initiated by a defrost sensor (which measures coil temperature) and controlled by the defrost control board. A faulty sensor might not detect ice, or a bad board might not trigger the defrost cycle. You can visually inspect the sensor wires for damage. Testing these components typically requires a multimeter and an understanding of electrical circuits and specific component specifications, which might be beyond the average DIYer.
- Pro Callout: If you suspect a faulty defrost sensor or control board, this is often a job for a qualified HVAC technician. They have the specialized tools and knowledge to diagnose these electrical components safely and accurately.
5. Inspect the Reversing Valve — A critical component
— The reversing valve is responsible for switching your heat pump between heating and cooling modes, and also for initiating the defrost cycle by briefly going into cooling mode. If this valve is stuck or failing, your system won't be able to switch modes or defrost properly. A common symptom of a stuck reversing valve in heating mode is that the heat pump will only blow cold air, regardless of the thermostat setting. Sometimes, a gentle tap on the valve (with the power off) can unstick it, but this is a temporary fix at best.
- Pro Callout: A failing reversing valve usually requires professional replacement. This involves recovering refrigerant, brazing new lines, and recharging the system, all of which demand specialized equipment and EPA certification.
6. Verify Indoor Airflow and Filter Cleanliness — Overlooked but vital
— Restricted airflow inside your home can also impact heat pump performance. A dirty air filter is the most common culprit, making your system work harder and reducing heating efficiency. Check your indoor air filter monthly and replace it every 1-3 months, or more frequently if you have pets or allergies. Also, ensure all return and supply vents throughout your home are open and unobstructed.
- Tools: New air filter (matching size and MERV rating).
- Cost: ~$10-$30 per filter.
7. Listen for Auxiliary Heat Engagement — A silent problem
— When your heat pump can't keep up, auxiliary heat should engage. Listen for a different, often louder, sound coming from your indoor unit (air handler) when the heat pump struggles in very cold weather. If you hear no change in sound and your home isn't getting warm, auxiliary heat might not be activating. This could be due to a tripped breaker for the auxiliary heat strips, faulty heating elements, or a control board issue.
- Check Breakers: Locate your electrical panel and check the breaker labeled 'Furnace,' 'Air Handler,' or 'Heat Strips.' Reset if tripped.
8. Check Refrigerant Levels and Leaks — Often requires a pro
— While less common as a direct cause of
Related Articles
Keep troubleshooting with these hand-picked guides from FixlyGuide:
- The #1 Mistake Homeowners Make When Heat Pumps Stop Heating in Winter — Discover the crucial mistake most homeowners make when their heat pump struggles in cold weather and how to fix it, potentially saving hund…
- Why Your Thermostat Lies: The Real Reason Your Home Won't Hit the Set Temperature — Discover why your thermostat struggles to reach the set temperature and learn actionable steps to diagnose and fix common HVAC issues.
- The #1 Mistake Homeowners Make When Their AC Won't Turn On (And the Easy Fix) — Learn the most common oversight homeowners make when their AC won't turn on and how to troubleshoot basic issues to restore cooling.
- The Hidden Reason Your AC Freezes — And Why Most Homeowners Get It Wrong — Your AC freezing up outside isn't just about low refrigerant; restricted airflow is often the true culprit, leading to inefficient cooling…
- The #1 Mistake Homeowners Make When Their AC Won't Turn On (And the Easy Fix) — Learn the most common reason your air conditioner won't turn on and how to diagnose and fix it with simple steps.
- The Hidden Reason Your AC Isn't Cooling (It's Not Just Freon) — A central AC system that isn't cooling your home can often be traced back to a surprising culprit: airflow obstruction, which mistakenly le…
Frequently asked questions
Why does my heat pump struggle to heat when it's very cold outside?+
Heat pumps extract heat from the outside air. As temperatures drop below 35-40°F, there's less heat available, making the unit work harder. It should then rely on auxiliary or emergency heat to supplement heating, but if that system isn't engaging, it will struggle.
How often should a heat pump go into defrost mode?+
The frequency of defrost cycles varies based on outdoor temperature, humidity, and the amount of ice buildup. In very cold, damp conditions, it might defrost every 30-90 minutes, lasting 5-10 minutes each time. In dry, milder cold, it might go hours without defrosting.
Can I manually turn on auxiliary heat to help my heat pump?+
Most modern thermostats have an 'Emergency Heat' or 'Aux Heat' setting you can manually activate. This will run only the auxiliary heat, bypassing the heat pump. Use this sparingly, as auxiliary heat is much less energy-efficient and more expensive to run than the heat pump.
What does a 'normal' heat pump defrost cycle look and sound like?+
During a defrost cycle, the outdoor fan will usually stop, and you might hear a hissing sound as refrigerant flows to melt ice. Steam might rise from the outdoor unit as ice melts. The indoor unit will typically activate auxiliary heat to temper the air, so you shouldn't feel cold air blowing inside.
Is it normal for a heat pump to have some ice on it in winter?+
A light coating of frost on the outdoor coil is normal in cold, humid weather. The unit is designed to periodically enter a defrost cycle to melt this frost. However, a thick layer of ice (more than 1/4 inch) covering the entire coil or fan blades indicates a problem with the defrost system.


Discussion
Loading comments…