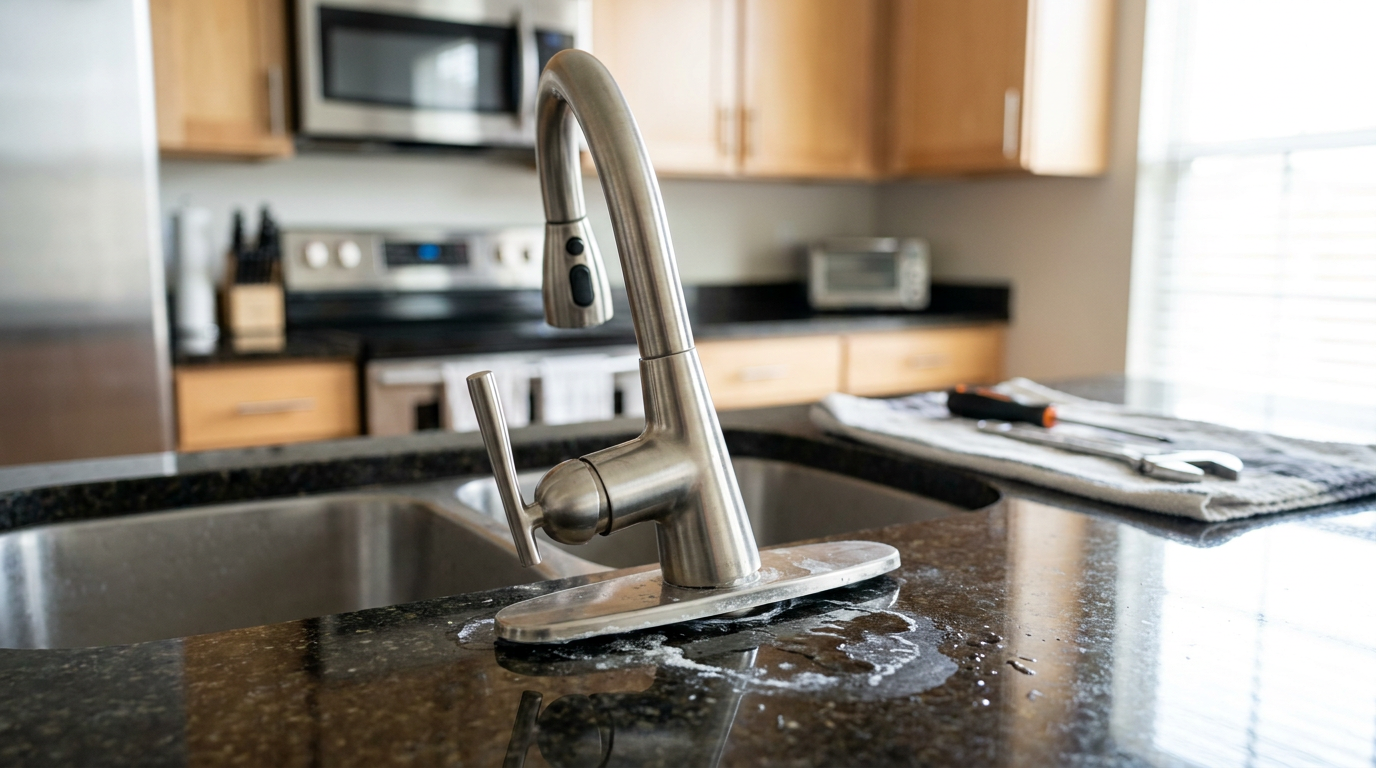
- Torque the locknut until completely seated — Slide the T-handle on your basin wrench for maximum leverage and rotate clockwise. Turn the nut until the horseshoe plate bites hard into the underside of the stone or laminate deck.
- Torque target: You want roughly 8 to 10 ft-lbs of torque—snug and unyielding by hand, but not so brutal that you crack an acrylic or porcelain deck plate.
- If your bracket has dual tension screws: Tighten the main brass nut finger-tight first, then take a long 2 Phillips screwdriver and crank the two secondary locking screws alternately until they pinch the metal washer flat against the deck.
Plumbing · Leak
| Project category | Plumbing |
|---|---|
| Problem type | Leak |
| Trade required | Plumbing |
| Urgency | Emergency — act now |
| Safety risk | High safety risk |
| DIY suitability | DIY for experienced homeowners |
| Cost category | Low cost |
| Typical timeline | Shut water off now; repair usually same or next day |
| Contractor type | Licensed plumber |
Repair option
Isolate at the shutoff, replace the failed component, and dry the cavity fully.
Replacement option
Repipe the run or the branch when corrosion is widespread.
Common causes
- Failed supply line or shutoff valve
- Worn washers, cartridges, or P-trap connections
- Pinhole corrosion in older copper
Relevant tools:emergency checklistdiy or hire a pro
Published November 14, 2026Last updated November 14, 2026
Tools & materials you'll need
Affiliate links- AmazonAdjustable basin wrench1 · Essential for reaching tight nuts behind sink basins
- AmazonRechargeable LED headlamp or work light1 · To illuminate the dark underside of the sink deck
- AmazonHex key (Allen wrench) set1 set · For top-mount set screws and trim collars
- AmazonPhillips and flat-head screwdrivers2 · Long shank #2 Phillips is best
- AmazonSmall plastic bucket or bowl1 · To catch drainage from the disconnected sprayer line
- Amazon100% kitchen and bath clear silicone1 tube · To seal under the escutcheon plate against water leaks
- AmazonPenetrating oil (PB Blaster or WD-40 Specialist)1 can · If threads show heavy calcium or corrosion
- AmazonFaucet reinforcement stabilizing bracket1 · Needed only if mounting to a thin stainless sink or rotted wood deck
As an Amazon Associate FixlyGuide earns from qualifying purchases — at no extra cost to you. Prices and availability are accurate as of publication and subject to change.
Quick Answer
A loose, wobbling faucet base is almost always caused by a loosened mounting nut or a corroded mounting bracket sitting right under your countertop. You can fix it in about 20 minutes by climbing under the sink with a flashlight and a basin wrench to snug the threaded mounting nut onto the under-sink retention plate. If your faucet tightens with top-mount hex bolts, you just pop the decorative trim ring at the base of the spout and torque down the tension screws from above.
The Problem
You grab the kitchen or bathroom faucet handle to wash your hands, and the whole assembly shifts an inch to the left. Turn it off, and it twists right back. Feels cheap, doesn’t it? Worse, it’s quietly chewing up your subtop.
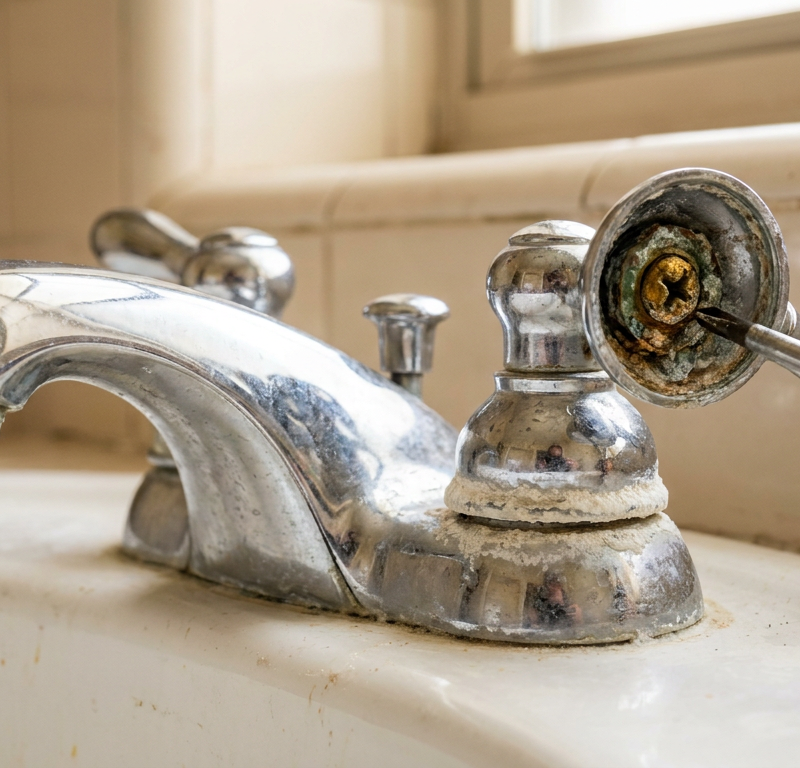
Every time that faucet body pivots on the deck, it grinds away at the caulk or rubber deck-plate gasket sealing the hole through your countertop. Water splashed from dirty dishes, soapy hands, or a wet sponge slips straight beneath the chrome trim ring and runs down the hole. Down below, it soaks into plywood sub-tops, rusts iron brackets, and rots cabinet baseboards. In places with nasty hard water—North Texas is a good example, where limestone-heavy water can carry up to 12 to 18 grains of hardness per gallon—that seepage leaves behind crusty calcium deposits that lock the hardware in place. Then what should’ve been a quick tighten-and-go job turns into a fight with seized brass nuts. I pulled a kitchen faucet in Frisco last month that had exactly this leak, and the nut looked like it had been welded on.
How It Works
To fix the wobble, you’ve got to know what’s actually clamping that faucet to the counter. Modern faucets use one of two mounting designs: traditional underneath locknuts or top-mount tension assemblies.
In a traditional under-mount setup, the cast metal faucet body sits on top of your granite, quartz, or laminate deck. Threaded brass or plastic shanks run straight down through standard 1-3/8-inch or 1-1/2-inch pre-drilled holes. Underneath the sink deck, an installer slides on a horseshoe-shaped metal friction plate or a wide rubber washer, then a heavy threaded brass locknut—or a big plastic wing nut. When you crank it down, that nut wedges the countertop tight between the upper faucet deck and the lower mounting plate, putting thousands of pounds of clamping force on the assembly.
          [ FAUCET SPOUT / HANDLE ASSEMBLY ]
  ═══════════════════[ COUNTERTOP DECK ]═══════════════════
        │                                         │
        │ [RUBBER GASKET OR SILICONE BEAD]        │
        │ [THREADED STEEL / BRASS MOUNTING SHANK] │
        │ [HORSESHOE METAL FRICTION WASHER]       │
        │ [THREADED LOCKNUT / PRESSURE SCREWS]    │
        ▼                                         ▼
Top-mount designs (common on a lot of modern Moen, Delta, and Kohler pull-down models) flip that logic upside down so plumbers don’t have to live under the cabinet all day. A base bracket drops in through the deck hole from above, anchored by toggle bolts or long vertical tension screws. Turning those screws from above pulls an expanding metal bracket up against the underside of the counter. Over time, heavy daily torque, temperature swings that expand and contract copper supply pipes, and the constant yank from weighted sprayer hoses work those nuts and screws loose. No mystery there.
Step-by-Step Fix
Before you go shopping for a brand-new faucet, grab a drop light and crawl under the sink. Nine times out of ten, your existing hardware is fine—it’s just backed off its threads. Here’s how I’d lock it down solid.
-
Clear out the cabinet and set up direct lighting — Empty every cleaning spray, trash bin, and plastic bucket from under your sink so you’ve got room to work. Lay a folded moving blanket or thick towel over the bottom cabinet lip so your ribs don’t get hammered, then set a bright work light on the cabinet floor pointing straight up behind the sink basins.
- Tools required: Drop light or rechargeable headlamp, thick towel or cardboard sheet.
- Safety check: If you’ve got an under-sink garbage disposal or instant hot-water dispenser, unplug them from the wall receptacle so you don’t bump a live switch by mistake.
-
Diagnose your specific mounting style — Look straight up into the cramped cavity between the back of your sink basin and the cabinet wall. If you see a large, hollow threaded rod with a brass or black plastic nut running up against a crescent-shaped metal plate, you’ve got a bottom-mount fixture. If you see small Phillips or 3/32-inch hex set screws recessed around the outside base above the counter, your faucet tightens from the top.
- If this doesn’t match: Dual-handle widespread faucets have separate locknuts under each handle shank; both need to be checked and secured on their own.
-
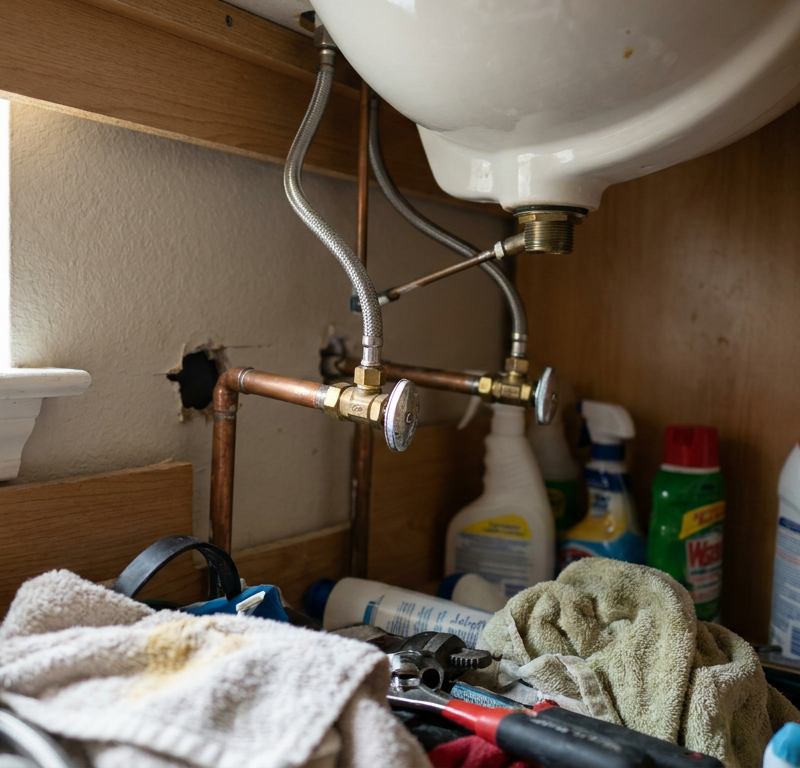
Shut off the hot and cold water supply stops — Reach into the back of the cabinet and turn both oval shutoff valves clockwise until they stop firmly to kill the water pressure. Even though you aren’t disconnecting water supply lines just yet, a slipping wrench can smack a brittle plastic supply valve and snap it clean off.
- Precaution: Open the faucet handles upstairs to bleed off residual line pressure and make sure the water’s truly stopped.
-
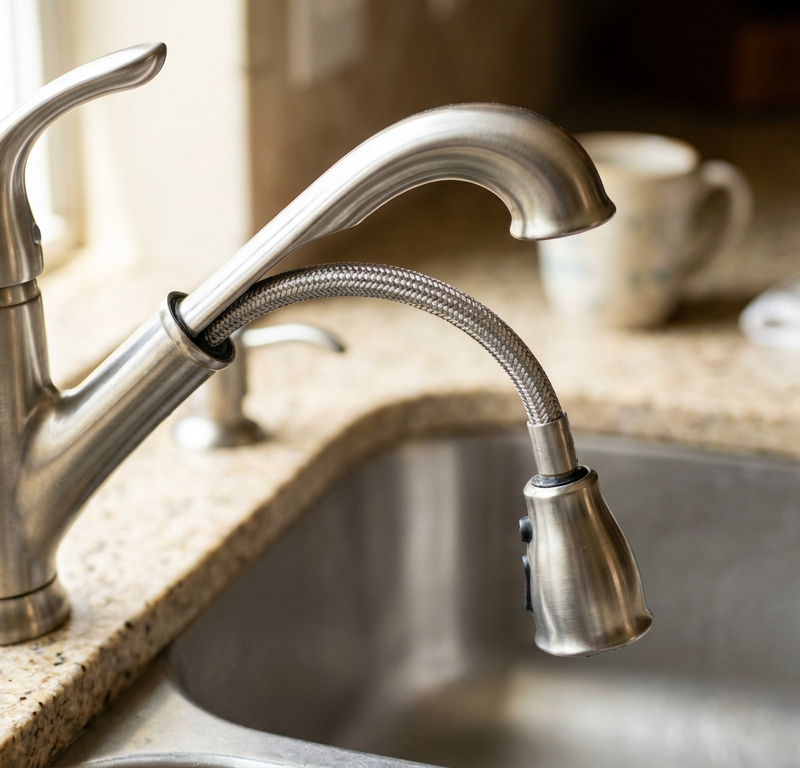
Disconnect the pull-out sprayer hose (if equipped) — On pull-down kitchen faucets, the flexible nylon-braided hose runs straight through the center of the threaded mounting shank. That hose blocks your wrench from getting a clean bite on the locknut. Unclip the snap-connect fitting at the base of the faucet housing, pop off the lead counterweight, and push the loose hose end up an inch out of your swinging path.
- Watch out: Keep a shallow plastic bowl directly beneath this connection; roughly 4 to 8 ounces of stagnant water will drain out when the fitting snaps free.
-
Examine the underside mounting plate and subtop condition — Look closely at where the metal bracket meets the counter. If you’ve got particleboard countertops, check for swelling or rot; if the wood is crumbly, a standard nut won’t bite into solid material anymore.
- If the subtop is rotted: You’ve got to insert an aftermarket faucet reinforcement plate (a wide steel stabilizer bracket) between the wood and your mounting nut to bridge the damaged hole.
-
Position an adjustable basin wrench on the mounting nut — Traditional open-ended wrenches or channel-lock pliers won’t fit into the 2-inch gap between deep undermount sink bowls and the back wall. Take an extendable basin wrench, flip its spring-loaded, pivoting serrated jaw into the "tighten" (clockwise) position, and slide the head over the nut.
- Tool Tip: If your faucet came with a long, hollow yellow or red plastic installation socket tool, use that instead—it slips straight over the lines and grabs the nut teeth like it was made for the job.
-
Square and center the faucet base above the counter — Don’t crank the nut down while the faucet’s cockeyed. Have a helper sit above the counter holding the faucet body dead center over the sink holes, pressing it down firm so the rubber seal underneath doesn’t squeeze out sideways.
- Solo DIYer trick: If you’re working alone, wrap blue painter’s tape tightly around the faucet body and anchor it to the countertop backsplash to hold the alignment while you climb underneath.
-
Torque the locknut until completely seated — Slide the T-handle on your basin wrench for maximum leverage and rotate clockwise. Turn the nut until the horseshoe plate bites hard into the underside of the stone or laminate deck.
- Torque target: You want roughly 8 to 10 ft-lbs of torque—snug and unyielding by hand, but not so brutal that you crack an acrylic or porcelain deck plate.
- If your bracket has dual tension screws: Tighten the main brass nut finger-tight first, then take a long #2 Phillips screwdriver and crank the two secondary locking screws alternately until they pinch the metal washer flat against the deck.
-
Alternative Step: Tighten top-mount mounting bolts (for Moen/Delta top-mount models) — If you figured out in Step 2 that your faucet is top-mounted, stay above the counter. Loosen the set screw on the back of the spout using an Allen wrench, lift off the spout and trim collar, and find the two vertical mounting screws inside the base casting. Tighten both screws clockwise down into the deck clamp using a ball-end hex driver or Phillips screwdriver until the base stops rocking completely.
-
Re-seal the deck perimeter against future water intrusion — Inspect the gap between your faucet escutcheon plate and the stone deck. If the factory foam gasket is shredded or missing, water will leak underneath and start this whole mess over again. Lay a neat, razor-thin bead of 100% clear kitchen-and-bath silicone around the underside rim of the baseplate before final lockdown, wiping away excess squeeze-out with a mineral-spirit rag.
- Safety note: Never use standard plumber's putty on porous natural stone like granite or marble; the oils will soak into the rock and leave a permanent, dark grease ring around the faucet hole.
-
Reconnect the sprayer line and test for stability — Click the quick-connect sprayer hose back into its receptor until you hear a sharp, physical click. Slide the counterweight back onto the hose about 6 inches above its lowest loop point. Turn your hot and cold stop valves back on counter-clockwise.
- Final check: Grab the faucet spout and firmly cycle the handle back and forth under pressure. Check underneath with your dry fingertip for even a single drop of weeping water around the brass shanks.
Common Causes
- Repeated Handle and Hose Torque: Every pull of a spray wand and every hard smack on a commercial-style lever arm puts rotational leverage on the center brass mounting shank. Over 2 to 3 years, micro-vibrations walk the nut down the threads.
- Rotted Particleboard Subtop: On laminate countertops, water leaking past the chrome deck plate turns the cheap 5/8-inch particleboard core into soggy oatmeal. The wood compresses, creates empty air space, and the mounting nut drops completely loose.
- Deformed or Missing Friction Washers: Cheap plastic crescent washers crack under heavy torque or thermal cycling. Once that plastic washer snaps, the mounting nut loses its tension bite against the counter.
- Stripped Top-Mount Toggle Screws: On newer top-mount fixtures, overtightening the tension bolts during original installation can strip the soft pot-metal threads in the expanding under-counter toggle wings, causing them to slip downward under tension.
- Incompatible Deck Thickness: Many faucets are built for deck thicknesses between 1 inch and 1-1/2 inches. If someone installs one on a thin, stamped stainless steel sink basin without an under-deck reinforcement plate, that thin metal flexes every time the handle moves.
Common Mistakes
- Using Channel Locks in a Blind Space: Trying to wedge standard 10-inch tongue-and-groove pliers behind a deep double-bowl sink will strip the brass nut’s corners, smash plastic P-traps, and scrape your knuckles raw. Spend the $18 on a basin wrench or an all-in-one faucet installation socket; it’s the only tool built for this 14-inch vertical reach.
- Overtightening on Fragile Sinks: Cranking a metal locknut against a cast-iron porcelain or fireclay bathroom sink without an intervening rubber or cardboard friction washer will shatter the sink boss. Make sure a rubber gasket or fiber ring sits between the iron nut and the fragile china fixture.
- Ignoring the Rotted Sub-deck: Simply re-tightening a nut into rotted, sponge-like particleboard solves the wobble for about 48 hours. If the wood gives way, you’ve got to bridge that rot with a 1/8-inch galvanized steel faucet stabilizing plate or an oversized structural washer.
- Staining Natural Stone with Plumber's Putty: Plumber's putty contains linseed oil. Jamming it under the trim ring of a granite or quartzite counter will wick oil deep into the stone pores within 48 hours. Use neutral-cure 100% silicone or the manufacturer’s pre-molded rubber O-ring instead.
- Leaving the Weight Misaligned: After reconnecting the pull-down hose, don’t just toss the counterweight into the cabinet. If it snags on your hot and cold water shutoff valves, it’ll tug the whole faucet body sideways every time you pull the nozzle, loosening your fresh repair within weeks.
Cost & Time Breakdown
| Task | DIY Cost | Pro Cost | Time |
|---|---|---|---|
| Tighten Existing Under-Sink Locknut | $0–$20 (cost of basin wrench) | $175–$250 | 20–30 mins |
| Replace Stripped Mounting Hardware Kit | $8–$15 | $185–$275 | 30–45 mins |
| Install Deck Stabilizer Plate on Thin Steel | $12–$22 | $200–$300 | 45–60 mins |
| Top-Mount Toggle System Rebuild | $10–$25 | $180–$260 | 30–40 mins |
| Full Faucet Replacement (if threads fused) | $120–$350 (parts) | $350–$600 | 1–2 hours |
Tips & Prevention
- Check Under-Sink Dryness Monthly: Every time you restock dish soap under the cabinet, run your hand along the brass mounting shank. If it’s damp or shows turquoise copper corrosion, you’ve got water getting past the top deck seal.
- Install a Hose Guide Bracket: If your pull-down faucet hose keeps knocking into the water supply lines and drain pipes, install an inexpensive plastic hose guide bracket to keep every pull moving in a straight, frictionless vertical line.
- Keep Your Aerator Sparkling Clean: A mineral-clogged aerator creates internal hydraulic backpressure inside the spout body. In pull-out faucets, that backpressure pushes micro-leaks down into the faucet neck, soaking the mounting hardware below.
- Don't Use the Faucet Neck as a Handhold: Teach everybody in the house not to grab the high-arc gooseneck spout for balance or leverage when reaching deep into the sink basin. Those spouts work like big levers—a 10-pound pull on an 11-inch spout turns into a lot of torque at the mounting deck.
- Annual Wrench Check: Give the under-sink locknut a quick quarter-turn check once a year. Catching a backed-off nut before it lets the deck move preserves your caulking and prevents wood rot entirely.
When to Call a Professional
Most loose faucet assemblies give up to a basin wrench and 15 minutes of patience. But there are times you need to set the wrench down and bring in a licensed plumber. If you look under the sink and find the mounting nuts fused solid into a single block of calcified green corrosion, taking a hacksaw or blowtorch into that tight, combustible cabinet space carries real risk. Plumbers have specialized reciprocating oscillating blades and nut-splitters that slice seized brass collars off the shank in seconds without torching cabinet walls.
You should also call a pro if tightening the nut shows that the copper supply shanks inside the faucet body have twisted and kinked—a common mistake when somebody wrenches hard from below while the faucet spins above. Once those internal copper lines buckle, they’ll burst under normal 60 PSI city water pressure and flood your home. And if your countertop is cracked across the mounting bridge, a structural stone technician needs to evaluate the granite before you apply clamping pressure that could split the stone slab clean in half.
Related Articles
Keep troubleshooting with these hand-picked guides from FixlyGuide:
- Kitchen Faucet Leaking Under the Sink When Sprayer Runs? 5 Causes and the Step-by-Step Fix — Fix that hidden water leak under your kitchen sink. Step-by-step diagnostic and repair instructions for leaking pull-out hoses, bad O-rings…
- Pull-Down Faucet Won't Retract? 6 Causes and the Step-by-Step Fix — Kitchen faucet spray wand won't snap back in place? Learn how to inspect the hose path, adjust the counterweight, and restore smooth retrac…
- Dishwasher Backing Up into Sink? 5 Causes and the Step-by-Step Fix — Is dirty water backing up into your sink when the dishwasher runs? Learn how to clear clogged disposal inlets, fix hose routing, and stop b…
- Hot Water Running Brown? 5 Causes and the Step-by-Step Fix — Rusty or brown hot water coming from your faucets? Learn why it happens, how to check your sacrificial anode rod, and the step-by-step fix…
- Why Your Hot Water Only Lasts 5 Minutes (And How to Fix It FAST) — If your hot showers are cut short, it's likely a simple issue with your water heater's dip tube, heating elements, or thermostat. Most home…
- The Sagging Gutter Secret: Why Your Rain Runs Wild (And How to Seal It Right) — Sagging gutters often point to failing sealant in the joints, leading to leaks and water damage. This guide shows you how to effectively cl…
Should you do this yourself?
Answer five quick questions before you start. Safety outranks savings every time.
Your experience with work like this
How high do you have to work?
Does the job involve any of these?
Will it need a permit?
Specialty tools
Free and instant. Educational guidance only — not a quote, inspection, or professional diagnosis.
What should this project cost?
Enter your project details for a realistic cost range before you call anyone.
Common repairs run $150–$650; repipes and water-heater replacements reach $1,500–$4,500.
- Regional adjustment
- National average
- Labor share (typical)
- ~$754
- Quotes to collect
- 3 written estimates
Educational estimate based on national averages — not a binding quote. Always confirm with written local estimates.
Fixly Project Decision Box
- DIY difficulty
- Moderate
- Estimated time
- 30 minutes – half a day
- Cost level
- Moderate
Main tools / materials
- Adjustable wrench
- Plunger or drain auger
- Bucket and towels
- Thread tape
When to stop and call a pro
- Water you cannot shut off at the fixture or main
- Sewage backing up into more than one fixture
- Water near electrical panels or outlets
- Gas water heater work beyond relighting a pilot
Need professional help?
Get a Licensed PlumberGet the print-ready PDF of this guide
A clean, ad-free, printable version you can keep on your phone or pin to the workshop wall. Free with a FixlyGuide account.
- Print-optimized layout
- Tools, materials & every step included
- Saved to your account
Frequently asked questions
Do I need to replace my whole faucet if the base is loose?+
You almost never need to replace the entire faucet. A wobbly fixture is almost always caused by a mounting nut or bracket that has vibrated loose from daily use. Unless the cast metal housing is fractured or the threaded brass mounting shanks are stripped clean, tightening or replacing the inexpensive mounting nut kit under the sink will make it rock-solid again.
Why can't I just use regular channel-lock pliers instead of a basin wrench?+
A basin wrench is specifically built with a long shaft and a spring-loaded, swiveling claw head that reaches 10 to 16 inches vertically into the blind, narrow space between your sink basin and the back wall. Standard wrenches, pliers, and channel locks must be held horizontally, which is physically impossible in the 2-inch clearance behind most undermount kitchen sinks.
Why is water leaking under my cabinet when my faucet base is loose?+
On a standard laminate countertop, wet sponges, splashed dishwater, and soap scum leak around the loose base and penetrate the raw particleboard core inside the cutout. That particleboard acts like a sponge, swelling to twice its thickness and crumbling into mulch. Once rotted, there is no solid wood left for your mounting nut to bite into, requiring an extra reinforcement plate.
How do I tell if my faucet tightens from the top or from underneath?+
Top-mount faucets tighten through screws accessible from above the countertop, usually hidden beneath a pop-off spout or decorative escutcheon ring. Under-mount faucets—the traditional style—have long threaded shanks extending under the counter, secured from underneath using wide brass locknuts, crescent friction washers, or large threaded plastic nuts.
What if the brass nut underneath my sink is completely rusted and won't budge?+
You can try spraying the seized threads with a fast-acting penetrating oil like PB Blaster and letting it sit for 30 minutes to dissolve the mineral scale. If that fails, do not heat the brass with an open-flame torch under a wooden cabinet; instead, use a specialized nut-splitter tool or an oscillating multi-tool with a metal carbide blade to carefully notch and crack the nut off the shank.
Why does my faucet still wobble after tightening it down on a stainless steel sink?+
Thin 20-gauge or 22-gauge stainless steel sinks flex under the weight and lever action of tall, commercial-style gooseneck faucets. To eliminate the bounce, install a universal triangular plastic or steel faucet reinforcement bracket under the sink deck. This spreads the clamping force across an 8-inch surface area instead of concentrating it on thin sheet metal.
Should I put plumber's putty or silicone under the base plate when tightening it?+
Yes, but use 100% neutral-cure silicone or the rubber gasket supplied by the manufacturer rather than traditional plumber's putty. Plumber's putty contains mineral and linseed oils that penetrate the porous structure of granite, quartz, and marble, leaving a permanent dark stain ring around the base of your fixture that cannot be washed out.
Why do I have to disconnect my pull-down sprayer hose just to tighten the base?+
In kitchen pull-down faucets, the flexible sprayer hose travels directly through the center of the threaded shank. If you don't disconnect the hose and push it out of the way, your wrench will pinch, kink, or tear the delicate woven nylon sleeve against the sharp metal threads of the shank while you swing the tool, causing an invisible leak inside your cabinet later.
Discussion
Loading comments…