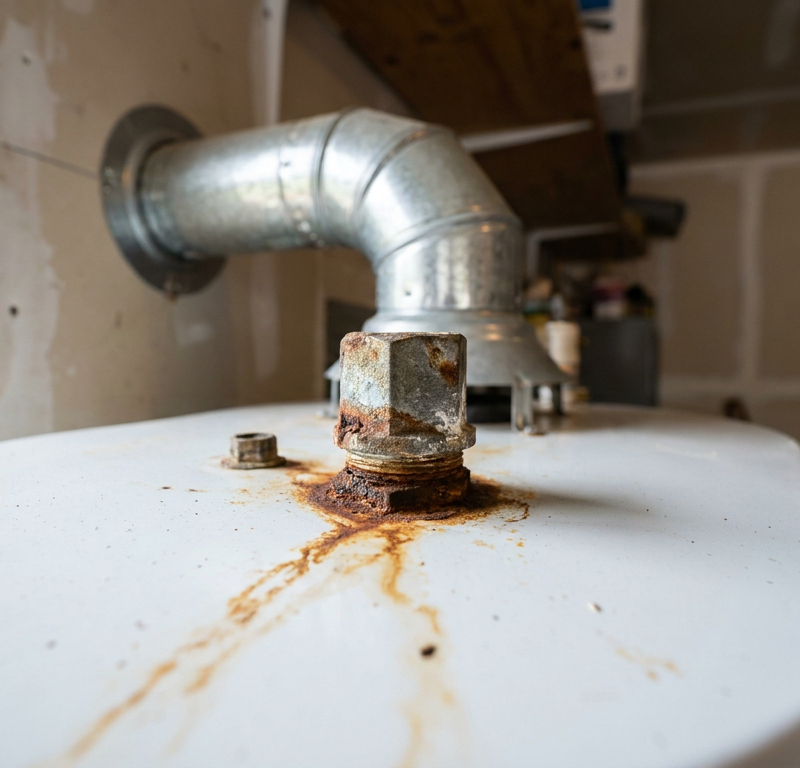
- Galvanic Corrosion at Tank Nipples: Running copper pipe straight into steel water heater ports creates a galvanic battery. The steel threads break down fast and shed rusty debris into the outgoing water line.
- Internal Glass Lining Failure: Once a tank gets to 10 to 15 years old, thermal expansion cracks the internal vitreous porcelain coating. The carbon steel underneath rusts nonstop until the tank finally develops a pinhole leak.
- Utility Main Disturbances: Fire hydrant flushing, municipal main breaks, or street work can stir up iron deposits in the utility mains. If the rust shows up on your cold water taps too, the problem’s outside your house.
Plumbing · Leak
| Project category | Plumbing |
|---|---|
| Problem type | Leak |
| Trade required | Plumbing |
| Urgency | Emergency — act now |
| Safety risk | High safety risk |
| DIY suitability | DIY for experienced homeowners |
| Cost category | Low cost |
| Typical timeline | Shut water off now; repair usually same or next day |
| Contractor type | Licensed plumber |
Repair option
Isolate at the shutoff, replace the failed component, and dry the cavity fully.
Replacement option
Repipe the run or the branch when corrosion is widespread.
Common causes
- Failed supply line or shutoff valve
- Worn washers, cartridges, or P-trap connections
- Pinhole corrosion in older copper
Relevant tools:emergency checklistdiy or hire a pro
Published October 30, 2026Last updated October 30, 2026
Tools & materials you'll need
Affiliate links- Amazon1-1/16-inch deep socket (6-point)1 · Standard size for residential water heater anode hex heads
- Amazon1/2-inch drive breaker bar or impact wrench1 · Needed to break high factory torque
- AmazonHeavy-duty garden hose1 · Heat-rated for hot water drainage
- AmazonNon-contact voltage tester1 · For electric water heater safety verification
- AmazonFlathead screwdriver1 · For opening bottom drain valve and popping top caps
As an Amazon Associate FixlyGuide earns from qualifying purchases — at no extra cost to you. Prices and availability are accurate as of publication and subject to change.
Quick Answer
If your hot water’s coming out rusty, brown, or just plain ugly, the cause is usually iron oxidation inside the tank, a worn-out sacrificial anode rod, or corroded galvanized plumbing nipples. If the discoloration shows up on both hot and cold taps, your municipal main or well casing is the culprit. If it only happens when you run hot water, swapping the depleted anode rod and flushing the sediment out of the tank solves it 80% of the time.
The Problem
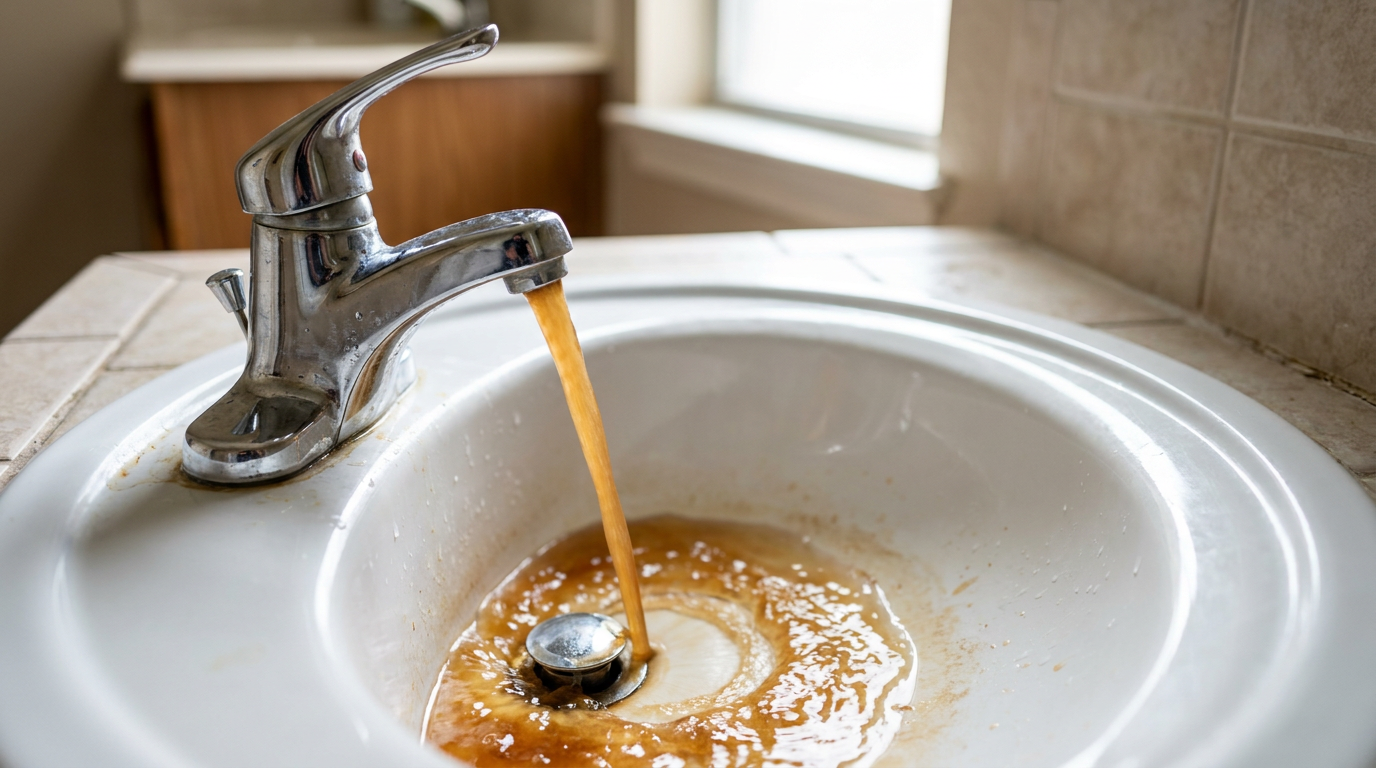
Discolored water’ll get your attention in a hurry. You turn on the bathroom faucet or fill a white porcelain tub, and instead of clean water, you get an amber, orange, or muddy brown stream. It stains sinks, ruins light laundry, and tastes like metallic pennies.
The first thing folks worry about is whether the water heater’s rusted through and is about to dump all over the utility closet or attic. Sometimes that’s exactly what’s going on. But most times, rusty hot water is just the heater waving a red flag. The tank’s protective rod has eaten away, iron bacteria have settled in, or sediment’s been sitting at the bottom of that 40- or 50-gallon tank until normal flow kicks it loose. Catch it early, and a $40 part can save you a $1,800 unit replacement. Ignore it, and that corrosive water keeps chewing on the steel tank walls until that thing’s toast.
How It Works
Standard storage water heaters are built with an internal steel tank lined on the inside with a thin layer of vitreous porcelain enamel—most folks call it a "glass lining." During factory production, that lining always ends up with microscopic cracks and pinholes. Steel in hot water doesn’t hold up well, so manufacturers thread a sacrificial anode rod into the top of the tank.
That rod’s usually magnesium, aluminum, or a zinc alloy. Those metals are less noble than steel on the galvanic scale. Simple chemistry does the dirty work here: corrosive current attacks the anode rod first, dissolving it a little at a time over 3 to 5 years while the steel tank stays protected.
Once that rod’s gone down to the bare steel wire core, the oxygenated hot water starts going after the tank’s exposed steel shell. Ferrous iron oxidizes into ferric oxide—plain old rust. When you open a hot tap, incoming cold water comes in through the dip tube at roughly 40 to 60 PSI, churning that loose rust and sediment up into the hot water supply pipe at the top. In North Texas and other hard water areas, calcium carbonate grabs onto that loose rust and makes a thick, gritty slurry that turns the water brown and clogs faucet aerators. I pulled a water heater in Frisco last month that had exactly this mess—brown soup in the tank and a packed-up aerator on every sink.
Step-by-Step Fix
Before you buy anything, do a quick check: run the cold tap at your kitchen sink for 60 seconds. Clear? Good. Now run the hot tap. If the rust only shows up on the hot side, the problem’s in the water heater footprint. Here’s how I’d chase it down and fix it.
-
Kill the power or gas supply completely — Don’t service a hot, energized tank. For an electric unit, switch off the dedicated double-pole 30-amp breaker at your main service panel. For a gas water heater, turn the gas control valve dial from ON to the VACATION or PILOT setting.
- Safety check: Use a non-contact voltage tester directly on the upper thermostat terminals of an electric unit after removing the metal access panel to make sure you’ve got zero volts.
-
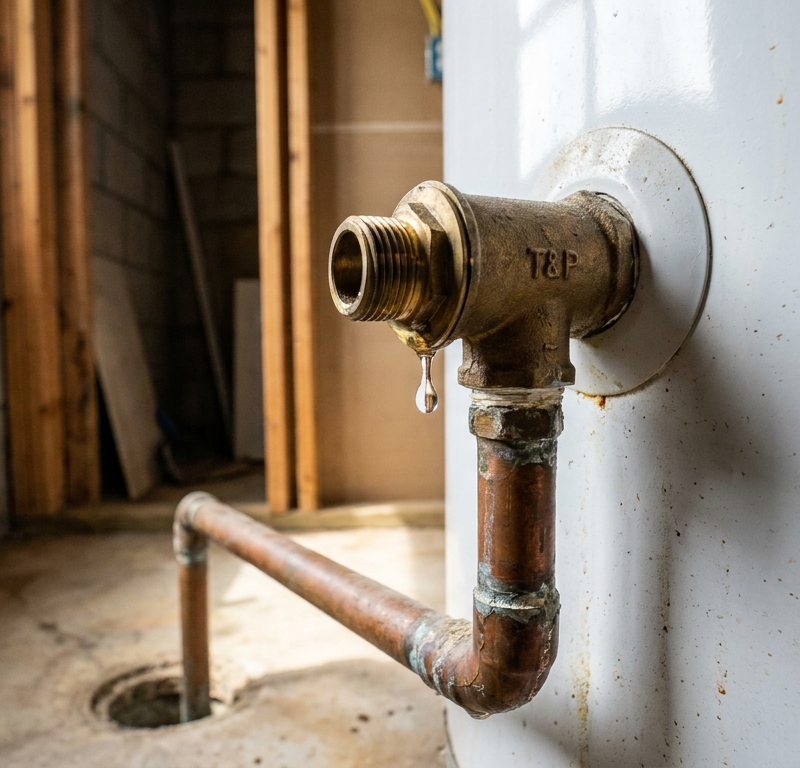
Isolate and relieve tank pressure — Shut off the cold water supply valve on the cold inlet pipe right above the water heater. Hook a heavy-duty, heat-resistant garden hose to the brass drain valve at the bottom of the tank, and run the other end to an exterior drain, a driveway, or a floor drain. Flip up the small metal test lever on the temperature and pressure (T&P) relief valve near the top of the tank to break the vacuum.
- Warning: The water coming out can exceed 130°F. Keep kids and pets away from the hose discharge end.
-
Perform a pressurized blast drain — Open the bottom drain valve all the way with a flathead screwdriver or small crescent wrench. Let it run for 3 minutes. Then open the cold water supply shutoff valve at the top in short 10-second bursts. That sudden blast of 50 PSI municipal pressure scours the bottom convex head of the tank, breaks up stubborn rust-caked sediment, and pushes it out the hose. Keep going until the discharge runs clear.
- If the drain valve is clogged: Mineral chunks love to plug plastic drain valves. Unscrew the hose, stick a short piece of stiff 12-gauge copper wire into the valve port to knock the chunk loose, then reconnect the hose.
-
Locate the sacrificial anode rod hex head — The anode rod hangs from the top jacket of the heater. Look for an exposed 1-1/16-inch hex bolt head on the top metal cap. On some models, it sits under a circular plastic cover that pops out with a flathead screwdriver. If your water heater has an integrated hot outlet anode, the rod hangs directly beneath the hot water outlet nipple.
-
Break the factory anode seal — Anode rods get torqued down hard at the factory, often over 70 to 90 ft-lbs, and heat cycles lock them in even tighter. Fit a 1-1/16-inch, 6-point deep socket onto a 1/2-inch drive breaker bar. Have a helper hug the tank and keep it from spinning on the base while you lean into it counter-clockwise—because if it twists, you can snap copper or gas lines fast.
- Pro tip: If it won’t move, skip the breaker bar and grab a 1/2-inch cordless impact wrench. That quick hammering torque breaks thread-lock compounds loose without twisting the tank.
-
Inspect the old rod — Pull the rod straight up out of the tank. If you’ve got low overhead clearance, which I see all the time in closets and basements, bend the decaying rod as it clears the opening. Check the core: if the rod’s eaten down to a thin, coat-hanger-like steel wire or covered in thick, pitted white-and-orange chunks, it’s flat-out done and was dumping rust right into your lines.
- What if it looks fine? If the rod is thick and intact but your hot water’s still rusty, the tank’s inner steel shell is already corroding from the inside. The tank’s near failure.
-
Prep and install the replacement rod — Buy the right replacement rod. Go with a magnesium rod for soft water or municipal water without much sulfur, or use an aluminum-zinc alloy rod if your water smells like rotten eggs. If ceiling clearance is under 40 inches, get a segmented (flexible) anode rod with stainless steel cable joints. Wrap the top 3/4-inch NPT threads with 5 to 6 wraps of PTFE thread sealant tape clockwise, then add a thin coat of pipe thread paste.
- Installation caution: Don’t use tape on the lower threads if the rod depends on direct metal-to-metal contact for electrical grounding, though standard NPT threads usually bite through tape for ground continuity.
-
Torque the new anode rod into place — Hand-thread the new rod into the tank opening so you don’t cross-thread the soft steel tank collar. Once it spins in smoothly by hand, take your 1-1/16-inch socket and ratchet and snug it down to roughly 40 to 50 ft-lbs. It’s got to seal tight against 60+ PSI static pressure.
-
Inspect the plumbing dielectric nipples — Check the pipe connections right on top of the tank. Old installs often used copper pipe straight into steel tank ports with no dielectric unions or plastic-lined dielectric nipples. That sets up nasty galvanic corrosion at the joint and dumps rust flakes right into the water stream. If you see bubbling green corrosion and brown rust crust at those top threads, pull the fittings and swap them for lined 3/4-inch dielectric nipples.
-
Refill the tank and bleed all air pockets — Close the bottom drain valve tight. Close the lever on the T&P relief valve. Turn the cold water supply valve wide open. Then go to the highest hot water faucet in the house, usually an upstairs bathroom, and turn the hot handle all the way on. The pipes will sputter, hiss, and spit dirty air for 2 to 4 minutes. Once you’ve got a solid, bubble-free stream, shut it off. Check the top of the water heater for leaks around your new anode rod.
-
Restore power or relight the burner — Never re-energize an electric tank until it’s 100% full of water; if you fire a dry upper element, it burns out in under 15 seconds. Once the tank’s full, flip the 30-amp circuit breaker back on, or turn your gas control valve from PILOT back to your normal operating temperature setting (120°F is recommended).
Common Causes
Figuring out where the rust starts saves you from replacing parts you didn’t need to touch in the first place.
- Exhausted Sacrificial Anode Rod: This is the usual suspect. The anode rod dissolves over 3 to 6 years. Once that sacrificial metal’s used up, hot water starts attacking the steel tank wall and fittings right away, and the water turns yellow, orange, or brown.
- Heavy Sediment Accumulation: Every municipal and well water supply carries dissolved minerals. In heated water, calcium and iron settle out as solid grit. Over the years, that builds into a 2- to 6-inch layer of rust-colored silt at the bottom that stirs up whenever water usage gets heavy.
- Galvanic Corrosion at Tank Nipples: Running copper pipe straight into steel water heater ports creates a galvanic battery. The steel threads break down fast and shed rusty debris into the outgoing water line.
- Internal Glass Lining Failure: Once a tank gets to 10 to 15 years old, thermal expansion cracks the internal vitreous porcelain coating. The carbon steel underneath rusts nonstop until the tank finally develops a pinhole leak.
- Utility Main Disturbances: Fire hydrant flushing, municipal main breaks, or street work can stir up iron deposits in the utility mains. If the rust shows up on your cold water taps too, the problem’s outside your house.
Common Mistakes
- Draining a tank without opening a hot tap or the T&P valve. Water won’t drain worth a darn out of the bottom hose if the tank’s sitting in a vacuum. You’ve got to open a faucet upstairs or pull the T&P valve lever so air can get in and replace the draining water.
- Powering on an electric heater before it is full. Homeowners finish an anode swap, flip the breaker right away, and fry the upper heating element. A dry element can hit catastrophic temps in 10 to 15 seconds. Always wait until water runs steady from a hot tap before turning the breaker back on.
- Torquing the anode rod without stabilizing the tank. Putting 80 ft-lbs on a breaker bar without holding the tank still can spin the whole heater. That twists and cracks hard copper supply lines or snaps rigid black-iron gas pipe. Always have somebody brace the tank or counter-torque it.
- Ignoring the cold water check. Replacing an anode rod when the rust’s actually coming from an old galvanized cold-water trunk line or a municipal main flush just wastes your afternoon and your money. Always figure out whether the rust is hot-only or hot-and-cold first.
- Re-using an old plastic drain valve. Cheap factory plastic drain valves get brittle from heat. When you open an old one, the plastic gate or stem often shears off or won’t reseat, and then you’re stuck with a constant drip. If the tank’s older, replace it with a full-port brass ball valve.
Cost & Time Breakdown
| Task | DIY Cost | Pro Cost | Time |
|---|---|---|---|
| Tank Power-Flush (Sediment Clearing) | $15 (Hose & fittings) | $150–$250 | 45–60 mins |
| Sacrificial Anode Rod Replacement | $35–$65 (New rod) | $220–$375 | 1–2 hours |
| Dielectric Nipple Replacement | $15–$30 (Pair of nipples) | $175–$300 | 45 mins |
| Drain Valve Upgrade (Plastic to Brass) | $20–$30 | $150–$225 | 30 mins |
| Full Water Heater Replacement | $650–$1,100 (Tank only) | $1,600–$2,800 | 3–5 hours |
Tips & Prevention
- Check the anode rod every 3 years: If you’ve got a whole-home water softener, check it every 2 years. Softened water swaps calcium for sodium, and that ramps up anode consumption through higher electrical conductivity.
- Flush 2 to 3 gallons every 6 months: You don’t need a giant system overhaul every time. Hook up a garden hose twice a year and blow out 2 to 3 gallons under full municipal pressure to kick out fresh sediment before it cakes up.
- Set your temperature to 120°F: Water heated above 130°F makes mineral scale drop out of suspension at twice the rate. Lower temps cut scaling and help the tank last longer.
- Switch to a powered titanium anode: If your water eats magnesium rods fast or you keep getting that rotten egg (sulfur) smell, spend the money on an active titanium anode rod ($120–$150). It uses a tiny electrical current to stop corrosion and doesn’t wear away or shed material.
When to Call a Professional
Swapping an anode rod or clearing sediment is pretty straightforward DIY maintenance, but some warning signs mean you need a licensed plumber. If you see water pooling under the tank and the rust-colored liquid is seeping out from under the bottom jacket or lower heating element access panel, the inner vessel has fractured. That can’t be repaired; the water heater needs immediate replacement.
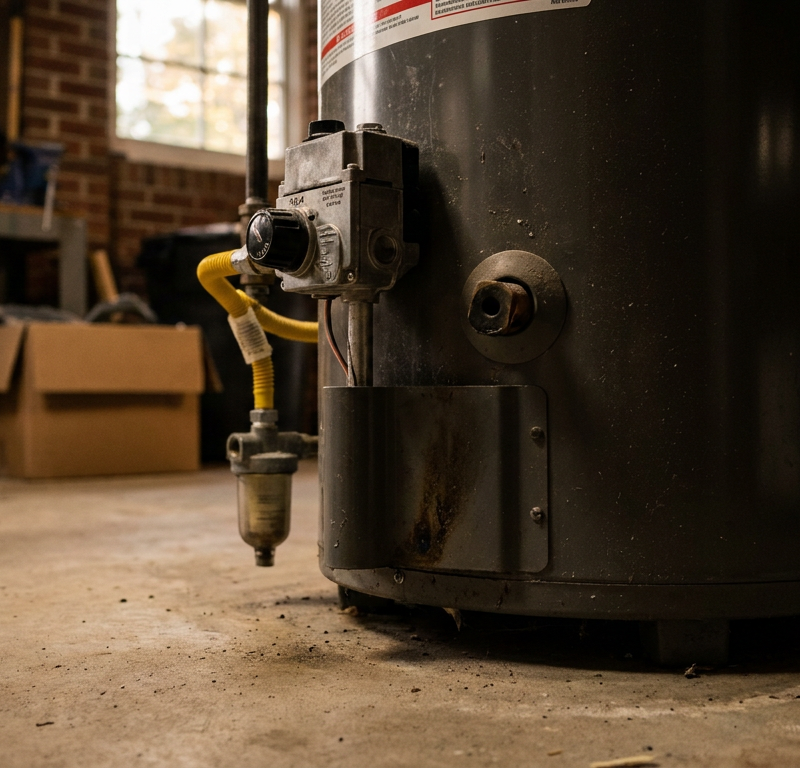
Call a pro right away if you smell natural gas, if your gas control valve has soot buildup or melting plastic wire clips (that usually means dangerous backdrafting), or if your water heater’s got rigid, direct-soldered copper pipes with no flex connectors and you don’t have the torch skills to install replacement dielectric fittings safely. Anything involving corroded electrical boxes or sketchy 240-volt wiring should go to a licensed technician, no question.
Related Articles
Keep troubleshooting with these hand-picked guides from FixlyGuide:
- Dishwasher Backing Up into Sink? 5 Causes and the Step-by-Step Fix — Is dirty water backing up into your sink when the dishwasher runs? Learn how to clear clogged disposal inlets, fix hose routing, and stop b…
- No Hot Water From Your Water Heater? 9 Causes and the Fix for Each — If you have no hot water, it's a cold shower for you and a major headache. We'll show you how to diagnose the cause, from a tripped breaker…
- Kitchen Faucet Leaking Under the Sink When Sprayer Runs? 5 Causes and the Step-by-Step Fix — Fix that hidden water leak under your kitchen sink. Step-by-step diagnostic and repair instructions for leaking pull-out hoses, bad O-rings…
- That Annoying Water Heater Popping Sound? It's Trying to Tell You This One Thing — A popping water heater usually signals a common issue: sediment buildup. Learn why it happens and how to fix it with a simple flush.
- Why Your Hot Water Only Lasts 5 Minutes (And How to Fix It FAST) — If your hot showers are cut short, it's likely a simple issue with your water heater's dip tube, heating elements, or thermostat. Most home…
- Dishwasher Won't Fill With Water? 5 Causes and the Step-by-Step Fix — Dishwasher running dry? Learn how to diagnose a stuck float switch, unclog a water inlet valve, and test solenoid continuity with step-by-s…
Should you do this yourself?
Answer five quick questions before you start. Safety outranks savings every time.
Your experience with work like this
How high do you have to work?
Does the job involve any of these?
Will it need a permit?
Specialty tools
Free and instant. Educational guidance only — not a quote, inspection, or professional diagnosis.
Estimate your own project cost
National averages are a starting point. Enter your details for a range that fits your house.
Water heater replacement cost
- Unit$550 – $1,400
- Installation labor$350 – $900
- Removal & disposal$60 – $150
- Permit & inspection$50 – $200
These estimates reflect typical US installed costs. Get 2–3 written quotes before committing.
Educational estimate only — always confirm with written local bids.
What should this project cost?
Enter your project details for a realistic cost range before you call anyone.
Common repairs run $150–$650; repipes and water-heater replacements reach $1,500–$4,500.
- Regional adjustment
- National average
- Labor share (typical)
- ~$754
- Quotes to collect
- 3 written estimates
Educational estimate based on national averages — not a binding quote. Always confirm with written local estimates.
Fixly Project Decision Box
- DIY difficulty
- Moderate
- Estimated time
- 30 minutes – half a day
- Cost level
- Moderate
Main tools / materials
- Adjustable wrench
- Plunger or drain auger
- Bucket and towels
- Thread tape
When to stop and call a pro
- Water you cannot shut off at the fixture or main
- Sewage backing up into more than one fixture
- Water near electrical panels or outlets
- Gas water heater work beyond relighting a pilot
Need professional help?
Get a Licensed PlumberGet the print-ready PDF of this guide
A clean, ad-free, printable version you can keep on your phone or pin to the workshop wall. Free with a FixlyGuide account.
- Print-optimized layout
- Tools, materials & every step included
- Saved to your account
Frequently asked questions
Why is my hot water brown, but my cold water runs clear?},{answer:+
If discoloration only comes from your hot faucets, the issue is inside your water heater—typically a depleted anode rod, heavy sediment, or a corroded tank. If rust shows up on the cold side as well, the issue lies in your home's main iron pipes or the city water supply.
Discussion
Loading comments…