- Manage your water pressure. Pick up a $15 pressure gauge and check your home’s psi every year or two. If it keeps creeping over 70 psi, your Pressure Reducing Valve (PRV) probably needs service or replacement.
- Don't set the temperature too high. Most manufacturers recommend 120°F for a good balance of safety and performance. Run it hotter and you’re asking for more scalding risk, higher energy bills, and more stress on the whole system.
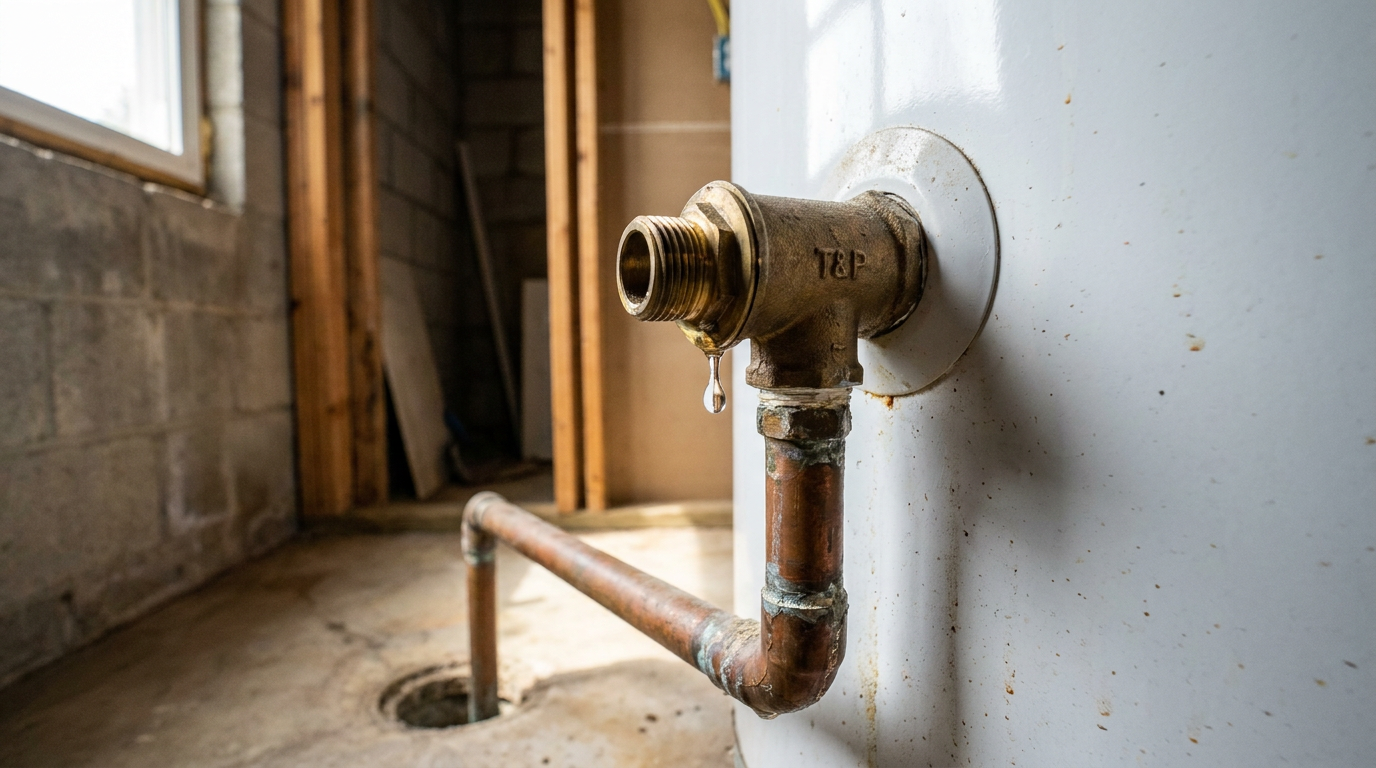
- Look at the discharge pipe. Make sure the pipe from the T&P valve down to the floor isn’t threaded at the end, isn’t reduced in size, and is made from a material rated for hot water like copper or CPVC, not standard PVC.
Plumbing · Leak
| Project category | Plumbing |
|---|---|
| Problem type | Leak |
| Trade required | Plumbing |
| Urgency | Emergency — act now |
| Safety risk | High safety risk |
| DIY suitability | DIY for experienced homeowners |
| Cost category | Low cost |
| Typical timeline | Shut water off now; repair usually same or next day |
| Contractor type | Licensed plumber |
Repair option
Isolate at the shutoff, replace the failed component, and dry the cavity fully.
Replacement option
Repipe the run or the branch when corrosion is widespread.
Common causes
- Failed supply line or shutoff valve
- Worn washers, cartridges, or P-trap connections
- Pinhole corrosion in older copper
Relevant tools:emergency checklistdiy or hire a pro
Published October 9, 2026Last updated October 9, 2026
Tools & materials you'll need
Affiliate linksAs an Amazon Associate FixlyGuide earns from qualifying purchases — at no extra cost to you. Prices and availability are accurate as of publication and subject to change.
Quick Answer
If your water heater's Temperature and Pressure (T&P) relief valve is leaking, one of three things is usually going on: it's doing its job and dumping excess pressure or heat, the valve itself has gone bad, or your home’s water pressure is too high. I always tell folks to look at the leak first. Is it a steady drip, or is it letting go in a hurry? A slow drip usually points to a tired valve. A hard discharge? That’s a red flag, and you don’t just shrug that off.
The Problem
You’ve spotted water around the base of the water heater, or maybe you hear a faint drip-drip somewhere in the utility room. You track it up to a pipe on the side of the tank, near the top. That’s the Temperature and Pressure (T&P) relief valve, and if it’s leaking, you’ve got a warning on your hands. It might be a little annoying drip, or it might be flat-out dumping water, but either way it matters. It’s telling you the valve could be failing, or there may be a dangerous pressure or temperature problem building inside that tank. Don’t just toss a bucket under it and call it a day—small leaks can point to big trouble.
How It Works
Think of the T&P valve as the emergency brake on your water heater. It’s a simple safety device, and it’s there for one reason: keep that tank from turning into a bomb. I’m not kidding. Inside that sealed steel tank, water heats up and expands. That expansion creates pressure. Under normal conditions, no big deal. But if the thermostat goes haywire and the water gets too hot—close to boiling at 212°F—or your incoming water pressure shoots up, the pressure inside the tank can get ugly fast.
That’s where the T&P valve comes in. It uses a spring set to stay shut under normal pressure. Most residential valves are designed to open at 150 psi (pounds per square inch) or at a water temperature of 210°F. If either limit gets crossed, the spring compresses, the seal opens, and hot water plus steam escape through the discharge pipe. That pipe should always dump safely toward a floor drain. This release is not a nuisance feature. It’s there to prevent a disaster. So if you see water coming out, you’ve usually got three possibilities: the valve is opening because pressure or temperature is too high and it’s doing its job, the valve is worn out and opening too early, or it’s stuck partway open. Figuring that out tells you whether you’re looking at a simple valve swap or a bigger system problem.
Step-by-Step Fix
Here’s how I’d track down the problem and, if it comes to it, swap out a bad T&P valve.
Safety First: We’re dealing with water that can burn you bad. Wear gloves and safety glasses. If you smell rotten eggs on a gas water heater, stop right there, get out of the house, and call your gas company from a safe distance.
-
Check for an Emergency — First thing: is the valve blasting water, or is it just dripping? A hard, steady discharge usually means the valve is reacting to a real high-pressure or high-temperature problem. The tank could be overheating. If that’s what you’ve got, shut off the power (flip the breaker for electric) or gas supply (turn the dial to OFF) right away. Don’t fight the leak. Let the tank cool for several hours before you go any further. If that makes you nervous, call a plumber. No shame in that.
-
Test the Valve (Briefly) — Put a bucket under the discharge pipe. Carefully lift the little metal test lever on top of the valve for just 2-3 seconds. You should hear air rush and see a quick spurt of hot water. Let the lever snap back shut. Warning: That water can be scalding hot. If nothing comes out, or if it keeps dripping after the lever closes, the valve’s junk and needs replacing. Hard-water scale can keep it from sealing right, and in North Texas I’ve seen that mineral buildup wreck a perfectly decent-looking valve.
-
Shut Down the Water Heater — Now we get ready to replace it. Turn off the heat source first. If it’s electric, flip off the matching breaker in the main panel. If it’s gas, turn the control knob on the front of the unit to the "OFF" position.
-
Turn Off the Water — Shut off the cold water supply going into the heater. There’s usually a valve or handle on that pipe at the top of the tank. Turn it clockwise until it stops. Then open a hot water faucet somewhere in the house—nearby sink works fine—to bleed off pressure.
-
Drain Some Water — You don’t need to empty the whole tank. Just get the water level below the T&P valve. Hook a garden hose to the drain valve at the bottom of the water heater and run the other end to a floor drain or outside. Open the drain valve and let about 5-10 gallons out. You’ll know the level’s low enough when water stops coming out of the open hot tap.
-
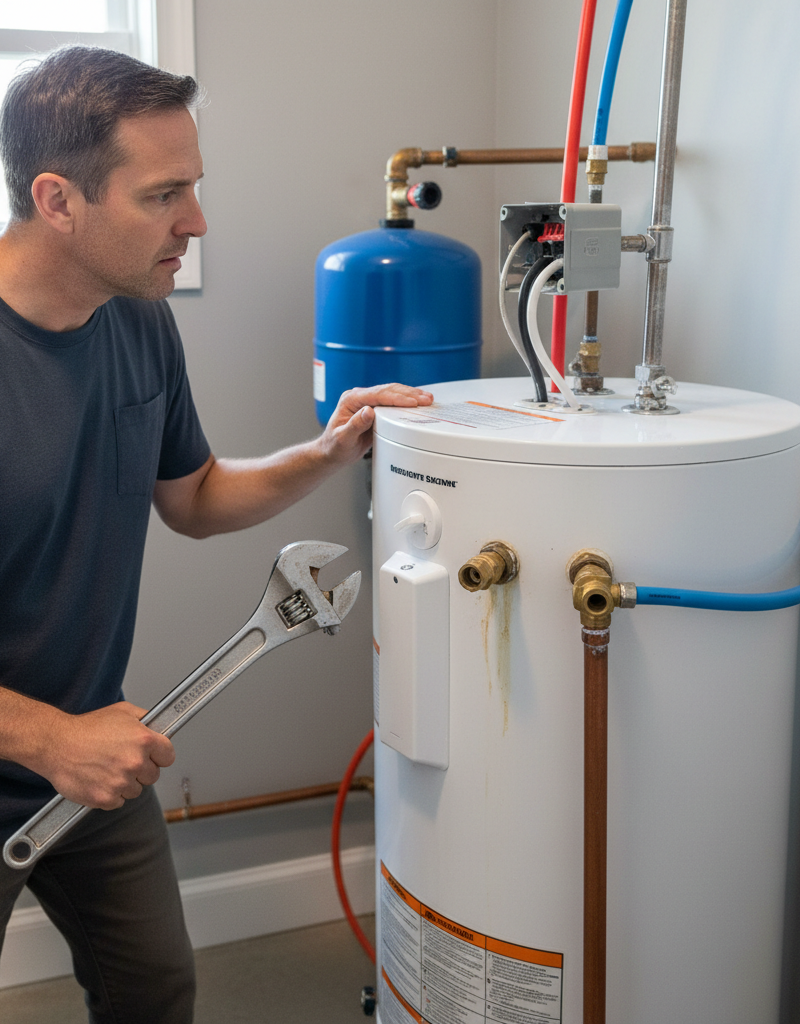
Remove the Old Valve — The T&P valve threads into the tank. You’ll see the discharge pipe hooked to it; take that off first. It might be copper or PVC. Once that’s loose, put a pipe wrench on the body of the old T&P valve and turn it counter-clockwise to back it out of the tank. Keep a rag handy. You’ll probably get a little spill, maybe more than a little.
-
Prepare the New Valve — Your replacement valve needs the same stem length and pressure ratings as the old one—take the old valve with you to the store if you’re not sure. Wrap the threads on the new valve with 3-4 wraps of Teflon tape (plumber's tape) going clockwise. That gives you a solid watertight seal.
-
Install the New Valve — Thread the new valve into the tank by hand first until it’s snug. Then use the pipe wrench to give it another one or two full turns until it’s tight and lined up so you can reconnect the discharge pipe. Don’t get cute and crank it down too hard. You can crack that tank fitting if you do.
-
Reattach the Discharge Pipe — Reconnect the discharge pipe to the new valve. And this matters: that pipe has to slope downward and needs an air gap of at least 6 inches above any floor drain. It should never be capped, plugged, or tied into another valve. Ever.
-
Repressurize and Check for Leaks — Close the drain valve at the bottom of the tank and pull the garden hose off. Turn the cold water supply back on. Let the tank fill all the way—you’ll know it’s full when water starts running steadily from the open hot water tap you left on. Once it’s full, check around the new valve for leaks. If you see any, you may need to snug it a bit more.
-
Turn the Heat Back On — Once you know everything’s dry, go ahead and turn the power or gas back on. Give it 30-60 minutes for the water to heat back up.
-
Test Your Home's Water Pressure — If that new valve starts leaking again pretty quick, your home’s water pressure is probably too high. Screw a water pressure gauge (you can grab one at any hardware store) onto an outdoor hose bib. You want to see 40-60 psi. If it’s sitting over 80 psi, you’ll need to install or adjust your home’s Pressure Reducing Valve (PRV).
Common Causes
So why’s that T&P valve leaking in the first place? It usually boils down to one of these three.
- Normal Operation: The valve is doing exactly what it’s supposed to do. If the thermostat fails and the water gets too hot (over 210°F), the valve opens. Same thing if city pressure spikes or your pressure-reducing valve quits and tank pressure climbs past 150 psi. This isn’t the most common reason for a slow drip, but it is the one I worry about most when the valve blows off hard and fast.
- Faulty Valve: This is the one I see all the time. A slow, stubborn drip usually means the valve’s internal spring is tired, or mineral buildup—especially around here in North Texas with our hard water—has gunked up the seat so it won’t close clean. Sometimes they just wear out. Simple as that.
- Excessive System Pressure: If your house doesn’t have a thermal expansion tank and your water pressure’s already running high, say 75-80 psi, the normal heating cycle can push things just over the T&P valve’s limit. Then you get a little burp of water every time the heater runs. That’s not just a bad valve. That’s a whole-system pressure issue.
Common Mistakes
I’ve seen homeowners make some expensive mistakes with this one. Don’t go down these roads.
- Capping or Plugging the Leak: This is the most dangerous move on the list. Never, ever plug the T&P valve or its discharge line. You’d be shutting off the one safety device keeping that tank from blowing up. Pressure builds. The tank fails. That’s the ugly version.
- Ignoring a Dripping Valve: A drip isn’t “no big deal.” It’s a symptom. Put a bucket under it and forget it, and you’re asking for a bigger leak, wasted energy, or a hidden pressure issue that can crack the tank later.
- Installing the Wrong Valve: T&P valves aren’t one-size-fits-all. They’ve got specific temperature and pressure ratings, plus stem lengths. If the stem’s too short, it won’t sense the water temperature right, and that thing’s basically useless.
- Overtightening the New Valve: It’s tempting to muscle it down, but you can crack the threaded fitting on the tank itself. Once that happens, you’re in a bad spot. The whole water heater can be toast. Snug, then a quarter-turn more, is usually enough, especially with Teflon tape.
- Leaving the Discharge Pipe Off: That pipe isn’t optional. It carries scalding water and steam safely to the floor. Without it, a relieving valve could spray boiling water all over the room. No dice.
- Not Testing System Pressure: If you replace a leaking valve and never check the home’s water pressure, you may just be fixing the symptom. If high pressure’s the real issue, the new valve’ll start leaking again before long, and you’ll be right back where you started.
Cost & Time Breakdown
Here’s what you’re looking at for time and money to deal with a leaky T&P valve.
| Task | DIY Cost | Pro Cost | Time |
|---|---|---|---|
| Test & Diagnose the Problem | $0 | $100–$150 (service call) | 15 minutes |
| Replace a Faulty T&P Valve | $15–$25 (for the valve) | $200–$350 | 30-60 minutes |
| Test Home Water Pressure | $10–$15 (for a gauge) | Included in service call | 5 minutes |
| Install/Replace Expansion Tank | $100–$200 | $400–$650 | 1-2 hours |
| Install/Replace Pressure-Reducing Valve | $50–$100 | $350–$600 | 2-3 hours |
Tips & Prevention
A little prevention saves a lot of grief. Plumbing’s like that.
- Test your T&P valve annually. Most homeowners never touch it, but it only takes 10 seconds. Lift the lever briefly, make sure water comes out, and confirm it snaps shut cleanly. That helps wash out a little sediment and proves the spring isn’t frozen up.
- Manage your water pressure. Pick up a $15 pressure gauge and check your home’s psi every year or two. If it keeps creeping over 70 psi, your Pressure Reducing Valve (PRV) probably needs service or replacement.
- Install a thermal expansion tank. If your home runs as a "closed system"—meaning water can’t flow back toward the city main, which is common if you’ve got a PRV—you need a thermal expansion tank. It gives expanding hot water a place to go and takes the stress off the T&P valve.
- Don't set the temperature too high. Most manufacturers recommend 120°F for a good balance of safety and performance. Run it hotter and you’re asking for more scalding risk, higher energy bills, and more stress on the whole system.
- Look at the discharge pipe. Make sure the pipe from the T&P valve down to the floor isn’t threaded at the end, isn’t reduced in size, and is made from a material rated for hot water like copper or CPVC, not standard PVC.
When to Call a Professional
Replacing the valve itself is pretty straightforward for a lot of DIY folks, but you need a licensed plumber right away if you run into any of these:
- The T&P valve is dumping a large, continuous volume of water. That’s an emergency, not a simple leak. Shut off the power or gas to the heater and get help.
- You test your home’s water pressure and it’s over 80 psi. A pro needs to install or replace your main Pressure Reducing Valve (PRV).
- You smell gas around a gas water heater at any point. Stop. Get out. Call the gas company, then a plumber.
- The threads on the tank for the T&P valve are corroded, stripped, or cracked. Forcing a new valve in there will only make the leak worse, and you may be looking at a whole new water heater.
- If you don’t have a thermal expansion tank and your system pressure is high, have a pro install one. That job takes a bit more know-how than just changing out a valve, and I’d rather see someone experienced handle it.
Related Articles
Keep troubleshooting with these hand-picked guides from FixlyGuide:
- Why Your Hot Water Only Lasts 5 Minutes (And How to Fix It FAST) — If your hot showers are cut short, it's likely a simple issue with your water heater's dip tube, heating elements, or thermostat. Most home…
- Your shower's cold? 3 sneaky reasons your hot water vanishes — Tired of your hot shower turning lukewarm unexpectedly? We uncover the three most common culprits, from a hidden part in your water heater…
- That Annoying Water Heater Popping Sound? It's Trying to Tell You This One Thing — A popping water heater usually signals a common issue: sediment buildup. Learn why it happens and how to fix it with a simple flush.
- The Secret Reason Your Sump Pump Runs When It’s Not Raining — If your sump pump runs constantly even on a dry day, it's not a ghost; it's a sign of a stuck switch, a failed valve, or a surprisingly hig…
- The Secret Culprit Behind Your Leaky Refrigerator (It’s Not Always the Water Line) — Discover the most common, often overlooked, reasons your refrigerator is leaking water and how to fix them with simple DIY steps.
- Your Refrigerator's Loud Hum? The Fix Most People Miss — A constant, loud refrigerator hum is more than annoying—it's a warning sign. Before you call a pro, discover the #1 most overlooked cause a…
Should you do this yourself?
Answer five quick questions before you start. Safety outranks savings every time.
Your experience with work like this
How high do you have to work?
Does the job involve any of these?
Will it need a permit?
Specialty tools
Free and instant. Educational guidance only — not a quote, inspection, or professional diagnosis.
Questions to ask before you sign
Ask every contractor the same questions and the cheapest bid stops looking cheapest. Check them off as you go — your progress is saved on this device.
Free, no signup. Bring this to every walkthrough so you compare bids on the same terms.
What should this project cost?
Enter your project details for a realistic cost range before you call anyone.
Common repairs run $150–$650; repipes and water-heater replacements reach $1,500–$4,500.
- Regional adjustment
- National average
- Labor share (typical)
- ~$754
- Quotes to collect
- 3 written estimates
Educational estimate based on national averages — not a binding quote. Always confirm with written local estimates.
Fixly Project Decision Box
- DIY difficulty
- Moderate
- Estimated time
- 30 minutes – half a day
- Cost level
- Moderate
Main tools / materials
- Adjustable wrench
- Plunger or drain auger
- Bucket and towels
- Thread tape
When to stop and call a pro
- Water you cannot shut off at the fixture or main
- Sewage backing up into more than one fixture
- Water near electrical panels or outlets
- Gas water heater work beyond relighting a pilot
Need professional help?
Get a Licensed PlumberHandle this before it gets worse
First steps that limit damage, then a way to reach a qualified pro.
- Emergency repair checklistThe first steps that limit damage before a pro arrives.Open
- Get local estimatesSend one request and compare written estimates from vetted pros.Open
- Estimate this projectGet a cost range for your scope and ZIP before you call anyone.Open
Free, no signup required. Estimates are educational guidance, not a quote or an inspection.
Get the print-ready PDF of this guide
A clean, ad-free, printable version you can keep on your phone or pin to the workshop wall. Free with a FixlyGuide account.
- Print-optimized layout
- Tools, materials & every step included
- Saved to your account
Frequently asked questions
How serious is a leaking T&P valve?+
It can range from a minor nuisance to a critical safety warning. A slow drip is often just a failed valve, but a high-volume leak means it's actively preventing a dangerous pressure buildup. You should never ignore it.
Can I just cap the leaking T&P valve?+
Absolutely not. This is extremely dangerous. Capping the valve disables your water heater's only safety mechanism against excessive pressure, which could lead to the tank rupturing or exploding.
How often should a T&P valve be replaced?+
There's no strict replacement interval, but most plumbers recommend replacing them every 5 years as a preventative measure, or whenever you replace the water heater itself. If it fails a manual test or starts dripping, it should be replaced immediately.
Why does my NEW T&P valve still leak?+
If you just replaced the valve and it's already dripping, the problem isn't the valve—it's your system. Your home's water pressure is almost certainly too high (above 80 psi) or you need a thermal expansion tank to absorb pressure spikes.
What's the difference between a T&P valve and a drain valve?+
The T&P valve is a safety valve, usually near the top of the tank, that opens automatically due to high temperature or pressure. The drain valve is a manually operated spigot at the bottom of the tank used for flushing sediment or emptying the tank.
How much does it cost to have a plumber replace a T&P valve?+
You can expect to pay a plumber between $200 and $350 for a service call to replace a standard T&P valve. The cost is higher than the part itself because it includes their time, expertise, and travel.
Is it normal for the T&P valve to leak a little when the water is heating?+
No, it's not normal, but it is a classic sign of high system pressure and thermal expansion in a closed system. The heating water expands, and with nowhere to go, it pushes the pressure just high enough to 'burp' the T&P valve. The solution is usually installing a thermal expansion tank.
What temperature should my water heater be set to?+
The Department of Energy recommends a setting of 120°F. This is hot enough for most household needs, helps prevent scalding, and reduces energy waste compared to the 140°F factory default on many older heaters.

Discussion
Loading comments…