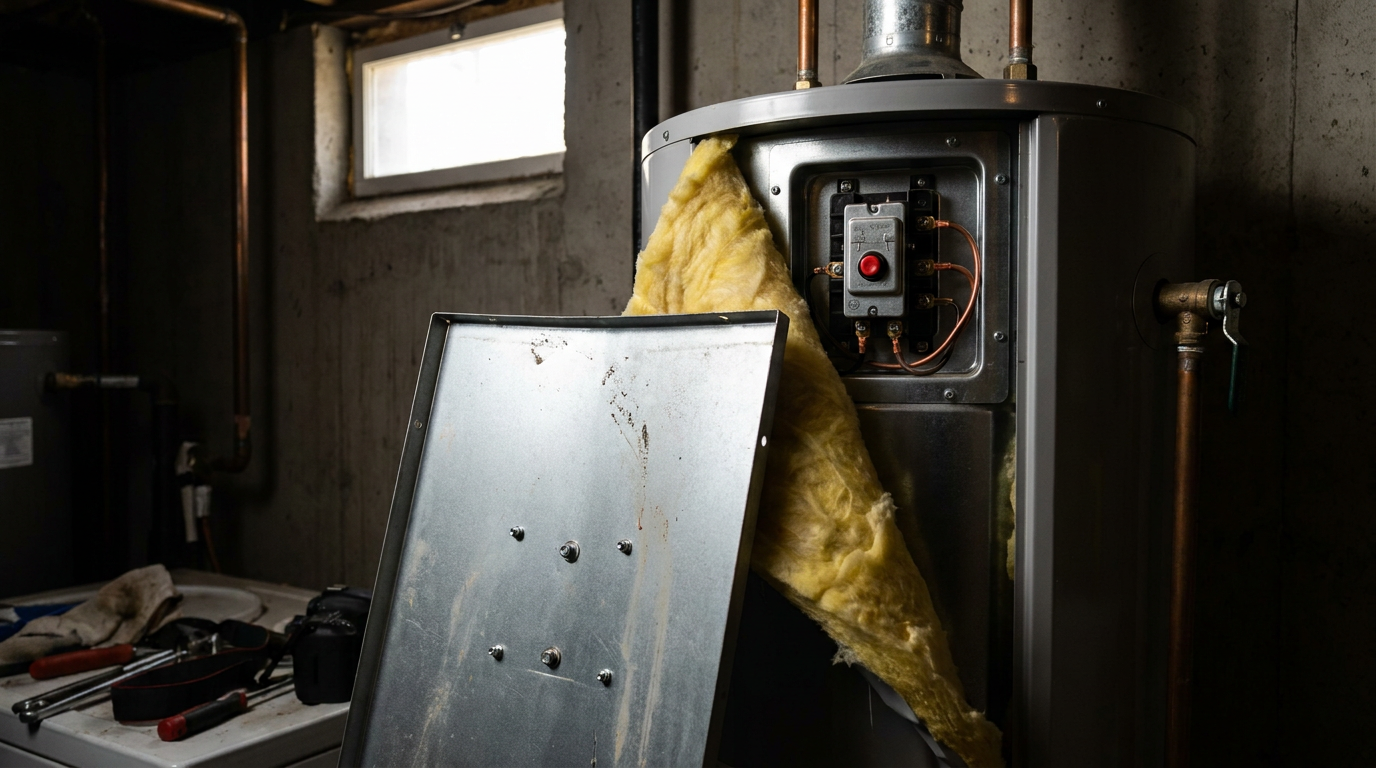
- Welded Thermostat Contacts: High electrical current arcing across mechanical contact points over thousands of cycles makes them pit, stick, and weld shut. Once that happens, the circuit never opens and power keeps feeding the element.
- Grounded/Burned-Out Element: Hard water scale chews up the element’s outer metal sheath. Once water gets to the inner resistance wire, electricity dumps straight to the grounded tank shell and bypasses the thermostat completely.
- Loose Thermostat Bracket: The thermostat has to touch the steel tank directly so it can read temperature. If the spring clips bend or slip, the sensor reads room air instead of tank water.
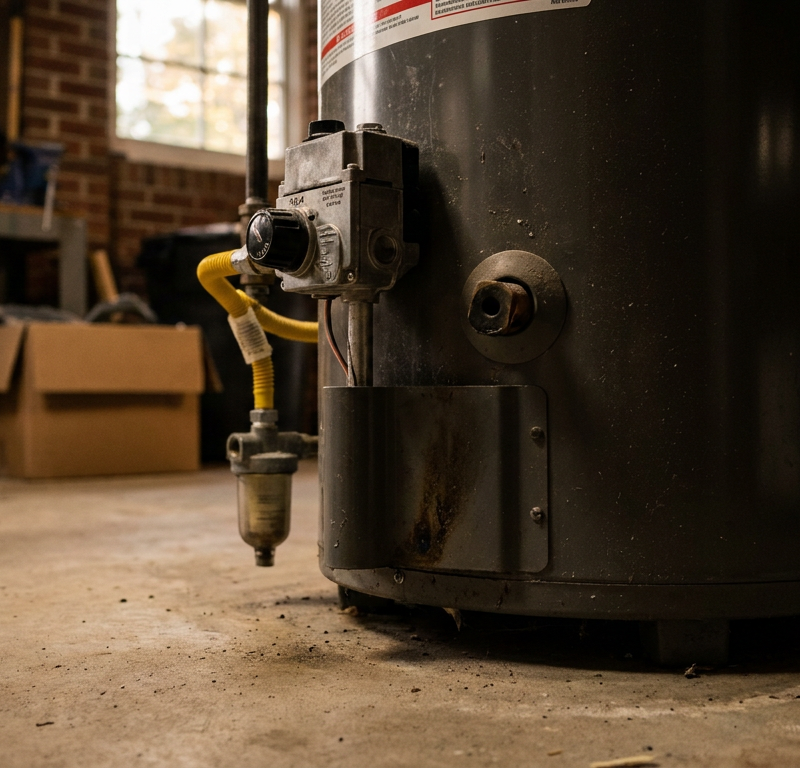
- Faulty Gas Control Valve (Gas Units): The internal thermopile-driven gas valve uses a mechanical rod-and-tube immersion sensor. If internal corrosion jams the valve open, the burner just keeps going.
Plumbing · Water heater problem
| Project category | Plumbing |
|---|---|
| Problem type | Water heater problem |
| Trade required | Plumbing |
| Urgency | Urgent — within days |
| Safety risk | Moderate safety risk |
| DIY suitability | Pro recommended |
| Cost category | Moderate cost |
| Typical timeline | Diagnosis same day; replacement typically a half-day install |
| Contractor type | Licensed plumber |
Repair option
Element, thermostat, or thermocouple replacement on a tank still in good condition.
Replacement option
Full replacement once the tank leaks or passes roughly a decade of service.
Common causes
- Failed heating element or thermocouple
- Sediment buildup reducing capacity
- Tank corrosion at end of service life
Relevant tools:repair or replaceproject cost estimator
Published November 16, 2026Last updated November 16, 2026
Tools & materials you'll need
Affiliate links- AmazonDigital Multimeter1 · Must measure AC voltage and resistance/continuity
- AmazonNon-Contact Voltage Tester1 · To double-check zero power at the panel
- Amazon1/4-inch Nut Driver1 · To remove panel access covers
- AmazonFlathead Screwdriver1 · For terminal screws and thermostat adjustment
- Amazon1-1/2-inch Element Socket Wrench1 · Stamped steel deep socket for heating elements
- AmazonHeavy-duty Garden Hose1 · For draining tank below element level
As an Amazon Associate FixlyGuide earns from qualifying purchases — at no extra cost to you. Prices and availability are accurate as of publication and subject to change.
Quick Answer
If your hot water’s coming out scalding hot, sputtering at the taps, or tripping that red reset button, your water heater’s overheating. Kill the breaker or shut the gas control valve right away so you don’t build dangerous pressure in the tank. Nine times out of ten, you’re looking at a bad upper or lower thermostat stuck in the closed “calling for heat” position, a shorted electric heating element, or mineral crust messing with the temperature probe.
The Problem
You turn on the bathroom faucet and get steam bursts or water hot enough to brew tea? That’s not just annoying. That’s a straight-up safety problem. Water hotter than 120°F can burn you bad, and at 140°F human skin can take third-degree burns in five seconds flat. At 150°F, it’s less than two seconds. No room for games there.
And it doesn’t stop at burns. Extreme overheating beats up the whole plumbing system. Most residential water heaters see 40 to 80 PSI of incoming municipal pressure. Once water starts heading toward boiling at 212°F, it expands hard. That pressure can push past 150 PSI, which makes PEX fittings soften, copper joints strain, and the Temperature and Pressure (T&P) relief valve dump scalding water onto the utility room floor. If your heater’s hissing, shaking, spitting steam, or keeps tripping its red High-Limit (ECO) safety switch, the thermal control loop has flat-out failed.
How It Works
Standard electric storage water heaters run on a 240-volt circuit and use two heating elements: one up top and one down low. They don’t fire together. They work in a flip-flop sequence controlled by two thermostats mounted against the outer steel skin of the inner tank.
When you use hot water in the morning, cold water comes in through the dip tube and settles at the bottom. If the tank’s cold all the way through, the upper thermostat takes priority. It sends 240 volts to the upper element and heats the top third first so you’ve got usable hot water fast. Once that upper thermostat hits its setpoint—ideally 120°F to 125°F—its little bimetal switch clicks over and sends power down to the lower thermostat.
Then the lower thermostat cycles the bottom element on and off to hold the tank at temp. If the contact points weld together on either thermostat, power just keeps flowing. On gas units, a mechanical immersion probe screwed into the gas control valve watches the temperature. If that probe goes bad or gets buried in hard-water scale, the burner won’t shut off and the water just keeps cooking. I pulled a water heater in Frisco last month that had exactly this leak-and-boil mess going on, and the whole bottom half was packed with white crust like someone poured concrete in there.
Step-by-Step Fix
This procedure covers how to test and replace a bad thermostat or a shorted heating element on an electric water heater, which is the usual culprit behind residential overheating.
-
Cut the Power at the Main Service Panel — Flip the dedicated double-pole 30-amp breaker to the "Off" position. Electric water heaters carry 240 volts, and that’ll hurt you fast. Don’t trust a thermostat dial or a wall switch and call it safe.
- Safety Check: Use a reliable non-contact voltage tester or digital multimeter directly across the top incoming terminals (screws L1 and L2) to verify zero volts before you pull any covers.
-
Remove the Upper and Lower Access Panels — Take out the upper and lower metal inspection covers on the side of the tank with a 1/4-inch nut driver. Fold back the fiberglass or foam insulation carefully so you can see the plastic terminal covers (personnel guards).
- Tool: 1/4-inch magnetic nut driver.
- Safety note: Wear gloves. The sheet metal back there is sharp enough to bite.
-
Inspect the Red High-Limit Reset Button — Look at the top thermostat assembly. You’ll see a red button labeled "RESET" on the Emergency Cut-Off (ECO) switch. If it’s popped out and clicks when you press it, the tank’s gone over 170°F, which tells you this thing has seriously overheated.
- Diagnostic branch: If the red button trips again right after reheating, you’ve got a welded contact or a grounded element.
-
Test for a Grounded Lower Heating Element — Set your digital multimeter to the lowest Ohms (Ω) setting or continuity mode. Disconnect at least one wire lead from the element terminals. Put one probe on one of the element’s screw terminals and touch the other probe to bare metal on the tank body or the element’s brass hex flange.
- Pass/Fail: Your meter must read "OL" (open loop / infinite resistance). If you get any resistance number or a continuity beep, the internal nichrome wire has broken down and welded to the outer copper sheath, so it’s heating nonstop no matter what the thermostat says.
-
Test Thermostat Continuity — With the power still off, test the internal switches of both thermostats. Disconnect the lower wire leads going from the upper thermostat to the lower unit. Use your multimeter probes to verify whether the contacts open when you turn the temperature screw down to its lowest setting (90°F–110°F).
- Diagnostic branch: If the switch still shows continuity (0.0 to 0.4 ohms) even when dialed down past ambient water temp, those contact points are welded shut. Replace the thermostat.
-
Drain Down the Tank (If Replacing an Element) — If an element failed the continuity test, hook a standard heavy-duty 3/4-inch garden hose to the bottom drain valve and run it outside. Shut off the cold water inlet valve on top of the water heater, open a hot water faucet inside the house to break vacuum suction, and drain roughly 5 to 10 gallons until the water level drops below the element port.
- If replacing thermostats only: Skip draining. Surface-mount thermostats sit dry against the outside steel tank skin.
-
Disconnect and Label Wiring — Snap a clear smartphone photo of the wiring diagram on the panel door and your existing wiring harness. Using a flathead or Phillips screwdriver, loosen the terminal screws and pull the wires free from the bad thermostat or element.
- Pro Tip: Label the wires (L1, L2, T1, T2) with blue painter’s tape so you don’t cross them up later.
-
Unseat and Swap the Thermostat — Lift the plastic retaining bracket tabs carefully with a flathead screwdriver and slide the bad thermostat upward out of its metal mounting bracket. Slide the new factory-matched thermostat down until it snaps tight against the bare steel tank.
- Critical step: The back metal plate of the thermostat has to sit dead flat against the curved steel tank skin. If insulation gets trapped behind it, the thermostat reads wrong and you’ll be right back here overheating again.
-
Replace a Faulty Element (If Applicable) — Fit a 1-1/2-inch water heater element socket over the hex head of the failed element. Turn counterclockwise with a 1/2-inch breaker bar to crack the factory seal. Thread in the new copper or high-grade Incoloy element with a fresh rubber O-ring, torquing it firmly to roughly 25 to 30 ft-lbs so it doesn’t leak.
- Tool: 1-1/2-inch stamped steel element socket wrench.
-
Reconnect Wiring and Reinstall Guards — Put the wires back on the right terminals based on your photo, tightening the terminal screws down firmly (aim for roughly 15 to 20 in-lbs; snug, but don’t strip the soft brass threads). Snap the clear plastic personnel covers securely back over the assemblies.
-
Refill the Tank Completely (Avoid Dry Fire) — If you drained water, close the drain valve and reopen the cold water supply valve all the way. Keep a hot water faucet running somewhere in the house until the sputtering stops and you get a solid, steady stream for 60 seconds.
- Safety warning: Turning power back on to an empty or partially filled tank will vaporize a new electric element in under 10 seconds (known as "dry fire").
- Restore Power and Calibrate Temperature — Turn the circuit breaker back on. Set both thermostats with a flathead screwdriver to 120°F (often marked as the "Hot" or normal index mark). Wait two hours, then run hot water into a mug at the nearest sink and check it with an instant-read digital cooking thermometer. Turn it down if it reads over 125°F.
Common Causes
Water heaters don’t overheat on their own. There’s always a mechanical or electrical failure behind it. Here’s what I usually find:
- Welded Thermostat Contacts: High electrical current arcing across mechanical contact points over thousands of cycles makes them pit, stick, and weld shut. Once that happens, the circuit never opens and power keeps feeding the element.
- Grounded/Burned-Out Element: Hard water scale chews up the element’s outer metal sheath. Once water gets to the inner resistance wire, electricity dumps straight to the grounded tank shell and bypasses the thermostat completely.
- Loose Thermostat Bracket: The thermostat has to touch the steel tank directly so it can read temperature. If the spring clips bend or slip, the sensor reads room air instead of tank water.
- Extreme Sediment Buildup: In hard-water areas like North Texas, dissolved calcium carbonate settles at the bottom of the tank. A 4-inch layer of lime insulates the lower element or gas heat exchanger, throws off the sensor, and bakes the water above it.
- Faulty Gas Control Valve (Gas Units): The internal thermopile-driven gas valve uses a mechanical rod-and-tube immersion sensor. If internal corrosion jams the valve open, the burner just keeps going.
Common Mistakes
- Cranking the dial down without fixing the bad part. Homeowners notice scalding water and just twist the external dial down to "vacation" or 90°F. If the thermostat contacts are welded or an element’s grounded, the dial doesn’t matter—the element stays powered 24/7.
- Ignoring a dripping T&P discharge pipe. When a heater overheats, the temperature and pressure relief valve cracks open to vent steam and hot water down that discharge pipe. Threading a cap or plug onto it to stop the “leak” turns the tank into an unvented pressure vessel. Never plug a T&P line.
- Powering up the heater before the tank is full. Flip the breaker too soon and you’ll destroy a new element in no time. Always bleed air through a hot faucet until the stream is smooth and solid.
- Not replacing both thermostats as a matched set. If the upper thermostat failed from age and wear, the lower one’s lived through the same cycles and load. Spend the extra $12 and swap both while you’re in there.
- Leaving insulation caught behind the sensor. Stuffing fiberglass between the thermostat and the steel tank creates a heat barrier. The thermostat thinks the water’s 70°F when it’s really 160°F. That thing’s toast.
Cost & Time Breakdown
| Task | DIY Cost | Pro Cost | Time |
|---|---|---|---|
| Thermostat Diagnostics (Multimeter) | $0 (if tool owned) | $120–$180 | 15–25 mins |
| Dual Thermostat Replacement | $20–$35 | $250–$375 | 45–60 mins |
| Lower Heating Element Replacement | $15–$30 | $275–$400 | 1–2 hours |
| Complete Electric Rebuild (Thermostats + Elements) | $45–$65 | $350–$500 | 2 hours |
| Gas Control Valve Replacement | $140–$280 (parts) | $450–$750 | 2–3 hours |
Tips & Prevention
- Set both dials to 120°F: Most modern thermostats come preset from the factory at 120°F (often marked with an arrow or "Normal"). That’s the sweet spot: hot enough to help suppress Legionella bacteria, but not so hot that it scalds skin or builds mineral crust fast.
- Flush sediment annually: Hard water minerals chew up elements. Open the drain valve and run a 5-minute pressurized flush every 12 months to knock loose scale out of the bottom third of the tank.
- Check the T&P valve lever yearly: Lift the metal test lever on your T&P valve for two seconds to make sure it opens and discharges freely, then let it snap shut. If it’s frozen shut, you’ve got zero emergency pressure protection.
- Check water pressure with a gauge: Thread a simple $10 pressure gauge onto an outdoor hose bib. If your street pressure is over 80 PSI, thermal expansion problems get a whole lot worse; install or service your pressure reducing valve (PRV).
When to Call a Professional
Testing an electric heater with a multimeter is pretty straightforward for most handy homeowners. Still, some symptoms mean you should hand it off to a licensed plumbing or electrical contractor.
Call a pro right away if you smell natural gas, see soot streaks around the draft hood of a gas water heater, or hear the burner roaring nonstop even when turned to "Off." Gas control valve replacement means breaking and resealing black iron gas pipe and checking for explosive micro-leaks with bubble solution or a combustible gas sniffer.
If your water heater is shaking hard, rumbling like a jet engine, and blowing continuous high-pressure steam from its safety pipe, get everyone out of the utility area, shut off the water at the main meter shutoff, and call an emergency plumber. If the electrical junction box shows melted wire insulation or the panel walls are charred, bring in a licensed electrician to check your breaker and service feeder lines.
Related Articles
Keep troubleshooting with these hand-picked guides from FixlyGuide:
- Chimney Leaking During Rain? 6 Causes and the Exact Fix for Each — Stop rain from leaking into your chimney. Learn to diagnose cap, crown, flashing, and brick issues, with step-by-step DIY fixes and clear r…
- Why Your Hot Water Only Lasts 5 Minutes (And How to Fix It FAST) — If your hot showers are cut short, it's likely a simple issue with your water heater's dip tube, heating elements, or thermostat. Most home…
- Water Heater T&P Valve Leaking? 3 Causes and a 30-Minute Fix — A leaking T&P valve on your water heater is an urgent warning sign. Here are the three main causes and the steps to diagnose and replace it…
- No Hot Water From Your Water Heater? 9 Causes and the Fix for Each — If you have no hot water, it's a cold shower for you and a major headache. We'll show you how to diagnose the cause, from a tripped breaker…
- Hot Water Running Brown? 5 Causes and the Step-by-Step Fix — Rusty or brown hot water coming from your faucets? Learn why it happens, how to check your sacrificial anode rod, and the step-by-step fix…
- Dishwasher Won't Fill With Water? 5 Causes and the Step-by-Step Fix — Dishwasher running dry? Learn how to diagnose a stuck float switch, unclog a water inlet valve, and test solenoid continuity with step-by-s…
Should you do this yourself?
Answer five quick questions before you start. Safety outranks savings every time.
Your experience with work like this
How high do you have to work?
Does the job involve any of these?
Will it need a permit?
Specialty tools
Free and instant. Educational guidance only — not a quote, inspection, or professional diagnosis.
Estimate your own project cost
National averages are a starting point. Enter your details for a range that fits your house.
Water heater replacement cost
- Unit$550 – $1,400
- Installation labor$350 – $900
- Removal & disposal$60 – $150
- Permit & inspection$50 – $200
These estimates reflect typical US installed costs. Get 2–3 written quotes before committing.
Educational estimate only — always confirm with written local bids.
What should this project cost?
Enter your project details for a realistic cost range before you call anyone.
Common repairs run $150–$650; repipes and water-heater replacements reach $1,500–$4,500.
- Regional adjustment
- National average
- Labor share (typical)
- ~$754
- Quotes to collect
- 3 written estimates
Educational estimate based on national averages — not a binding quote. Always confirm with written local estimates.
Fixly Project Decision Box
- DIY difficulty
- Advanced
- Estimated time
- Homeowner checks 20–30 minutes
- Cost level
- Moderate
Main tools / materials
- Clean air filter
- Garden hose for condenser coils
- Shop vac for the condensate line
When to stop and call a pro
- Burning smell, smoke, or a tripping breaker
- Refrigerant lines iced over or hissing
- Any work inside the sealed refrigerant circuit (EPA-licensed only)
- Gas smell near a furnace — leave and call the utility
Need professional help?
Find an HVAC Pro Near YouBefore you start
Check the difficulty, permits, and safety risk — then decide whether to call a pro.
Free, no signup required. Estimates are educational guidance, not a quote or an inspection.
Get the print-ready PDF of this guide
A clean, ad-free, printable version you can keep on your phone or pin to the workshop wall. Free with a FixlyGuide account.
- Print-optimized layout
- Tools, materials & every step included
- Saved to your account
Frequently asked questions
What temperature should my water heater thermostat be set to?+
The industry standard recommendation from the EPA and safety commissions is 120°F. This temperature prevents rapid third-degree burns within seconds while remaining high enough to stop bacteria such as Legionella from colonizing inside the storage tank. Setting it higher also accelerates limescale accumulation on your heating elements.
Can I just push the red reset button and keep using the water heater?+
No, you should never run the water heater continuously with a tripping reset button. That red button on the Emergency Cut-Off (ECO) switch trips at 170°F to prevent the tank from boiling and exploding. Pushing it back in without replacing the underlying defective thermostat or grounded element will simply lead to another dangerous overheat.
Why is my hot water faucet spitting and sputtering air?+
When water gets superheated past 200°F inside a sealed tank, pockets of flash steam form. When you open a sink or shower faucet, that trapped, pressurized steam releases all at once, blasting air pockets and boiling water through your aerator with violent, sputtering bursts.
Can a bad thermostat cause a water heater to overheat?+
Yes, absolutely. Electric water heaters utilize two thermostats: an upper unit with an emergency safety switch and a lower unit. If either thermostat has pitted, welded electrical contacts, current flows continuously to its element regardless of what the temperature dial is turned to.
Do I need to drain the entire tank to replace a thermostat?+
No. Thermostats are surface-mounted against the exterior steel skin of the water heater tank behind the outer access doors and fiberglass blanket. They are held tight against the steel by spring clips and can be swapped out without draining a single drop of water.
What is the difference between a burned-out element and a grounded element?+
An element burns out when the inner resistance coil snaps and continuity is broken, resulting in lukewarm or cold water. A grounded element occurs when that broken inner coil shifts and touches the outer copper sheath. It keeps drawing power directly through the metal tank, boiling your water non-stop.
Can I replace a thermostat on a gas water heater myself?+
On gas water heaters, the thermostat is an integral part of the gas control valve assembly screwed into the tank. While electric thermostats cost $15 to $20 and take 30 minutes to swap, gas control valves cost between $150 and $300 and require disconnecting gas lines, which generally warrants hiring a licensed plumber.
Is an overheating water heater dangerous?+
If an electric water heater is properly grounded and the breaker is off, it is safe to service. However, scalding water is an immediate burn hazard, and a boiling tank with a stuck relief valve can rupture. Always kill the 240V breaker before touching wires, and never stand directly in front of an open T&P discharge line.
Discussion
Loading comments…