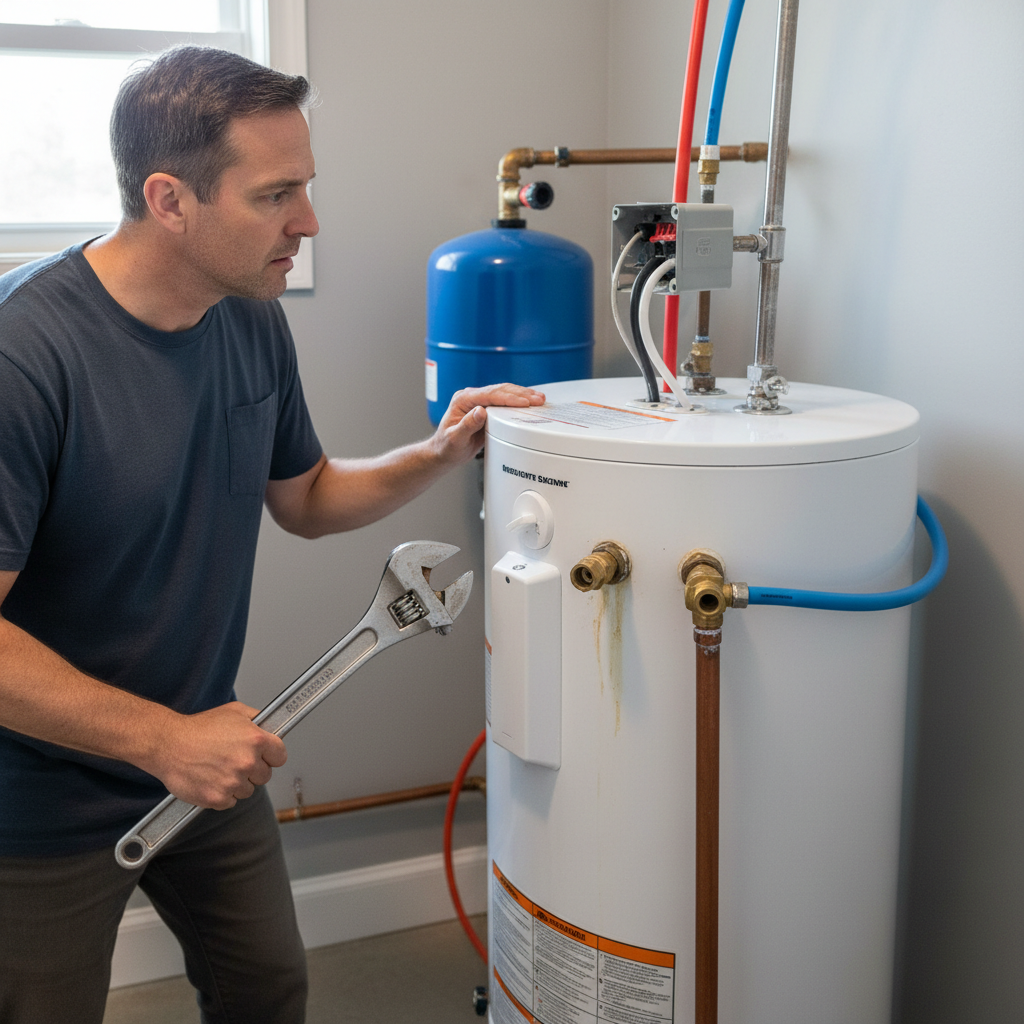
- Adjust Thermostat Settings – Sometimes It's Just a Dial
- Safety: Turn off power to electric water heaters at the breaker before you open any access panels. For gas, you can usually adjust the dial on the gas valve control.
- On gas units, the thermostat is usually one dial on the gas control valve. Turn it up a little, maybe 10 degrees, wait an hour, and see if that gets you back in business.
Plumbing · Water heater problem
| Project category | Plumbing |
|---|---|
| Problem type | Water heater problem |
| Trade required | Plumbing |
| Urgency | Urgent — within days |
| Safety risk | Moderate safety risk |
| DIY suitability | Pro recommended |
| Cost category | Moderate cost |
| Typical timeline | Diagnosis same day; replacement typically a half-day install |
| Contractor type | Licensed plumber |
Repair option
Element, thermostat, or thermocouple replacement on a tank still in good condition.
Replacement option
Full replacement once the tank leaks or passes roughly a decade of service.
Common causes
- Failed heating element or thermocouple
- Sediment buildup reducing capacity
- Tank corrosion at end of service life
Relevant tools:repair or replaceproject cost estimator
Published September 27, 2026Last updated September 27, 2026
Tools & materials you'll need
Affiliate linksAs an Amazon Associate FixlyGuide earns from qualifying purchases — at no extra cost to you. Prices and availability are accurate as of publication and subject to change.
Quick Answer
Alright, so you’re standing there in a nice hot shower, soap in your hair, and then—bam—it turns ice cold. Drives folks nuts. And nine times out of ten, your water heater isn’t dead. Usually it’s something fixable: a bad dip tube, a tired heating element, or a thermostat that’s acting up. A lot of this stuff you can handle yourself in under an hour, and that’s real money saved.
The Problem
Nothing ruins a morning faster than losing hot water halfway through a shower. Homeowners call me all the time saying, “My hot water only lasts five minutes!” or “It used to be fine, now it’s gone in a flash.” I’ve heard some version of that line more times than I can count. It’s especially rough when everybody in the house is trying to get ready at once. And no, it’s not just annoying — a water heater that’s struggling can burn more energy than it should, which means higher utility bills. So let’s get into why it happens and how you get that long, comfortable hot shower back.
How It Works
Let’s break down how that tank in your basement or closet actually does its thing. It isn’t complicated, but once you know the basics, troubleshooting gets a whole lot easier. Most residential water heaters — gas or electric — are storage-tank units. Cold water comes in through a dip tube, which is a long pipe that runs down toward the bottom of the tank. Why the bottom? Hot water rises. So the cold water gets sent low, heats up, and the hot water leaves from the top and heads to your faucets and showerheads.
If it’s an electric water heater, you’ve got two heating elements: one low, one high. Each one has its own thermostat controlling the temperature in that part of the tank. The lower element does most of the work, heating the bulk of the water. The upper one helps recover heat after you use a bunch of hot water. Gas heaters work a little differently — they’ve got a burner at the bottom and exhaust gases venting up through a flue in the center. Both styles also have a sacrificial anode rod inside, and that rod eats the corrosion so the tank lining doesn’t have to. They’ve also got a temperature and pressure (T&P) relief valve for safety, which opens if things get too hot or too pressurized. When hot water suddenly runs out early, I’m usually looking at that dip tube, a heating element, or the thermostats. It all comes back to getting cold water where it belongs, heating it right, and keeping the temperature steady.
Step-by-Step Fix
Before you touch anything, follow the golden rule: safety first. We’re dealing with electricity, gas, and hot water here. Shut off power or gas, and don’t get careless around hot water — it’ll burn you quick.
-
Check Breakers & Pilot Light – The Easiest First Step
- For electric water heaters, go to your electrical panel and see if the breaker for the heater is tripped. It’ll sit halfway between ON and OFF. Flip it fully OFF, then back ON. Sometimes that’s the whole fix. This is often a double-pole 30-amp breaker.
- For gas water heaters, check whether the pilot light is out. There’s usually a label right on the heater with relighting instructions. Most of the time, it’s a pretty simple job with an igniter button or a match.
-
Adjust Thermostat Settings – Sometimes It's Just a Dial
- Safety: Turn off power to electric water heaters at the breaker before you open any access panels. For gas, you can usually adjust the dial on the gas valve control.
- Electric water heaters often have two thermostats, one for each element, hidden behind access panels. Pop the panels off, pull back the insulation, and you’ll see a red reset button and the temperature dial. Check both top and bottom thermostats. Set the temperature to around 120°F (49°C) — that’s generally the sweet spot for safety and efficiency. If the reset button is popped, press it. If it trips again, there’s a bigger electrical issue in play, and now you’re calling a pro.
- On gas units, the thermostat is usually one dial on the gas control valve. Turn it up a little, maybe 10 degrees, wait an hour, and see if that gets you back in business.
-
Inspect the Dip Tube – The Sneaky Cold Water Culprit
- Safety: Shut off the cold water supply to the heater and kill the power/gas. Drain about 5-10 gallons from the tank to drop the pressure and keep surprises to a minimum. Be ready for hot water.
- The dip tube lives inside the cold water inlet pipe. Disconnect the cold water supply line at the top of the tank. Then look down into the inlet port — a flashlight helps. If that dip tube is cracked, broken, or missing, there’s your problem. Cold water is mixing right at the top instead of getting sent to the bottom, so you get lukewarm water almost instantly.
- You’ll need to replace the dip tube. They’re usually plastic, about 3/4-inch diameter, and they run almost to the bottom of the tank. They cost less than twenty bucks. It’s not a hard fix, but you’ve got to get a solid seal on the new connection. Don’t overdo it — I’ve seen folks crack a new tube or damage the tank fitting by cranking too hard. I had a house out in Smyrna a few years back where the homeowner was convinced the whole heater was toast. Nope. The dip tube had basically fallen apart from years of chlorinated city water. Ten minutes later, with a new tube in place, he was back to full hot water.
-
Test Electric Heating Elements – Powering the Heat
- Safety: Absolutely KILL THE POWER at the breaker. Use a non-contact voltage tester to make sure it’s dead. Remove the access panels and insulation.
- Set your multimeter to ohms (Ω), then touch the probes to the two terminal screws on each heating element. A good element should read between 10-30 ohms. If it reads infinity (open circuit) or zero (short circuit), it’s shot. If one element fails, your heater may only warm the top or bottom of the tank, and that’ll slash your hot water supply. Replacing them isn’t terrible, but draining the whole tank and dealing with high voltage means it’s not exactly a casual Saturday project. If you’re not comfortable, call a pro.
- Important: Test both the upper and lower elements. A bad lower element usually means only a small amount of hot water, while a bad upper element can leave you with lukewarm water or slow recovery.
-
Check Tank Sediment – The Hidden Thief
- Sediment build-up at the bottom of the tank, especially in gas water heaters, can insulate the water from the heating element/burner and cut efficiency hard. It also causes those popping noises everybody hears and ignores until the heater starts acting up.
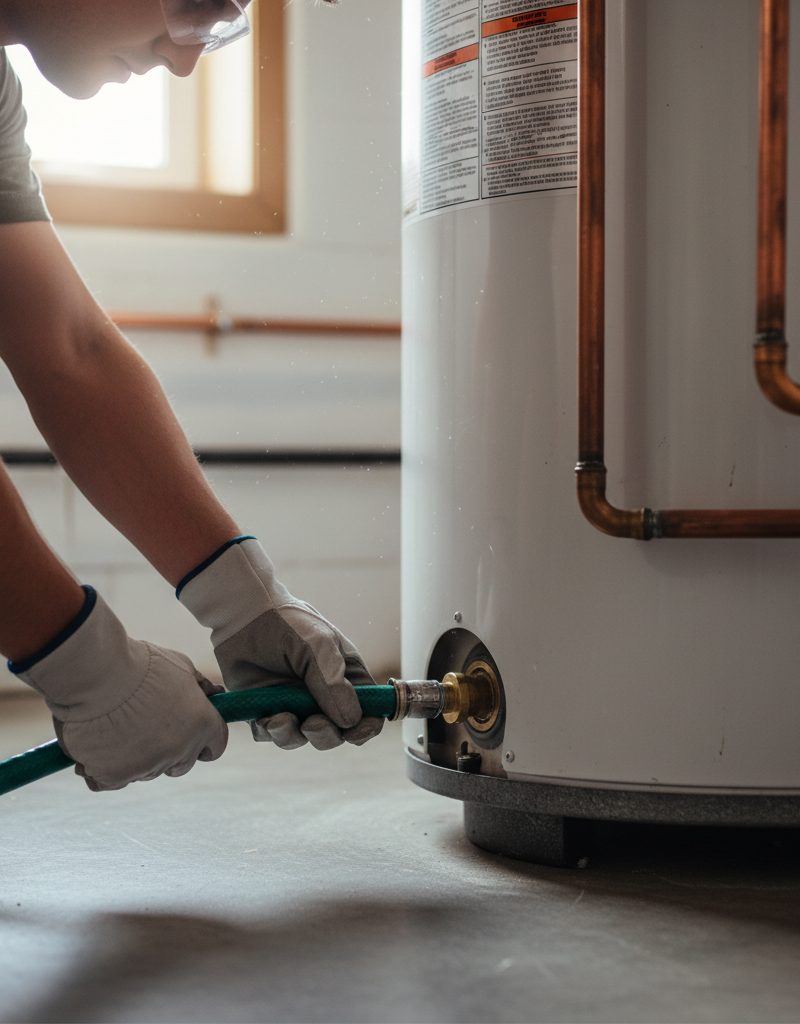
- You’ll need to drain the tank completely. Hook a garden hose to the drain valve at the bottom of the heater and run it to a floor drain or outside. Open the drain valve and crack open a hot water faucet upstairs to break the vacuum. Once it’s drained, open the cold water supply for a few minutes to flush out sediment. Close it all back up and refill. A full flush takes about 30-60 minutes, depending on tank size and how much junk’s in there.
Common Causes
- Broken Dip Tube: This is a big one. If the cold water isn’t forced to the bottom, it mixes with hot water at the top, and you get cold water out fast. It’s like dumping cold water straight into your hot coffee instead of letting the pot do its job.
- Faulty Heating Element (Electric Heaters): If one of your heating elements — especially the lower one — fails, only part of the tank gets heated, and your hot water supply drops off fast.
- Incorrect Thermostat Setting or Malfunction: If the thermostat’s set too low or it isn’t reading the water temperature right, the water won’t get hot enough or stay hot long enough.
- Sediment Buildup: A thick layer of mineral deposits at the bottom of the tank blocks heat transfer, so it takes longer to heat and you’ve effectively got less hot water volume.
- Overuse: Sometimes the heater isn’t broken at all — you’re just using more hot water than the tank can keep up with. Too many showers, laundry, and dishes at the same time can wipe it out fast.
- Tank Size: Your family may have grown, or your routines may have changed. A small 40-gallon tank can get overwhelmed real quick if four teenagers are all showering back-to-back.
Common Mistakes
- Ignoring Breaker or Pilot Light: Folks jump straight to replacing parts without checking the simple stuff first. Don’t do that. Start basic.
- Forgetting to Shut Off Power/Gas: Working on a live electrical circuit or around gas is dangerous. Verify the power is off with a voltage tester before you touch any electrical parts.
- Setting Thermostat Too High: Sure, it seems like an easy fix for more hot water, but it’s a burn risk — especially for kids and older folks. It also speeds up sediment buildup and can shorten the tank’s life. Stick to 120°F.
- Not Draining Enough Water for Dip Tube/Element Replacement: You’ll make a mess and you could get burned. Drain at least 5-10 gallons for a dip tube, and drain the whole tank for elements.
- Overtightening Connections: When you put it all back together, especially the dip tube or new elements, don’t muscle it down. You can strip threads or crack fittings and create leaks.
- Not Calling for Help When Out of Depth: If you’re not sure about a step, especially electrical testing or gas connections, don’t guess. That’s how a small problem turns into a big, expensive, dangerous one.
Cost & Time Breakdown
Here’s a rough idea of what you’re looking at if you do it yourself versus calling in the cavalry. Costs can swing pretty widely depending on parts and labor rates in your area.
| Task | DIY Cost | Pro Cost | Time |
|---|---|---|---|
| Check Breaker/Pilot Light | $0 | $100–$250 | 5 min |
| Adjust Thermostat | $0 | $100–$250 | 10 min |
| Replace Dip Tube | $10–$20 | $150–$300 | 30 min – 1 hr |
| Replace Heating Element(s) | $20–$50 per elem | $250–$500 per elem | 1–2 hr per elem |
| Flush Sediment from Tank | $0 (hose rental) | $150–$400 | 30 min – 1.5 hr |
| Thermostat Replacement (Elec) | $15–$30 per stat | $200–$450 | 1–1.5 hr per stat |
Tips & Prevention
- Annual Flush: Flush your water heater once a year, or every six months if you’ve got hard water. That keeps sediment from building up and choking off your hot water. I tell homeowners this all the time — it’s one of the easiest preventive jobs you can do.
- Check Anode Rod Every 3-5 Years: This “sacrificial” rod protects the tank from corrosion. If it’s mostly gone, replace it. It’s more of an advanced DIY job, but it can keep your tank from leaking way too soon.
- Insulate Hot Water Pipes: Wrapping the first 6 feet of hot and cold water pipes connected to the heater helps hold the heat longer and saves energy. Cheap fix. Easy win.
- Consider a Tankless Heater: If your family keeps outrunning the tank, a tankless water heater might make sense long term. It heats water on demand, so you don’t run out, but the upfront cost is steep and installation should be handled by a pro.
- Temperature Check: Don’t just set it and walk away. Check the temperature now and then to make sure it’s still around 120°F. If it drifts, adjust it.
- Monitor for Leaks: Any puddle around the base of the water heater could mean something bigger is brewing. Catch a leak early and you might dodge a flood.
When to Call a Professional
Look, I’m all for DIY, but there are times you just need to call in a pro. If you’ve tried the basic checks — breaker, pilot light, thermostat — and you’re still running out of hot water after only a few minutes, it’s probably time to pick up the phone. Same goes if you’re thinking about replacing heating elements on an electric water heater and you’re not comfortable working with high voltage (240V is no joke), or if you suspect a gas leak, hear banging or rumbling that won’t go away after flushing, or see rust or serious leaks from the tank itself, stop immediately. Gas work especially isn’t a DIY game; one mistake can go sideways in a hurry. If the breaker keeps tripping, that’s another sign you need a licensed electrician or a plumber with electrical experience. They’ve got the tools and the know-how to sort it out safely, keep your family protected, and keep the heater alive a little longer. Don’t risk it for a few bucks if you’re over your head.
Related Articles
Keep troubleshooting with these hand-picked guides from FixlyGuide:
- Your shower's cold? 3 sneaky reasons your hot water vanishes — Tired of your hot shower turning lukewarm unexpectedly? We uncover the three most common culprits, from a hidden part in your water heater…
- That Annoying Water Heater Popping Sound? It's Trying to Tell You This One Thing — A popping noise from your water heater is a common sign of sediment buildup, which can reduce efficiency and shorten its lifespan, but it's…
- Your shower's cold shock: 1 broken part is the secret culprit. — Tired of your shower going from hot to cold in minutes? Sediment buildup, a failed dip tube, or a bad thermostat in your water heater is li…
- The Secret Hairball Fix Plumbers Don't Want You to Know — Tired of standing in ankle-deep water? Most shower clogs are a gnarly mix of hair and soap scum, and you can clear them yourself without ha…
- Why Your Garbage Disposal Just Died (And the One Thing You Should Check First) — Don't panic if your garbage disposal went silent. Often, it's a simple, overlooked electrical issue you can fix in minutes without a plumbe…
- The 3 Hidden Reasons Your Sprinkler Head Won't Pop Up (And How to Fix It FAST) — Discover the most common reasons your sprinkler head isn't popping up and follow our step-by-step guide to quickly diagnose and fix the iss…
Should you do this yourself?
Answer five quick questions before you start. Safety outranks savings every time.
Your experience with work like this
How high do you have to work?
Does the job involve any of these?
Will it need a permit?
Specialty tools
Free and instant. Educational guidance only — not a quote, inspection, or professional diagnosis.
Estimate your own project cost
National averages are a starting point. Enter your details for a range that fits your house.
Water heater replacement cost
- Unit$550 – $1,400
- Installation labor$350 – $900
- Removal & disposal$60 – $150
- Permit & inspection$50 – $200
These estimates reflect typical US installed costs. Get 2–3 written quotes before committing.
Educational estimate only — always confirm with written local bids.
What should this project cost?
Enter your project details for a realistic cost range before you call anyone.
Common repairs run $150–$650; repipes and water-heater replacements reach $1,500–$4,500.
- Regional adjustment
- National average
- Labor share (typical)
- ~$754
- Quotes to collect
- 3 written estimates
Educational estimate based on national averages — not a binding quote. Always confirm with written local estimates.
Fixly Project Decision Box
- DIY difficulty
- Moderate
- Estimated time
- 30 minutes – half a day
- Cost level
- Moderate
Main tools / materials
- Adjustable wrench
- Plunger or drain auger
- Bucket and towels
- Thread tape
When to stop and call a pro
- Water you cannot shut off at the fixture or main
- Sewage backing up into more than one fixture
- Water near electrical panels or outlets
- Gas water heater work beyond relighting a pilot
Need professional help?
Get a Licensed PlumberBefore you start
Check the difficulty, permits, and safety risk — then decide whether to call a pro.
Free, no signup required. Estimates are educational guidance, not a quote or an inspection.
Get the print-ready PDF of this guide
A clean, ad-free, printable version you can keep on your phone or pin to the workshop wall. Free with a FixlyGuide account.
- Print-optimized layout
- Tools, materials & every step included
- Saved to your account
Frequently asked questions
Why does my hot water run out so quickly?+
The most common reasons are a broken dip tube that allows cold water to mix with hot water too soon, a faulty heating element (for electric heaters) that isn't fully heating the tank, or an incorrectly set or malfunctioning thermostat.
Can I fix a broken dip tube myself?+
Yes, replacing a broken dip tube is a moderate DIY task. You'll need to turn off the water and power/gas, drain a portion of the tank, and carefully remove and replace the old dip tube. New dip tubes are inexpensive and widely available.
How do I know if a heating element is bad?+
For electric water heaters, you can test heating elements with a multimeter set to ohms after cutting power. A reading of infinity or zero ohms indicates a faulty element that needs replacement. This is a job for experienced DIYers due to high voltage.
What's the ideal temperature setting for a water heater?+
Most experts recommend setting your water heater thermostat to 120°F (49°C). This temperature is hot enough for most household needs, prevents scalding, and is energy-efficient. Higher settings can increase sediment buildup and energy costs.
Does sediment buildup affect hot water duration?+
Absolutely. Sediment at the bottom of the tank acts as an insulator, making it harder for the heating element or burner to transfer heat to the water. This means it takes longer to heat, and your effective hot water capacity is reduced. Regular flushing prevents this.
How often should I flush my water heater?+
I recommend flushing your water heater once a year to remove sediment. If you live in an area with particularly hard water, you might consider flushing it every six months to maintain efficiency and prolong its lifespan.
My electric water heater keeps tripping the breaker. What's wrong?+
A constantly tripping breaker for an electric water heater often indicates a short circuit in a heating element or the thermostat. It's a safety mechanism to prevent overheating or electrical hazards. This issue usually requires a professional diagnosis and repair.
Can I add hot water capacity to my existing heater?+
While you can't increase the physical tank size, you can improve efficiency. Insulating the tank and pipes, flushing sediment, and ensuring proper thermostat function helps. For significantly more capacity, a larger tank or a tankless water heater might be necessary.

Discussion
Loading comments…