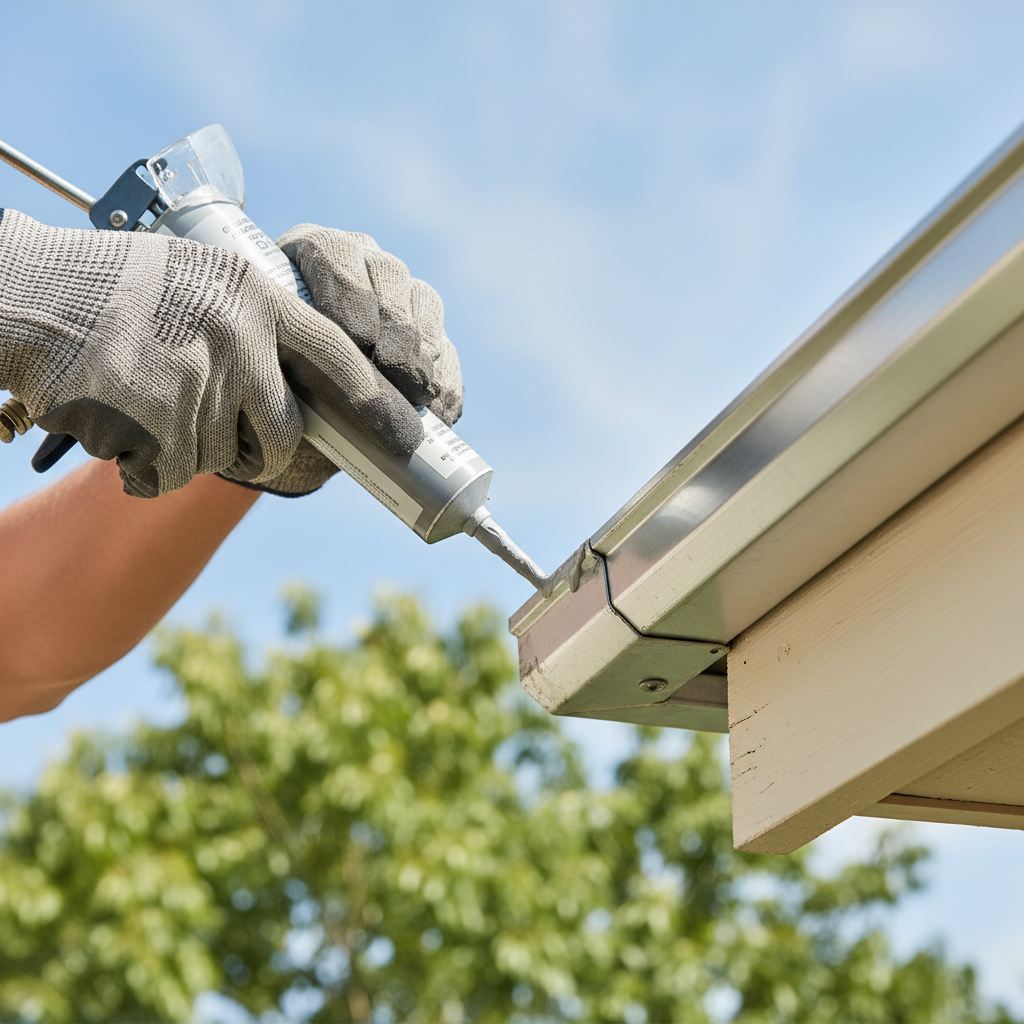
- Aging Sealant: Most gutter sealants last about 5-10 years. UV rays, hard temperature swings, and constant water wear it down until it hardens, cracks, and loses grip.
- Poor Initial Application: Sometimes the original installer didn’t clean the surfaces right, didn’t use enough sealant, or used the wrong product. If the prep was sloppy, that joint was already on borrowed time.
- Thermal Expansion & Contraction: Like I said earlier, materials move. That constant movement stresses the sealant. If it isn’t flexible enough, it’ll tear itself apart. Long gutter runs and big temperature swings make it worse.
- Improper Slope: If the gutter doesn’t slope correctly toward the downspout (generally a quarter-inch per 10 feet), water lingers inside, which raises the leak risk and wears out sealant faster. Sagging usually makes a bad slope even worse.
- Impact Damage: A falling branch, a ladder bump, or heavy ice dams can bend or stress gutter joints and break the sealant loose.
Plumbing · Leak
| Project category | Plumbing |
|---|---|
| Problem type | Leak |
| Trade required | Plumbing |
| Urgency | Emergency — act now |
| Safety risk | High safety risk |
| DIY suitability | DIY for experienced homeowners |
| Cost category | Low cost |
| Typical timeline | Shut water off now; repair usually same or next day |
| Contractor type | Licensed plumber |
Repair option
Isolate at the shutoff, replace the failed component, and dry the cavity fully.
Replacement option
Repipe the run or the branch when corrosion is widespread.
Common causes
- Failed supply line or shutoff valve
- Worn washers, cartridges, or P-trap connections
- Pinhole corrosion in older copper
Relevant tools:emergency checklistdiy or hire a pro
Published September 21, 2026Last updated September 21, 2026
Tools & materials you'll need
Affiliate linksAs an Amazon Associate FixlyGuide earns from qualifying purchases — at no extra cost to you. Prices and availability are accurate as of publication and subject to change.
Quick Answer
Those sagging, dripping gutter sections? They’re usually a dead giveaway that the sealant in the joints has quit on you. Once those seams fail, water doesn’t just drip out — it backs up, sits there, adds weight, and pulls the gutter down. That’s how you get the sag in the first place. The good news: you usually don’t need a whole new gutter system. With solid prep, a tough sealant, and a little elbow grease, you can clean out the old junk, reseal the joints tight, and get the water moving where it’s supposed to go. Worth doing right, too — keeps your foundation and landscaping out of trouble.
The Problem
I’ve seen this a hundred times. A homeowner calls me about water pooling by the foundation or weird stains on the siding, and nine times out of ten, it comes back to a leaky gutter. Usually right at the joints.
And that makes sense. A gutter isn’t one long, perfect piece. It’s sections pieced together at corners and long runs. What holds those joints together? Sealant. Over time, that stuff gets baked by sun, frozen, soaked, and beat up until it dries out, cracks, shrinks, or just plain gives up.
Once the sealant fails, water doesn’t just find the easiest path — it finds the gap and makes itself at home. It leaks, it sits, it turns a clean water channel into a sloppy mess. Then the standing water adds weight, the gutter starts to sag, and now you’ve got low spots collecting even more water. Nasty little cycle.
I pulled a gutter line in Frisco last month that had exactly this leak at a corner. The homeowner thought the whole run was shot. Nope. Bad joint, sagged section, clogged with leaves. Same story as always.
Pretty soon, water’s dumping where it shouldn’t, chewing up landscaping, staining fascia boards, and soaking the soil right against the foundation. And let me tell ya, foundation repair bills? They’re no joke. Thousands. So this isn’t just about making the gutters look decent — it’s about protecting the house.
How It Works
Alright, here’s how these things are supposed to work and why the joints matter so much.
Most residential gutters are aluminum, galvanized steel, or sometimes vinyl. They come in sections, usually 10 to 20 feet long. To make one continuous channel, those pieces get joined with slip-on connectors, overlaps, or mitered corners at the outside angles. The real trick isn’t just the screws, rivets, or crimps holding it together — it’s the sealant that goes in before the pieces are joined.
That sealant, usually a gutter caulk or mastic, makes a flexible waterproof barrier. It’s gotta flex because gutters move. They expand and contract every time the temperature swings, and a 20-foot aluminum section can grow or shrink by a quarter-inch or more between a blazing summer day and a cold winter night. If the sealant can’t move with it, it tears.
Then the seal breaks, and water goes hunting for that gap. Even a tiny pinhole can turn into a full-on leak during a hard rain. That water runs outside the gutter system and usually drips straight down the house. If the leak is near a corner or a downspout connection, water can pool there and load up that one section.
Think about it: a gallon of water weighs about 8.3 pounds. A few gallons sitting in one bad spot puts real stress on the hangers and fasteners. Add expansion and contraction on top of that, and eventually the gutter section starts pulling down. That’s the sag you see from the yard. One bad joint can mess up the whole run.
Step-by-Step Fix
Alright, let’s get those gutters sealed up and standing proud. This ain’t rocket science, but it does take patience and a little care. Do it once. Do it right.
-
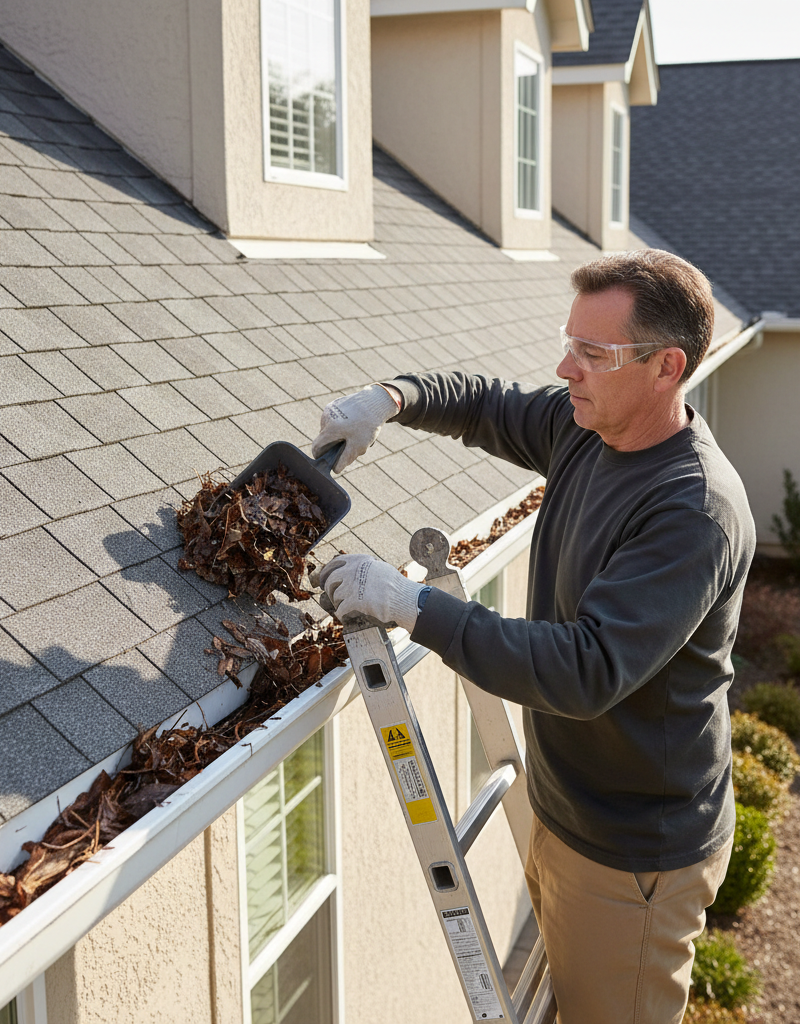
Safety First: Ladder Placement & Gear — Before you climb, make sure the ladder’s on solid, level ground. I’ve had enough close calls over the years to know better than to get casual with a ladder. Extend it at least three rungs above the roofline if you’re leaning it against the house. Wear sturdy work gloves and eye protection. You’ll be scraping old caulk, and those edges can be sharp.
- Tools: Sturdy extension ladder, work gloves, safety glasses.
- Safety Tip: Have a spotter if you can swing it, especially on taller ladders. Don’t work on gutters if it’s raining or if the ground’s wet and slick.
-
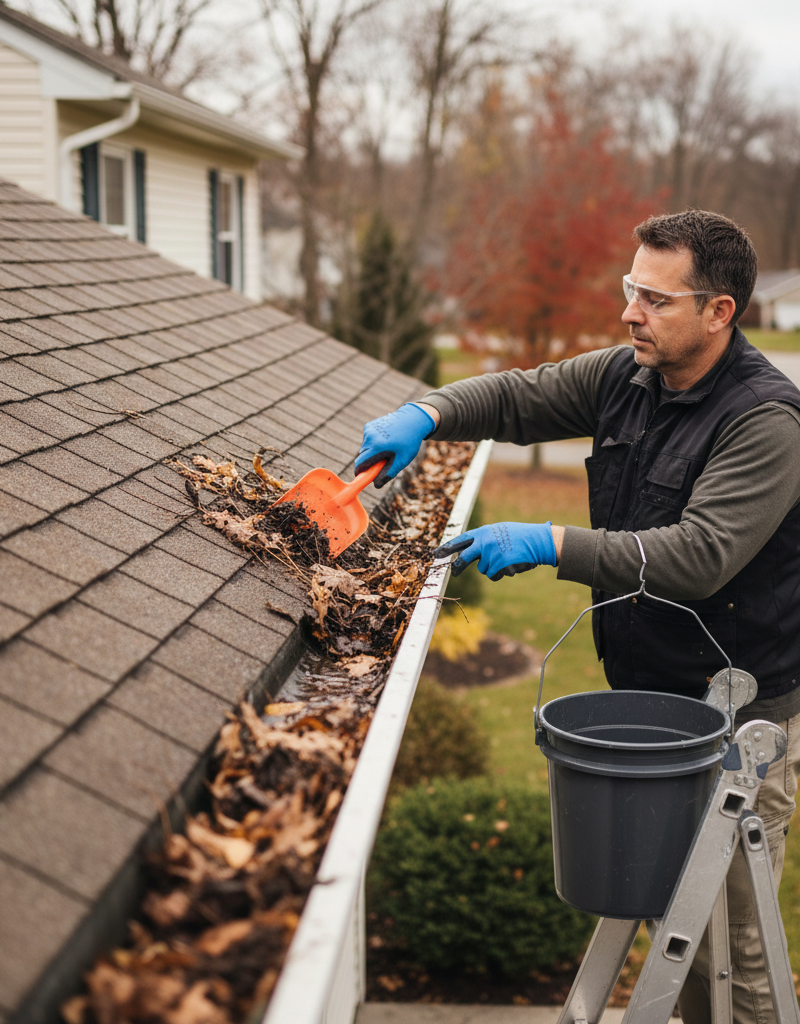
Clear the Gutter: Debris Removal — You can’t seal dirty metal. Scoop out all the leaves, twigs, shingle grit, and whatever else has settled in there. A little garden trowel works fine, or even your gloved hand if you don’t mind getting dirty. Make sure the downspout’s open too. If water can’t drain, you’re just putting lipstick on a pig.
- Tools: Garden trowel or scoop, bucket for debris.
- If this doesn't work: If the downspout’s still clogged after clearing the top, you may need a plumber’s snake or a strong blast from the hose to knock loose deeper junk.
-
Scrape Out Old Sealant: The Grunt Work — This is where a lot of DIY repairs fall flat. You’ve got to get all the old cracked, crusty sealant out. Use a stiff putty knife, utility knife, or a caulk removal tool. Work slow so you don’t gouge the gutter metal. You want bare, clean metal here. That’s the part folks skip — and that’s why the repair fails later.
- Tools: Stiff putty knife, utility knife, wire brush (optional).
- Note: If the old sealant fights back, a commercial caulk remover can help, but test it in a hidden spot first so you don’t mess up the finish.
-
Clean & Dry the Joint: Prep is Key — After the old caulk’s out, wipe the area down with a rag dampened with mineral spirits or denatured alcohol. That gets rid of greasy residue, oxidation, and fine dust that’ll keep the new sealant from bonding. Then let it dry completely. And I mean completely — give it at least 30 minutes in good weather, maybe longer if it’s muggy. A clean, dry surface isn’t optional.
- Materials: Rags, mineral spirits or denatured alcohol.
-
Realign the Gutter (If Sagging is Severe) — If the gutter’s really sagging, especially right at the joint, you may need to gently push it back into place. Check the hangers nearby. Loose? Bent? Shot? Tighten the screws or replace the damaged hangers. Sometimes adding an extra hanger or two close to the joint keeps the whole thing from drooping again. Don’t reef on it — just get it back to reasonably level.
- Tools: Cordless drill/driver, appropriate screws (e.g., 1.5-inch hex head screws), new gutter hangers (if needed).
- Note: Use screws made for outdoor use and metal, usually self-tapping or with a pilot hole. Don’t overtighten and strip the hole.
-
Apply New Gutter Sealant: The Magic Touch — Now you’re getting somewhere. Grab your heavy-duty gutter sealant — the stuff made for outdoor metal and water exposure — and your caulk gun. Cut the nozzle at a 45-degree angle, about a quarter-inch opening. Run a steady bead of sealant inside the joint, covering the seams and fastener heads. Don’t skimp, but don’t pile it on like frosting either. You want a solid bead that bridges the gap all the way across. If you’ve taken the joint apart, put sealant between the overlapping pieces before you screw them back together.
- Tools: Caulk gun, heavy-duty gutter sealant (e.g., Geocel 2300, OSI Quad Max).
- Tip: Practice on scrap cardboard first so you get a feel for the gun and the bead. If the gap’s wider, you may need a backer rod before the sealant goes on.
-
Smooth the Bead: A Professional Finish — Right after you apply it, smooth the sealant with a gloved finger, a caulk tool, or a wet rag. That pushes it into the joint and gives you a cleaner finish. Wipe off the extra right away — once it cures, it’s a bear to remove.
- Tools: Gloved finger, caulk smoothing tool, wet rag.
-
Allow Proper Cure Time: Patience, Grasshopper — This is where people get itchy. Check the manufacturer’s instructions for cure time. It might be a few hours, or it might take 24-48 hours before it’s fully waterproof and ready for rain. Don’t hit it with the hose right away. Let it set up. If rain’s coming, cover the area with plastic sheeting or wait for a dry stretch.
- Safety Tip: Keep pets and children away from the uncured sealant.
-
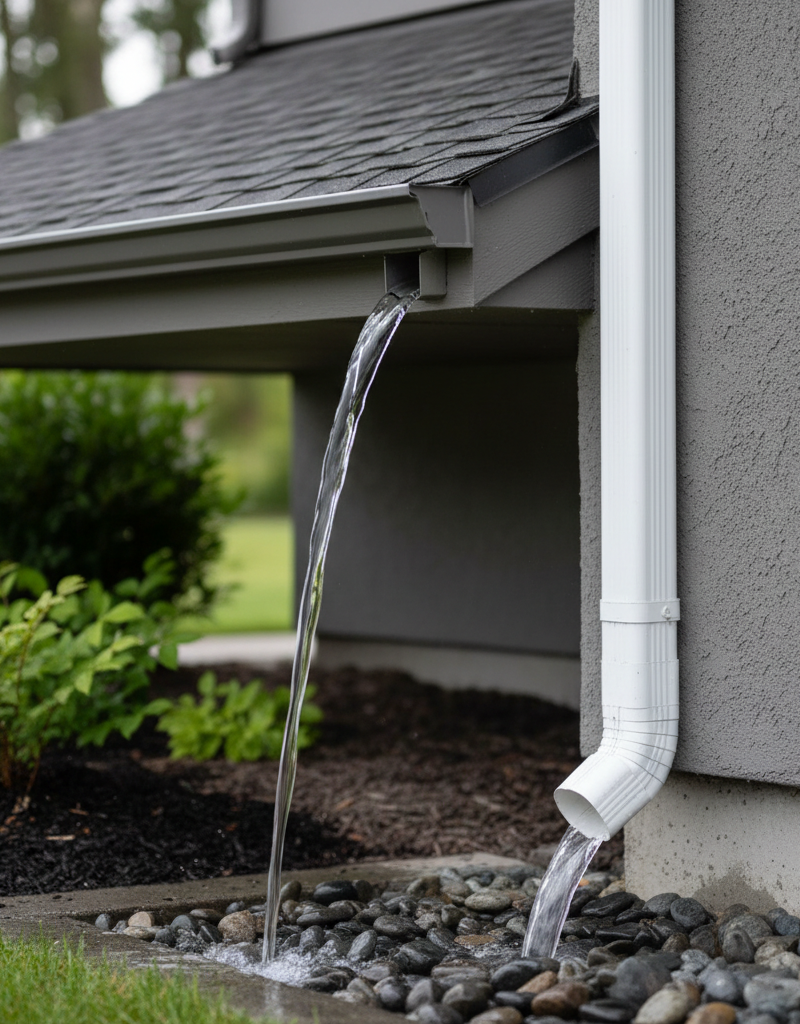
Test the Repair: Water Flow Check — After the sealant cures fully, run a garden hose into the gutter section above the repair. Watch it close. Look for drips, leaks, or water sneaking out where it shouldn’t. Check how it runs through the joint and down the downspout. If you spot a leak, clean the trouble area again and reapply sealant. Sometimes a second small bead does the trick.
Common Causes
- Aging Sealant: Most gutter sealants last about 5-10 years. UV rays, hard temperature swings, and constant water wear it down until it hardens, cracks, and loses grip.
- Poor Initial Application: Sometimes the original installer didn’t clean the surfaces right, didn’t use enough sealant, or used the wrong product. If the prep was sloppy, that joint was already on borrowed time.
- Thermal Expansion & Contraction: Like I said earlier, materials move. That constant movement stresses the sealant. If it isn’t flexible enough, it’ll tear itself apart. Long gutter runs and big temperature swings make it worse.
- Gutter Debris & Clogs: A gutter packed with leaves and junk isn’t just ugly — it’s a dam. Water backs up, sits there, and puts continuous hydrostatic pressure on the joints, forcing its way through weak spots. The weight alone can cause sagging.
- Improper Slope: If the gutter doesn’t slope correctly toward the downspout (generally a quarter-inch per 10 feet), water lingers inside, which raises the leak risk and wears out sealant faster. Sagging usually makes a bad slope even worse.
- Impact Damage: A falling branch, a ladder bump, or heavy ice dams can bend or stress gutter joints and break the sealant loose.
Common Mistakes
- Not Cleaning Thoroughly: This is the big one. If you don’t scrape out all the old caulk and clean with mineral spirits, the new sealant won’t bond. It’s like painting over rust — no dice.
- Using the Wrong Sealant: Interior caulk, basic silicone, or some exterior acrylics just aren’t made for gutters. You need a heavy-duty, flexible, UV-resistant sealant labeled for gutters or outdoor metal. Don’t cheap out here; cheap caulk means doing the job twice.
- Working on Wet Surfaces: Sealant needs a dry surface to stick right. If the gutter’s damp, or rain’s about to roll in, you’re asking for a weak repair.
- Not Allowing Full Cure Time: Getting impatient and blasting it with water before it cures is a recipe for failure. The outside may feel dry, but the core can still be soft, and water pressure will wreck it.
- Ignoring the Sagging Cause: Just sealing the leak without fixing why the gutter sagged — loose hangers, bad slope, or repeat clogs — means it’ll come back.
- Disregarding Safety: Working on a ladder, especially when you’re reaching or stretching, can go sideways in a hurry. Keep three points of contact, use a spotter, and don’t overreach. It’s not worth a trip to the ER.
Cost & Time Breakdown
Getting this joint sealed up doesn’t hit the wallet too hard, especially next to what foundation repairs can run.
| Task | DIY Cost | Pro Cost | Time |
|---|---|---|---|
| Cleaning & Scraping | $0 - $10 (rags, cleaner) | Included in service | 30 - 60 min |
| Sealant & Caulk Gun | $15 - $30 | Included in service | 10 - 20 min |
| Realign/Reinforce Gutter | $5 - $20 (screws, hangers) | Included in service | 15 - 30 min |
| Ladder Rental (if needed) | $25 - $50 / day | Pro owns | N/A |
| Total Estimated | $40 - $110 | $150 - $400 (for a few joints) | 1 - 2 hours per joint |
Tips & Prevention
- Regular Cleaning: Clear your gutters at least twice a year — once in late spring after pollen and seeds drop, and again in late fall after the leaves are down. Less debris means less standing water and less stress on the joints.
- Inspect Annually: Once a year, on a dry day if you can, walk the house and look over every gutter joint, corner, and downspout connection. Watch for cracks, peeling caulk, or drips and stains below.
- Use Gutter Guards: They’re not perfect, but good gutter guards can cut down on the junk getting into the gutters, which eases the load on the joints and cuts down on cleaning.
- Check Hanger Stability: Make sure the gutter hangers are still tight to the fascia board. Loose hangers help sagging along and put extra strain on sealed joints.
- Proper Drainage: Make sure downspout extensions carry water at least 5-10 feet away from the foundation. Even if the gutters are sealed up fine, poor drainage can still bite you.
- High-Quality Sealant: When it’s time to reseal, don’t grab the cheapest tube on the shelf. Spend a few extra bucks on a premium gutter sealant. Geocel 2300 or OSI Quad Max give you solid flexibility and UV resistance, and they hold up longer.
When to Call a Professional
Resealing a gutter joint is a pretty manageable DIY job for a lot of homeowners, but there are times when you should step back and call a pro. If the gutters are way up high and you’d need a very tall or special ladder, it’s safer to hire somebody with the right gear and experience. If the sagging is widespread, hitting several long sections, or the whole gutter system seems to be pulling away from the fascia, you may be dealing with structural issues that go past a simple sealant repair. Pros can usually realign or rehang big stretches of gutter faster and safer. And if you think there’s hidden damage to the fascia board or roof structure behind the gutters — maybe from a long-term leak — a pro can check it out and fix the underlying problem without turning it into a bigger mess. Bottom line: your safety and your house both come first.
Related Articles
Keep troubleshooting with these hand-picked guides from FixlyGuide:
- The 10-Second Flaw Home Inspectors Spot (That Hides Water Damage) — Discover the often-overlooked sign professionals catch in seconds that points to hidden water damage, protecting your home from costly repa…
- The Caulk Mystery: Why Your Door Frame Is Leaking (Even When It Looks Sealed) — Think your door frame is sealed tight but still getting leaks? You're probably looking at a common caulk failure point that lets water snea…
- The Weird Reason Your Drain's Gurgling (and It's Not a Clog) — That unsettling gurgling sound from your drain isn't always a full-blown clog; it's often a sign of negative air pressure building in your…
- The 30-Second Sump Pump Trick Most Homeowners Forget Before a Storm — A simple, 30-second test can prevent thousands in flood damage by ensuring your sump pump is ready for heavy rain.
- The 7 Critical Home Inspection Checks Most Homeowners Miss (And How to Spot Them) — Discover the crucial annual home inspection checks often overlooked by homeowners, and learn how to identify potential issues before they b…
- The #1 Gutter Mistake That Leads to $10,000 Roof Damage — Neglecting regular gutter cleaning is the leading cause of preventable roof damage, often resulting in costly repairs that could be avoided…
Should you do this yourself?
Answer five quick questions before you start. Safety outranks savings every time.
Your experience with work like this
How high do you have to work?
Does the job involve any of these?
Will it need a permit?
Specialty tools
Free and instant. Educational guidance only — not a quote, inspection, or professional diagnosis.
What should this project cost?
Enter your project details for a realistic cost range before you call anyone.
Cost depends heavily on which system turns out to be the source.
- Regional adjustment
- National average
- Labor share (typical)
- ~$1,620
- Quotes to collect
- 3 written estimates
Educational estimate based on national averages — not a binding quote. Always confirm with written local estimates.
Fixly Project Decision Box
- DIY difficulty
- Professional Recommended
- Estimated time
- Inspection 1–2 hours · repairs 1–3 days
- Cost level
- High
Main tools / materials
- Binoculars for a ground-level look
- Flashlight for attic checks
- Moisture meter
- Roofing cement (temporary patch only)
When to stop and call a pro
- Active leak near lights, fans, or any wiring
- Sagging, bulging, or water-filled ceiling
- Steep, wet, or two-story roof — do not climb it
- Storm or hail damage you plan to claim on insurance
Need professional help?
Free roof assessment first — no phone calls until you ask for them.
Get Local Roofing HelpDecide what your roof needs
Two minutes of questions turns "something is wrong up there" into a clear next step.
- Repair or replace your roof?Answer 10 questions about age, leaks, and damage to get a clear next step.Open
- Compare contractor quotesScore up to four bids on price, warranty, licensing, and timeline.Open
- Get local estimatesSend one request and compare written estimates from vetted pros.Open
Free, no signup required. Estimates are educational guidance, not a quote or an inspection.
Get the print-ready PDF of this guide
A clean, ad-free, printable version you can keep on your phone or pin to the workshop wall. Free with a FixlyGuide account.
- Print-optimized layout
- Tools, materials & every step included
- Saved to your account
Recommended for DIYers & woodworkers
Sponsored
The Top 20 Tools for Workshops of Any Budget
No stationary machines or power tools required — plus 3 fundamental tools that can't be bought at any price.
Get the free guide
Ted's Woodworking — The #1 Woodworking Resource
Detailed instructions, dimensioned drawings, materials & cutting lists, and 3D schematics for every skill level.
See the plansSponsored: links above are affiliate links. FixlyGuide may earn a commission on qualifying purchases — at no extra cost to you.
Frequently asked questions
How often should I inspect my gutter joints?+
You should inspect your gutter joints at least once a year, preferably on a dry day. Look for cracks, peeling caulk, or any signs of drips and stains below the joints.
What's the best type of sealant for gutter joints?+
Always use a heavy-duty, flexible, and UV-resistant sealant specifically labeled for gutter or outdoor metal applications. Brands like Geocel 2300 or OSI Quad Max are popular choices among pros for their durability and adhesion.
Can I use regular silicone caulk for gutters?+
No, regular silicone caulk isn't ideal for gutters. It often lacks the necessary flexibility and adhesion for constant expansion/contraction and exposure to harsh weather, leading to premature failure.
Why does my gutter keep sagging even after I fix the leak?+
If your gutter continues to sag, the problem might be loose or damaged hangers that aren't supporting the gutter effectively. You might need to tighten existing hangers, replace broken ones, or add more support closer to the joint.
Is it okay to seal gutter joints from the outside?+
While you can apply sealant from the outside for a temporary fix, for a lasting repair, it's best to apply sealant *inside* the joint after thorough cleaning. This ensures the sealant creates a proper waterproof barrier where the two sections meet.
How long does gutter sealant typically last?+
High-quality gutter sealants, properly applied, can last anywhere from 5 to 10 years, sometimes longer. Cheaper or improperly applied sealants will fail much faster, often within a year or two.
What if my gutters are too high to reach safely?+
If your gutters are at a height that makes ladder work unsafe, it's always best to call a professional. They have the right equipment and training to perform the repair safely and efficiently.
Can a sagging gutter damage my foundation?+
Yes, absolutely. A sagging gutter that leaks or doesn't drain properly will deposit water directly against your home's foundation. Over time, this can lead to soil erosion, foundation cracks, and costly structural damage.
Do gutter guards prevent joint leaks?+
Gutter guards primarily prevent debris from clogging the gutter channel. While they can reduce standing water that puts stress on joints, they don't directly prevent joint leaks caused by failing sealant or improper installation. Regular inspection is still necessary.
What tools do I need for this repair?+
You'll need a sturdy ladder, work gloves, safety glasses, a garden trowel, a stiff putty knife or utility knife, rags, mineral spirits or denatured alcohol, a caulk gun, and heavy-duty gutter sealant.
Discussion
Loading comments…