- UV Degradation: The most common cause. Sunlight'''s UV rays break down the polymers in low-quality caulk, making it hard and brittle.
- Wrong Caulk Type: Using interior-grade painter'''s caulk on an exterior window is a guarantee of failure within 1-2 years. It lacks the flexibility and weather resistance required.
- Joint Movement: The natural expansion and contraction of building materials eventually exceeds the flexibility of older or lower-grade caulk.
- Improper Surface Prep: Applying new caulk over dirty, dusty, or oily surfaces, or over old caulk, prevents proper adhesion, leading to premature peeling.
- Building Settling: As a home settles over the years, window openings can shift slightly, putting immense stress on the caulk beads.
General remodeling · Renovation planning
| Project category | General remodeling |
|---|---|
| Problem type | Renovation planning |
| Trade required | General contracting |
| Urgency | Planned project |
| Safety risk | Low safety risk |
| DIY suitability | Pro recommended |
| Cost category | Major investment |
| Typical timeline | Design and permitting often 2–4 months before work starts |
| Contractor type | General contractor |
Repair option
Phase the work and fix the building envelope first.
Replacement option
Full renovation with permits, design, and a general contractor.
Common causes
- Space no longer fits how the household lives
- Resale preparation
- Deferred maintenance stacking up
Relevant tools:project cost estimatorcompare quoteshome improvement material prices
Published June 27, 2026Last updated August 17, 2026
Tools & materials you'll need
Affiliate links- AmazonElastomeric or 100% Silicone Caulk1 tube per 2-3 windows · Ensure it is rated for exterior use
- AmazonPainter's Tape1 roll · For creating clean, sharp lines
- AmazonMineral Spirits or Denatured Alcohol1 quart · For cleaning the joint surfaces before application
- AmazonPaper Towels/Rags1 roll
- AmazonBacker RodAs needed · Only needed for gaps wider than 1/4 inch
As an Amazon Associate FixlyGuide earns from qualifying purchases — at no extra cost to you. Prices and availability are accurate as of publication and subject to change.
'''
Quick Answer
Failed window caulk is a major source of home energy loss. Over time, caulk degrades from UV exposure and temperature changes, creating gaps that let in cold drafts. You can fix this by completely removing the old caulk, cleaning the joint, and applying a new bead of high-quality, exterior-grade elastomeric or silicone caulk for a flexible, airtight seal.
The Problem
You feel it on the coldest days—that persistent, chilly draft that seems to emanate from nowhere and everywhere at once. You crank up the thermostat, but one corner of the living room remains stubbornly cold. The culprit is often not the window itself, but the failing seal around it. This is a classic case of air infiltration, a home performance issue that accounts for 25% to 40% of the energy used for heating and cooling in a typical American home. The primary line of defense against this is a simple, inexpensive material: window caulk.
When caulk is new, it forms a flexible, airtight, and watertight barrier in the small gap between your window frame and the siding or wall. However, this barrier is under constant assault. Sunlight’s ultraviolet (UV) rays bombard it, breaking down its chemical structure and making it brittle. The house settles, and framing materials expand and contract with seasonal temperature and humidity swings, forcing the caulk to stretch and compress thousands of times. Over years, this relentless stress causes the caulk to lose its elasticity, crack, peel away from the surface, or even crumble and fall out entirely. A gap of just 1/8-inch around a single window is thermodynamically equivalent to leaving a 2.5-square-inch hole in your wall. Multiply that by all the windows in your home, and you begin to see the scale of the energy loss. That draft isn'''s not just a comfort issue; it'''s a significant and unnecessary expense on your monthly heating and cooling bills.
How It Works
Understanding how caulk functions reveals why selecting and applying it correctly is so critical. At its core, caulk is a flexible sealant designed to bridge a gap between two different materials, a joint. For windows, this is typically the joint between the window frame (vinyl, wood, aluminum) and the home'''s exterior cladding (wood siding, brick, stucco, fiber cement). The caulk must adhere strongly to both surfaces and, most importantly, remain flexible enough to accommodate their independent movement.
This "joint movement capability" is the most critical property of window caulk. As temperatures fluctuate, materials expand and contract at different rates. A vinyl window frame will expand and contract much more than the adjacent wood trim. The caulk in between must be able to stretch and compress without tearing or pulling away. This is why you can'''t just use any old "painter'''s caulk" (which is typically acrylic latex). High-quality window caulks are either "elastomeric" or "silicone."
- Silicone Caulks: These are 100% synthetic polymers. They offer excellent flexibility and adhesion, are completely waterproof, and have superior resistance to UV degradation and extreme temperatures. Their main downside is that they are not paintable. This makes them ideal for situations where the caulk color already matches the trim.
- Elastomeric Caulks (often co-polymer or acrylic-based): These are advanced sealants formulated for high flexibility and long life spans—often 50 years or more. They stretch significantly more than basic caulks and adhere to a wide range of surfaces. Crucially, most high-quality elastomeric caulks are paintable, making them the most versatile choice for sealing windows where you need to match a specific trim color.
By removing the old, failed caulk and replacing it with a new bead of one of these high-performance materials, you are restoring the home'''s primary air and moisture barrier around its most vulnerable openings.
Step-by-Step Fix
SAFETY NOTE: Always wear safety glasses and work gloves. When using solvents like mineral spirits, ensure adequate ventilation and keep away from open flames. If using a heat gun, keep it moving to avoid scorching the paint or melting vinyl frames. Test any cleaners or solvents on a small, hidden area first.
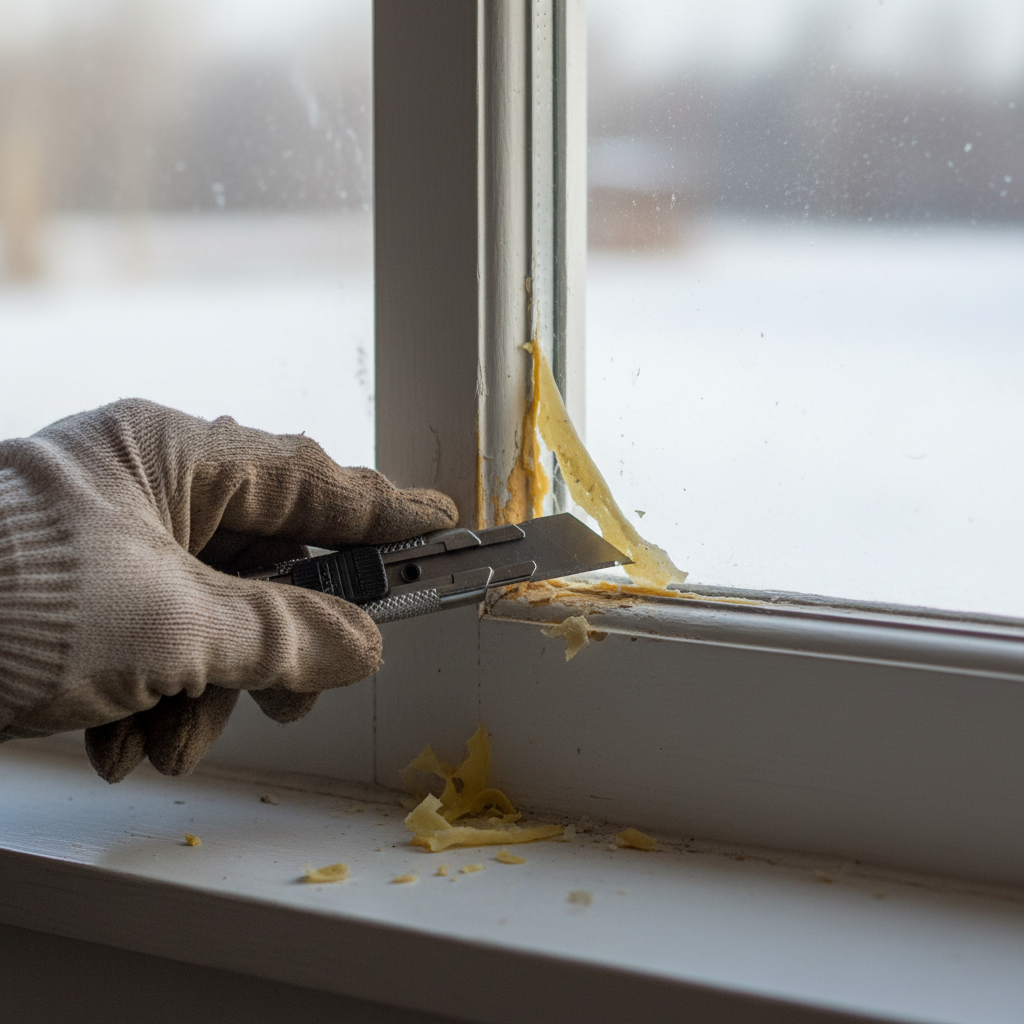
1. Scrape and Cut Away the Old Caulk
- Task: The first and most crucial step is the complete removal of the old, failed caulk. Do not caulk over old caulk.
- Execution: Use a sharp utility knife with a fresh blade to carefully score both the top and bottom edges of the old caulk bead. Keep the blade at a low angle to avoid scratching the window frame or siding. Once scored, use a hooked caulk removal tool or a painter'''s 5-in-1 tool to dig in and pull the old caulk out. For stubborn, brittle caulk, you may need to use needle-nose pliers to grab and pull it out in pieces.
2. Address a Stubborn Residue
- Task: After the bulk of the caulk is removed, a thin, stubborn film often remains.
- Execution: For residual silicone caulk that is difficult to scrape, you can apply a commercial silicone remover gel. For latex or elastomeric caulk residue, a heat gun on a low setting (around 250-400°F) can soften the material enough to be scraped away with a putty knife. Use extreme caution on vinyl windows, as excessive heat can cause warping.
3. Deep Clean the Joint
- Task: The joint must be perfectly clean, dry, and free of all dust, debris, and oils for the new caulk to adhere properly.
- Execution: Start by using a stiff brush (a firm-bristle toothbrush is perfect) to sweep out any remaining dust or crumbled bits of old caulk. Then, dampen a clean rag with a solvent like mineral spirits or denatured alcohol and wipe the joint surfaces thoroughly. This dissolves any remaining adhesive residue and oils. Allow the solvent to evaporate completely, which usually takes 10-15 minutes.
4. Check for Wood Rot or Damage
- Task: With the joint exposed and clean, inspect the window frame and surrounding siding for any signs of water damage.
- Execution: Gently poke the wood around the joint with the tip of a screwdriver. Solid wood will resist the pressure. If the wood is soft, spongy, or flakes away easily, you have wood rot that must be addressed before proceeding. This is a more complex repair that involves digging out the rot, treating the area with a wood hardener, and filling it with an epoxy wood filler.
5. Insert a Backer Rod (for large gaps)
- Task: If the gap you are sealing is wider than 1/4 inch, it needs a backer rod.
- Execution: A backer rod is a flexible foam rope that you press into the joint before caulking. It serves two purposes: it saves caulk and, more importantly, it creates the ideal "hourglass" shape for the caulk bead, which allows for maximum flexibility. The rod should be slightly larger in diameter than the gap. Use a blunt tool, like the back of a putty knife, to press it into the gap to a depth of about 1/4 inch.
6. Tape for Clean Lines
- Task: For a professional-looking, sharp caulk line, use painter'''s tape.
- Execution: Apply two parallel strips of high-quality painter'''s tape, one on the window frame and one on the siding, leaving the gap you intend to caulk exposed. Aim for a final caulk bead width between 1/4 and 3/8 inch. This step takes a few extra minutes but is the secret to a perfect finish.
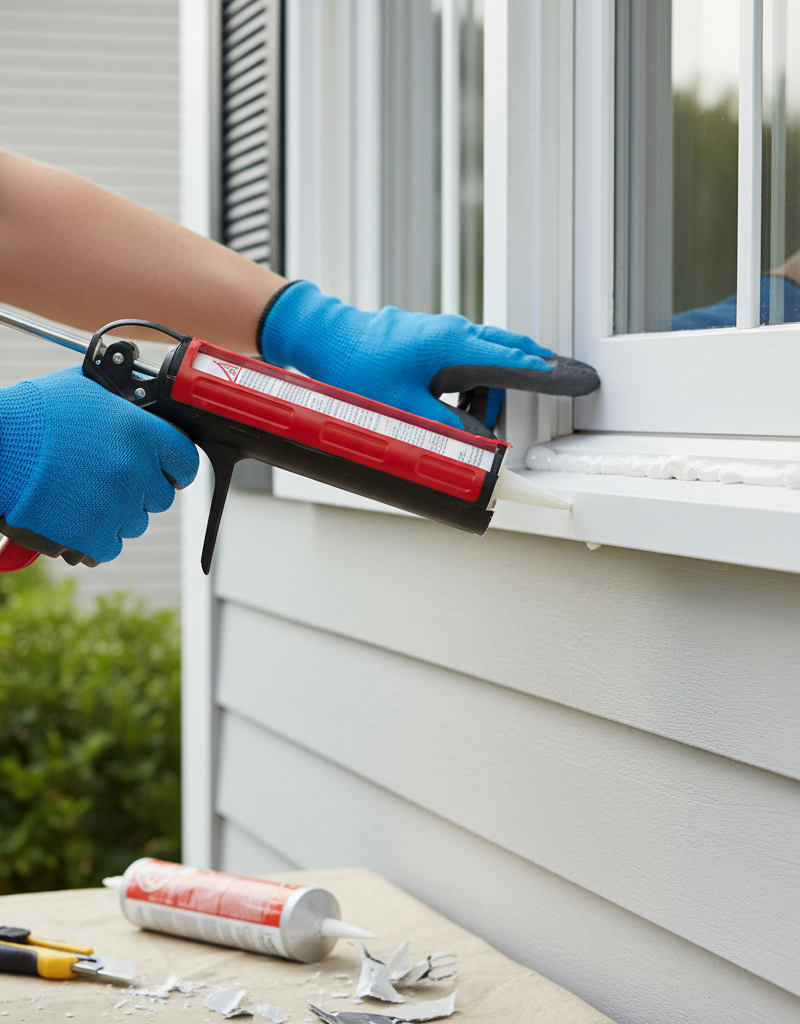
7. Cut and Load the Caulk Tube
- Task: Prepare the caulk tube for application.
- Execution: Using a utility knife, cut the nozzle of the caulk tube at a 45-degree angle. The opening should be slightly smaller than the gap you plan to fill. Puncture the inner foil seal using the long metal pin attached to most caulk guns (or a long nail). Load the tube into the caulk gun and gently squeeze the trigger until you see caulk at the nozzle tip.
8. Apply the New Caulk Bead
- Task: Apply a continuous, even bead of caulk.
- Execution: Start at one corner and move the caulk gun steadily along the joint, applying consistent pressure on the trigger. The goal is to push the caulk into the joint, not just lay it on top. Move at a pace that fills the joint completely in one pass. Work in manageable sections, typically one side of the window at a time.
9. Tool the Caulk Bead
- Task: "Tooling" means smoothing the bead to ensure it makes solid contact with both sides of the joint and has a clean, concave appearance.
- Execution: Immediately after applying the caulk, wet your finger with a little water or a specialized caulk finishing tool and run it lightly over the bead. This presses the caulk firmly against the surfaces and removes any excess. Keep a roll of paper towels handy to wipe the excess caulk from your finger after each pass.
10. Remove the Tape and Cure
- Task: Remove the painter'''s tape for a crisp edge.
- Execution: While the caulk is still wet, carefully pull the painter'''s tape off, pulling it away from the caulk bead at a 45-degree angle. This will leave a perfectly straight, professional-looking line. Allow the caulk to cure undisturbed according to the manufacturer'''s instructions—this can range from 24 hours to several days for a full cure.
Common Causes
- UV Degradation: The most common cause. Sunlight'''s UV rays break down the polymers in low-quality caulk, making it hard and brittle.
- Wrong Caulk Type: Using interior-grade painter'''s caulk on an exterior window is a guarantee of failure within 1-2 years. It lacks the flexibility and weather resistance required.
- Joint Movement: The natural expansion and contraction of building materials eventually exceeds the flexibility of older or lower-grade caulk.
- Improper Surface Prep: Applying new caulk over dirty, dusty, or oily surfaces, or over old caulk, prevents proper adhesion, leading to premature peeling.
- Building Settling: As a home settles over the years, window openings can shift slightly, putting immense stress on the caulk beads.
- Moisture: Constant exposure to water from rain or sprinklers can degrade some types of caulk and promote mildew growth, which can break the seal.
Common Mistakes
- Caulking Over Old Caulk: This is the most frequent mistake. The new caulk will not bond properly and will fail quickly, as it'''s only sticking to a failing surface.
- Not Cleaning the Joint: Any dust, oil, or old caulk residue acts as a bond-breaker, preventing the new sealant from adhering.
- Using the Wrong Caulk: Choosing a cheap acrylic latex caulk for an exterior application will lead to cracking and peeling in a short time.
- Making the Bead Too Small or Too Big: Too small a bead won'''t have enough surface area to adhere properly; too large a bead is wasteful, looks messy, and can take a very long time to cure.
- Forgetting to Tool the Bead: Skipping this step leaves an uneven surface and, more importantly, can result in poor adhesion on the edges of the bead.
- Applying Caulk in Bad Weather: Most caulks should be applied in dry weather with temperatures above 40°F (5°C) to ensure proper curing.
Cost & Time Breakdown
The cost of this project is extremely low for the DIYer, with the primary expense being the caulk itself. The professional cost is almost entirely labor-based.
| Task | DIY Cost | Pro Cost (per window) | Time (per window) |
|---|---|---|---|
| Caulk & Supplies | $25 - $50 | Included in labor | N/A |
| Old Caulk Removal | $0 (elbow grease) | $50 - $100 | 30-45 minutes |
| Cleaning & Prep | $0 | $25 - $50 | 15-20 minutes |
| New Caulk Application | $0 | $50 - $100 | 15-20 minutes |
| TOTAL | $25 - $50 | $125 - $250 | 1 - 1.5 hours |
Tips & Prevention
- Annual Inspection: Every fall, walk around your home and visually inspect the caulk on all windows and doors. Gently press on it to check for flexibility. If it'''s hard, cracked, or pulling away, it'''s time to replace it.
- Buy High-Quality Caulk: Don'''t skimp. A tube of premium elastomeric or 100% silicone caulk may cost $8-$12 instead of $3, but it will last 5-10 times longer, saving you work and money in the long run.
- Check the Label: Ensure the caulk is rated for "exterior" use, is "paintable" (if needed), and is compatible with your window and siding materials.
- Mind the Gaps: For gaps wider than 1/4", always use a foam backer rod. This ensures the caulk bead has the correct depth and shape for maximum flexibility.
- Keep it Clean: Regularly cleaning your window frames and sills prevents dirt and mildew from building up and potentially compromising the caulk bead over time.
When to Call a Professional
While replacing exterior window caulk is a very manageable DIY project, there are situations where calling a professional is the wise choice. If during your inspection you discover significant wood rot around the window frame, this indicates a deeper, more systemic water intrusion problem that caulk alone cannot fix. A professional carpenter or window installer will need to assess the extent of the damage and perform a proper repair.
Similarly, if the windows are on the second or third story and you are not comfortable working on a tall ladder, hiring an insured professional is essential for your safety. Finally, if you see condensation or fogging between the panes of a double-pane window, this means the window seal itself has failed. The entire window unit (or the insulated glass unit, the IGU) will need to be replaced, which is a job for a professional window contractor. A professional can quickly and safely handle the work, ensuring a durable, long-lasting seal, especially on high or difficult-to-reach windows. '''
What should this project cost?
Enter your project details for a realistic cost range before you call anyone.
Per-window replacement commonly $450–$1,400 installed; hardware repairs often under $300.
- Regional adjustment
- National average
- Labor share (typical)
- ~$281
- Quotes to collect
- 3 written estimates
Educational estimate based on national averages — not a binding quote. Always confirm with written local estimates.
Recommended for DIYers & woodworkers
Sponsored
The Top 20 Tools for Workshops of Any Budget
No stationary machines or power tools required — plus 3 fundamental tools that can't be bought at any price.
Get the free guide
Ted's Woodworking — The #1 Woodworking Resource
Detailed instructions, dimensioned drawings, materials & cutting lists, and 3D schematics for every skill level.
See the plansSponsored: links above are affiliate links. FixlyGuide may earn a commission on qualifying purchases — at no extra cost to you.
Frequently asked questions
How often should you replace window caulk?+
You should inspect your window caulk annually. Depending on the quality of the caulk and environmental exposure, exterior caulk typically needs to be replaced every 5 to 10 years. If it is cracked, peeling, or no longer flexible, it's time to replace it.
Can I just put new caulk over old caulk?+
No, you should never apply new caulk over old caulk. The new bead will not adhere properly and will fail quickly. For a lasting seal, the old caulk must be completely removed and the surface thoroughly cleaned before applying the new bead.
What is the best caulk for exterior windows?+
The best caulk for exterior windows is a high-quality 100% silicone or an advanced elastomeric/co-polymer sealant. These types offer superior flexibility to withstand temperature changes, strong adhesion, and excellent resistance to water and UV degradation. Choose silicone if you don't need to paint it and an elastomeric formula if you need to match a paint color.
What temperature is best for caulking windows?+
It's best to apply caulk in mild, dry weather. Most manufacturers recommend an application temperature between 40°F and 90°F (5°C and 32°C). Applying caulk in extreme cold or heat can affect its ability to adhere and cure properly.
Discussion
Loading comments…