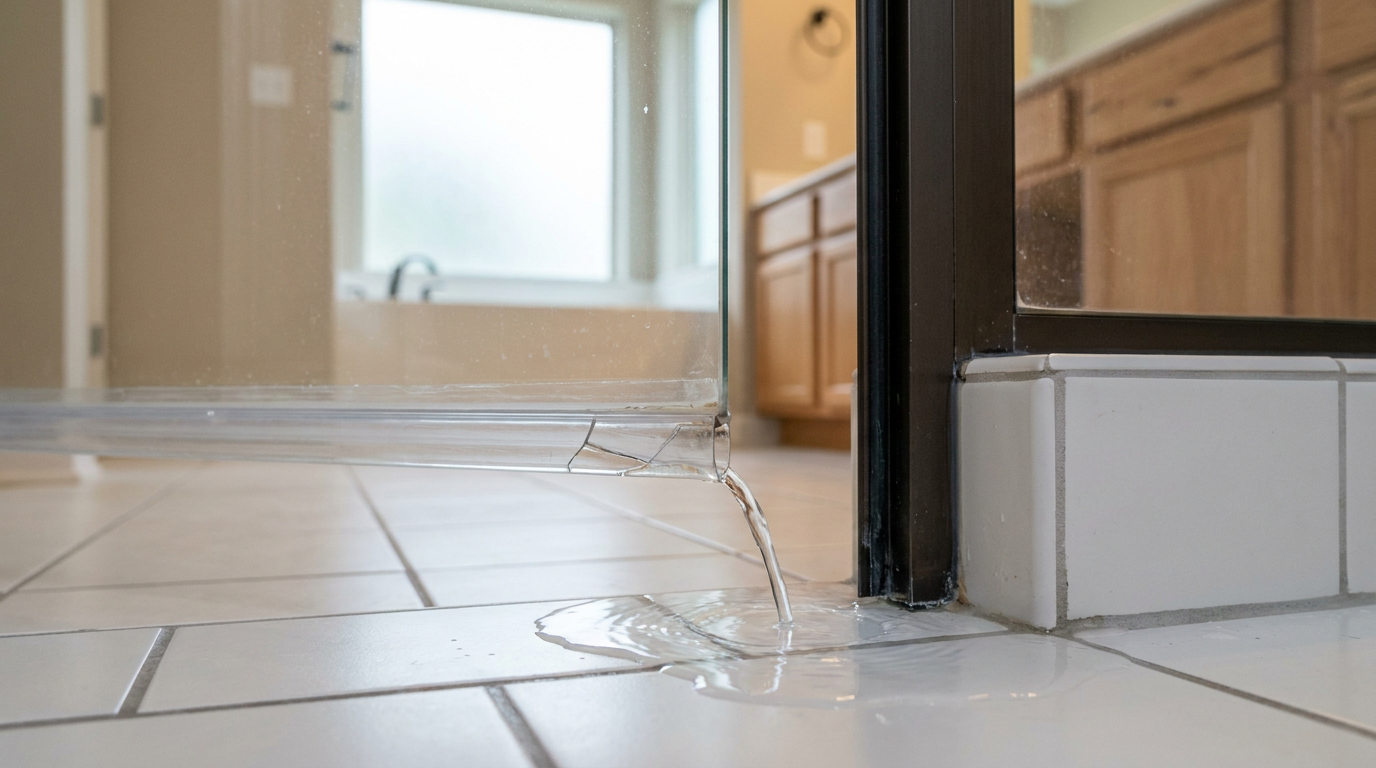
- Failed Sweep/Seal: The vinyl sweep at the bottom of the door is the 1 weak spot. It hardens, cracks, or deforms over time from hard water and cleaners, and then gaps show up.
- Cracked or Peeling Caulk: The caulk sealing the metal frame to the shower curb and walls breaks down. Silicone caulk usually lasts 5-10 years, but bad prep or the wrong caulk — painter’s caulk, for example — can kill it in months.
- Clogged Weep Holes: The bottom track has small weep holes so water can drain back into the shower. If soap scum and hair clog them, the track can overflow and leak onto the floor.
- Door Misalignment: If the hinges are loose, the door can sag and leave an uneven gap at the bottom that the sweep can’t seal.
Plumbing · Leak
| Project category | Plumbing |
|---|---|
| Problem type | Leak |
| Trade required | Plumbing |
| Urgency | Emergency — act now |
| Safety risk | High safety risk |
| DIY suitability | DIY for experienced homeowners |
| Cost category | Low cost |
| Typical timeline | Shut water off now; repair usually same or next day |
| Contractor type | Licensed plumber |
Repair option
Isolate at the shutoff, replace the failed component, and dry the cavity fully.
Replacement option
Repipe the run or the branch when corrosion is widespread.
Common causes
- Failed supply line or shutoff valve
- Worn washers, cartridges, or P-trap connections
- Pinhole corrosion in older copper
Relevant tools:emergency checklistdiy or hire a pro
Published October 9, 2026Last updated October 9, 2026
Tools & materials you'll need
Affiliate linksAs an Amazon Associate FixlyGuide earns from qualifying purchases — at no extra cost to you. Prices and availability are accurate as of publication and subject to change.
Quick Answer
If your shower door’s leaking at the bottom, the usual suspects are a worn vinyl sweep, gaps in the caulk along the metal frame, or a door that’s gone out of alignment. I’d start with the soft vinyl seal at the bottom of the door and look for cracks, warping, or hard spots. If that sweep’s shot, it’s a cheap, easy swap. If it looks okay, then check the vertical and bottom caulk lines where the stationary glass panels and metal frame meet the shower curb and walls.
The Problem
You step out of the shower and there’s a puddle on the bathroom floor, right by the door. Not a few drips. A real puddle. That’s not just a nuisance you wipe up and forget about — that water can get under tile, rot the subfloor, wreck the ceiling below, and turn into a mold factory in no time. I’ve seen “small” shower leaks turn into ugly, expensive repairs because nobody wanted to deal with them early. The leak is usually showing up at the bottom of the door, either under the swinging door itself or out of the base of the fixed metal frame.
How It Works
A modern shower door is supposed to act like a watertight barrier, and it does that with a few parts working together. Here’s how I break it down on the job:
- The Frame & Curb: An aluminum or stainless steel frame gets mounted right onto the shower stall’s fiberglass or tile curb and the nearby walls. That frame holds the fixed glass and gives the hinged door something solid to work with.
- The Caulk Seal: This is the big one. A bead of 100% silicone caulk goes along the exterior edges of the metal frame — where it meets the curb and walls. That’s the main seal keeping water out of the room. The inside usually stays uncaulked so any water that sneaks into the frame’s channels can weep back into the shower pan. Caulk the inside and you can trap water in there. No dice. That leads to mold and corroded metal.
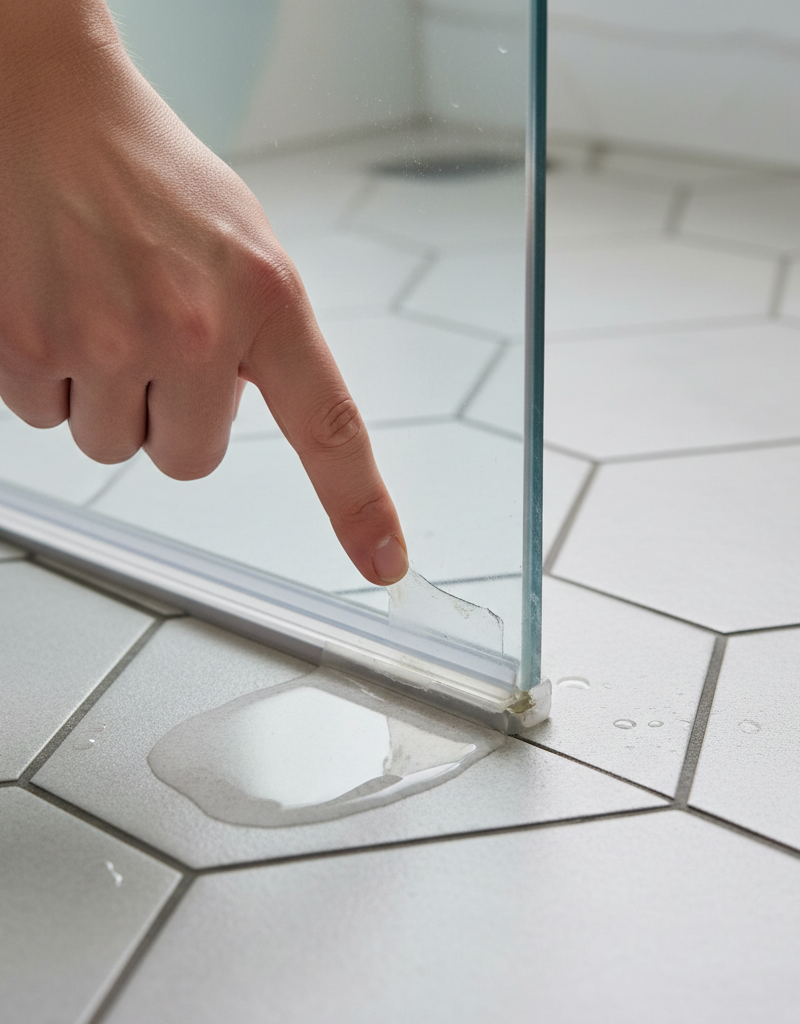
- The Vinyl Sweep: This is the flexible, translucent plastic or vinyl piece attached to the bottom of the swinging glass door. It’s got one or more little fins that press against the shower curb when the door closes, which blocks water from escaping. After enough soap scum and hard water, that vinyl gets brittle, cracks, or warps — and then water finds its way out.
- The Drip Rail: Some doors use a metal channel on the bottom of the door to catch water and send it back into the shower instead of letting it run onto the floor.
When you see a leak, one of those parts has usually failed. Most of the time, I’m replacing a worn sweep or pulling bad caulk and laying down a fresh waterproof bead.
Step-by-Step Fix
This one’s focused on the most common repair: replacing the shower sweep and, if needed, recaulking the exterior frame. Plan on about an hour.
1. Pinpoint the Leak
- Before you start ripping things apart, make sure you know where the water’s coming from. Close the shower door. From the outside, run a cup of water along the bottom track and vertical seams. If you’ve got a helper, have them inside aim the handheld sprayer at the bottom of the door, then at the seams. Seeing exactly where the water shows up tells you which seal failed.
2. Remove the Old Door Sweep
- Open the shower door. Most sweeps are just pressure-fit onto the glass. Usually, you can grab one end and pull it straight down or slide it off the end of the door. Some older styles have a couple small screws; if they do, back those out. If the sweep’s brittle, it may crack and come off in pieces. That’s fine.
3. Clean the Glass Edge Thoroughly
- This is where a lot of folks get lazy, and then they wonder why the new sweep won’t sit right. Use a plastic razor blade or an old credit card to scrape off soap scum, mineral buildup, and any old adhesive from the bottom edge of the glass door. Then wipe it down with denatured alcohol on a rag to get rid of the leftover residue. The glass has to be clean. Really clean.
4. Measure and Cut the New Sweep
- Lay the new vinyl sweep next to the old one so you can check the length. If the old one’s gone, measure the width of the glass door. Mark your cut line on the new sweep with a marker. Use a sharp utility knife or heavy-duty shears and cut it to size. I’d rather see it a hair long (1/16") than too short. You can trim. You can’t add material back.
5. Install the New Sweep
- Line up one end of the new sweep with the edge of the door and push it up onto the glass. Work your way across, pressing firmly so it seats all the way along the bottom. If it’s a slide-on type, guide it into the track and push it across. Make sure the angled fins face the inside of the shower.
6. Test the New Sweep
- Close the door. The new sweep ought to make firm, even contact with the shower curb. Run the shower for a minute and aim water at the bottom of the door. Check for leaks. If the floor stays dry, you’re done. If water’s still showing up, the problem’s probably the frame caulk.
7. (If Needed) Remove the Old Frame Caulk
- Safety: Make sure the area’s dry. Use a caulk removal tool or a plastic razor blade to carefully cut and peel away the old caulk from the outside of the shower frame where it meets the tile or fiberglass. Don’t gouge the shower material or scratch the metal frame. A product like 3M Caulk Remover can help soften stubborn silicone. I pulled a water heater in Frisco last month that had exactly this kind of rotten caulk around a nearby enclosure — once silicone gets old, it hangs on like a tick.
8. Clean and Prep the Seam
- Vacuum out any debris. Scrape away the leftover caulk residue. This is the step that makes or breaks the repair. Scrub the joint hard with a rag soaked in denatured alcohol so you get all the soap scum, oils, and old silicone off there. Let it dry completely for at least 30 minutes. If you spot black mildew or mold, scrub it with a bleach solution (1 part bleach to 10 parts water) and let it dry fully.
9. Apply New Silicone Caulk
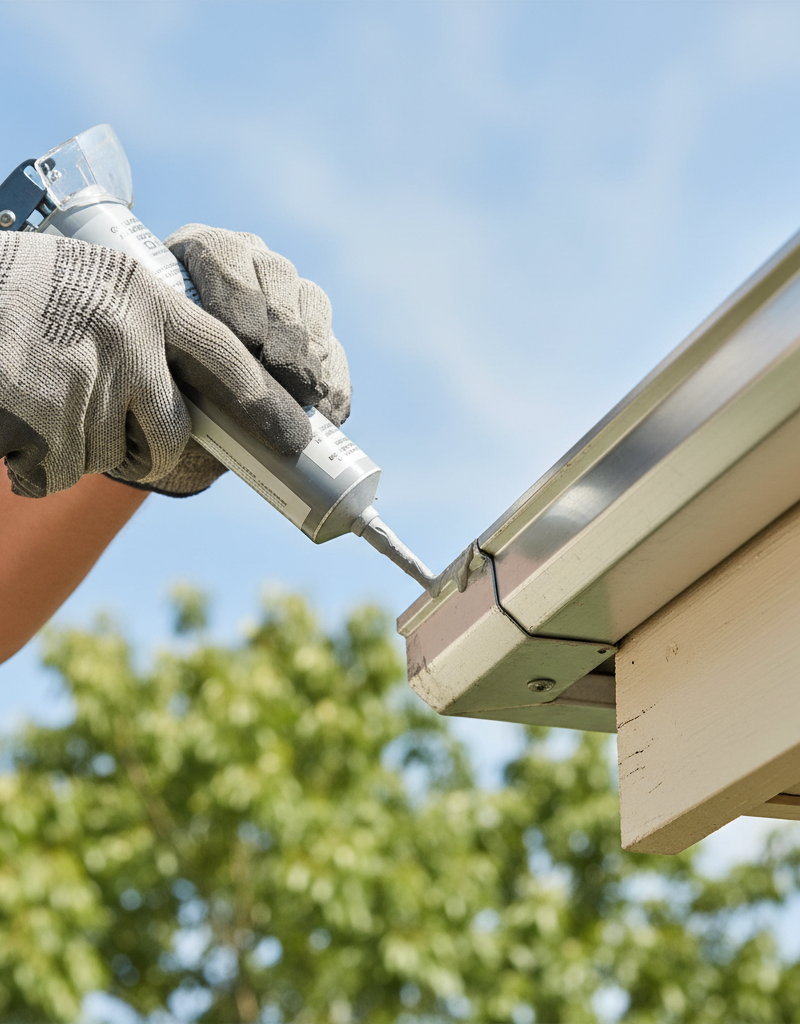
- Load a tube of 100% silicone kitchen & bath caulk (with mold inhibitor) into a caulk gun. Cut the tip at a 45-degree angle to make a small opening, about 1/8-inch. Puncture the inner seal. Run a steady, continuous bead of caulk along the joint where the frame meets the shower curb and wall on the exterior only. Don’t just smear over the top — fill the gap.
10. Tool the Caulk Bead
- Right after you lay the bead, lightly wet your finger or a caulk tooling spatula with denatured alcohol so the silicone won’t stick. Smooth the bead and press it into the joint so it bonds well. That gives you a clean, professional-looking concave seal.
11. Clean Up and Cure
- Wipe off the excess caulk from your tool and the nearby surfaces with a paper towel. Let the caulk cure untouched for at least 24 hours (check the tube for exact time). Don’t use the shower during that window. The silicone needs time to cure before it’s truly waterproof.
Common Causes
- Failed Sweep/Seal: The vinyl sweep at the bottom of the door is the #1 weak spot. It hardens, cracks, or deforms over time from hard water and cleaners, and then gaps show up.
- Cracked or Peeling Caulk: The caulk sealing the metal frame to the shower curb and walls breaks down. Silicone caulk usually lasts 5-10 years, but bad prep or the wrong caulk — painter’s caulk, for example — can kill it in months.
- Improperly Caulked Frame: A common mistake is caulking the inside of the shower frame. Those channels are supposed to weep water back into the shower pan. Seal them up and you trap water, which eventually finds an exit, usually at the corners.
- Clogged Weep Holes: The bottom track has small weep holes so water can drain back into the shower. If soap scum and hair clog them, the track can overflow and leak onto the floor.
- Door Misalignment: If the hinges are loose, the door can sag and leave an uneven gap at the bottom that the sweep can’t seal.
Common Mistakes
- Using the Wrong Caulk: Don’t use acrylic latex painter’s caulk in a shower. It’ll yellow, feed mold, and fall apart. You need 100% silicone caulk labeled for "Kitchen & Bath" or "Shower & Tub."
- Caulking Over Old Caulk: This almost never works. New caulk won’t bond to old, slick silicone, and the leak path is still sitting there underneath. Pull the old bead off completely.
- Bad Surface Prep: If you put new caulk on a wet, dirty, or soap-scum-covered surface, it’s going to peel off pretty fast. The joint needs to be surgically clean and bone dry.
- Caulking the Inside of the Frame: That traps water inside the metal channels, which leads to hidden mold and leaks at the corners. Caulk the exterior perimeter only.
- Making the Caulk Bead Too Big: A giant bead looks sloppy and peels easier. A clean, tooled 1/8" to 3/16" bead is plenty to fill the gap and keep water where it belongs.
Cost & Time Breakdown
This is one of those low-cost, high-payoff repairs. If you hire it out, most of what you’re paying for is labor.
| Task | DIY Cost | Pro Cost | Time |
|---|---|---|---|
| Replace Door Sweep Only | $15–$30 | $125–$175 | 15 minutes |
| Recaulk Frame Perimeter | $10–$20 | $150–$225 | 45-60 minutes |
| Sweep & Recaulk | $25–$50 | $200–$300 | 1–1.5 hours |
| Clean Weep Holes | $0 | included | 5 minutes |
Tips & Prevention
- Clean the Sweep Weekly: When you clean the shower, wipe down the vinyl sweep. That gets rid of soap scum and hard water buildup that chew up the seal faster.
- Check Your Weep Holes: Every few months, look at the weep holes in the bottom track. If they’re packed with junk, use a pipe cleaner or a zip-tie to clear them.
- Choose 100% Silicone: When it’s time to recaulk, don’t cheap out. Spend the extra $3 on a good 100% silicone caulk. It stays flexible and waterproof way better than siliconized acrylics.
- Squeegee After Use: A quick squeegee on the glass and door after each shower cuts way down on the water and soap scum sitting on the seals, so they last longer.
- Don't Slam the Door: Slamming the shower door over and over can loosen the hinges and throw the door out of alignment over time.
- Run the Exhaust Fan: Keep the bathroom exhaust fan on for 20-30 minutes after every shower. Less humidity means the caulk and seals dry out right and mold doesn’t get a foothold.
When to Call a Professional
This is a pretty DIY-friendly fix, but sometimes you need a glass pro or a plumber. If the leak’s still there after you’ve replaced the sweep and recaulked the exterior the right way, there may be a bigger problem hiding under the surface. Call a pro if you see cracks in the shower pan, loose wall tile that suggests water’s been getting behind it, or a metal frame that’s loose or corroded. Those are signs you’ve got more than a simple seal failure, and that usually means a more invasive repair.
Related Articles
Keep troubleshooting with these hand-picked guides from FixlyGuide:
- The Caulk Mystery: Why Your Door Frame Is Leaking (Even When It Looks Sealed) — Think your door frame is sealed tight but still getting leaks? You're probably looking at a common caulk failure point that lets water snea…
- The #1 Reason Your Baseboards Are Pulling Away (It's Not What You Think) — Discover why your baseboards are separating from the wall, often due to humidity changes, and learn how to fix them securely with common to…
- The Caulk Joint Mystery: Why Your Shower Base Keeps Leaking (Even After Recaulking) — Discover why your shower base might still be leaking after recaulking, focusing on common missed spots and structural issues that caulk alo…
- The Grimy Secret: Why Your Toilet Bowl Stains Keep Coming Back — Fed up with scrubbing stubborn toilet bowl stains only for them to reappear days later? The real culprit is likely hiding in your tank, not…
- The 3 Washing Machine Mistakes That Cost You Hundreds (And How to Fix Them Forever) — Avoid costly repairs and premature replacement by learning three common washing machine mistakes and how to fix them for good.
- That Puddle By Your Shower? The Seal Trick You Don't Know — Stop that frustrating puddle on your bathroom floor by understanding the real reason your beautiful frameless shower door leaks and how a s…
Should you do this yourself?
Answer five quick questions before you start. Safety outranks savings every time.
Your experience with work like this
How high do you have to work?
Does the job involve any of these?
Will it need a permit?
Specialty tools
Free and instant. Educational guidance only — not a quote, inspection, or professional diagnosis.
Questions to ask before you sign
Ask every contractor the same questions and the cheapest bid stops looking cheapest. Check them off as you go — your progress is saved on this device.
Free, no signup. Bring this to every walkthrough so you compare bids on the same terms.
What should this project cost?
Enter your project details for a realistic cost range before you call anyone.
Cost depends heavily on which system turns out to be the source.
- Regional adjustment
- National average
- Labor share (typical)
- ~$1,620
- Quotes to collect
- 3 written estimates
Educational estimate based on national averages — not a binding quote. Always confirm with written local estimates.
Handle this before it gets worse
First steps that limit damage, then a way to reach a qualified pro.
- Emergency repair checklistThe first steps that limit damage before a pro arrives.Open
- Get local estimatesSend one request and compare written estimates from vetted pros.Open
- Estimate this projectGet a cost range for your scope and ZIP before you call anyone.Open
Free, no signup required. Estimates are educational guidance, not a quote or an inspection.
Recommended for DIYers & woodworkers
Sponsored
The Top 20 Tools for Workshops of Any Budget
No stationary machines or power tools required — plus 3 fundamental tools that can't be bought at any price.
Get the free guide
Ted's Woodworking — The #1 Woodworking Resource
Detailed instructions, dimensioned drawings, materials & cutting lists, and 3D schematics for every skill level.
See the plansSponsored: links above are affiliate links. FixlyGuide may earn a commission on qualifying purchases — at no extra cost to you.
Frequently asked questions
How do I know if my shower door sweep needs replacing?+
Look for visible signs of wear. If the vinyl sweep is yellowed, brittle, cracked, or visibly warped, it's no longer creating a proper seal. If you close the door and can see a gap between the sweep and the shower curb, it's definitely time for a replacement.
Can I just put new caulk over the old caulk?+
No, this is a common mistake that never works. New silicone caulk will not stick to old, cured silicone. You must completely remove the old bead and clean the surface thoroughly for the new caulk to form a durable, waterproof bond.
Why is my frameless shower door leaking at the bottom?+
Frameless doors typically use a clear polycarbonate or vinyl sweep at the bottom and a vinyl seal along the hinged side. Just like framed doors, these seals wear out and are the most common cause of leaks. The replacement process is nearly identical: pull off the old seal, clean the glass, and press on the new one.
Should I caulk the inside or outside of my shower door frame?+
You should only caulk the exterior of the shower frame where it meets the walls and curb. The inside track is designed with weep holes to allow water to drain back into the shower pan. Caulking the inside traps water, which can lead to mold and leaks.
How much does it cost to fix a leaky shower door?+
It's a very affordable DIY fix. A new door sweep costs between $15 and $30. If you need to recaulk, a tube of quality 100% silicone caulk is about $10-$15. A professional would likely charge $150 to $250 for the same repair.
What is the best caulk to use for a shower door?+
Always use a 100% silicone caulk that is specifically rated for kitchens and baths. These formulas contain mildewcides to prevent mold growth and are completely waterproof and flexible once cured. Do not use acrylic latex or painter's caulk.
How long do I need to wait for shower caulk to dry?+
You must let new silicone caulk cure for at least 24 hours before exposing it to water. Some fast-drying formulas claim to be water-ready in as little as 30 minutes, but waiting the full 24 hours is the safest bet to ensure a durable, long-lasting seal. Do not use the shower during this time.
My shower is still leaking after replacing the sweep and caulk. Now what?+
If you've properly replaced the sweep and recaulked the exterior frame and the leak persists, check the small weep holes in the bottom metal track to ensure they aren't clogged. If they're clear, you may have a more complex issue, like a leak from the faucet valve behind the wall, a crack in the shower pan, or failed grout/tile. At that point, it's wise to call a professional plumber or tile setter.
Discussion
Loading comments…