- Poor Surface Preparation: This is the 1 culprit. Old caulk, soap scum, grease, or moisture on the surface keeps the new stuff from bonding. It’s like trying to stick a stamp to a greasy envelope—it’s not happening.
- Wrong Type of Caulk: Using paintable acrylic latex caulk in a wet spot like a sink is asking for trouble. It’s not flexible enough or water-resistant enough for the long haul. You want 100% silicone here.
- Applying Over Old Caulk: This shortcut almost never works. The new caulk bonds to failing caulk, and when the old layer lets go, the new one goes with it. Pull all of it out.
- Applying Too Much Caulk: A fat bead looks sloppy and can crack or peel as it cures. A smaller, well-tooled bead holds up better.
- Lack of Curing Time: If you hit it with water too soon, you weaken the bond and the caulk can fail early.
General remodeling · Renovation planning
| Project category | General remodeling |
|---|---|
| Problem type | Renovation planning |
| Trade required | General contracting |
| Urgency | Planned project |
| Safety risk | Low safety risk |
| DIY suitability | Pro recommended |
| Cost category | Major investment |
| Typical timeline | Design and permitting often 2–4 months before work starts |
| Contractor type | General contractor |
Repair option
Phase the work and fix the building envelope first.
Replacement option
Full renovation with permits, design, and a general contractor.
Common causes
- Space no longer fits how the household lives
- Resale preparation
- Deferred maintenance stacking up
Relevant tools:project cost estimatorcompare quoteshome improvement material prices
Published September 5, 2026Last updated September 5, 2026
Tools & materials you'll need
Affiliate linksAs an Amazon Associate FixlyGuide earns from qualifying purchases — at no extra cost to you. Prices and availability are accurate as of publication and subject to change.
Quick Answer
When you see caulk peeling away from your sink or countertop, it’s usually telling you one thing plain as day: the prep was lousy. Most homeowners—and plenty of weekend warriors—try to run new caulk right over the old stuff, or they don’t clean the surface well enough. That new bead never gets a real bite. Then you’ve got ugly gaps, water sneaking where it doesn’t belong, and a job you’ll be back on before long. The real fix is to strip it down, get both surfaces dead clean, and lay in a fresh bead of the right sealant with a steady hand.
The Problem
I’ve been in this trade for over 25 years, and I can tell you peeling caulk around a sink is one of the most common callouts I get. It’s not just ugly. That little split is an open door for water, and water doesn’t stop at the countertop edge—it keeps going. Rot, mold, mildew, ruined cabinets, soft subfloors, mushy vanity boxes... I’ve seen the whole mess. It starts small. Then it gets expensive. Kitchens and bathrooms are the worst for it because they stay damp and get used hard, day after day.
Most times, the trouble starts when the old caulk finally gives up. Maybe it dried out. Maybe it’s been there for a decade. Maybe it was cheap builder-grade acrylic from the jump. Then somebody tries to do the right thing—bless ’em—and smears fresh caulk over the top. Or they scrape a little, leave soap scum, grease, or sticky residue behind, and call it a day. No dice. New caulk, even good stuff, won’t bond to junk. It’ll look fine for a bit, maybe weeks or months, and then it starts lifting at the edge. Frustrating? Sure. Preventable? Absolutely.
How It Works
To really get why caulk peels, you gotta know what caulk is doing in the first place. Think of it like a flexible waterproof bridge. It seals the gap between two surfaces that move different ways—like a porcelain sink and a laminate countertop, or tile meeting granite. Those materials expand and contract a little. The caulk has to keep up.
There are a few main types, but around sinks I’m usually talking silicone or siliconized acrylic latex. Silicone’s the boss in wet spots. It’s flexible, tough, and handles water like it’s nothing. It cures by reacting with moisture in the air. Siliconized acrylic latex is easier to clean up and can be painted, which is handy in some jobs, but it doesn’t hold up as well in wet, high-movement areas. Around sinks, I lean hard on 100% silicone. It’s fussier. It’s worth it.
The whole thing depends on adhesion—the caulk has to stick to the surface. For that to happen, the substrate needs to be clean, dry, and free of old caulk, grease, soap scum, or cleaner residue. If there’s a film in the way, the caulk’s just sitting on top of it. That’s like trying to stick tape to a greasy pan. Temperature and humidity matter too. Most caulks like to be installed somewhere between 40°F and 90°F. Too cold, and it gets stiff and won’t grab well. Too hot, and it can cure too fast or get runny. If it doesn’t bond right, the normal movement of the house or sink will pull it loose, and then you’re right back where you started.
Step-by-Step Fix
Alright, let’s do it right. This isn’t a hurry-up job. Rush it and you’ll be back in there fixing it again.
-
Clear the Area — Get the whole workspace open. Move everything off the counter. Dishes, soap, sponges, little jars, all of it. You want a clear shot at the joint. Toss down old towels or newspaper so you’re not chasing caulk bits across the floor later.
-
Score the Old Caulk — Break the seal first. Grab a utility knife or a caulk removal tool. Run the blade carefully along both edges of the bead where it meets the sink and countertop or backsplash. Don’t gouge the finish, but do cut the bond. That makes the pull-out way easier. You’re just separating the old stuff from the surfaces.
-
Scrape It Out — Get the old junk gone. Now use the removal tool, a putty knife, or even a chisel if you’re careful. Scrape out the bulk of the caulk slowly. Keep steady pressure. If it’s stubborn—silicone usually is—you might have to grab an edge with pliers and peel it in one strip. That’s where a lot of DIYers get sloppy. Don’t. Get as much out as you can.
-
Clean Up the Residue — This is the big one. After the chunks are gone, you’ll still have film and little stuck-on bits. For silicone residue, I like mineral spirits or a dedicated silicone remover like DAP Silicone Remover. Put it on a rag, let it sit a few minutes, then scrub with a stiff brush or plastic scraper. For acrylic latex, denatured alcohol or hot soapy water and a scrub brush usually works. Wipe it clean with a damp cloth, then dry it with a fresh dry cloth. Seriously, don’t skate past this. Any grease, soap scum, or leftover film will mess up the new bond.
-
Degrease and Dry — Get it ready to grab. Give the area one last wipe with rubbing alcohol (isopropyl alcohol). That knocks down any leftover oils or cleaner residue and helps the surface dry out fully. Let it air dry for at least 30 minutes, or even an hour, and use a fan if you want to speed things along. It needs to be bone dry. No shortcuts here.
-
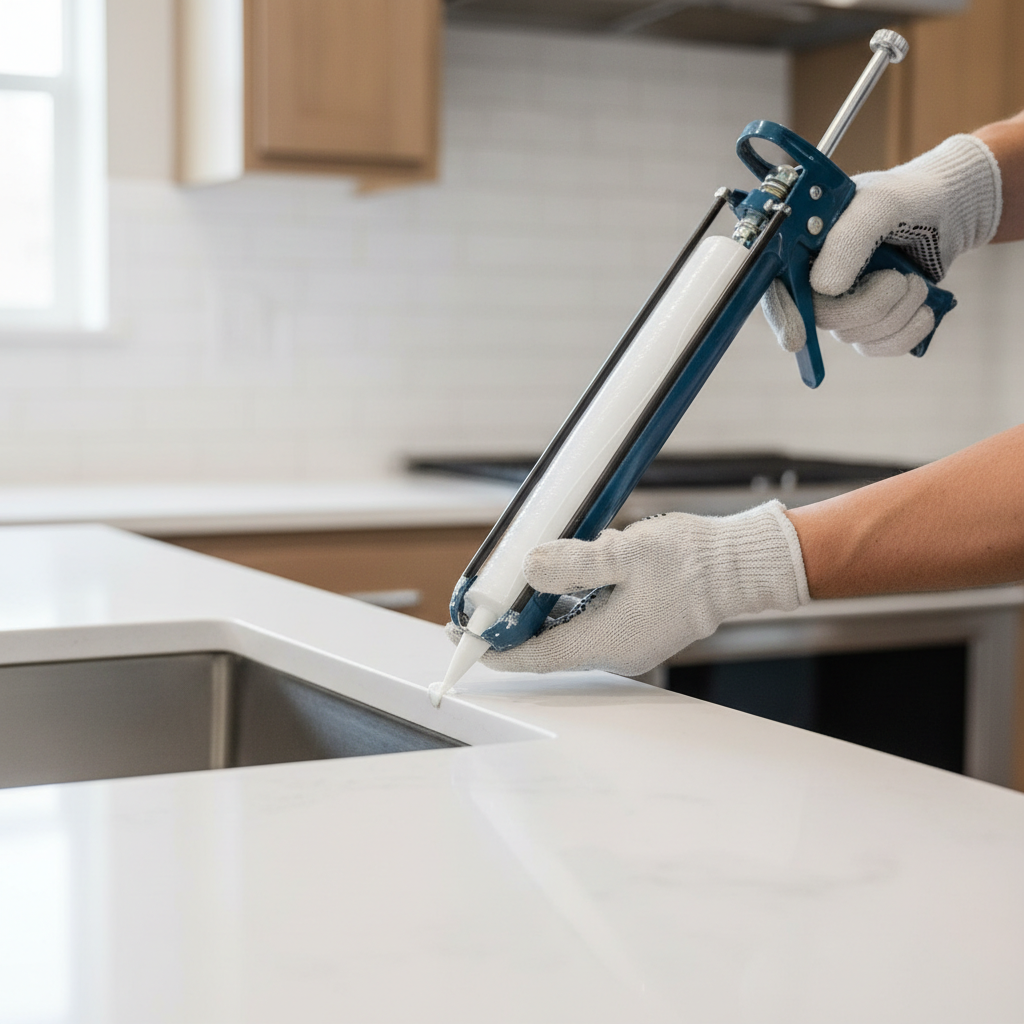
Prep Your Caulk Gun and Tube — Set yourself up clean. Cut the caulk tip at a 45-degree angle. Start small—you can always open it up more if you need a bigger bead. Puncture the inner seal with the metal rod on the gun, or a nail if that’s what you’ve got. Load the tube. Then squeeze out a little bead on cardboard or paper first so the flow gets even and you can check the bead size. I do this all the time. Saves headaches.
-
Apply the New Caulk — Keep it steady. Start in a spot that won’t scream at you if the bead isn’t perfect. Set the tip into the joint and squeeze the trigger evenly while you move the gun along the seam in one smooth pass. Try not to stop mid-run. If you have to pause, let off the trigger so it doesn’t keep burping caulk out. Overlap your starts and stops a little so the line stays sealed. And don’t overdo it—a ¼-inch bead is usually enough for most sink-to-counter joints.
-
Tool the Bead — Make it look right. This is where the job goes from “done” to “done right.” Right after you apply the caulk—within 5-10 minutes, depending on the product and humidity—tool it. You can use a caulk tool, a gloved finger, or even a plastic spoon if that’s what you’ve got. For acrylic, a nitrile glove slightly dampened with water works. For silicone, I use a little mineral spirits on the glove. Smooth it along the bead, knock off the extra, and leave a clean concave finish. Keep a rag or paper towels nearby to wipe your finger or tool. Don’t fuss with it forever. A couple passes, and that’s enough.
-
Clean Up and Cure — Then leave it alone. Wipe any stray caulk off the surrounding surfaces right away with a damp cloth or paper towel. For fresh silicone mistakes, mineral spirits will clean them up. For acrylic, water usually does it. Then let the caulk cure before it sees any water. That part matters. Check the tube, but silicone usually needs 24-48 hours before getting wet, and full cure can take several days. Acrylic might be tack-free in an hour, but it still needs 12-24 hours before light use.
Common Causes
- Poor Surface Preparation: This is the #1 culprit. Old caulk, soap scum, grease, or moisture on the surface keeps the new stuff from bonding. It’s like trying to stick a stamp to a greasy envelope—it’s not happening.
- Wrong Type of Caulk: Using paintable acrylic latex caulk in a wet spot like a sink is asking for trouble. It’s not flexible enough or water-resistant enough for the long haul. You want 100% silicone here.
- Applying Over Old Caulk: This shortcut almost never works. The new caulk bonds to failing caulk, and when the old layer lets go, the new one goes with it. Pull all of it out.
- Applying Too Much Caulk: A fat bead looks sloppy and can crack or peel as it cures. A smaller, well-tooled bead holds up better.
- Lack of Curing Time: If you hit it with water too soon, you weaken the bond and the caulk can fail early.
- House Movement/Expansion: This isn’t always the main cause, but old homes move more than folks think. Expansion and contraction can stress the joint over time, and if the caulk’s not flexible enough, it’ll eventually let go.
Common Mistakes
- Not removing all the old caulk: I see this constantly. Homeowners think “good enough” is good enough, but it isn’t. One little strip of old silicone can wreck the whole repair.
- Skipping the cleanup: If the joint still has soap, oils, or dust in it, the new bead won’t hold. Simple as that.
- Using the wrong caulk: I’ve had people use painter’s caulk around sinks and wonder why it peels off. Wrong product, wrong spot.
- Trying to smooth it too late: Once caulk starts skinning over, tooling it gets messy fast. I pulled a water heater in Frisco last month that had exactly this kind of half-done seal around a utility sink—looked fine from ten feet away, but the bead had already gone brittle and popped loose in strips. Timing matters.
- Using way too much pressure: That’s how you end up with a blobby mess and no control at the corners.
- Getting it wet too soon: You’d be surprised how often this happens. Let it cure. Let it sit. Then use it.
Related Articles
Keep troubleshooting with these hand-picked guides from FixlyGuide:
- The #1 Mistake Homeowners Make Recaulking a Tub (And How to Fix It for Good) — Most homeowners make a crucial mistake when recaulking their bathtub, leading to recurring mold and leaks. Learn the right way to achieve a…
- The #1 Caulk Mistake That Leads to Mold (And How to Fix It Right) — Discover the most common caulk mistake that causes frustrating mold growth around your bathtub and learn the simple, effective way to recau…
- The Silent Rot: What Your Soffits and Fascia Tell You About a Deeper Problem — Ignoring damaged soffit and fascia boards isn't just an aesthetic issue; it's a flashing warning sign your home could be facing serious, ex…
- That White Crust On Your Faucet? It's A Big Problem — That chalky, white buildup on your fixtures isn't just ugly—it's limescale from hard water, and it's actively clogging, corroding, and ruin…
- The 9 Sneaky Signs Your Roof Is Failing (And How to Spot Them From the Ground) — Learn to spot critical signs of roof damage from the safety of the ground, potentially saving thousands in repairs.
- The #1 Mistake Homeowners Make When Caulking a Bathroom Sink (And How to Fix It) — Discover the most common caulk mistake homeowners make around bathroom sinks and follow simple steps to achieve a lasting, watertight seal.
Should you do this yourself?
Answer five quick questions before you start. Safety outranks savings every time.
Your experience with work like this
How high do you have to work?
Does the job involve any of these?
Will it need a permit?
Specialty tools
Free and instant. Educational guidance only — not a quote, inspection, or professional diagnosis.
What should this project cost?
Enter your project details for a realistic cost range before you call anyone.
Cosmetic refreshes start near $5,000; full remodels commonly $25,000–$45,000.
- Regional adjustment
- National average
- Labor share (typical)
- ~$8,550
- Quotes to collect
- 3 written estimates
Educational estimate based on national averages — not a binding quote. Always confirm with written local estimates.
Get the print-ready PDF of this guide
A clean, ad-free, printable version you can keep on your phone or pin to the workshop wall. Free with a FixlyGuide account.
- Print-optimized layout
- Tools, materials & every step included
- Saved to your account
Recommended for DIYers & woodworkers
Sponsored
The Top 20 Tools for Workshops of Any Budget
No stationary machines or power tools required — plus 3 fundamental tools that can't be bought at any price.
Get the free guide
Ted's Woodworking — The #1 Woodworking Resource
Detailed instructions, dimensioned drawings, materials & cutting lists, and 3D schematics for every skill level.
See the plansSponsored: links above are affiliate links. FixlyGuide may earn a commission on qualifying purchases — at no extra cost to you.
Frequently asked questions
Why does caulk around my sink keep peeling?+
Caulk typically peels due to poor surface preparation. If the old caulk, grease, soap scum, or moisture isn't completely removed before applying new caulk, the new sealant won't properly adhere to the surfaces, causing it to fail prematurely.
What's the best type of caulk to use for sinks?+
For sinks, especially in high-moisture areas like kitchens and bathrooms, 100% silicone sealant is highly recommended. It offers superior flexibility, durability, and water resistance compared to acrylic latex caulks, making it ideal for joints that see a lot of water and movement.
How do I remove old silicone caulk effectively?+
To remove old silicone caulk, first score its edges with a utility knife. Then, scrape away the bulk with a caulk removal tool or putty knife. For stubborn residue, use mineral spirits or a dedicated silicone caulk remover, allowing it to soak before scrubbing clean.
Can I caulk over existing caulk?+
No, you should never caulk over existing caulk. New caulk will only adhere to the old, failing caulk, which means it will peel away along with the original layer. Always completely remove all old caulk before applying a fresh bead.
How long does sink caulk need to dry before getting wet?+
The drying time, or cure time, depends on the type of caulk. For 100% silicone, you typically need to wait 24-48 hours before exposing it to water. For full strength, it might take several days. Always check the manufacturer's instructions on the tube.
How do I get a smooth caulk bead?+
To get a smooth caulk bead, apply steady, even pressure as you move the gun, aiming for a consistent bead. Immediately after application, use a caulk tooling tool or a gloved finger (dampened with water for acrylic, or mineral spirits for silicone) to smooth out the bead and remove excess.
What tools do I need to recaulk my sink?+
You'll need a utility knife or caulk removal tool, a putty knife or scraper, rags, mineral spirits or rubbing alcohol, paper towels, painter's tape (optional), a caulk gun, and a tube of 100% silicone sealant for kitchens and baths.
How often should I recaulk around my sink?+
With proper application and good quality silicone caulk, your sink caulk can last 5-10 years. However, it's a good idea to inspect it annually and recaulk sooner if you notice any signs of cracking, peeling, discoloration, or mold growth.
Is it better to use painter's tape when caulking?+
Painter's tape can be a great help for getting super clean lines, especially if you're not confident in your caulking skills. Apply it neatly on either side of the joint, leaving the gap for the caulk. Apply the caulk, tool it, and then remove the tape immediately while the caulk is still wet for crisp edges.
What if I get caulk on my countertop or sink?+
If you get caulk where it doesn't belong, wipe it up immediately. For silicone, use a rag dampened with mineral spirits. For acrylic latex, use a damp cloth with water. Once cured, silicone is very difficult to remove without special removers or scraping, so clean as you go.
Discussion
Loading comments…