
How it works
A standard residential electrical circuit is a closed loop that begins and ends at your main electrical panel. Power flows from a circuit breaker, along a black or red "hot" wire (typically 12 or 14-gauge), to one or more devices on the circuit, and returns to the panel along a white "neutral" wire. A bare copper or green wire provides a ground path for safety. When an outlet isn't working but the breaker is on, the interruption is happening somewhere along this loop, not at its source (the breaker).
Outlets on a single circuit are usually wired in a daisy-chain fashion. Power is fed to the terminals of the first outlet, and another set of wires carries that power from the first outlet to the second, and so on. This means a loose connection or a fault at an outlet "upstream" will sever power to all outlets "downstream" from it. The most common culprit is a Ground Fault Circuit Interrupter (GFCI) outlet. A GFCI is a specialized safety device that constantly monitors the current flowing on the hot and neutral wires. If it detects a tiny imbalance—as little as 4-6 milliamps, indicating that current is leaking to ground (potentially through a person)—it trips in milliseconds, cutting power to itself and any standard outlets wired downstream from its "LOAD" terminals. This is why a single tripped GFCI in a garage can disable outlets in an adjacent bathroom.
Step-by-Step Fix
Follow these steps systematically, from simplest to most complex, to diagnose the issue. Do not skip steps, as they are ordered to ensure safety and efficiency.
-
Confirm the Appliance Works — This fundamental step is often overlooked. Plug the lamp, charger, or appliance you were trying to use into a different outlet in another room that you know is working. If the device still doesn't power on, the problem is with the device's cord, plug, or internal components, not the outlet.
- Tools: None.
- If this works: The appliance is fine. Proceed to the next step to diagnose the original outlet.
-
Identify and Reset All GFCI Outlets — The most common reason for a dead outlet with the breaker on is a tripped GFCI. This protective outlet may be located in a completely different area. Press the "RESET" button firmly until it clicks and stays in.
- Tools: None.
- Common GFCI Locations: Check all outlets in kitchens, bathrooms, laundry rooms, basements, garages, and on exterior walls. One tripped GFCI can affect multiple standard outlets.
- If the button won't reset or pops out immediately: Unplug all appliances from the dead outlet and any others on the same circuit, then try resetting the GFCI again. A faulty appliance can prevent the GFCI from resetting.
-
Map the Circuit and Find Hidden Outlets — Use a simple plug-in circuit tester or a lamp to determine which other receptacles are on the same circuit as the dead one. Turn off the breaker you believe controls the outlet and see what else loses power. This process can help you locate a hidden GFCI you may have missed (e.g., behind a storage box in the garage) or confirm the scope of the problem.
- Tools: Plug-in circuit tester or a small lamp.
- If this doesn't work: If you cannot identify which breaker controls the outlet, you will need to turn off the main breaker to work safely in later steps. This is a significant inconvenience and a good reason to label your panel.
-
Perform a Hard Reset on the Circuit Breaker — A breaker can sometimes trip internally without the handle moving decisively to the "OFF" position. It may look and feel like it's on but is not making a proper connection. Go to your electrical panel, locate the correct breaker, and flip it firmly and completely to the "OFF" position, then back to "ON".
- Tools: None.
- Safety: Stand to the side of the panel, not directly in front of it, when resetting breakers. Look away from the panel as you flip the switch.
-
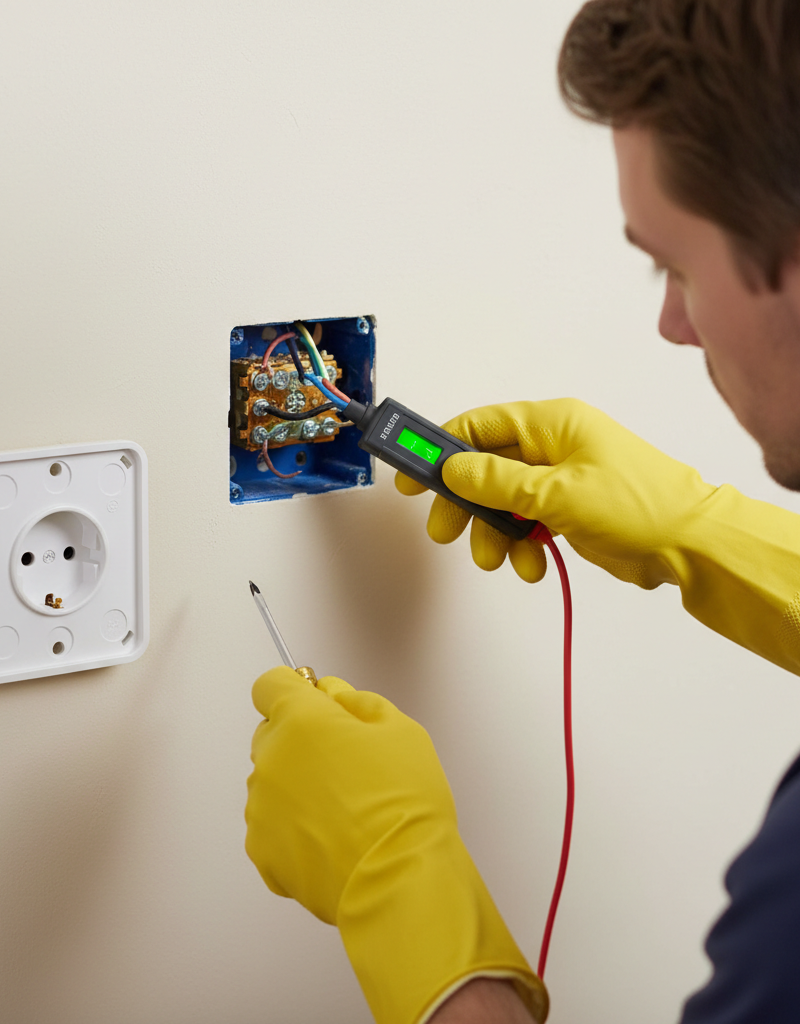
Turn Off Power and Verify It Is Off — Before touching any wires, you must ensure the circuit is de-energized. Turn the appropriate circuit breaker to the "OFF" position. Then, use a non-contact voltage tester (NCVT) to confirm there is no power at the outlet.
- Tools: Non-contact voltage tester (NCVT).
- Safety: First, test your NCVT on a known live outlet to ensure it is working correctly. Then, insert the tip of the tester into the hot slot (the shorter, rectangular slot) of the dead outlet. The tester should not light up or beep. Test both the hot and neutral slots.
-
Visually Inspect the Outlet Face — With the power confirmed off, remove the single screw holding the outlet's cover plate. Examine the face of the outlet receptacle itself. Look for signs of heat, such as discoloration (yellowing, browning, or black marks), melting plastic, or cracks in the body of the receptacle. If you see any of these, the outlet must be replaced.
- Tools: Screwdriver.
- If you see scorch marks: This indicates a past or present arcing event. Proceed with extreme caution and plan to replace the outlet.
-
Inspect the Outlet's Wire Connections — Unscrew the two mounting screws holding the outlet in the electrical box. Gently pull the outlet straight out, taking care not to yank the wires. Inspect the connections on the sides and back.
- Tools: Screwdriver.
- Look for:
- Loose Screw Terminals: Check that the black wire (hot) is screwed to a brass-colored terminal and the white wire (neutral) is screwed to a silver-colored terminal. Nudge them to ensure they are tight.
- Back-Stab Connections: Many older outlets use push-in "back-stab" connections on the rear. These are a notorious failure point. If wires are inserted here, they may have loosened. A loose connection here is a very likely cause of the problem.
-
Check Wire Nut Connections in the Box — Look inside the electrical box for any plastic wire nuts connecting groups of wires. A "pigtail" (a short wire leading to the outlet) may be connected to the circuit feed wires here. Gently tug on each individual wire entering a wire nut. If any wire pulls out, the connection has failed and must be remade.
- Tools: None for inspection; pliers and new wire nuts for repair.
- To fix: If a wire is loose, unscrew the wire nut. Use pliers to twist the bare ends of the wires together neatly in a clockwise direction, then screw on a new, correctly sized wire nut until it is firm and no bare copper is exposed.
-
Test for Incoming Voltage (Advanced) — This step determines if power is reaching the box. USE EXTREME CAUTION. Turn the breaker back ON. Set a multimeter to AC voltage (V~, usually at the 200V setting). Carefully touch one probe to the bare copper or green ground wire and the other probe to the screw terminal where the black (hot) wire is connected. You should get a reading of approximately 120V.
- Tools: Multimeter.
- Safety: Do not let the probes touch each other or any other metal surface. Hold the insulated probes carefully.
- If you get ~120V: Power is reaching the outlet, but the outlet itself is faulty. Proceed to replace it.
- If you get 0V: The problem is further upstream—a loose connection at the previous outlet or a break in the wire. This may require a professional.
-
Replace the Outlet Receptacle — If the outlet is damaged or testing proves it's faulty, replace it. Ensure the power is OFF and verified with your NCVT.
- Tools: Screwdriver, wire strippers, new outlet receptacle.
- Procedure: Loosen the terminal screws and detach the wires. If using a new standard outlet, create a J-shaped hook on the end of each wire. Hook the black wire clockwise around a brass screw, the white wire clockwise around a silver screw, and the ground wire clockwise around the green screw. Tighten all screws firmly. Do not use the back-stab holes.
- If replacing a GFCI: Note which wires are attached to the "LINE" terminals (power source) and which, if any, are on the "LOAD" terminals (protecting downstream outlets). Wire the new GFCI identically.
-
Reassemble and Final Test — Carefully fold the wires back into the electrical box in an accordion pattern. Screw the outlet back into the box, ensuring it is flush and straight. Reattach the cover plate. Turn the circuit breaker back on and test the outlet with your circuit tester or a lamp.
Common mistakes
- Assuming a Breaker Is On Visually. A breaker can be internally tripped while the handle remains close to the "ON" position. Always perform a "hard reset" by fully switching it off and then on again to be certain.
- Forgetting About Distant GFCIs. Homeowners often search for a tripped GFCI only in the room with the dead outlet. Electrical circuits can span multiple rooms, so a GFCI in the garage is a common protector for outlets in a nearby powder room or even an outdoor receptacle. Check every GFCI in the house.
- Using Back-Stab Connections. When replacing an outlet, it's tempting to use the quick push-in holes on the back. These connections rely on a small spring clip and are far less reliable than wrapping the wire around the side terminal screw. Always use the screws for a secure, long-lasting connection.
- Replacing a GFCI Outlet with a Standard One. If you find a faulty GFCI, you must replace it with another GFCI to maintain code compliance and the necessary ground-fault protection. Replacing it with a $1 standard outlet creates a serious safety hazard.
- Mismatching Wires. Confusing the hot (black) and neutral (white) wires on an outlet is called reverse polarity. While an appliance may still function, it creates a shock hazard as the device's internal "off" switch will now only be disabling the neutral leg, leaving the internal circuitry energized. Black wire always goes to the brass screw; white wire to the silver.
- Working Without Verifying Power is Off. Never trust the breaker panel alone. After flipping the breaker, always confirm the circuit is dead at the specific outlet you are working on, using a non-contact voltage tester that you have first confirmed is working.
Cost & time breakdown
Costs are estimates and can vary by region. Pro costs include a typical service call fee and labor.
| Task | DIY Cost | Pro Cost | Time |
|---|---|---|---|
| Locating & Resetting a GFCI | $0 | $75 - $150 | 5-15 minutes |
| Mapping Circuit & Resetting Breaker | $0 - $20 (for a circuit tester) | $75 - $150 | 15-30 minutes |
| Replacing a Standard 15A Outlet | $1 - $5 (outlet) + tools | $100 - $200 | 20-45 minutes |
| Replacing a GFCI Outlet | $15 - $25 (outlet) + tools | $125 - $250 | 25-50 minutes |
| Re-securing a Loose Wire | $0 - $1 (for a new wire nut) | $150 - $300 | 30-60 minutes |
| Troubleshooting an Upstream Fault | N/A | $200 - $400+ | 1-3 hours |
When to call a pro
While many outlet issues are simple DIY fixes, certain signs indicate a more dangerous problem that requires a licensed electrician. Stop work immediately and call a professional if you encounter any of the following:
- Evidence of Burning: A distinct smell of burning plastic or ozone, or visible black scorch marks around outlet terminals or on wires, indicates a dangerous arcing condition that has already occurred.
- Aluminum Wiring: If you open the outlet box and find solid aluminum wiring (dull gray instead of coppery), do not touch it. Aluminum wiring requires specialized connectors and techniques to prevent fire hazards.
- No Power Reaching the Box: If you use a multimeter and confirm that no voltage is getting to the outlet's electrical box, it means there is a break in the wire somewhere inside a wall. Finding and fixing this is not a DIY job.
- Repeatedly Tripping Breakers: If a breaker trips immediately after you reset it, even with nothing plugged in, there is a short circuit somewhere in the wiring that needs professional diagnosis.
- Multiple, Unrelated Dead Outlets: If outlets on different circuits in different parts of the house are dead, it could signal a problem with your main breaker or a loss of one "phase" of power from the utility service.
- Any Sign of Water: If there is moisture or active dripping inside an electrical box, do not proceed. An electrician needs to address the source of the water and inspect for damage before the circuit can be safely used.
Prevention & maintenance
Proactive checks can prevent future failures and improve the safety of your home's electrical system.
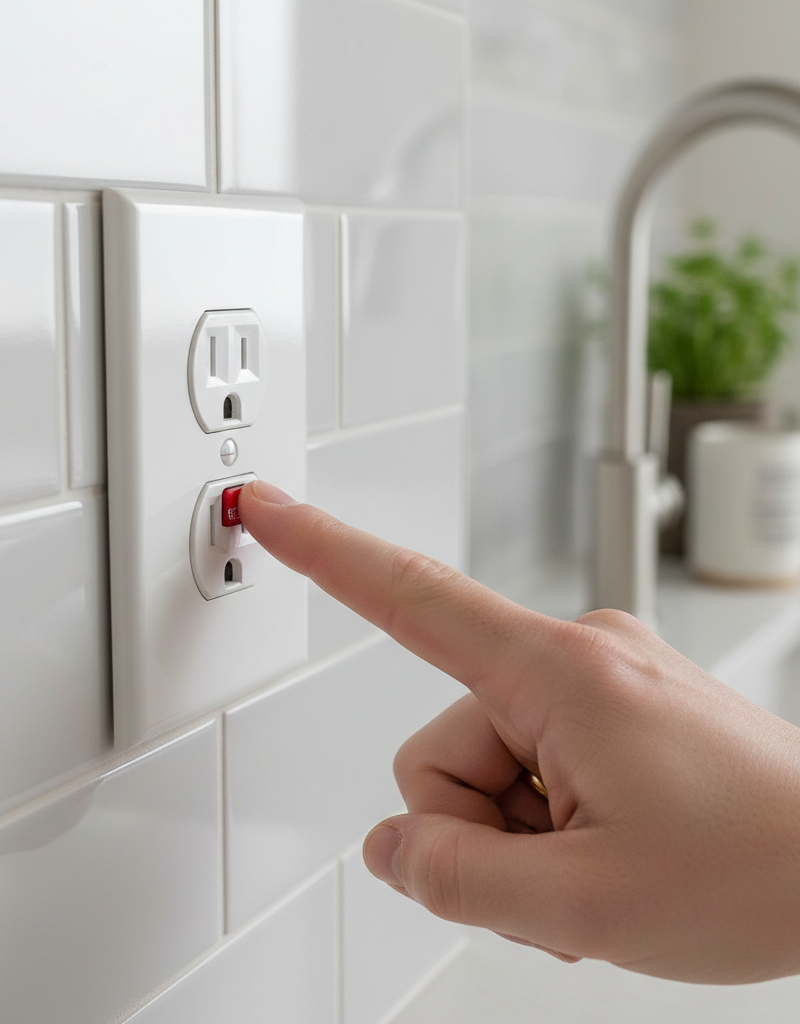
- Test GFCIs Monthly: Every GFCI outlet has "TEST" and "RESET" buttons. Once a month, press the "TEST" button to trip the device, then press "RESET" to restore power. This ensures the internal safety mechanism is functional.
- Visually Inspect High-Use Outlets: Annually, look at outlets that are frequently used (e.g., kitchen counter, workshop). Check for cracks, discoloration, and make sure plugs fit snugly. A loose-fitting plug can lead to poor contact and dangerous heat buildup.
- Avoid "Back-Stabbed" Outlets: As a long-term upgrade project, consider systematically replacing old builder-grade outlets that use back-stab connections. Install new receptacles using the more secure side-screw terminals, especially on circuits with heavy loads.
- Map Your Circuit Breaker Panel: If your panel isn't clearly and accurately labeled, take the time to map it. Work with a helper to turn off each breaker one by one and identify every outlet, light, and appliance it controls. An accurate label is invaluable for safety and troubleshooting.
- Don't Overload Circuits: Be mindful of what is plugged in. Avoid running multiple high-draw appliances, like a space heater and a microwave, on the same circuit simultaneously. This stresses connections and can lead to premature failure or nuisance breaker trips.
Related Articles
Keep troubleshooting with these hand-picked guides from FixlyGuide:
- The 7 Head-Scratching Reasons Your Outlet Died (Even With The Breaker On) — Discover the surprising reasons why an electrical outlet might stop working even when its circuit breaker is fully engaged, and how to safe…
- Why Does Only One Outlet Have No Power (When the Breaker Is On)? — Discover the surprisingly common reasons a single electrical outlet stops working while its circuit breaker remains on, and learn how to sa…
- Why Your Outlet Died But the Breaker's STILL On (The GFCI Culprit) — Discover the hidden reasons an electrical outlet stops working, even when the circuit breaker remains on, often pointing to a tripped GFCI.
- Why Your Circuit Breaker Keeps Tripping: A DIY Guide — A tripping circuit breaker is a common household problem, often indicating an overloaded circuit or a short circuit. This guide helps you d…
- GFCI Outlet Won't Reset? Fix It With These Simple Steps — A GFCI outlet that won't reset usually indicates a tripped circuit, a ground fault, or a faulty outlet. Learn how to diagnose and fix the p…
- Sprinkler System Not Working? Easy Troubleshooting Steps for Homeowners — If your sprinkler system isn't working, it can lead to a dry lawn and dead plants. This guide will help you identify common issues and prov…
Frequently asked questions
Why would an outlet stop working if the breaker isn't tripped?+
The most common reasons are a tripped GFCI outlet on the same circuit, a loose wire connection inside the outlet itself, or the outlet has simply gone bad. Less commonly, a breaker can be in a 'partially tripped' state that isn't obvious.
How do I know if an outlet is GFCI protected?+
GFCI outlets have two distinct buttons on their face, labeled 'TEST' and 'RESET'. They are typically found in areas like kitchens, bathrooms, garages, and basements where water might be present.
Is it safe to try and fix an outlet myself?+
Only if you are comfortable working with electricity, understand how to safely turn off power at the breaker, and possess a non-contact voltage tester to confirm the power is off. If you are unsure at all, it's safer to call a professional.
When should I call an electrician for a non-working outlet?+
Call an electrician if you find burnt wires or burning smells, if the breaker repeatedly trips, if multiple outlets or large areas are without power, or if you are uncomfortable or unsure about any steps involved in troubleshooting or repair.

Discussion
Loading comments…