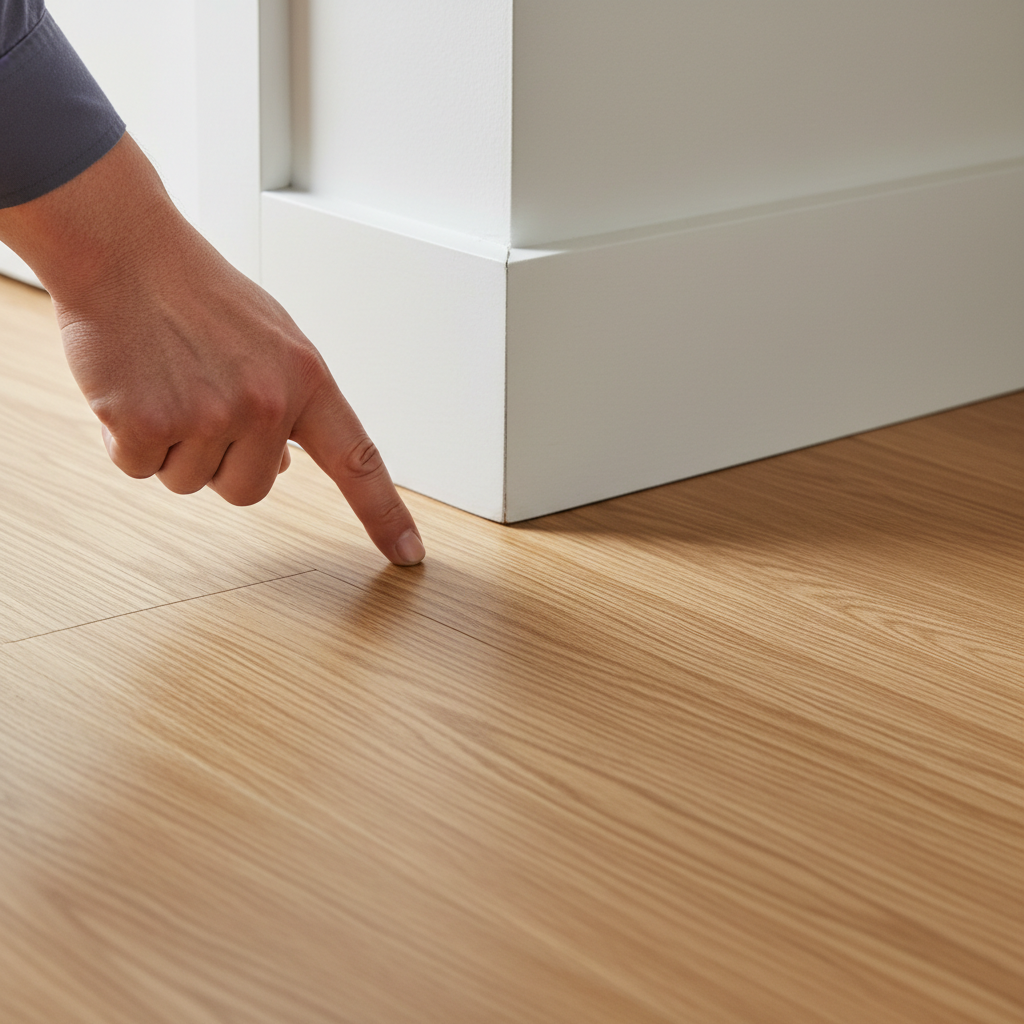
- Identify the Pressure Point – Look for the tight spots
- Tools: Flashlight, painter's tape.
- Tip: Mark suspect spots with painter’s tape so you don’t lose track. Don’t overthink it; start with the easy stuff.
General remodeling · Renovation planning
| Project category | General remodeling |
|---|---|
| Problem type | Renovation planning |
| Trade required | General contracting |
| Urgency | Planned project |
| Safety risk | Low safety risk |
| DIY suitability | Pro recommended |
| Cost category | Major investment |
| Typical timeline | Design and permitting often 2–4 months before work starts |
| Contractor type | General contractor |
Repair option
Phase the work and fix the building envelope first.
Replacement option
Full renovation with permits, design, and a general contractor.
Common causes
- Space no longer fits how the household lives
- Resale preparation
- Deferred maintenance stacking up
Relevant tools:project cost estimatorcompare quoteshome improvement material prices
Published September 23, 2026Last updated September 23, 2026
Tools & materials you'll need
Affiliate links- AmazonUtility knife1
- AmazonSmall pry bar1
- AmazonCircular sawwith a fine-tooth blade
- AmazonOscillating multi-toolwith a flush-cut blade (alternative to circular saw)
- AmazonMeasuring tape1
- AmazonPencil1
- AmazonEye protection1 pair
- AmazonGloves1 pair
- AmazonHygrometerfor monitoring humidity
- AmazonHumidifier/Dehumidifieras needed for climate control
No materials required.
As an Amazon Associate FixlyGuide earns from qualifying purchases — at no extra cost to you. Prices and availability are accurate as of publication and subject to change.
Quick Answer
When you see your floorboards start to lift or buckle, especially in the middle of a room, it’s real easy to jump straight to a catastrophic leak. But hang on a second. After years of crawling under houses and tearing up floors, I can tell you water’s a common villain, sure, but it’s not always the one behind raised boards. A lot of the time, it’s something simpler: not enough expansion space, humidity swings in the house, or even trouble with the subfloor itself.
The Problem
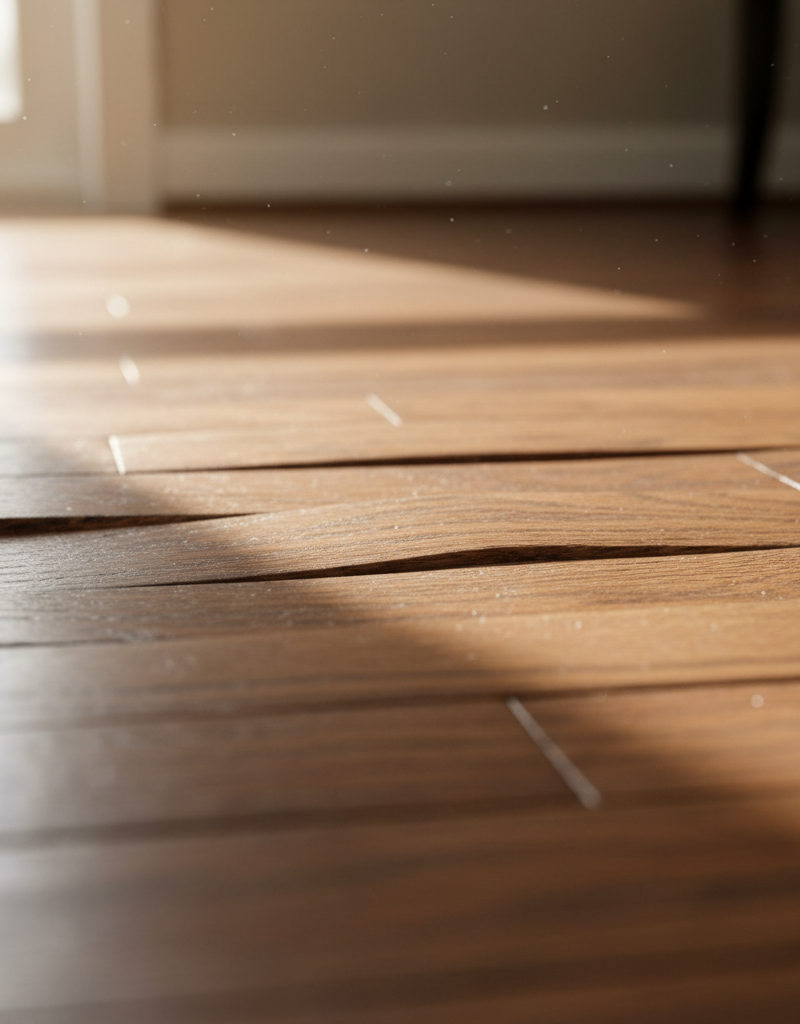
There’s nothing like walking into a room and feeling that little hump under your boots, or seeing a run of boards pushing up against each other. It’ll make you stop and stare. This “cupping,” “crowning,” or “buckling” isn’t just ugly; it can trip somebody, it can mess with the flooring’s structure, and if you ignore it, it can snowball into a bigger headache.
Most homeowners immediately think “water damage!” and I get why. That’s usually the dramatic answer. But I’ve seen plenty of bone-dry homes with boards that look like they’re trying to crawl out of the floor. I pulled a water heater in Frisco last month that had exactly this kind of floor issue nearby, and there wasn’t a leak to blame at all — the install was just pinched tight at the walls. So we need to figure out what’s really going on before you start ripping stuff out or calling a restoration company for no reason.
How It Works
Let’s talk about how floors breathe, because that’s basically what’s happening here. Most flooring materials, especially wood, are hygroscopic, which just means they soak up and give off moisture from the air. When they take on moisture, they expand. When they dry out, they shrink back. Pretty simple.
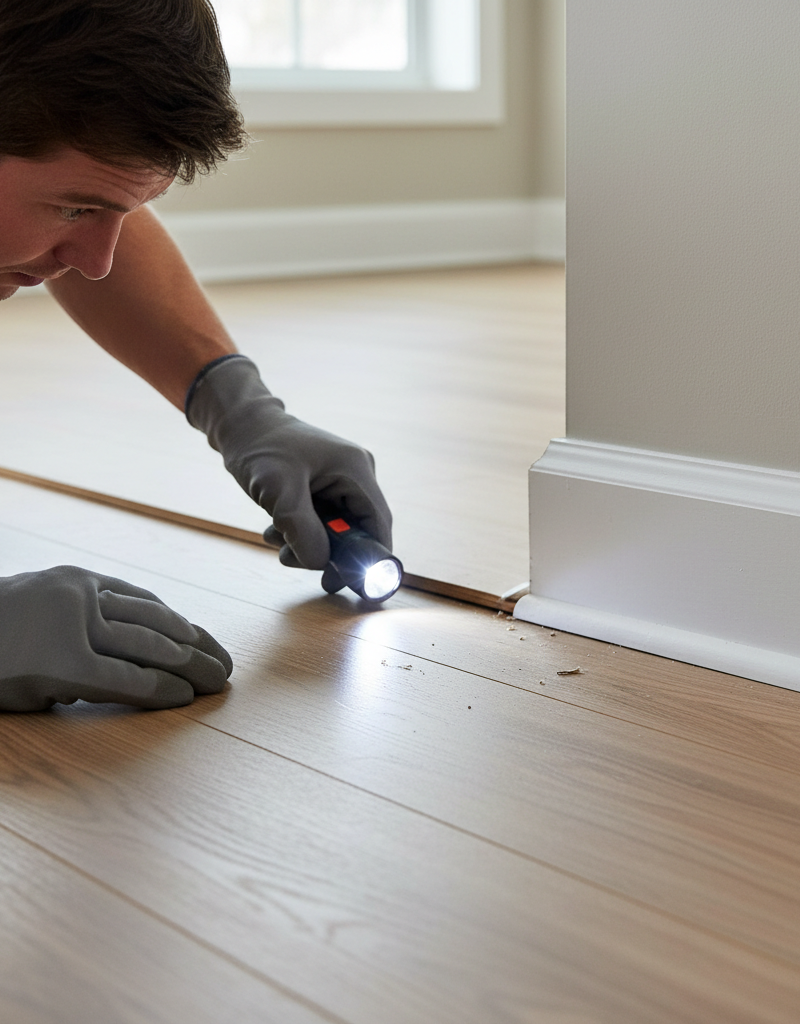
That’s why every decent installer leaves a small gap — usually around 1/4 inch to 1/2 inch — around the perimeter of the room, tucked under the baseboards. That’s your expansion gap. It gives the floor room to move without smashing into the walls.
If that gap isn’t big enough, or it gets packed with debris, or furniture pins the edge down, the floor’s got nowhere to go when it swells. It has to go somewhere, so it buckles up. Think of a deck of cards getting pushed from all sides — they pop up in the middle. Same deal with your floorboards.
Humidity matters a lot here. If your house goes from a dry winter to a muggy summer without good climate control, those boards are going to swell. Subfloor issues, like uneven spots or weak fastening, can add to the mess too, letting sections lift. Sometimes it’s a combination of all of it working together and making your floor look like a roller coaster. Figuring out that movement is step one if you want to fix it without making a bigger mess.
Step-by-Step Fix
Before you dive in, safety first. You’ll be working with power tools, so wear eye protection and gloves. If you suspect water damage, get that handled first by a pro, because you don’t want mold or rot hiding out under your repair.
-
Identify the Pressure Point – Look for the tight spots Go around the room and inspect the perimeter, especially where the buckling looks worst. Can you see where the floorboards are jammed tight against baseboards, door frames, or kitchen island trim? Sometimes it’s just one little area starting the whole thing.
- Tools: Flashlight, painter's tape.
- Tip: Mark suspect spots with painter’s tape so you don’t lose track. Don’t overthink it; start with the easy stuff.
-
Check for Restricted Expansion Gaps – Give your floor some breathing room Use a utility knife or thin pry bar to gently pull back quarter-round molding or baseboards. You’re looking for a gap between the flooring and the wall. If there’s no gap, or if it’s less than, say, 1/8 inch, you may have found the problem. Sometimes construction debris or old, dried glue gets stuffed right into that space.
- Tools: Utility knife, small pry bar, painter's tape.
- Safety: Keep your fingers clear of the blade. Cut away from yourself every time.
-
Relieve Pressure at the Edges – Careful trimming can save the day If you found a tight spot, you’ll need to trim the edge of the flooring carefully. Mark a line about 1/4 to 1/2 inch from the wall, depending on how much gap you need. Use a circular saw with a fine-tooth blade or a multi-tool with a flush-cut blade to cut along that line. Go slow. You’re not rebuilding the floor, just giving it room to move.
- Tools: Circular saw with fine-tooth blade OR oscillating multi-tool with flush-cut blade, measuring tape, pencil.
- Safety: Wear eye protection and ear protection. Unplug tools when changing blades. Keep people and pets out of the work area.
- What if: If the boards still buckle after trimming, check adjacent walls or even furniture placement. Sometimes the pinch point isn’t where you think it is.
-
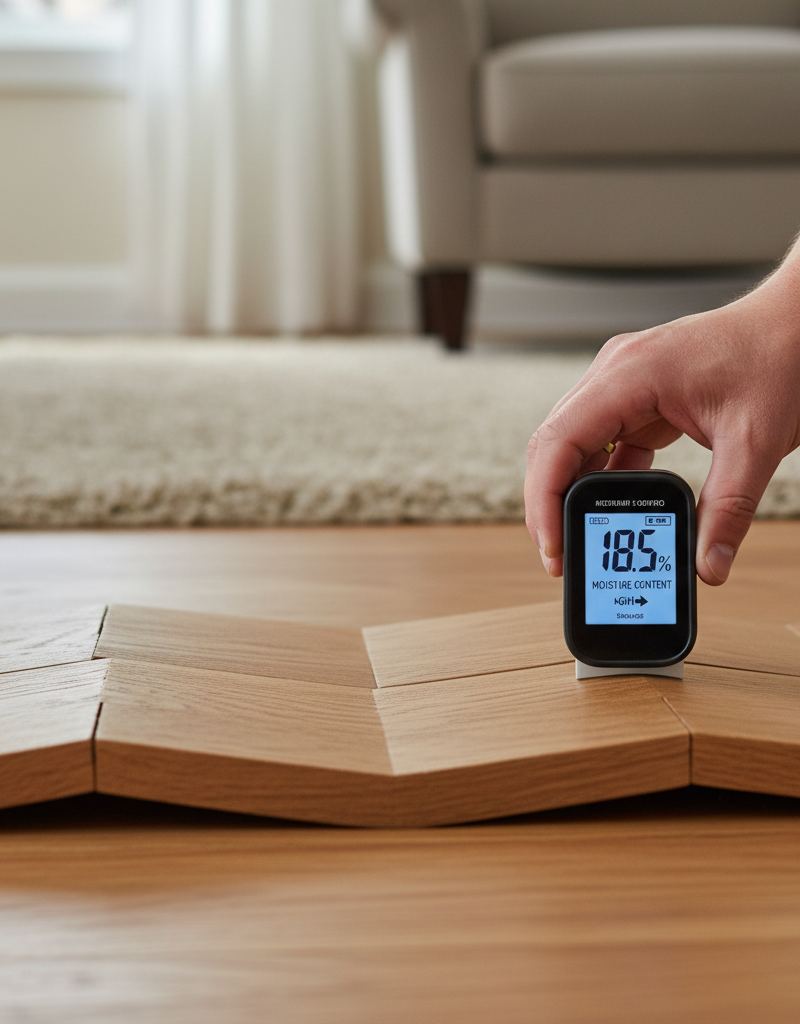
Address Humidity Issues – Control your climate, control your floor If your home has big humidity swings — bone-dry winters, swampy summers — that could be the main culprit. Get a hygrometer and keep an eye on indoor humidity. Aim for a steady range between 35% and 55% relative humidity. Use a humidifier in dry months and a dehumidifier in humid months. This matters a lot in basements or homes without central AC.
- Tools: Hygrometer, humidifier, dehumidifier.
- Tip: Give it a few days before you expect the floor to calm down. Wood doesn’t snap back on command.
-
Examine Subfloor Levelness (if pressure relief doesn't work) – Sometimes the problem is deeper If the floor still won’t settle after you’ve relieved pressure and controlled humidity, the subfloor may be out of whack. That’s a bigger job. You’d need to carefully remove the affected floorboards — click-lock is easier, glued-down is a whole different animal — and check the subfloor with a long level or straightedge. Look for dips or humps larger than 1/8 inch over 6 feet.
- Tools: Long level (6 ft or longer), straightedge, floorboard puller (for nail-down), pry bar.
- Pro Tip: This is where the work gets tricky. If you’re dealing with glued-down engineered wood or solid hardwood, I’d seriously think about calling a pro for removal and reinstallation.
-
Re-secure Loose Subfloor Sections (if needed) – Tighten things up down below If you found loose subfloor sections in step 5, go ahead and re-secure them. Use deck screws (2.5-3 inches long) to fasten any creaky or unstable spots into the joists below. Pre-drill pilot holes so you don’t split anything. That steadies the base your floor is sitting on.
- Tools: Drill, appropriate drill bits, deck screws (2.5-3 inches).
- Caution: Make sure you know where electrical wires or plumbing lines run before you drill into joists.
-
Reinstall or Replace Trim – Finishing touches Once the floor has settled and you’ve got proper expansion gaps, reinstall your quarter-round molding or baseboards. Don’t nail them through the floorboards; nail them into the wall or baseboard only. That lets the floor keep moving the way it’s supposed to.
- Tools: Brad nailer or hammer, finish nails, caulk gun, caulk.
- Tip: A little caulk along the top edge of the trim can make everything look clean and finished.
-
Monitor and Maintain – Keep an eye on it After the fix, keep watching the floor and your home’s humidity levels. Regular upkeep — like making sure baseboards aren’t pressing on the floor and keeping humidity steady — goes a long way toward preventing future buckling. I’ve seen homes in Brighton, Massachusetts, where the seasonal swings are so wild that if you don’t stay on top of them, your floor’s talking back by spring.
Common Causes
- Insufficient Expansion Gaps: The most common troublemaker. If your floor doesn’t have room to swell, it’ll push up. I’ve seen plenty of installs where the guy either didn’t know what he was doing or just got lazy.
- High Humidity: Wood floors act like sponges. If the relative humidity in your home sits above 60-65% for long stretches, those boards are going to suck up moisture and expand like crazy.
- Water Spills or Leaks: Obvious, but still a big one. A leak from a fridge, dishwasher, or even a slow-drip houseplant can swell the flooring in one spot and make it buckle.
- Uneven Subfloor: If the subfloor wasn’t flat when the flooring went down, any movement can make existing humps and dips worse, and that’ll show up in the finished floor.
- Improper Acclimation: New flooring needs time in the home — usually 3-7 days — before installation so it can adjust to the humidity and temperature. Rush that part, and the floor can react hard later.
- Wrong Fasteners/Adhesive: Using the wrong adhesive, not enough adhesive, or the wrong fastening method can let boards lift or come loose over time.
Common Mistakes
- Ignoring Expansion Gaps: Thinking trimming a tiny bit isn’t a big deal. It is. Those gaps matter more than folks think.
- Over-humidifying/Dehumidifying: Going too hard with climate control. Big, fast swings in humidity can shock the floor just like steady high or low levels.
- Not Identifying the Real Cause: Drying out a floor that buckled because it had no expansion room doesn’t solve anything. It’ll buckle again when the seasons change. I’ve seen people throw thousands at water damage cleanup when all they needed was a trim saw and a little patience.
- Nailing Trim Too Tight: Fastening baseboards or quarter-round directly into the flooring. That pins the floor down and stops it from moving naturally.
- Spot Fixing Only: Only dealing with the one area you can see without checking the whole perimeter. The pinch point could be on a different wall altogether.
- Rushing the Repair: Expecting the floor to flatten right away after you relieve pressure or change humidity. Wood needs time to settle back in.
Cost & Time Breakdown
| Task | DIY cost | Pro cost | Time |
|---|---|---|---|
| Diagnosing the problem | $0 (your time) | $75–$200 | 30 min – 2 hrs |
| Basic trim/gap adjustment | $10–$50 | $150–$400 | 1–3 hours |
| Humidity control (hygrometer) | $20–$40 | $0 (part of diagnosis) | Instant |
| Dehumidifier/Humidifier | $150–$300 | $0 (purchase only) | N/A |
| Subfloor leveling (minor) | $50–$150 | $400–$800+ | 4–8 hours |
| Professional water damage | Not recommended | $500–$5,000+ | 1–7 days |
Tips & Prevention
- Maintain Consistent Humidity: The best thing you can do for your floors. Keep indoor relative humidity between 35% and 55% year-round. That’s a big one, trust me.
- Proper Acclimation: If you’re installing new flooring, let it sit in the room for at least 72 hours before install. Longer’s better.
- Check Expansion Gaps Periodically: Every few years, pull back a section of quarter-round or baseboard in a discreet spot and make sure the expansion gaps are still clear. Debris creeps in there.
- Wipe Up Spills Immediately: Simple, but worth saying. Don’t let standing water sit on your wood floors.
- Use Floor Protectors: Put them on furniture legs, especially heavy pieces, so the floor can move underneath without getting pinched.
- Monitor Basement Humidity: If you’ve got a basement or crawl space, keep a close eye on its humidity. What happens down there affects the main floors above.
When to Call a Professional
You might be able to handle trimming a few tight boards, but if the whole floor looks like a funhouse mirror, or if you suspect major subfloor damage or a plumbing leak, that’s the time to pick up the phone. If you see mold, heavy water staining that goes beyond a surface spill, or the floor starts making weird structural noises, get a pro involved. Any buckling that comes right back after a DIY fix usually means there’s a deeper issue that needs a real assessment. A licensed flooring contractor or water damage specialist will have the tools and know-how to diagnose and repair the underlying problem without making it worse. Don’t mess around with widespread subfloor rot or structural trouble; that’s big-gun territory.
Related Articles
Keep troubleshooting with these hand-picked guides from FixlyGuide:
- The Mystery of the Raised Floorboards: It's Not Always Water Damage — Don't panic if your hardwood floorboards are lifting and uneven. It's often a solvable humidity problem, not major water damage. Learn how…
- The Secret Reason Your Interior Door Sticks (It's Not Always Humidity) — Before you blame humidity, learn the less obvious culprits behind a sticking interior door and how to fix it with simple steps.
- Why Your Paint is Peeling (And It’s Not Always Bad Prep) — Peeling paint isn't just an eyesore; it often signals deeper issues than just a shoddy paint job. I'll walk you through the real culprits a…
- The Unseen Culprit Behind Hardwood Floor Gaps (It’s Not Always Age) — Discover why your hardwood floors are gapping and what to do about it, often due to hidden moisture issues, not just normal wear and tear.
- The Secret Reason Your Interior Door Sticks (It's Not Always Humidity) — Before you blame humidity, learn the true culprits behind a sticky interior door and how to fix them with simple DIY steps.
- The #1 Mistake Homeowners Make When Sealing a Deck (And How to Fix It) — Discover the crucial, often-missed step in deck sealing that prevents premature wear and water damage, ensuring your wood deck lasts for ye…
Should you do this yourself?
Answer five quick questions before you start. Safety outranks savings every time.
Your experience with work like this
How high do you have to work?
Does the job involve any of these?
Will it need a permit?
Specialty tools
Free and instant. Educational guidance only — not a quote, inspection, or professional diagnosis.
Questions to ask before you sign
Ask every contractor the same questions and the cheapest bid stops looking cheapest. Check them off as you go — your progress is saved on this device.
Free, no signup. Bring this to every walkthrough so you compare bids on the same terms.
What should this project cost?
Enter your project details for a realistic cost range before you call anyone.
Cost depends heavily on which system turns out to be the source.
- Regional adjustment
- National average
- Labor share (typical)
- ~$1,620
- Quotes to collect
- 3 written estimates
Educational estimate based on national averages — not a binding quote. Always confirm with written local estimates.
Handle this before it gets worse
First steps that limit damage, then a way to reach a qualified pro.
- Emergency repair checklistThe first steps that limit damage before a pro arrives.Open
- Get local estimatesSend one request and compare written estimates from vetted pros.Open
- Estimate this projectGet a cost range for your scope and ZIP before you call anyone.Open
Free, no signup required. Estimates are educational guidance, not a quote or an inspection.
Get the print-ready PDF of this guide
A clean, ad-free, printable version you can keep on your phone or pin to the workshop wall. Free with a FixlyGuide account.
- Print-optimized layout
- Tools, materials & every step included
- Saved to your account
Recommended for DIYers & woodworkers
Sponsored
The Top 20 Tools for Workshops of Any Budget
No stationary machines or power tools required — plus 3 fundamental tools that can't be bought at any price.
Get the free guide
Ted's Woodworking — The #1 Woodworking Resource
Detailed instructions, dimensioned drawings, materials & cutting lists, and 3D schematics for every skill level.
See the plansSponsored: links above are affiliate links. FixlyGuide may earn a commission on qualifying purchases — at no extra cost to you.
Frequently asked questions
What causes floorboards to raise or buckle?+
Raised floorboards are often caused by insufficient expansion gaps, which don't allow the wood to swell naturally. High humidity, direct water exposure, or an uneven subfloor are also common culprits that put pressure on the planks.
Can humidity alone cause my floor to buckle?+
Absolutely. Wood is hygroscopic, meaning it absorbs moisture from the air. If your home's relative humidity swings wildly or stays consistently high (above 60%), your floorboards can swell significantly and buckle upwards, even without a direct leak.
How much expansion gap should my floor have?+
Generally, most wood and laminate flooring requires an expansion gap of about 1/4 inch to 1/2 inch around the entire perimeter of the room. This gap is hidden beneath your baseboards or quarter-round molding and is crucial for the floor's natural movement.
How long does it take for buckled floorboards to flatten after fixing the cause?+
It's not an instant fix. Once the underlying cause, like excess moisture or restricted expansion, is addressed, it can take several days to a few weeks for the wood to slowly acclimate and flatten out. Patience is key when dealing with wood's natural movement.
Is it okay to nail down buckled floorboards?+
Rarely. Nailing down buckled boards without addressing the root cause is usually a temporary fix that can lead to further damage. You're fighting the natural expansion and contraction of the wood, which will likely just buckle again or even crack.
Can an uneven subfloor cause my finished floor to buckle?+
Yes, an uneven subfloor can absolutely contribute to buckling. If the subfloor has significant dips or humps, the finished flooring laid over it won't sit flat. Over time, this can lead to pressure points and the visible raising of floorboards.
What tools do I need to create an expansion gap?+
You'll typically need a circular saw with a fine-tooth blade or an oscillating multi-tool with a flush-cut blade, a measuring tape, and a pencil. A small pry bar and utility knife can also help remove existing trim and debris from tight spaces.
When should I call a professional for raised floorboards?+
Call a pro if you suspect extensive water damage, mold growth, or significant subfloor issues. If the buckling is widespread, returns after DIY attempts, or if you're uncomfortable using power tools to trim the flooring, it's best to bring in a licensed flooring contractor.
Can furniture cause floorboards to buckle?+
While not a direct cause, extremely heavy furniture placed directly on the floor near a wall can inadvertently reduce the effective expansion gap. If the floor is already tight, the pressure from the furniture could exacerbate buckling in that area.
Does cleaning product overuse cause buckling?+
Using too much liquid when cleaning, or using the wrong type of cleaning solution that leaves excess moisture, can definitely contribute to floorboard swelling and buckling over time, especially with laminate or engineered wood floors.
Discussion
Loading comments…