- With the system calling for cooling, go outside and listen. You should hear two separate sounds: the compressor humming low and steady, and the fan whirring.
- If the fan is NOT spinning but the compressor is humming: The fan motor or its capacitor probably gave up. A dead fan can make the compressor overheat and trip its thermal overload. That’s pro territory.
- If you hear clicking or buzzing but nothing starts: Could be a bad capacitor, contactor, or a deeper electrical problem. Shut it down and call for service.
HVAC · High energy usage
| Project category | HVAC |
|---|---|
| Problem type | High energy usage |
| Trade required | HVAC |
| Urgency | Planned project |
| Safety risk | Low safety risk |
| DIY suitability | DIY for experienced homeowners |
| Cost category | High cost |
| Typical timeline | Assessment within weeks; replacement planned off-season |
| Contractor type | Licensed HVAC technician |
Repair option
Duct sealing, insulation, and a tune-up before touching the equipment.
Replacement option
High-efficiency replacement sized by a load calculation, not a rule of thumb.
Common causes
- Aging, low-efficiency equipment
- Leaking ducts losing conditioned air
- Insufficient attic insulation
- Oversized system short-cycling
Relevant tools:project cost estimatorrepair or replace
Published October 12, 2026Last updated October 12, 2026
Tools & materials you'll need
Affiliate links- AmazonAir filtermatch the size printed on your old filter
As an Amazon Associate FixlyGuide earns from qualifying purchases — at no extra cost to you. Prices and availability are accurate as of publication and subject to change.
Quick Answer
If your thermostat won't go below 70 degrees, I’d start with the usual suspects: a dirty air filter choking off airflow, a lockout after a power flicker, or just a settings issue. Swap the filter first. Then kill power to the whole HVAC system at the breaker and bring it back up. And yeah, check for any 'eco' or 'away' modes—those sneaky little settings can override what you think you asked for.
The Problem
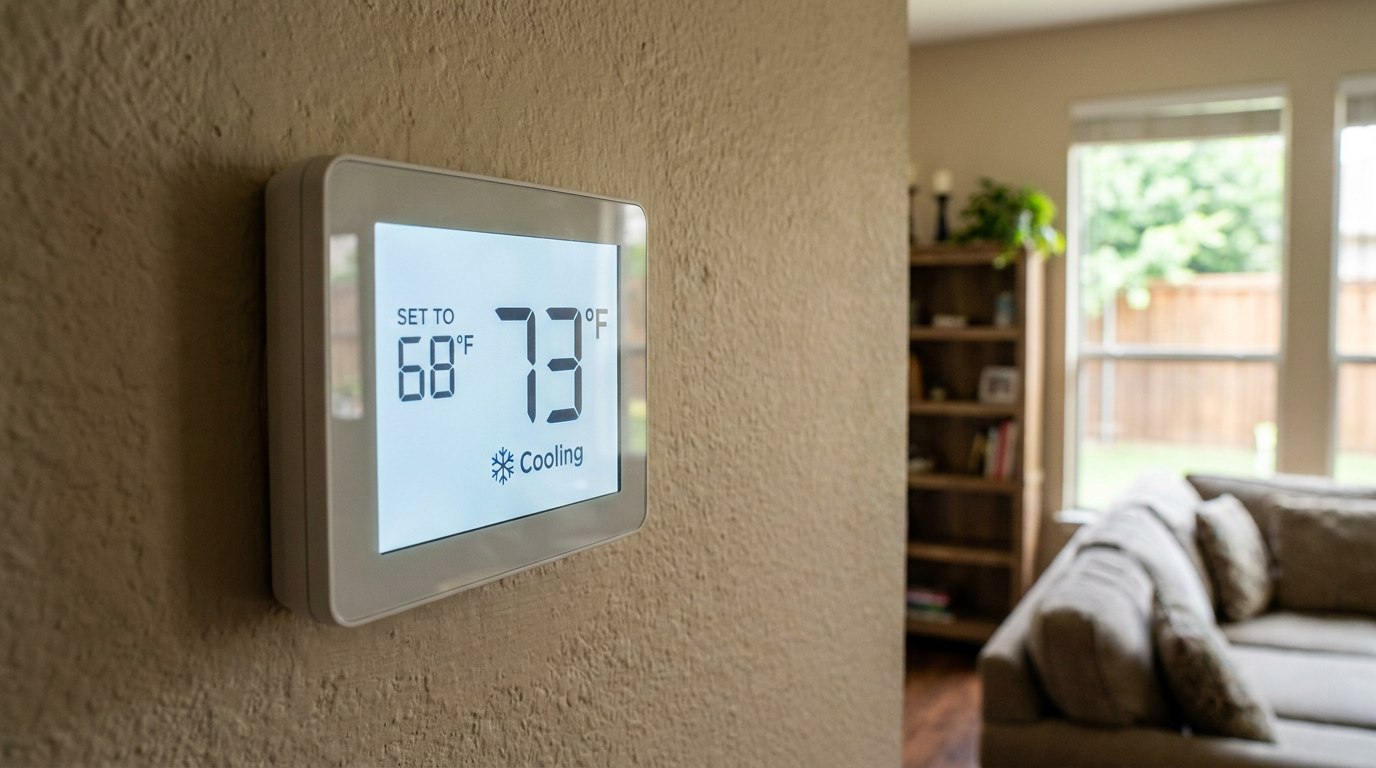
You set the thermostat to a nice, cool 68°F, but the house just refuses to get there. The screen might say it’s trying to cool, the blower may be running, but the temperature hangs around 70, 72, or worse. I’ve seen this a hundred times, and it’s especially miserable in a Texas heatwave. You’re paying for cold air, but the system’s dragging its feet.
That’s not just a comfort problem. It’s hard on the equipment too. An HVAC system that runs and runs without reaching setpoint burns electricity and beats up the parts inside. Left alone, that can turn into an early breakdown. The upside? A lot of the time, the cause is something you can spot and fix yourself in under an hour.
How It Works
Your thermostat is the brain of the system, but it doesn’t make cold air. It’s really just a smart switch. When the room temp climbs above your setpoint — say, 68°F — the thermostat senses that gap. Then it closes a low-voltage circuit and tells the indoor air handler and outdoor condenser to kick on.
Inside, the air handler starts the blower and pulls warm, muggy house air through the return vents and that big air filter. That air then moves across the evaporator coil, which is a bunch of copper tubing carrying frigid refrigerant, usually around 40°F. That coil soaks up heat and moisture like a cold beer can on a humid day.
Outside, the condenser is doing the dirty work of dumping that heat. The refrigerant, now carrying heat from inside your house, gets pumped outdoors and compressed. That makes it even hotter. Then a big fan blows outside air across the condenser coils and throws the heat away. The cooled refrigerant heads back inside and does it all over again.
So when the system won’t get below something like 70°F, something in that heat-transfer chain has gone sideways. Could be airflow — dirty filter, blocked vents. Could be refrigerant. Could be a weak compressor or some other mechanical headache that’s keeping the system from shedding heat the way it should.
Step-by-Step Fix
Let’s walk it from the easy stuff to the slightly messier stuff. Don’t skip around. The simple fix is often the one that saves your bacon.
1. Check Thermostat Settings & Modes
- Before you touch anything else, look at the thermostat itself. Is it stuck in an "Eco," "Away," or "Savings" mode? Those programs are built to save energy by letting the temp drift up. Shut off any schedules or eco-modes and put it in plain old manual "Cool." Also make sure the fan is set to "Auto," not "On." If the fan runs nonstop, it can make cooling act weird.
2. Power Cycle the Entire HVAC System
- A good old reboot can clear up a lot of electronic nonsense, especially after a power blip. Head to your main electrical panel and find the breaker(s) labeled "HVAC," "Furnace," "Air Handler," or "Condenser." There may be one or two. Flip them to "OFF." Then walk back to the thermostat — the screen ought to go blank. Wait a full five minutes. That gives the system time to reset any protection timers or lockouts. After that, flip the breakers back to "ON." Set the thermostat to cool and see if it starts acting right.
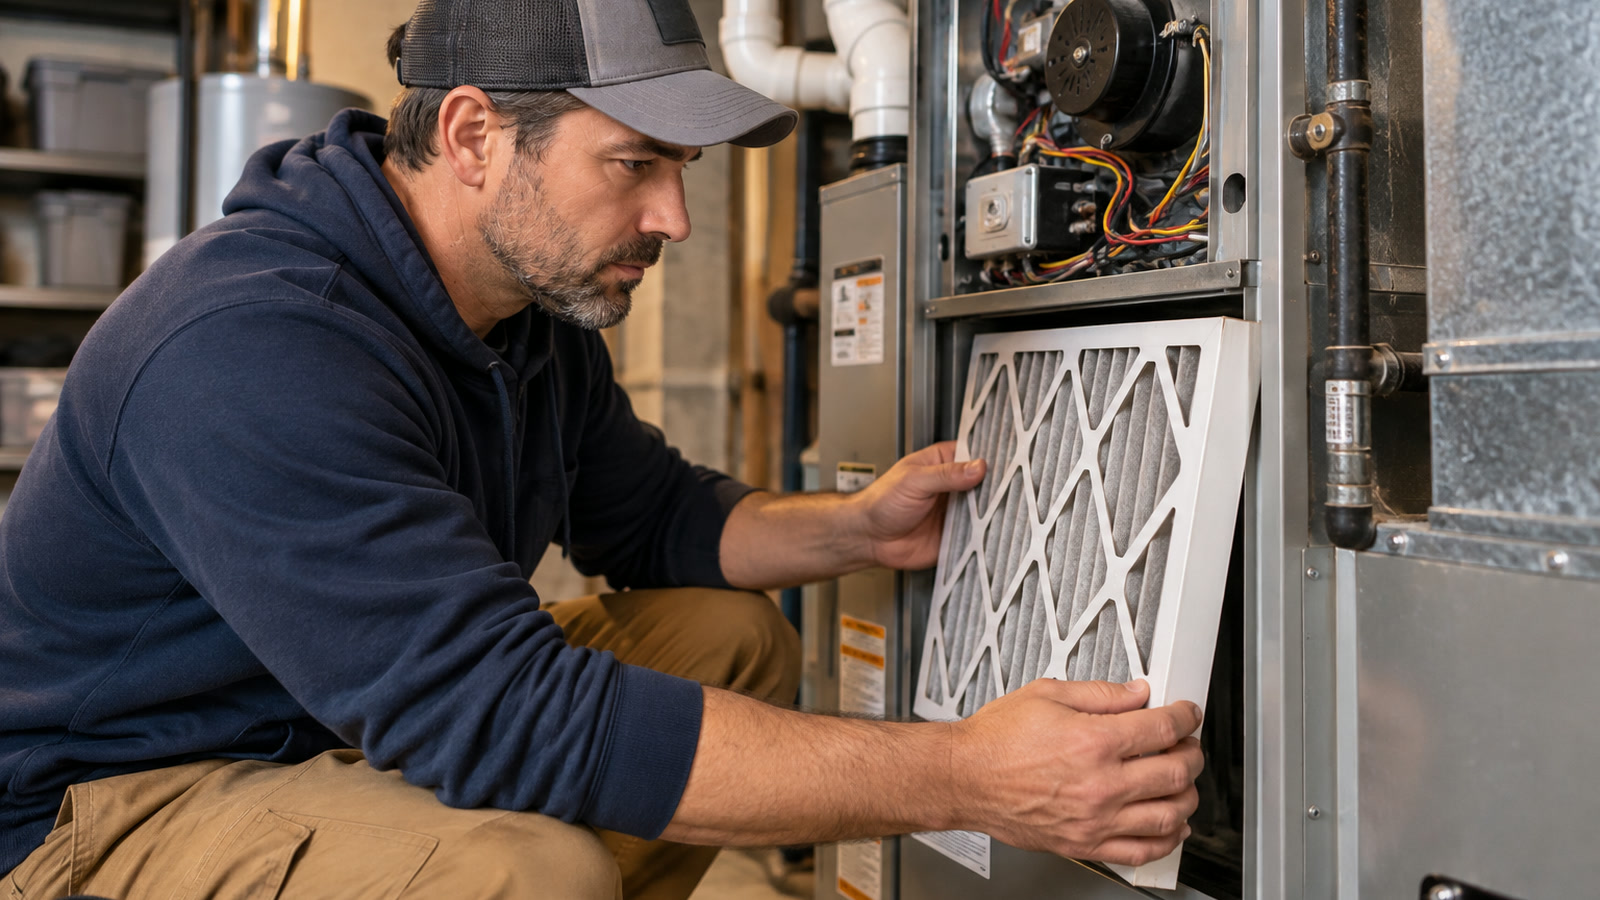
3. Replace Your Air Filter
- This is the #1 culprit, no contest. A clogged filter starves the system and cuts down the air moving over the evaporator coil. When airflow drops too low, the coil can get too cold and freeze into a block of ice, and then cooling pretty much goes out the window.
- Tools: New air filter.
- Action: Find the filter slot, usually a 1-inch wide hinged or sliding door on the indoor air handler. Pull the old filter out, watch the arrow for airflow direction, and slide the new one in the same way. Don’t grab a fancy high-MERV "allergen" filter unless your system is built for it — some of those are just too restrictive.
4. Inspect Outdoor Condenser Unit for Airflow
- That outdoor unit needs room to breathe if it’s going to dump heat.
- Safety: Shut off power to the condenser at both the main breaker panel and the outdoor disconnect switch — that little box mounted near the unit — before you clean anything.
- Action: Look for obvious junk in the way. Bushes, tall grass, storage tubs, lawn clippings — all of it matters. You want at least 2 feet of open space on all sides and 5 feet above. Use a garden hose nozzle gently, NEVER a pressure washer, and rinse the aluminum fins to knock off dirt, dust, and cottonwood fluff. If you can safely pull the top fan grille, spray from the inside out.
5. Check and Clear All Vents and Returns
- Walk room to room and make sure every supply vent — the ones blowing cool air out — is open and not buried under furniture, rugs, or curtains. Then find the main return grilles, which are bigger and usually sit on a wall or ceiling in a central hallway. Make sure those aren’t blocked either. A blocked return is like trying to breathe through a pillow. No dice.
6. Listen to the Condenser Unit
- With the system calling for cooling, go outside and listen. You should hear two separate sounds: the compressor humming low and steady, and the fan whirring.
- If the fan is NOT spinning but the compressor is humming: The fan motor or its capacitor probably gave up. A dead fan can make the compressor overheat and trip its thermal overload. That’s pro territory.
- If you hear clicking or buzzing but nothing starts: Could be a bad capacitor, contactor, or a deeper electrical problem. Shut it down and call for service.
7. Look for a Frozen Evaporator Coil
- If airflow’s been lousy — dirty filter, blocked return, all that — the indoor coil may be frozen solid. Open the main panel on the indoor air handler. You might need a nut driver or screwdriver. Look for the A-shaped evaporator coil. If you spot ice or frost, there’s your smoking gun.
- The Fix: Turn the thermostat to "OFF," but set the fan to "ON." Let it run for several hours so the ice can thaw. A full block of ice can take 3-6 hours, sometimes longer, to melt all the way. DO NOT chip at it. That just causes damage. Once it’s thawed, you can switch back to "Cool" after you’ve fixed the airflow problem that caused it.
8. Check for a Clogged Condensate Drain Line
- As the system pulls humidity out of the air, it makes water — condensate — that drains through a PVC pipe. If that line plugs up with algae and sludge, a safety float switch can shut the whole system down to keep you from flooding the place. Find where the drain line exits the indoor unit. A lot of them have a clear "P-trap" or a "T" fitting with a cap. Look for standing water. If you see it, the line’s clogged. You can sometimes clear it with a wet/dry vacuum at the outside end.
Common Causes
- Dirty Air Filter: The usual first suspect. It cuts airflow, makes the system work harder, and can freeze the coil.
- Low Refrigerant: If there’s a leak, the system doesn’t have enough refrigerant to grab heat the way it should. It’ll run, but cooling stinks. A pro has to find the leak, fix it, and recharge the system.
- Failing Capacitor: Capacitors are basically the kick-starters for the compressor and fan motors. When they get weak, motors struggle to come on and cooling turns spotty.
- Dirty Outdoor Condenser Coils: Dirt and grime act like a blanket, keeping the unit from dumping heat outside.
- Obstructed Vents or Returns: If air can’t move freely, the system can’t cool the house, plain and simple.
- Undersized HVAC Unit: If the system was never sized right for your home’s square footage, insulation, and window layout, it may just not have enough muscle for the hottest days.
Common Mistakes
- Ignoring the Air Filter: Put a reminder on your calendar to check it monthly and change it at least quarterly. That’s one of the cheapest ways to protect your HVAC.
- Using a High-Pressure Washer on Coils: The aluminum fins on the condenser are delicate as can be. High pressure bends them flat and ruins airflow. Use a gentle hose spray only.
- Immediately Restarting the System: After a power outage or breaker trip, give it at least 5-10 minutes before turning the AC back on. That lets pressure in the refrigerant lines equalize and helps protect the compressor from a hard start.
- Adding Refrigerant without Fixing the Leak: Refrigerant runs in a sealed loop. If it’s low, there’s a leak. Just “topping it off” is a band-aid, and an expensive one at that. It ignores the real problem and puts chemicals into the atmosphere. A pro’s got to find and repair the leak first.
Cost & Time Breakdown
| Task | DIY Cost | Pro Cost | Time |
|---|---|---|---|
| Replace Air Filter | $5 - $30 | $90 - $150 | 5 minutes |
| Clean Outdoor Condenser Coil | $0 (hose) | $150 - $300 | 30 minutes |
| Clear Condensate Drain Line | $0 (wet vac) | $100 - $250 | 45 minutes |
| Replace Run Capacitor | $15 - $50 (part) | $175 - $450 | 1 hour (Pro recommended) |
| Find & Repair Refrigerant Leak | N/A | $500 - $2,500+ | 2-6 hours |
| Replace Condenser Fan Motor | N/A | $450 - $900 | 1-2 hours |
Tips & Prevention
- Regular Filter Changes: Put it on the calendar. In dusty areas or homes with pets, I’d check it every month. Clean filter, happier system.
- Annual Professional Tune-Ups: Have a licensed HVAC tech look it over every spring. They’ll clean coils, check refrigerant levels, test capacitors, and catch the little stuff before it turns into a big bill.
- Keep the Outdoor Unit Clear: Trim shrubs and weeds back so you’ve got at least 24 inches of space around the condenser.
- Use a Shop Vac on Your Drain Line: Every 3-4 months, hook a wet/dry vac to the outside end of the condensate line and let it run for a minute. Sucks out the gunk before it turns into a clog.
- Check Your Insulation: Sometimes that hard-working AC isn’t the real issue. Weak attic insulation or leaky windows and doors can make the whole house hard to cool.
I pulled a water heater in Frisco last month that had exactly this kind of “it’s running but not doing much” complaint nearby, and the homeowner had a filter packed so tight with dust it looked like felt. Same story, different equipment.
When to Call a Professional
A lot of this is DIY-friendly, sure, but some signs mean you need to stop and bring in a licensed HVAC tech right away. If you’ve worked through the steps above and it still won’t cool, or if you notice any of these, make the call: loud grinding or metallic screeching from any HVAC part, a refrigerant leak (often with a hissing sound or oily residue on the copper lines), or signs that point to a bad capacitor, contactor, or motor. Refrigerant and high-voltage electrical parts aren’t anything to play around with — you need the right tools and training for that stuff.
Related Articles
Keep troubleshooting with these hand-picked guides from FixlyGuide:
- Thermostat Won't Connect to Wi-Fi? 9 Reasons and What to Check First — A smart thermostat that can't connect to Wi-Fi is just a thermostat. Here are the 9 most common reasons yours keeps dropping offline and th…
- The Secret Reason Your Furnace Turns On and Off So Much (It's Not What You Think) — Short cycling strains your furnace and wastes energy. Learn the most common surprising causes and how to fix them to restore efficient heat…
- Bathroom Fan Making Loud Noises? 8 Reasons and the Fix for Each — A noisy bathroom exhaust fan is more than an annoyance—it's a sign of a problem. Here are the 8 most common causes for a loud fan and how y…
- AC Not Turning On? 9 Things to Check Before You Call a Pro — Your air conditioner won't turn on, and it's getting hot inside. Here are the 9 most common reasons—and the simple checks you can do yourse…
- Thermostat Reading Wrong Temperature? 9 Reasons and How to Recalibrate — Your thermostat says it's 75°F, but it feels like 80°F. Here are the most common causes for a thermostat reading the wrong temperature and…
- Dishwasher Door Won't Latch? 6 Reasons It's Not Closing Securely—and How to Fix It — If your dishwasher door won't latch or close properly, it won't start. Here are the 6 most common causes and how to fix them, from a misali…
Should you do this yourself?
Answer five quick questions before you start. Safety outranks savings every time.
Your experience with work like this
How high do you have to work?
Does the job involve any of these?
Will it need a permit?
Specialty tools
Free and instant. Educational guidance only — not a quote, inspection, or professional diagnosis.
Estimate your own project cost
National averages are a starting point. Enter your details for a range that fits your house.
HVAC replacement cost
- Equipment$2,200 – $3,800
- Installation labor$1,200 – $2,500
Always insist on a Manual J load calculation — sq-ft sizing is only a rough check. Federal heat-pump rebates may reduce cost significantly.
Educational estimate only — always confirm with written local bids.
What should this project cost?
Enter your project details for a realistic cost range before you call anyone.
Service calls and common repairs run $150–$900; full system replacement typically $6,000–$12,000.
- Regional adjustment
- National average
- Labor share (typical)
- ~$1,935
- Quotes to collect
- 3 written estimates
Educational estimate based on national averages — not a binding quote. Always confirm with written local estimates.
Fixly Project Decision Box
- DIY difficulty
- Advanced
- Estimated time
- Homeowner checks 20–30 minutes
- Cost level
- Moderate
Main tools / materials
- Clean air filter
- Garden hose for condenser coils
- Shop vac for the condensate line
When to stop and call a pro
- Burning smell, smoke, or a tripping breaker
- Refrigerant lines iced over or hissing
- Any work inside the sealed refrigerant circuit (EPA-licensed only)
- Gas smell near a furnace — leave and call the utility
Need professional help?
Find an HVAC Pro Near YouFrequently asked questions
Why won't my AC cool my house below 75 degrees?+
This is often a sign of restricted airflow or a system struggling to remove heat. The most common causes are a severely clogged air filter, dirty outdoor condenser coils, or being low on refrigerant due to a leak. Start by changing the filter and cleaning the outdoor unit.
Can a bad thermostat cause the AC to not cool enough?+
While possible, it's less common. A faulty thermostat sensor might read the room temperature incorrectly, causing it to shut off prematurely. However, if the AC runs continuously but just can't cool the house down, the problem is more likely with the HVAC equipment itself (airflow, refrigerant, etc.) rather than the thermostat.
Is it bad for the AC to run all day?+
On extremely hot days (over 100°F in Texas), it's normal for a properly sized AC unit to run for long periods to maintain the temperature. However, if it runs constantly on milder days and still can't reach your setpoint, it indicates an underlying problem that needs to be addressed to avoid high energy bills and excessive wear.
How do I know if my AC is low on Freon (refrigerant)?+
Signs of low refrigerant include the system running but blowing lukewarm air, ice or frost forming on the copper lines near the indoor or outdoor unit, and a hissing sound. You can't fix this yourself; a professional must find and repair the leak and then recharge the system to the manufacturer's specifications.
How often should I clean my outside AC unit?+
It's a good practice to visually inspect it monthly and give it a gentle cleaning with a garden hose at least once or twice a year, typically in the spring before cooling season starts and in the fall. If you live in an area with a lot of dust or cottonwood trees, you may need to clean it more frequently.
Could a power surge make my thermostat stop cooling correctly?+
Yes. A power surge or even a brief flicker can trip a safety device or put the unit's internal logic into a 'lockout' mode. This is why the first step is always to completely power cycle the system at the circuit breaker for at least five minutes to allow everything to fully reset.
Why does my thermostat setting not match the room temperature?+
This can happen for a few reasons. The thermostat's sensor could be dirty or failing, or it could be located in a poor spot (like in direct sunlight or near a hot lamp). More often, it's because the AC system itself is unable to produce enough cool air to overcome the heat load of the house.
Is it cheaper to leave my AC at one temperature all day?+
No, that's a common myth. It's more energy-efficient to set the temperature higher (e.g., 78-80°F) when you're away from home. The savings from not running the AC as hard while you're out outweighs the energy it takes to cool the house back down when you return.
Discussion
Loading comments…