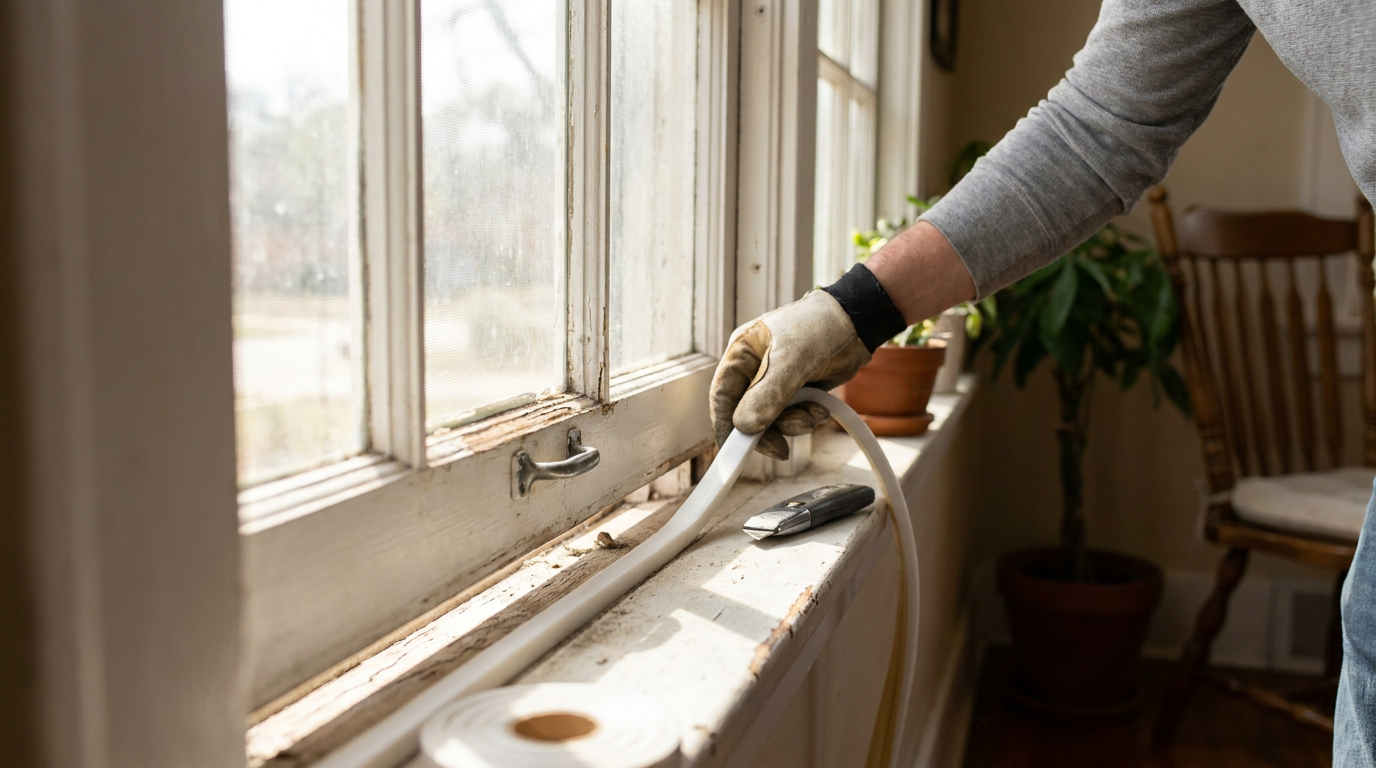
- Failed or brittle weatherstripping: Vinyl and open-cell foam seals wear out after 5 to 8 years of sunlight exposure and constant cycling, flattening permanently and leaving open gaps.
- House settling and foundation movement: As soil shifts, framing studs move out of square, creating uneven, wedge-shaped air gaps along the tops and sides of sashes.
- Missing or deteriorated exterior caulk: High summer heat bakes exterior caulk until it hardens, shrinks, and separates from siding or brick molding, letting outside drafts slip into the wall cavity.
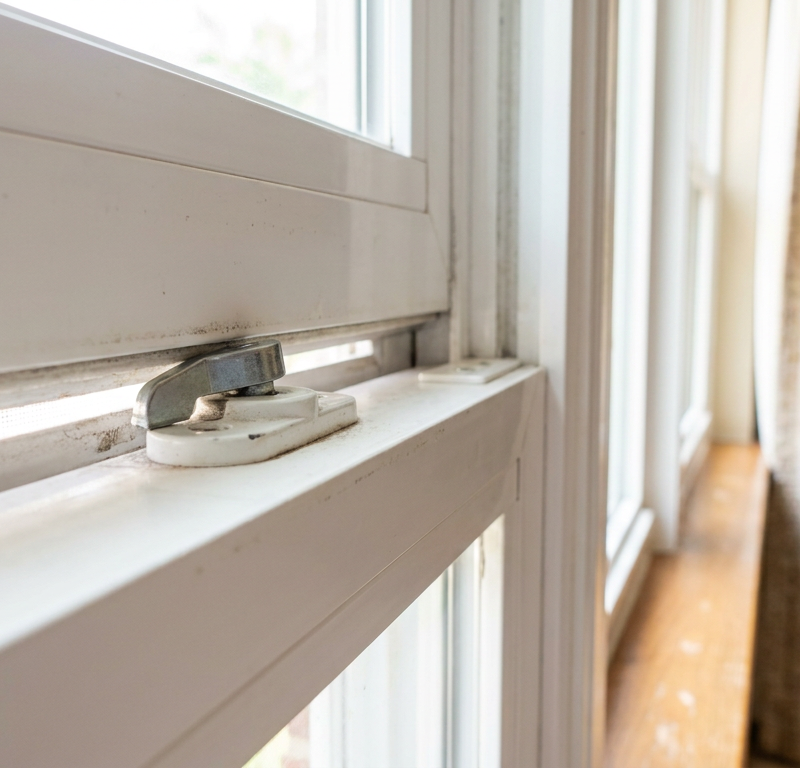
- Loose or broken sash cam locks: If the locking mechanism doesn't generate positive mechanical clamping pressure, the meeting rails sit loosely against one another.
- Cracked or missing glazing putty: On older single-pane wood windows, the linseed-oil-based putty holding the glass into the wood frame dries up, cracks, and falls out in chunks, letting air blow around the edges of the pane itself.
Plumbing · Leak
| Project category | Plumbing |
|---|---|
| Problem type | Leak |
| Trade required | Plumbing |
| Urgency | Emergency — act now |
| Safety risk | High safety risk |
| DIY suitability | DIY for experienced homeowners |
| Cost category | Low cost |
| Typical timeline | Shut water off now; repair usually same or next day |
| Contractor type | Licensed plumber |
Repair option
Isolate at the shutoff, replace the failed component, and dry the cavity fully.
Replacement option
Repipe the run or the branch when corrosion is widespread.
Common causes
- Failed supply line or shutoff valve
- Worn washers, cartridges, or P-trap connections
- Pinhole corrosion in older copper
Relevant tools:emergency checklistdiy or hire a pro
Published November 6, 2026Last updated November 6, 2026
Tools & materials you'll need
Affiliate links- AmazonClosed-cell EPDM foam weatherstripping tape1–2 rolls
- AmazonV-strip (tension) weatherstripping1 roll (17 ft)
- AmazonPaintable elastomeric interior caulk1–2 tubes
- AmazonExterior polyurethane or 100% silicone sealant1 tube
- AmazonDenatured alcohol or rubbing alcohol1 bottle
- AmazonWindow shrink-film insulation kit1 kit · For extreme seasonal drafts
As an Amazon Associate FixlyGuide earns from qualifying purchases — at no extra cost to you. Prices and availability are accurate as of publication and subject to change.
Quick Answer
If you want to seal drafty windows yourself, start by finding the leak with an incense stick or a lit candle around the frame. For operable sash gaps, install adhesive-backed closed-cell foam or V-strip weatherstripping along the sash tracks and meeting rail. For perimeter perimeter framing gaps, lay down a 1/4-inch continuous bead of paintable 100% silicone or elastomeric caulk along the interior trim and exterior casing. If you're dealing with older single-pane windows during severe winter cold or blazing Texas summers, finish by stretching a shrink-film insulation kit across the entire interior casing using double-sided tape and a standard hairdryer.
The Problem
A drafty window is a slow leak in your wallet.
According to the U.S. Department of Energy, air infiltration through leaky windows and doors accounts for roughly 25% to 30% of residential heating and cooling energy use. You sit on the couch in January, and you feel that phantom breeze across your ankles. Or maybe in July, when outdoor temps hit 102°F, you walk past a hallway window and it feels like someone opened an oven door.
The trouble usually isn’t broken glass. It’s shifting frames, cracked glazing compound, and old materials that quit doing their job years ago. Houses settle—especially in areas with heavy clay soil that shrinks during dry spells and swells during monsoon seasons. Once that framing starts moving, square window openings turn into subtle parallelograms. Factory rubber seals harden, crack, and turn to dust under ultraviolet rays. The window sash stops pressing flush against the jambs. Gaps as narrow as 1/16 of an inch open up.
That tiny 1/16-inch slit around the perimeter of an average 3x5-foot window adds up to the equivalent of an open brick-sized hole in your exterior wall. Outside air gets sucked in while your conditioned air blows straight into the neighborhood. I pulled a water heater in Frisco last month that had exactly this kind of sneaky draft around an old dining-room window—homeowner swore the insulation was bad, but nope, it was the window bleeding air the whole time.
How It Works
Windows manage air infiltration through three primary defense layers: exterior caulking, operable weatherstripping, and glass glazing.
Your window sits inside a framed rough opening in the wall studs. The builder leaves a 1/4-inch to 1/2-inch expansion gap around the window frame to allow for thermal movement and settling. On the outside, flashing tape and exterior-grade caulking block wind-driven rain and air from penetrating that gap. Inside, interior casing trim covers the void, which should ideally be packed with low-expansion polyurethane foam.
The movable parts—the sashes—rely entirely on mechanical compression. When you push a double-hung sash down and throw the cam latch, that latch doesn't just lock the window for security; it acts as a lever. It pulls the meeting rails together and forces the bottom rail down against the sill. Compression weatherstripping (rubber bulbs, foam tape, or brass V-strips) squashes flat between these wooden or vinyl surfaces, closing off the pathway for moving air.
If that weatherstripping loses its elasticity, or if the latch cam is loose, the mechanical seal never forms. Air takes the path of least resistance: it slips between the sash and track, rides over the sill, and dumps cold or hot air right into your living space. Simple as that.
Step-by-Step Fix
Here is how you track down drafts and eliminate them using professional sealing techniques.
-
Locate the air leaks — Turn off your HVAC system, shut all exterior doors, and switch on your bathroom exhaust fans to depressurize the house slightly. Hold a lit stick of incense or an unlit lighter with the gas valve cracked 2 inches away from the perimeter of the window sash, meeting rail, and interior trim. Watch the smoke trail or flame; anywhere it blows sideways or scatters violently indicates an active draft.
- Pro tip: Mark each leaky spot with a small piece of blue painter’s tape so you don't lose track once you begin working. Saves you from playing hide-and-seek with the draft.
-
Scrape away failed interior and exterior caulk — Pull loose, dry, or cracked caulking out of the window seams using a 5-in-1 painter's tool or a pull-type caulk scraper. Don't just smear new caulk over the old bead; the new material won't bond right and it'll peel off within six months.
- Tools: 5-in-1 tool, utility knife, wire brush.
- Safety: Wear eye protection and an N95 dust mask, especially if you are working on a home built before 1978 where old paint layers may contain lead.
-
Clean and degrease the contact surfaces — Wipe down the window jambs, sills, and trim using a rag soaked in denatured alcohol or a 50/50 mixture of water and white vinegar. Window tracks collect nasty layers of insect debris, dirt, and graphite lube that stop adhesives and caulk from sticking. Let the surface dry completely for 10 minutes.
-
Seal structural trim gaps with elastomeric caulk — Load a tube of paintable elastomeric or high-grade acrylic latex caulk into your dripless caulk gun. Cut the plastic nozzle at a 45-degree angle to leave a 1/8-inch opening. Hold the gun at a 45-degree angle and pull the trigger with smooth, continuous pressure, pushing the bead directly into the crack between the interior window casing and the drywall.
- If the gap exceeds 3/8-inch: Push closed-cell foam backer rod into the space first so your caulk doesn't sink into a bottomless pit.
- Tooling: Smooth the wet bead immediately using a gloved finger dipped in water or a damp foam sponge.
-
Install V-strip (tension) weatherstripping on sash tracks — For double-hung or sliding windows, measure the height of the side channels (jamb tracks) where the sash slides. Cut a strip of adhesive-backed polypropylene or bronze V-channel to length using tin snips or heavy kitchen shears. Peel the paper backing and press the strip against the jamb with the "V" opening facing toward the outdoors so incoming air pressure forces the channel to flare open and seal tighter.
- If the adhesive fails to stick to bare wood: Secure it every 4 inches with 1/2-inch wire brads or copper tacks.
-
Add closed-cell foam to the bottom rail — Raise the lower sash and wipe the bottom face clean. Cut a piece of 3/8-inch-wide by 1/4-inch-thick adhesive closed-cell EPDM foam tape to match the width of the sash. Stick the foam directly to the underside of the bottom rail, not the windowsill. When the window closes, the rail compresses the foam against the sill without tearing it up from sliding friction.
-
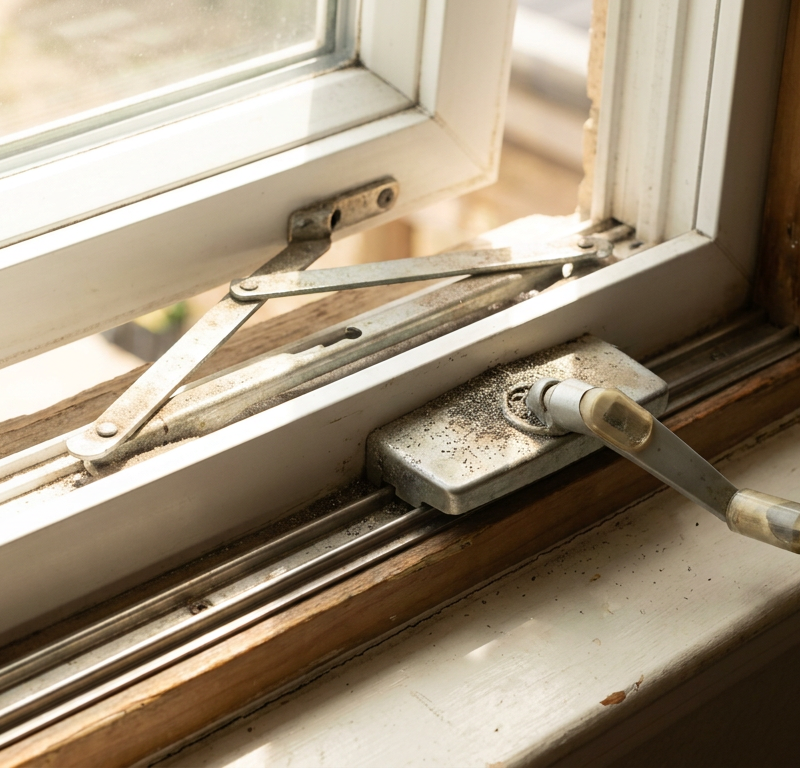
Tighten or replace the sash lock hardware — A loose cam lock prevents the sashes from pulling together tightly. Back out the mounting screws on the sash lock and keeper using a manual screwdriver. If the screw holes are stripped out, insert two wooden toothpicks coated in wood glue into the holes, snap them off flush, let them dry 15 minutes, and drive the screws back in. When you flip the lever, you should feel resistance as the lock pulls the top and bottom sashes toward each other.
-
Recaulk exterior window perimeters — Move outside and inspect the joint where the window frame meets your siding, brick, or stucco. Clean out old cracked caulk, brush away dust, and lay down a 1/4-inch bead of 100% exterior silicone or polyurethane sealant. Polyurethane handles extreme temperature swings (-40°F to 180°F) and structural movement better than standard silicone on masonry and wood.
-
Apply window shrink film for extreme seasonal drafts — If single-pane glass radiates cold or the wood frame is warped beyond the reach of weatherstripping, install an interior shrink-film kit. Apply the included double-sided mounting tape to the front face of the window trim, leaving the backing paper on. Peel the paper, press the clear plastic sheet firmly against the tape at the top, pull it taut to the bottom, and seal the sides.
- Shrinking process: Hold a standard hair dryer 2 inches away on high heat, moving constantly across the plastic. The wrinkles will disappear, pulling the plastic drum-tight to create a dead-air insulating barrier that mimics double-pane glass.
Common Causes
- Failed or brittle weatherstripping: Vinyl and open-cell foam seals wear out after 5 to 8 years of sunlight exposure and constant cycling, flattening permanently and leaving open gaps.
- House settling and foundation movement: As soil shifts, framing studs move out of square, creating uneven, wedge-shaped air gaps along the tops and sides of sashes.
- Missing or deteriorated exterior caulk: High summer heat bakes exterior caulk until it hardens, shrinks, and separates from siding or brick molding, letting outside drafts slip into the wall cavity.
- Loose or broken sash cam locks: If the locking mechanism doesn't generate positive mechanical clamping pressure, the meeting rails sit loosely against one another.
- Cracked or missing glazing putty: On older single-pane wood windows, the linseed-oil-based putty holding the glass into the wood frame dries up, cracks, and falls out in chunks, letting air blow around the edges of the pane itself.
- Uninsulated rough openings: Builders often skip foaming the gap between the window jamb and the wall framing studs, leaving hollow wall pockets hidden behind decorative interior trim.
Common Mistakes
- Using open-cell foam instead of closed-cell foam. Open-cell foam acts like a household sponge. It absorbs ambient moisture, promotes wood rot, and lets air push straight through its porous structure. Always purchase closed-cell foam or EPDM rubber weatherstripping.
- Caulking operable sashes shut. Never run a bead of caulk along the line where the movable window sash meets the frame. You will seal the window permanently, create a major fire-safety hazard, and ruin the window's operation. Caulk is for stationary joints only (trim-to-wall, frame-to-sheathing).
- Caulking the exterior weep holes. Modern vinyl and aluminum windows have small rectangular weep holes at the bottom exterior edge of the frame to drain water away. If you caulk these shut thinking they are air leaks, rainwater pools inside the frame and rots your subfloor and wall framing.
- Stretching weatherstripping during installation. Pulling rubber or foam strips taut while sticking them down puts the material under tension. Over the next month, the material will shrink back to its original length, peeling away from the corners and leaving 1- to 2-inch gaps at the ends. Lay it down loosely and press it in place without pulling.
- Applying caulk to dirty, chalky surfaces. Caulk needs clean wood, vinyl, or masonry to adhere. Applying fresh caulk over peeling paint, mildew, or dust creates a bond that lets go under the first strong cold front.
Cost & Time Breakdown
| Task | DIY Cost | Pro Cost | Time |
|---|---|---|---|
| Smoke Test & Leak Detection (Whole House) | $2–$5 | $150–$300 (Energy Audit) | 30–45 mins |
| Replacing Sash Weatherstripping (Per Window) | $8–$15 | $65–$120 | 20–30 mins |
| Interior Trim Re-Caulking (Per Window) | $4–$8 | $45–$75 | 15–25 mins |
| Exterior Perimeter Caulking (Per Window) | $8–$12 | $75–$130 | 30–45 mins |
| Installing Shrink-Film Insulation (Per Window) | $3–$6 | $40–$60 | 15–20 mins |
| Sash Lock Adjustment & Hardware Realignment | $0–$10 | $50–$80 | 15 mins |
Tips & Prevention
- Conduct a seasonal draft check every October: Don't wait for your furnace to run continuously in January. Run your hand or an incense stick along your windows every autumn before cold weather sets in.
- Lubricate tracks with dry silicone spray: Never use WD-40 or petroleum-based oils on window tracks; they attract dirt and turn into an abrasive paste that wears out weatherstripping. Use dry silicone or pure paraffin wax on wood and vinyl tracks.
- Check exterior caulk joints every 12 months: Look for hairline cracks or peeling beads along the top drip cap and side trim. Touch up small splits immediately before moisture rots the wooden framing beneath.
- Keep sash locks secured year-round: Homeowners often leave window locks unlatched during mild spring months. Keeping them engaged pulls the weatherstripping into compression and prevents the wooden sashes from warping under humidity changes.
- Inspect glazing putty on traditional windows: If you have vintage wood windows, tap the glass gently. If you hear a rattle, the exterior glazing compound has separated from the glass and needs re-bedding with fresh glazing points and compound.
When to Call a Professional
While sealing cracks and replacing foam tape is well within the scope of a weekend DIY project, certain structural and envelope issues require professional intervention.
If you discover soft, spongy wood around the window sill, jambs, or interior framing, dry rot has taken hold. Caulking over rotted framing traps moisture and accelerates structural decay. You need a window specialist or carpenter to evaluate structural integrity and replace rotted framing members.
Similarly, if you have modern double- or triple-pane insulated glass units (IGUs) that show fogging, condensation, or a dirty film between the panes of glass, the factory hermetic seal has failed. Caulking won't fix this; the inert argon gas has escaped and the sash or entire glass unit must be replaced.
Finally, if a window is so out of square from severe foundation shifting that the sash cannot latch or leaves an uneven 1/2-inch wedge gap across the top, weatherstripping won't bridge the divide. Call a licensed window installer or general contractor to reset the rough opening.
Related Articles
Keep troubleshooting with these hand-picked guides from FixlyGuide:
- Are Your Window Screens Ripped? A Step-by-Step Guide to Replacing the Mesh — Torn, ripped, or faded window screens not only look bad but also let in bugs. Here's the complete guide to replacing the mesh yourself in u…
- Foggy Double-Pane Windows? 4 Reasons You Have Seal Failure—and What to Do — Seeing fog, haze, or moisture between the panes of your double-pane windows? It's a sign of window seal failure, which means the insulating…
- Window Frame Cracked? 5 Causes and How to Fix Each Type — A cracked window frame isn't just ugly—it can lead to leaks, drafts, and even bigger structural problems if you don't fix it right.
- Window Won't Stay Up? 3 Reasons Your Sash Falls (and the Real Fix) — Tired of a window sash that crashes down? We'll show you how to diagnose a broken window balance system—the hidden mechanism that holds the…
- Window Won't Lock? 6 Reasons It's Misaligned—and How to Fix It — Can't get your window to lock? It's usually a simple alignment issue you can fix yourself in under 30 minutes with a few basic tools.
- Hidden Water Leak in Your House? 5 Spots Homeowners Miss and the Fix for Each — Hidden water leaks can quietly destroy your home and drive up bills. Here are five concealed leak zones, how to test them, and step-by-step…
Should you do this yourself?
Answer five quick questions before you start. Safety outranks savings every time.
Your experience with work like this
How high do you have to work?
Does the job involve any of these?
Will it need a permit?
Specialty tools
Free and instant. Educational guidance only — not a quote, inspection, or professional diagnosis.
What should this project cost?
Enter your project details for a realistic cost range before you call anyone.
Per-window replacement commonly $450–$1,400 installed; hardware repairs often under $300.
- Regional adjustment
- National average
- Labor share (typical)
- ~$281
- Quotes to collect
- 3 written estimates
Educational estimate based on national averages — not a binding quote. Always confirm with written local estimates.
Before you start
Check the difficulty, permits, and safety risk — then decide whether to call a pro.
- Estimate this projectGet a cost range for your scope and ZIP before you call anyone.Open
- Get local estimatesSend one request and compare written estimates from vetted pros.Open
Free, no signup required. Estimates are educational guidance, not a quote or an inspection.
Get the print-ready PDF of this guide
A clean, ad-free, printable version you can keep on your phone or pin to the workshop wall. Free with a FixlyGuide account.
- Print-optimized layout
- Tools, materials & every step included
- Saved to your account
Recommended for DIYers & woodworkers
Sponsored
The Top 20 Tools for Workshops of Any Budget
No stationary machines or power tools required — plus 3 fundamental tools that can't be bought at any price.
Get the free guide
Ted's Woodworking — The #1 Woodworking Resource
Detailed instructions, dimensioned drawings, materials & cutting lists, and 3D schematics for every skill level.
See the plansSponsored: links above are affiliate links. FixlyGuide may earn a commission on qualifying purchases — at no extra cost to you.
Frequently asked questions
Can I just caulk around the movable sash to stop drafts?+
No. Caulk is meant only for stationary joints, such as where the window frame meets the drywall or exterior trim. Caulking an operable window shut ruins its functionality and creates a severe safety and fire hazard. Use removable compression weatherstripping or temporary rope caulk for movable parts.
How long does plastic shrink film last on drafty windows?+
Window shrink-film insulation kits can last an entire heating season (4 to 6 months) without peeling if applied to clean, dry trim. While effective at creating an insulating dead-air pocket, the film must be removed in spring if you plan to open your windows.
What is the best weatherstripping material for old double-hung windows?+
Look at the thickness of the gap and whether the surface moves. Closed-cell foam tape works best for flat compression joints (like the bottom rail). V-strip (tension) weatherstripping is ideal for sliding friction tracks. Silicone bulb seals work best in routed wood grooves or along sash stops.
Do draft stoppers or fabric draft snakes actually work on windows?+
Draft stoppers (draft snakes) only block air movement along the bottom sill. They do nothing to stop air leaking through the side jambs, top rail, meeting rail, or the uninsulated trim casing around the window perimeter.
How do I find out exactly where the cold air is coming through?+
Turn off the HVAC system, close all doors, and turn on kitchen and bathroom exhaust fans to drop interior pressure. Walk around the window holding a lit incense stick or an unlit lighter with the valve pressed. Watch for points where the smoke or gas stream blows sideways.
Can I seal the weep holes at the bottom of my window frame?+
Never seal the small rectangular weep holes located on the bottom exterior edge of vinyl or metal window frames. These holes are engineered to drain wind-driven rain out of the track. Sealing them causes trapped water to rot your subfloor and interior wall cavities.
Do drafty windows always need to be replaced entirely?+
Not necessarily. If your window frames are structurally sound and rot-free, comprehensive weatherstripping, fresh exterior polyurethane caulk, and low-E storm window panels can achieve 80% to 90% of the energy efficiency of brand-new replacement windows at a fraction of the cost.
Is there a temporary way to seal windows if I rent my home?+
Yes. Rope caulk is a non-hardening, putty-like bead that presses into sash gaps by hand. It holds tight against winter wind but peels off cleanly in the spring without pulling paint or leaving sticky adhesive residue behind.
Discussion
Loading comments…